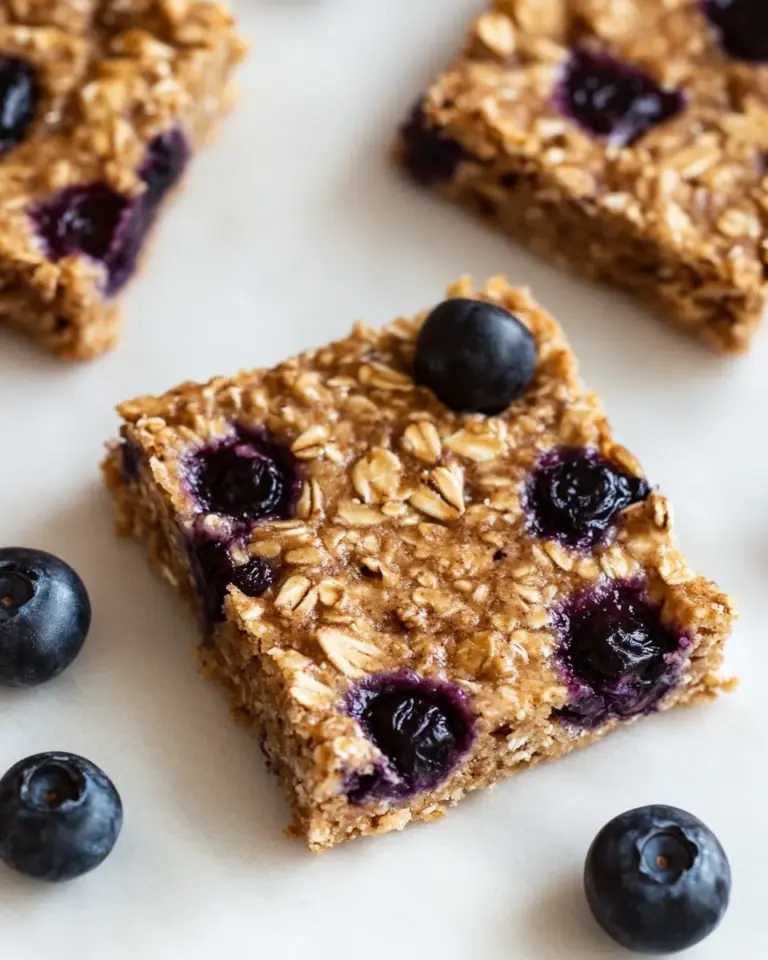
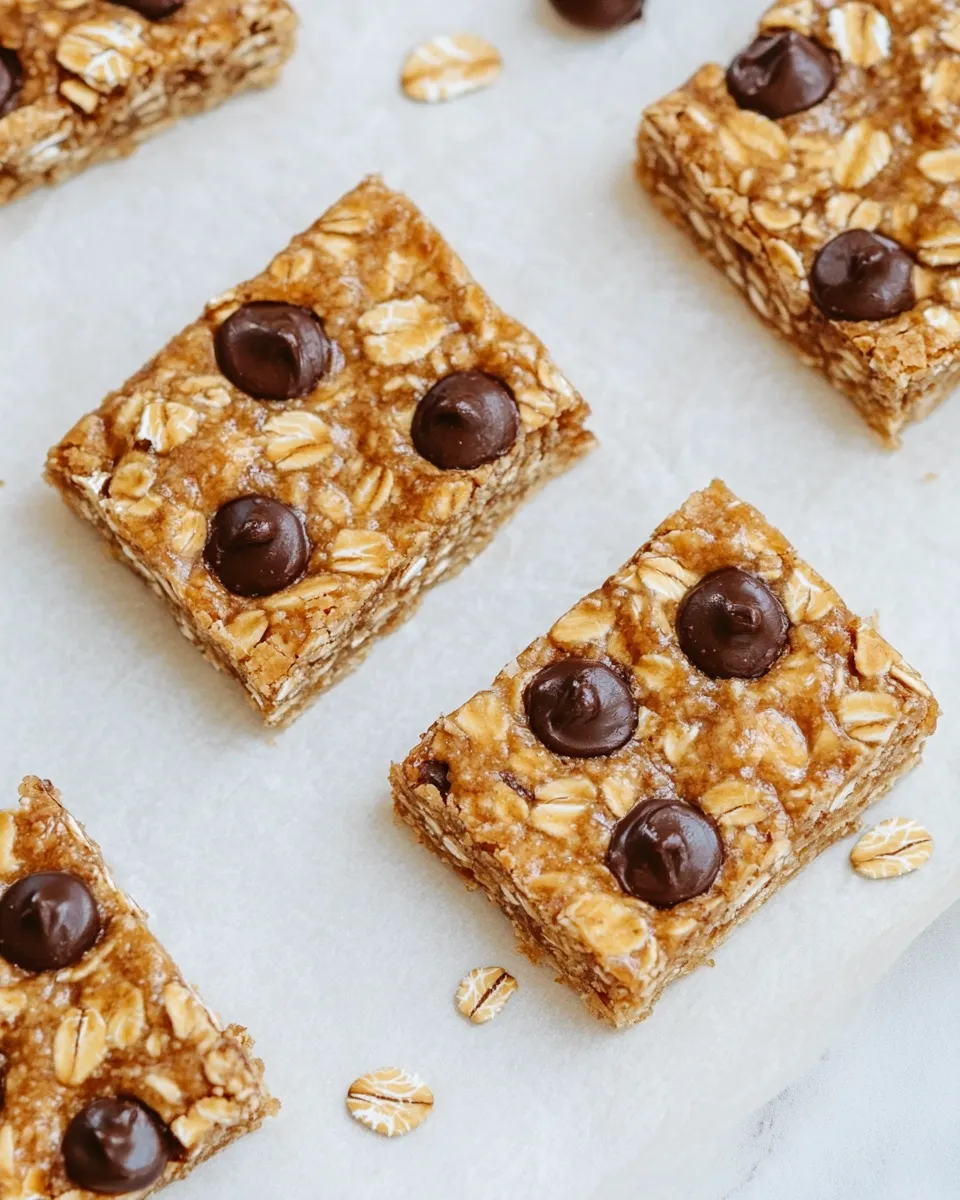
These baked oatmeal breakfast bars are the kind of recipe I come back to when mornings are busy and I still want something homey, portable, and honest. They take simple pantry staples, rely on a ripe banana rather than complicated binders, and produce a chewy, slightly crisp bar that handles the commute and the school run. No fussy steps. No mixer required.
I like them because they’re forgiving. You press the mixture into a pan, bake, then let the residual heat finish the set — which gives you more control over texture without babysitting the oven. A handful of chocolate chips on top keeps them kid-approved; if you want to skip the chips, they’re still delicious and mildly sweet from the banana and honey.
Below you’ll find the exact ingredient list and step-by-step method I use every time. I’ll also explain why each ingredient is there, how to swap things safely, what equipment actually matters, and the mistakes I see most often. Practical, no-fluff advice so your first batch comes out as intended.
The Ingredient Lineup

- 1 cup mashed banana — Acts as the primary binder and natural sweetener; use very ripe bananas for best flavor and moisture.
- 2 cups rolled oats — The base of the bars; rolled oats give chew and structure without turning gummy the way instant oats can.
- 5 tablespoons water — Adjusts the batter hydration so oats absorb enough liquid to hold together once baked.
- Pinch of cinnamon — Adds gentle warmth and depth; it’s optional but recommended for balance.
- Pinch of salt — Enhances the sweetness and overall flavor; a small amount goes a long way.
- 2 tablespoons honey — Provides extra sweetness and a bit of stickiness to help the bars set; balances the banana.
- 3 tablespoons canola oil — Keeps the bars tender and helps with browning; neutral-flavored oil lets the banana shine.
- 1 teaspoon vanilla extract — Rounds out flavor and lifts the oat-banana profile.
- Handful of chocolate chips — Optional finishing touch for sweetness and texture contrast; sprinkle on top so they melt into the surface.
Make Baked Oatmeal Breakfast Bars: A Simple Method
- Preheat the oven to 350°F and place a rack in the center position.
- Line a 9×9-inch baking pan with parchment paper, leaving an overhang on two sides for easy removal.
- Place 1 cup mashed banana in a large mixing bowl.
- Add 2 tablespoons honey, 3 tablespoons canola oil, 5 tablespoons water, and 1 teaspoon vanilla extract to the bowl and stir until the wet ingredients are combined.
- Add 2 cups rolled oats, a pinch of cinnamon, and a pinch of salt to the bowl. Stir until the oats are evenly moistened and the mixture is uniform.
- Transfer the mixture to the prepared 9×9-inch pan and use a spatula to spread and press it into an even layer.
- Sprinkle a handful of chocolate chips evenly over the top and gently press them into the surface.
- Bake for 25 minutes. After 25 minutes, turn off the oven and leave the pan inside with the oven door closed for an additional 5 minutes.
- Remove the pan from the oven and place it on a wire rack to cool until firm and cool to the touch.
- Use the parchment overhang to lift the baked oatmeal from the pan, place on a cutting board, and slice into bars.
Why You’ll Love This Recipe
It’s straightforward and fast to prep. From mashed banana to the oven-ready pan it’s about 10 minutes of hands-on time. That makes these bars ideal for weekend batch-baking or evening prep for weekday breakfasts.
They store well and travel without falling apart, plus the texture balances chew and tenderness. The use of banana and honey gives a natural sweetness, so the bars aren’t cloying. And because you press the mixture into a pan, the bars brown on the edges while the center stays slightly softer — a texture contrast that feels intentional without extra effort.
Swap Guide

Grains & Oats
Roll down rolled oats only. Steel-cut oats won’t hydrate properly here and instant oats make a mushier result. If you must use a substitute, quick oats can work but expect a softer, denser bar.
Fats & Oils
Canola oil is neutral and economical. If you prefer, swap with equal parts melted coconut oil for a subtle coconut note, or light olive oil for a fruitier undertone. Avoid butter unless you melt it first; it will solidify when chilled and can make bars firmer than intended.
Sweeteners & Add-ins
Honey is called for, but maple syrup can be used 1:1 for a different flavor profile. Chocolate chips on top are optional — think raisins, chopped nuts, or seeds if you want more texture. Don’t add wet fruit chunks to the raw mixture; they can change hydration and baking time.
Equipment Breakdown
- 9×9-inch baking pan — Gives the correct thickness for even baking; using a much larger or smaller pan changes bake time and texture.
- Parchment paper — Essential for easy removal; the overhang turns the slab into a lift-out for clean slicing.
- Large mixing bowl — Needed to combine wet and dry ingredients without spilling.
- Spatula or spoon — For folding and pressing the mixture evenly into the pan.
- Wire rack — Cools the bars evenly so they firm up properly before slicing.
Learn from These Mistakes
Timing and hydration are the two most common pitfalls. If your banana isn’t ripe enough, the bars will be under-sweet and more crumbly. If you add extra liquid or use instant oats, the mixture can be too wet and produce a gummy texture. Stick to the 5 tablespoons of water and 2 cups rolled oats unless you adjust for different oat types (see Swap Guide).
Another frequent issue is slicing too soon. The bars will look set on top but still be soft internally. Let them cool on a wire rack until they’re cool to the touch; this lets the starches set so the bars hold their shape when cut.
Finally, avoid skipping the parchment overhang. Trying to remove bars from the pan without it often tears them apart or leaves bits stuck to the pan.
Fit It to Your Goals
Want higher protein? Serve bars with a dollop of Greek yogurt or spread a thin layer of nut butter on top — that boosts protein without changing the bake. Looking to cut sugar? Use less honey or swap for a low-glycemic syrup, but remember sweetness affects perceived texture; bars can taste drier if you remove too much sweetener.
Need vegan? This recipe already is, assuming your chocolate chips are dairy-free and your honey is swapped for maple syrup. For lower fat, reduce oil slightly, but expect a firmer, drier bar; you may need an extra teaspoon or two of water to compensate.
Chef’s Rationale
I designed this recipe to be intentionally simple. The mashed banana provides both moisture and binding, avoiding the need for eggs. Rolled oats are chosen for their balance of structure and tenderness. The small amount of oil prevents the bars from becoming cakey and keeps the crumb tender. Honey and vanilla give subtle sweetness and depth without overpowering the banana.
Finally, the bake-then-rest technique (turning the oven off and leaving the pan inside) is my go-to for baked oat bars. It prevents overbrowning while allowing residual heat to finish setting the interior — a small step that improves texture with zero extra hassle.
Shelf Life & Storage

Room temperature: Store in an airtight container for up to 2 days. The bars are fine on the counter if your kitchen isn’t hot.
Refrigerator: Keep in an airtight container for up to 5 days. Chilled bars will be firmer; allow a few minutes at room temperature or a short zap in the microwave to soften before eating.
Freezer: Wrap individual bars or stack with parchment between layers and freeze in a sealed container for up to 2 months. Thaw overnight in the fridge or warm briefly in the microwave before serving.
Ask & Learn
Q: Can I make the bars gluten-free?
A: Yes, use certified gluten-free rolled oats. Oats themselves are naturally gluten-free but can be cross-contaminated during processing.
Q: My bars are crumbly — what happened?
A: Likely under-ripe banana, not enough moisture, or you cut them before they cooled and set. Try riper bananas and ensure the 5 tablespoons of water and 3 tablespoons oil are included. Cool fully before slicing.
Q: Can I double the recipe?
A: You can, but bake in a larger pan and watch bake time. A larger, thinner slab will bake faster; a deeper pan will take longer. I recommend keeping the 9×9 pan for this quantity for predictable results.
See You at the Table
Make a batch on Sunday and you’ll thank yourself on Wednesday morning. These bars are meant to be a dependable foundation — simple to prepare, easy to tweak, and forgiving when life rushes you. They’re the kind of recipe that frees you from morning franticness, so you can focus on the things that need your attention instead.
If you try them, tell me how you customize the toppings or swaps. I love hearing practical adjustments that actually work in real kitchens. Happy baking — and enjoy your mornings.
Baked Oatmeal Breakfast Bars
Equipment
- Oven
- 9x9-inch baking pan
- Parchment Paper
- Large Mixing Bowl
- Spatula
- Wire Rack
- Cutting Board
Ingredients
Ingredients
- 1 cupmashed banana
- 2 cupsrolled oats
- 5 tablespoonswater
- Pinchof cinnamon
- Pinchof salt
- 2 tablespoonshoney
- 3 tablespoonscanola oil
- 1 teaspoonvanilla extract
- Handful ofchocolate chips
Instructions
Instructions
- Preheat the oven to 350°F and place a rack in the center position.
- Line a 9×9-inch baking pan with parchment paper, leaving an overhang on two sides for easy removal.
- Place 1 cup mashed banana in a large mixing bowl.
- Add 2 tablespoons honey, 3 tablespoons canola oil, 5 tablespoons water, and 1 teaspoon vanilla extract to the bowl and stir until the wet ingredients are combined.
- Add 2 cups rolled oats, a pinch of cinnamon, and a pinch of salt to the bowl. Stir until the oats are evenly moistened and the mixture is uniform.
- Transfer the mixture to the prepared 9×9-inch pan and use a spatula to spread and press it into an even layer.
- Sprinkle a handful of chocolate chips evenly over the top and gently press them into the surface.
- Bake for 25 minutes. After 25 minutes, turn off the oven and leave the pan inside with the oven door closed for an additional 5 minutes.
- Remove the pan from the oven and place it on a wire rack to cool until firm and cool to the touch.
- Use the parchment overhang to lift the baked oatmeal from the pan, place on a cutting board, and slice into bars.