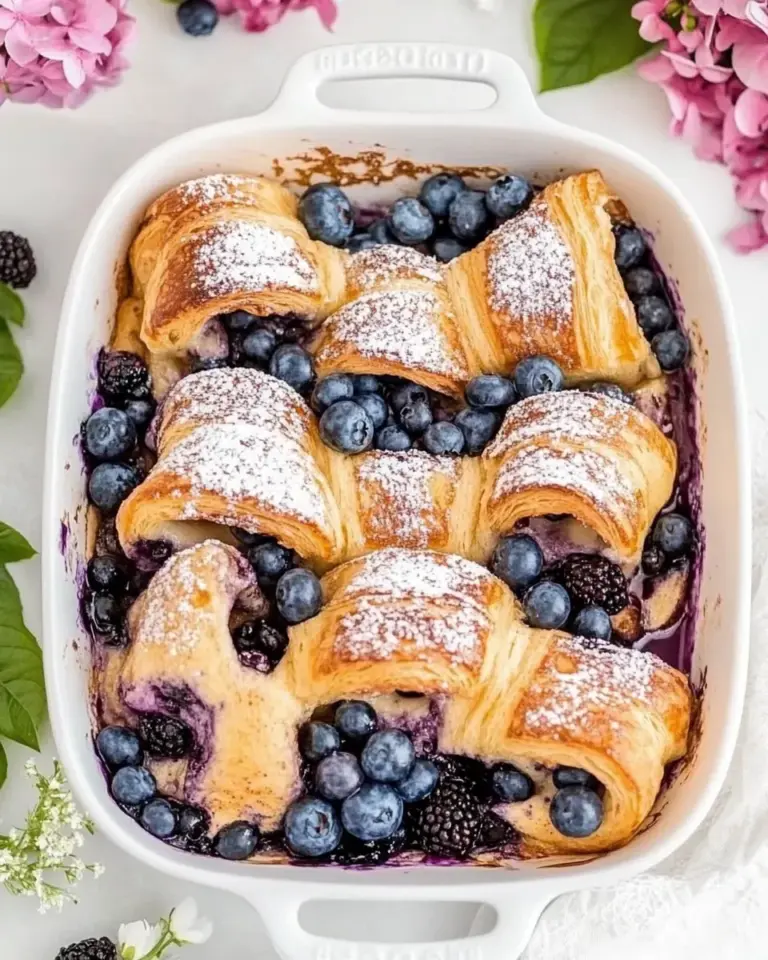
I bake and write about food because a good scone can change your morning. These blueberry scones are exactly that: straightforward, sturdy, and bright with blueberries. They make a reliably excellent breakfast or a portable treat you can feel proud to share.
This recipe uses a few techniques to keep the scones tender—cold butter, minimal mixing, and a brief chill—so they bake up flaky and not dense. The glaze is optional but it adds a soft sweetness and a pretty finish.
Read through the ingredient notes and the step-by-step instructions before you start. Measure, keep ingredients cold, and work confidently. You’ll get consistent results every time.
The Ingredient Lineup
- 4 cups all-purpose flour — the structure for the scones; measure by spooning into the cup and leveling for accuracy.
- 1 cup sugar + 2 tablespoons sugar — 1 cup sweetens the dough; the extra 2 tablespoons are reserved to sprinkle on top for sparkle and crunch.
- 1 tablespoon baking powder — the leavener that gives the scones lift; make sure it’s fresh.
- Pinch of sea salt — balances sweetness and enhances flavor.
- 1 1/3 sticks cold unsalted butter — grated cold and distributed in small bits to create flakiness; keep it very cold until mixing.
- 1 cup cold buttermilk — adds acidity and tenderness; cold helps keep the butter solid until baking.
- 2 large eggs — add structure and moisture; whisked into the buttermilk before adding to dry ingredients.
- 1 1/2 cups fresh blueberries — fold in gently so they stay whole and juicy; avoid overmixing to prevent color bleed.
- Melted unsalted butter — brushed on before baking for color and flavor; no exact amount listed—use enough to coat tops lightly.
- 1/2 cup sifted powdered sugar — for the glaze; sifted for a smooth finish.
- 1 to 2 tablespoons whole milk — thins the glaze to a pourable consistency; add slowly to reach desired thickness.
From Start to Finish: Blueberry Scones
- Preheat the oven to 375°F (190°C). Line a sheet tray with parchment paper.
- In a large bowl, whisk together 4 cups all-purpose flour, 1 cup sugar, 1 tablespoon baking powder, and a pinch of sea salt until evenly combined.
- Grate 1 1/3 sticks cold unsalted butter on a cheese grater directly into the dry ingredients. Use a fork or your fingertips to fold the grated butter into the flour mixture until the butter is distributed in small, pea-sized pieces.
- In a separate bowl, whisk together 1 cup cold buttermilk and 2 large eggs until combined.
- Pour the buttermilk-and-egg mixture into the dry ingredients. Use a rubber spatula or spoon to mix gently until a shaggy dough forms. Do not overmix.
- Gently fold 1 1/2 cups fresh blueberries into the dough, taking care not to crush them.
- Turn the dough out onto a lightly floured work surface. Pat or roll the dough into a roughly round disk about 1 inch thick (about 8–9 inches across).
- Using a knife or bench scraper, cut the disk into 12 equal triangular wedges. Transfer the wedges to the prepared sheet tray, arranging them in a circle or rows about 1/4 to 1/2 inch apart.
- Chill the scones on the sheet tray in the refrigerator for 20 to 25 minutes to firm up the butter.
- Remove the sheet tray from the refrigerator. Brush the tops of the chilled scones with melted unsalted butter and sprinkle evenly with the reserved 2 tablespoons sugar.
- Bake at 375°F for 25 to 30 minutes, or until the scone edges are lightly browned and a toothpick inserted into the center comes out clean. Remove from the oven and transfer scones to a wire rack to cool to room temperature.
- For the glaze, whisk together 1/2 cup sifted powdered sugar and 1 to 2 tablespoons whole milk until smooth and pourable. Drizzle the glaze over the cooled scones. (There may be some glaze left over.)
Why Cooks Rave About It
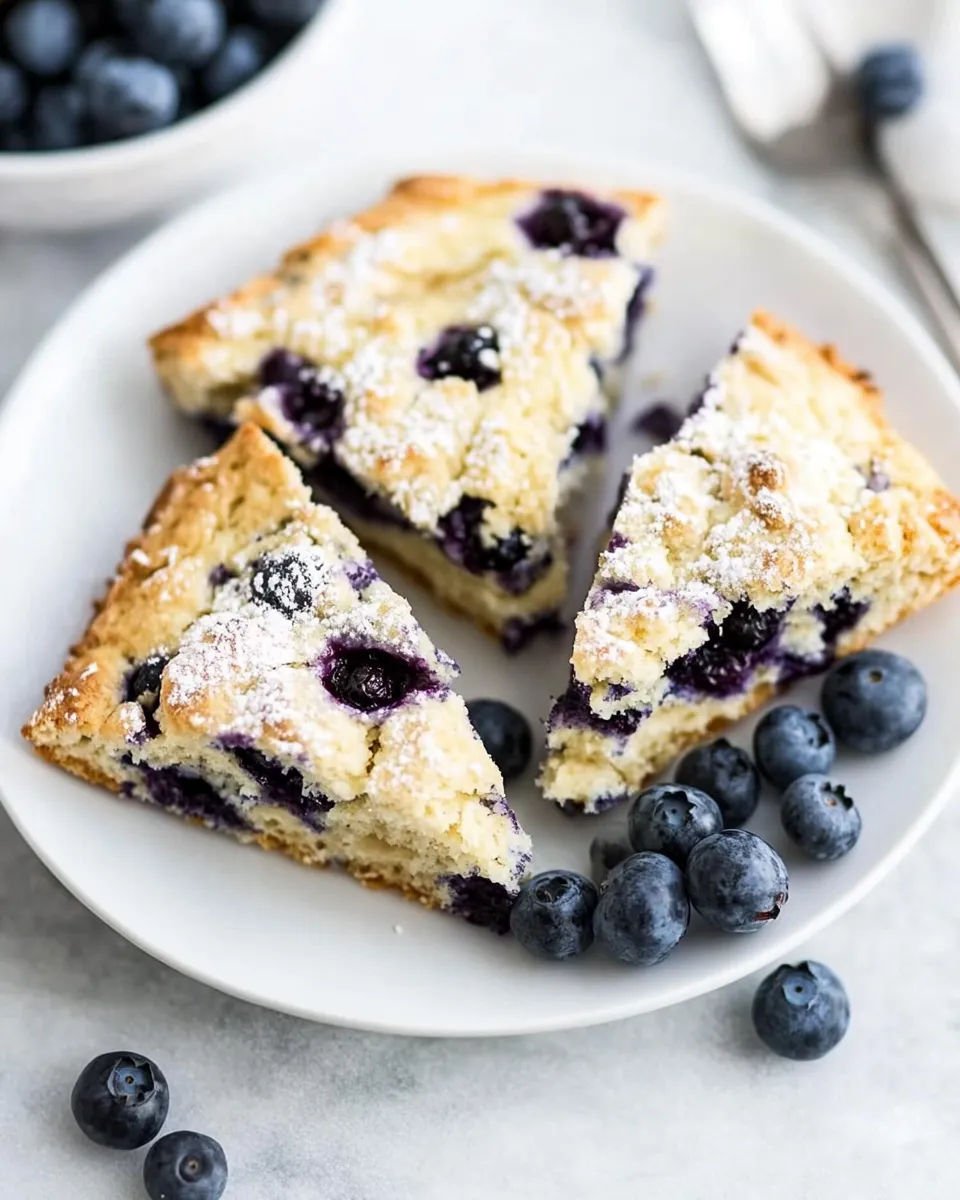
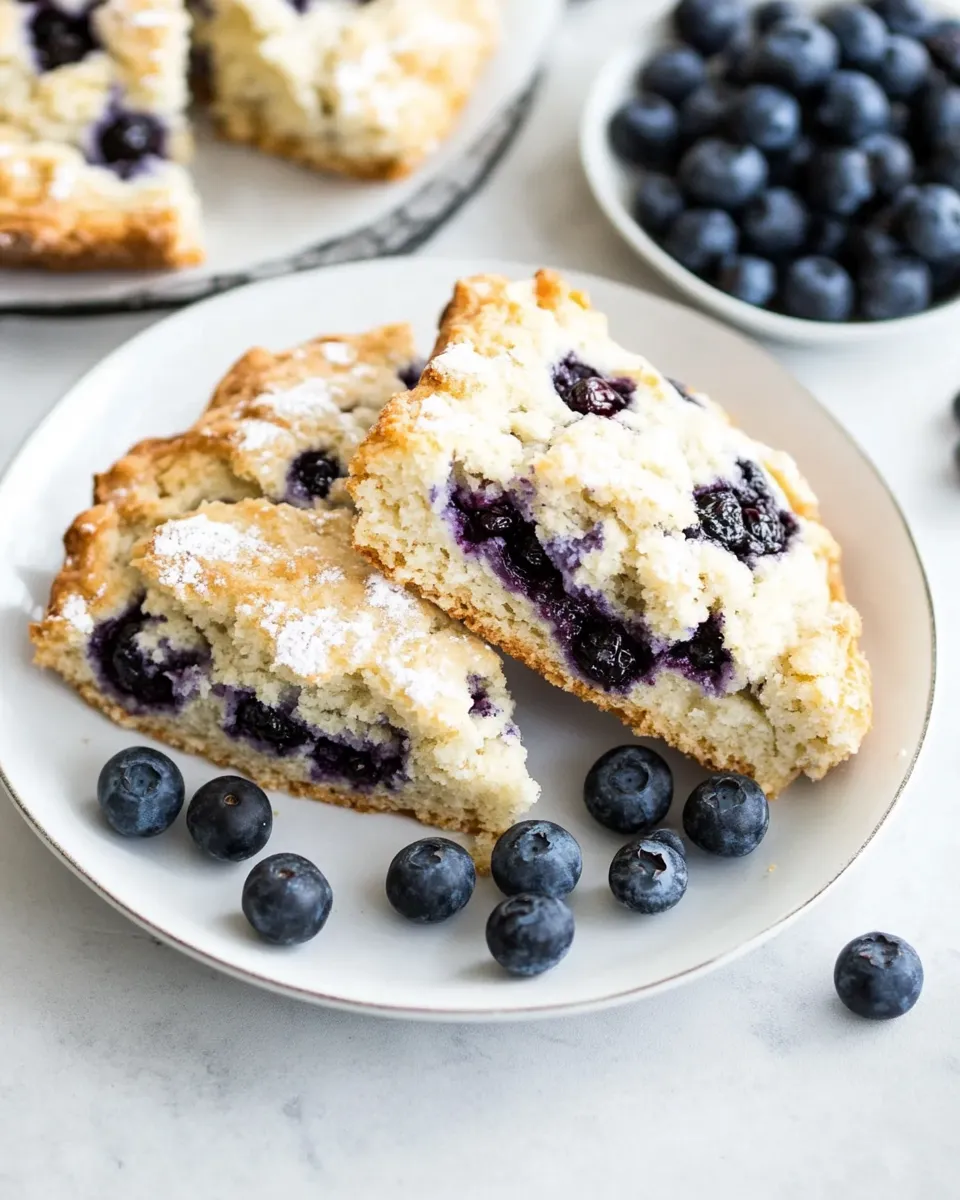
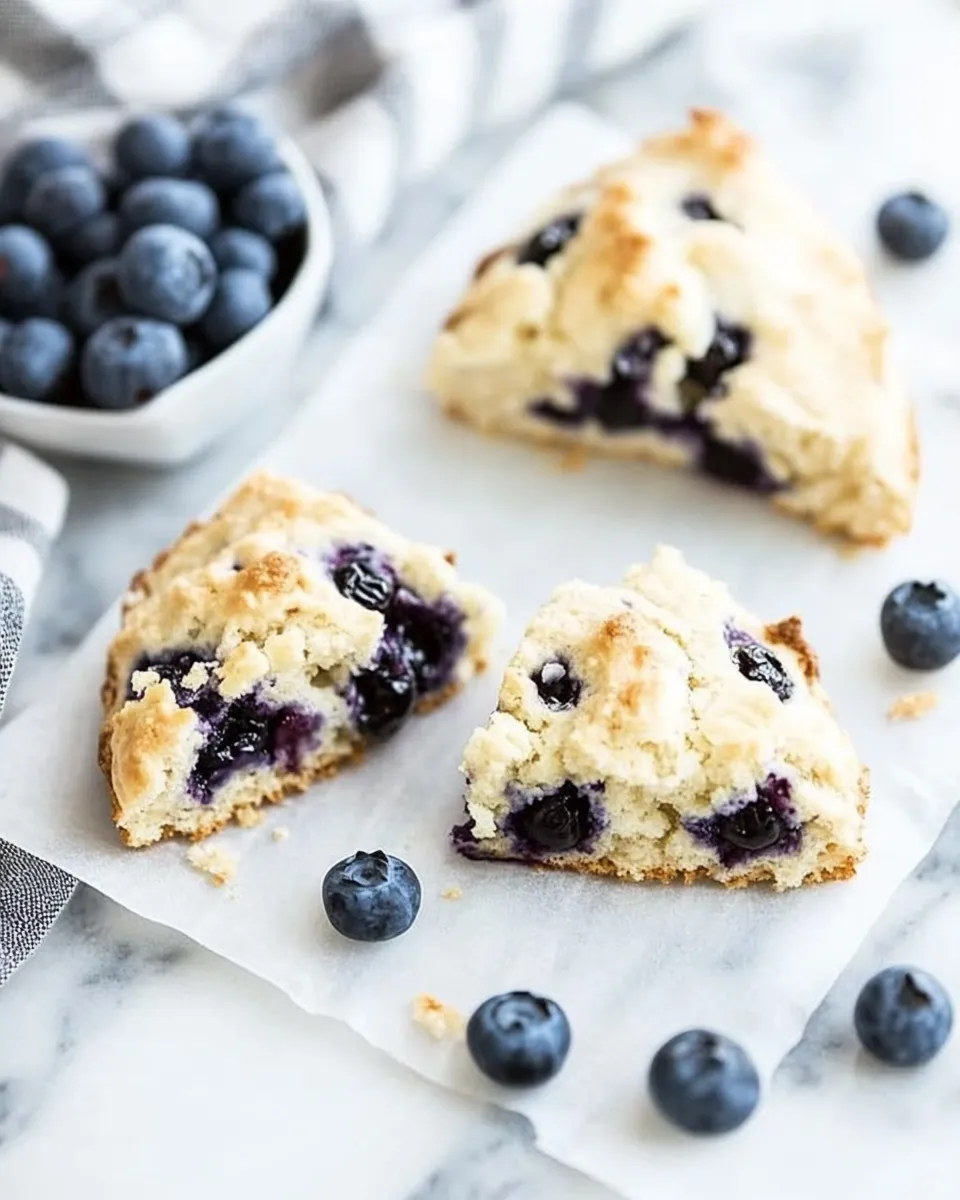
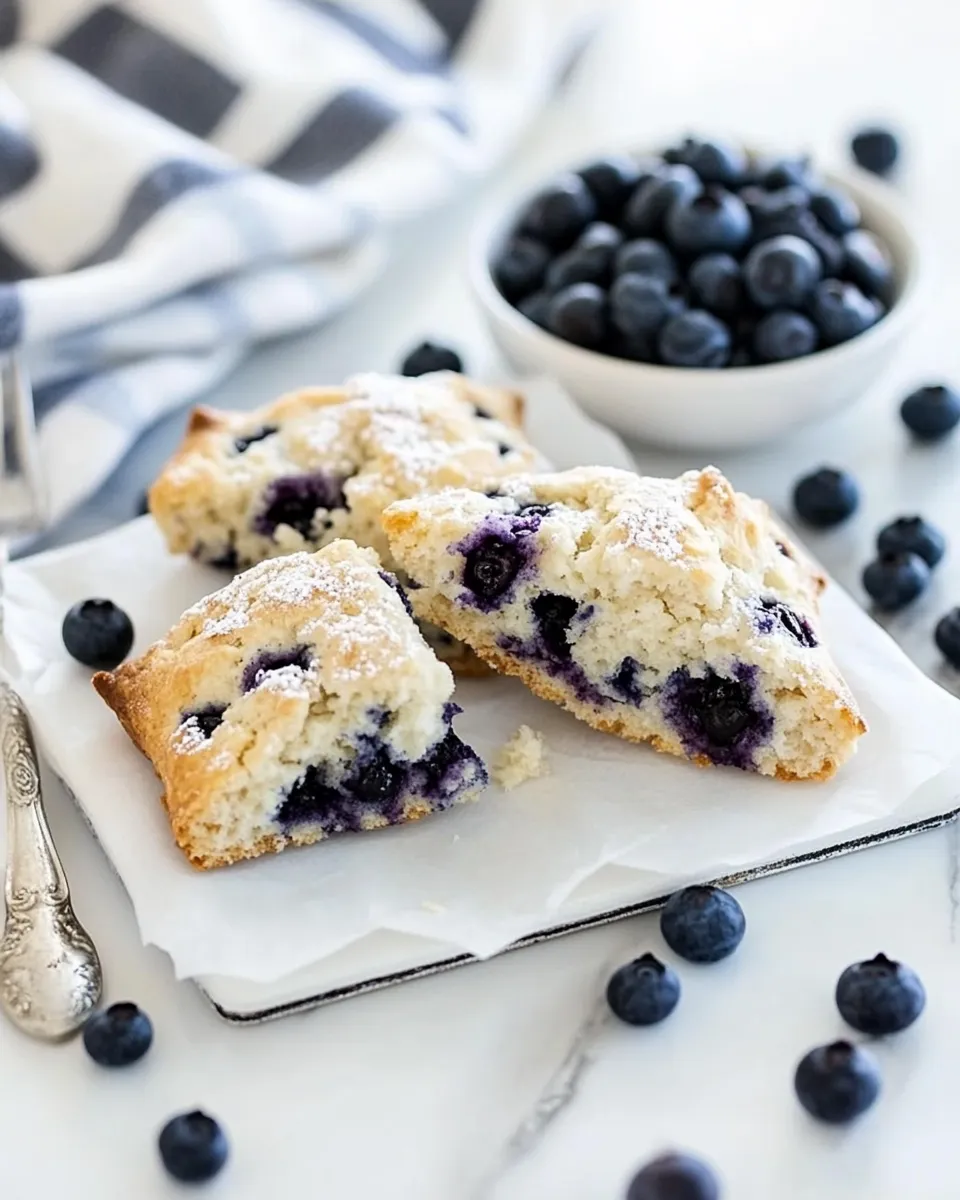
These scones combine a tender crumb with a slightly crisp exterior. The grated cold butter creates tiny pockets of fat that melt in the oven, making layers and a flaky texture you can see and taste. Fresh blueberries stay intact, giving bursts of juice in every bite.
The method is forgiving. You don’t need a mixer, and the dough benefits from minimal handling. Chilling the shaped scones before baking firms the butter and helps them keep their shape, so they rise well without spreading into a flat disk.
And the glaze? It’s simple but transformative. A thin drizzle brightens the flavor and makes the scones feel just a bit more special—perfect for guests or a weekend treat.
Dairy-Free/Gluten-Free Swaps
If you need dairy-free options: use a non-dairy buttermilk substitute (mix 1 cup unsweetened plant milk with 1 tablespoon lemon juice or vinegar and let it sit for 5 minutes) and replace the butter with a cold, firm dairy-free block butter that performs similarly in baking. For brushing, use a neutral oil or dairy-free butter alternative.
For gluten-free scones: use a 1-to-1 gluten-free all-purpose flour blend that contains xanthan gum or add a small amount of xanthan if your blend doesn’t include it. Keep in mind that gluten-free doughs can be a bit more fragile—handle gently, and consider chilling a little longer before cutting and baking.
These swaps change texture slightly—gluten-free scones won’t be identical to the original—but they will still deliver satisfying flavor and a good crumb when done carefully.
What’s in the Gear List
- Large mixing bowl — for whisking the dry ingredients and combining the dough.
- Cheese grater — for grating cold butter quickly and evenly into the flour.
- Rubber spatula or wooden spoon — to mix the wet and dry gently without overworking.
- Sheet tray lined with parchment paper — prevents sticking and helps with even baking.
- Bench scraper or sharp knife — to cut the dough disk into 12 wedges cleanly.
- Wire rack — to cool scones so bottoms stay crisp.
- Small bowl and whisk — for making the glaze.
Learn from These Mistakes
Overmixing the dough is the most common error. Mix only until a shaggy dough forms; visible streaks of flour are okay. Overworking develops gluten and makes scones dense rather than tender.
Using warm butter or warm liquids reduces flakiness. Keep the butter cold and the buttermilk chilled. If your kitchen is warm, return the dough to the fridge after shaping for an extra 10–15 minutes before cutting.
Not chilling the shaped scones is another misstep. The short rest in the fridge firms the butter and helps the scones rise up instead of spreading out. Skip the chill and you’ll get flatter, less layered scones.
Finally, loading the pan too close together can prevent proper browning. Give the wedges about 1/4 to 1/2 inch space so hot air circulates.
Season-by-Season Upgrades
Spring: Add a teaspoon of lemon zest to the dough to brighten the blueberries. Use baby blueberries when available—they’re sweeter and less watery.
Summer: Fold in a handful of chopped fresh basil or thyme for a savory lift, or swap half the blueberries for diced peaches for a juicy, summery variation.
Fall: Stir in a pinch of ground cinnamon and nutmeg, or toss in a handful of chopped apples with a tablespoon of sugar for an apple-blueberry hybrid.
Winter: Use frozen blueberries straight from the freezer (do not thaw) to minimize bleed. Add a splash of vanilla or almond extract to the glaze for a cozy finish.
Flavor Logic
The base here is mildly sweet with a tender crumb; it’s meant to highlight the fruit. Buttermilk brings a soft tang that balances the sugar and complements the blueberries. The butter’s salt and browned top add savory and toasty notes that prevent the scones from tasting one-dimensional.
Sprinkling sugar on top before baking creates tiny crunchy crystals that contrast with the soft interior. The glaze adds a sweet, glossy finish that tames any edge of tang and makes the scones feel finished and bakery-worthy.
Save It for Later
Room temperature: Store cooled scones in an airtight container for up to 2 days. They will soften slightly but remain pleasant.
Refrigerator: Keep in an airtight container for up to 5 days. Reheat gently in a 300°F oven for 8–10 minutes to refresh the exterior.
Freezer: Flash-freeze cooled scones on a tray, then transfer to a freezer-safe bag for up to 3 months. Reheat from frozen: wrap in foil and bake at 350°F for 15–20 minutes, or thaw overnight in the fridge and warm for 8–10 minutes.
Blueberry Scones FAQs
Can I use frozen blueberries? Yes. Use them frozen and fold them into the dough straight from the freezer to reduce bleeding. They may add a touch more moisture, so handle the dough gently.
Why grate butter instead of cutting it in? Grating cold butter distributes tiny pieces quickly and evenly without warming it. Those little bits make flaky layers as they melt in the oven.
My scones spread—what happened? Likely the butter was too warm or the dough was overworked. Chill the shaped scones longer and make sure your butter is properly cold.
Can I make the dough ahead? Yes. After shaping and cutting the wedges, keep them on the tray covered and refrigerate for up to 24 hours before baking, or freeze for longer storage.
Next Steps
Make a batch this weekend. Take photos while piping the glaze on—scones photograph beautifully. Try one seasonal variation and note what you liked or changed. If you enjoyed this recipe, consider bookmarking it, sharing it with a friend, or trying a savory scone next time—cheddar and chive pairs wonderfully with this method.
Happy baking. Keep the butter cold, the mixing light, and the blueberries intact. You’ll have scones worth serving with coffee and conversation.
Homemade Blueberry Scones Recipe
Equipment
- Oven
- sheet tray
- Parchment Paper
- Large Bowl
- Cheese Grater
- Fork
- Rubber spatula
- Spoon
- Knife
- Bench Scraper
- Refrigerator
- Wire Rack
Ingredients
Ingredients
- 4 cupsall-purpose flour
- 1 cupsugar + 2 tablespoons sugar
- 1 tablespoonbaking powder
- pinchof sea salt
- 1 1/3 sticks cold unsalted butter
- 1 cupcold buttermilk
- 2 large eggs
- 1 1/2 cupsfresh blueberries
- melted unsalted butter
- 1/2 cupsifted powdered sugar
- 1 to 2 tablespoonswhole milk
Instructions
Instructions
- Preheat the oven to 375°F (190°C). Line a sheet tray with parchment paper.
- In a large bowl, whisk together 4 cups all-purpose flour, 1 cup sugar, 1 tablespoon baking powder, and a pinch of sea salt until evenly combined.
- Grate 1 1/3 sticks cold unsalted butter on a cheese grater directly into the dry ingredients. Use a fork or your fingertips to fold the grated butter into the flour mixture until the butter is distributed in small, pea-sized pieces.
- In a separate bowl, whisk together 1 cup cold buttermilk and 2 large eggs until combined.
- Pour the buttermilk-and-egg mixture into the dry ingredients. Use a rubber spatula or spoon to mix gently until a shaggy dough forms. Do not overmix.
- Gently fold 1 1/2 cups fresh blueberries into the dough, taking care not to crush them.
- Turn the dough out onto a lightly floured work surface. Pat or roll the dough into a roughly round disk about 1 inch thick (about 8–9 inches across).
- Using a knife or bench scraper, cut the disk into 12 equal triangular wedges. Transfer the wedges to the prepared sheet tray, arranging them in a circle or rows about 1/4 to 1/2 inch apart.
- Chill the scones on the sheet tray in the refrigerator for 20 to 25 minutes to firm up the butter.
- Remove the sheet tray from the refrigerator. Brush the tops of the chilled scones with melted unsalted butter and sprinkle evenly with the reserved 2 tablespoons sugar.
- Bake at 375°F for 25 to 30 minutes, or until the scone edges are lightly browned and a toothpick inserted into the center comes out clean. Remove from the oven and transfer scones to a wire rack to cool to room temperature.
- For the glaze, whisk together 1/2 cup sifted powdered sugar and 1 to 2 tablespoons whole milk until smooth and pourable. Drizzle the glaze over the cooled scones. (There may be some glaze left over.)
Notes
Scones can sometimes turn out dry in texture and flavor, but I have a simple fix for that. Most of the time, dryness comes from not having enough fat or from overcooking. My rule of thumb is to use 1 stick of butter for every 3 cups of flour, which gives just the right amount of richness to keep them moist. One of my favorite tricks is to shred the butter on a cheese grater before mixing it in, since it blends quickly and evenly into the dough.
Carryover cooking:
Remember that these scones won’t stop cooking when you take them out of the oven. They will continue to cook as they cool, but it won’t be direct heat that will help keep them from drying out.
Mixing the dough:
I avoid overmixing the dough because it can make the scones tough instead of flaky.
Chill before baking:
I like to chill the scones before baking so they hold their shape.
Glazing:
I let the scones cool before glazing so the glaze sets perfectly on top.
Make-Ahead:
You can make these up to 2 days ahead of time.
How to Store:
Blueberry scones can be wrapped in plastic at room temperature for 3 days or kept in the refrigerator for 5 days. They also freeze well wrapped tightly in plastic for up to 3 months. Thaw in the refrigerator a day before wanting to serve them.