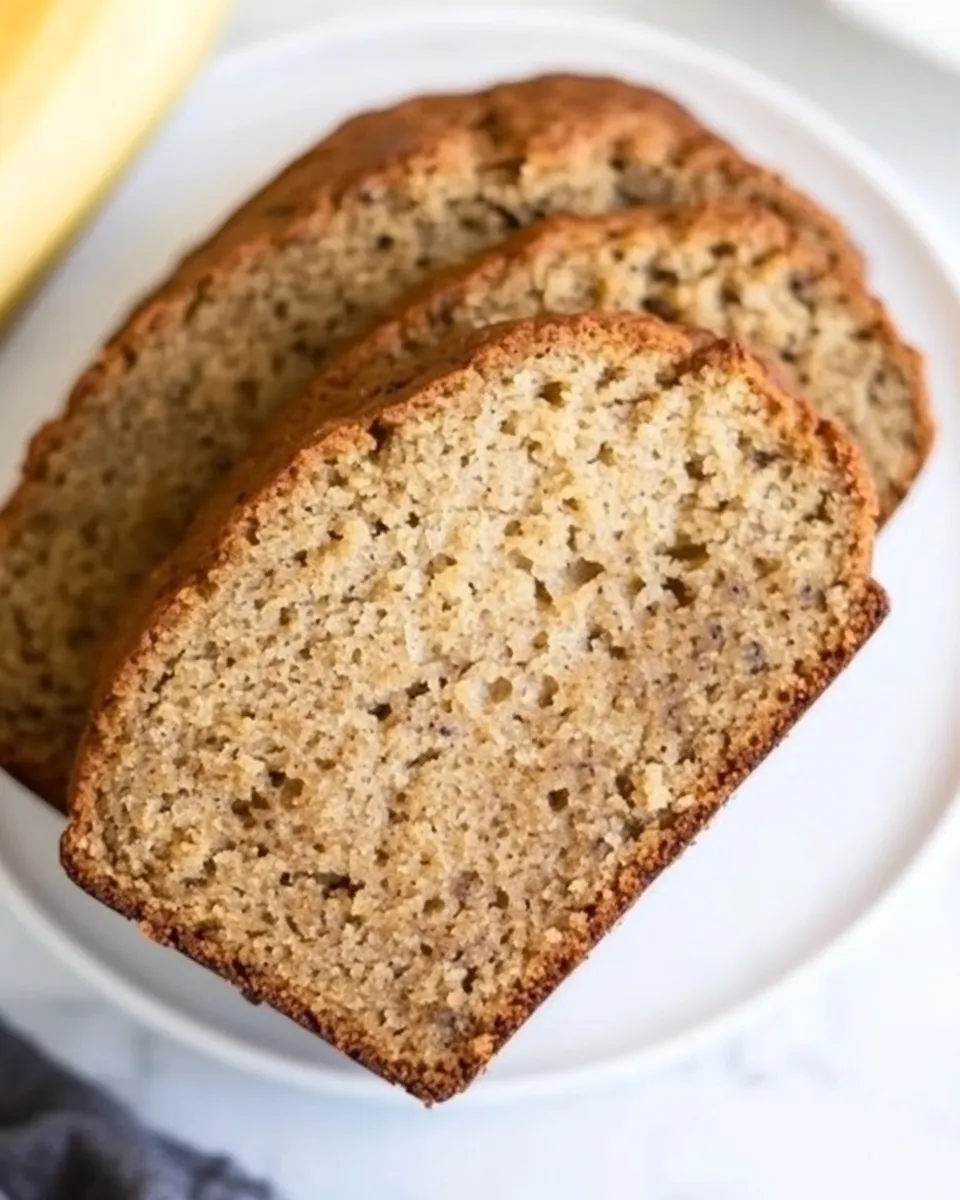
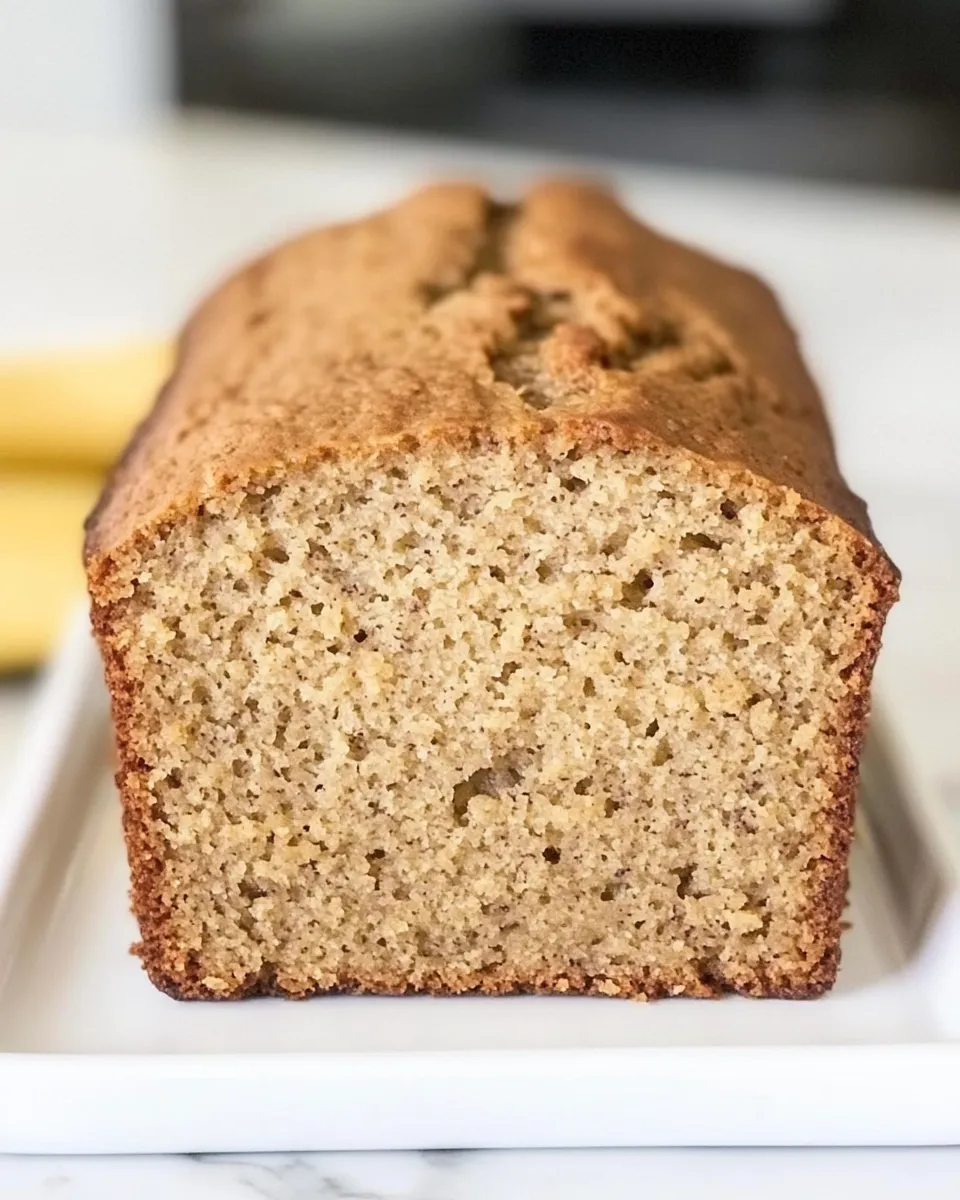
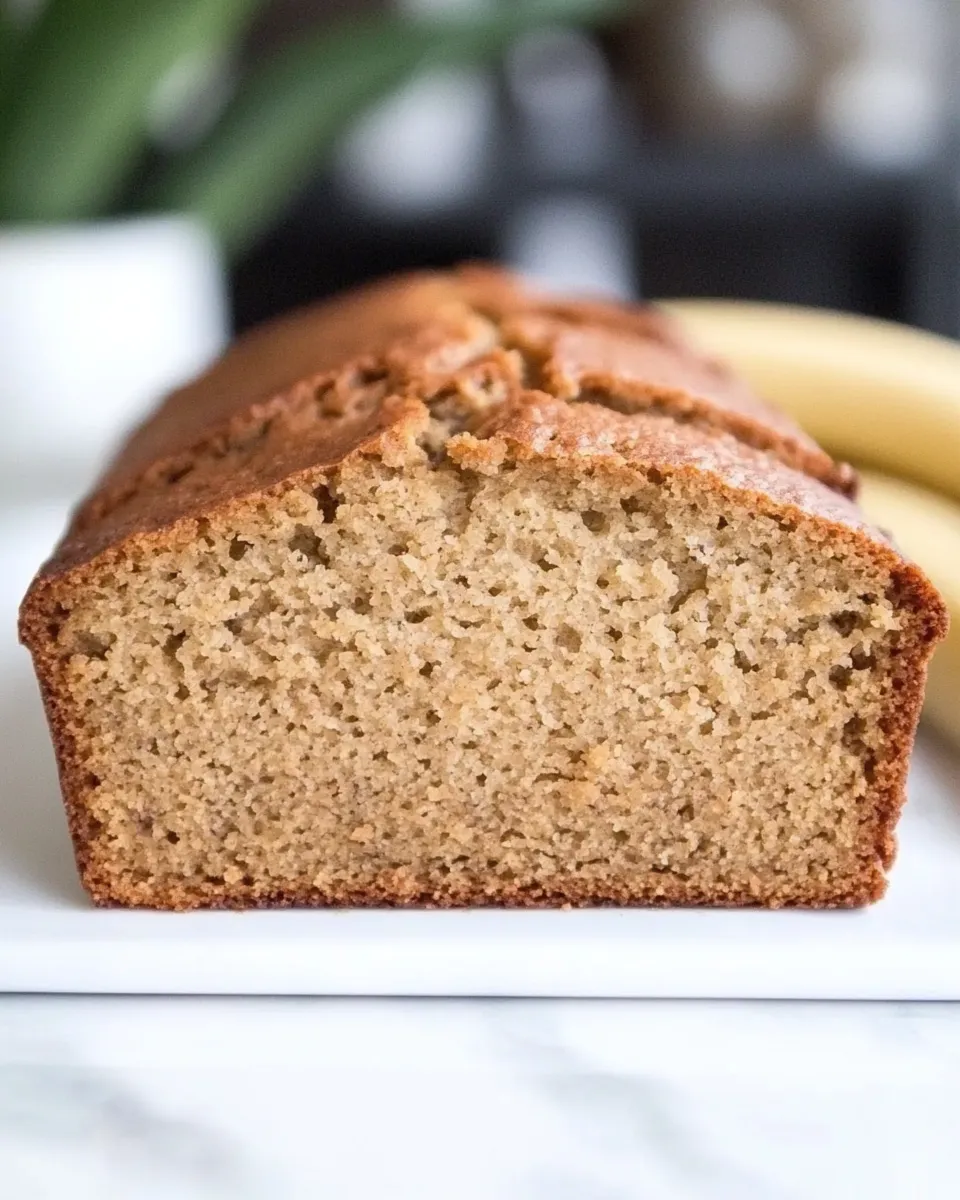
I bake a lot, and this loaf is one I return to when I want something predictable, homey, and simple. It uses pantry basics and ripe bananas to do the heavy lifting. No butter, no milk—just straightforward ingredients that give a moist crumb and a warm cinnamon note.
It’s the kind of recipe you can make on a weeknight or pull together for a last-minute guest. The steps are forgiving, and the result makes great toast the next morning or a quick afternoon pick-me-up. I’ll walk you through what each ingredient is doing, the exact process, and quick fixes if something goes sideways.
Below you’ll find the ingredient breakdown, the step-by-step instructions, and practical tips for swapping, storing, and customizing this loaf to suit your kitchen. Let’s bake.
Ingredient Rundown
Ingredients
- 4 very ripe medium bananas — the primary sweetener and source of moisture; riper bananas mean more sweetness and banana flavor.
- 1/2 cup granulated sugar — provides sweetness and helps with structure and tender crumb.
- 1/2 cup dark brown sugar — adds moisture and a deeper, caramel-like flavor.
- 1/2 cup canola oil* — fat for tenderness and moistness; canola is neutral in flavor.
- 2 large eggs — binders that add structure and lift.
- 2 teaspoons pure vanilla extract — flavor enhancer; brings out the banana and brown sugar notes.
- 1 1/2 cups all-purpose flour — the structure of the loaf; don’t substitute without reading swap notes below.
- 1 teaspoon baking soda — leavening agent that reacts with the acids in the batter for rise.
- 2 teaspoons ground cinnamon — spice for warmth and depth; balances the sweetness.
- 1 teaspoon fine-grain sea salt — enhances flavor and balances the sugars.
Cooking (Dairy-Free Banana Bread): The Process
- Preheat the oven to 350 degrees Fahrenheit. Grease a standard-size loaf pan and set it aside.
- In a large mixing bowl add 4 very ripe medium bananas. Using a potato masher (or a fork), mash the bananas until as smooth as possible.
- To the mashed bananas, add 1/2 cup granulated sugar and 1/2 cup dark brown sugar. Stir to combine, then add 1/2 cup canola oil and stir until evenly incorporated.
- Add 2 large eggs to the banana mixture and whisk until smooth. Whisk in 2 teaspoons pure vanilla extract.
- Place a fine-mesh sieve over the bowl. Add 1 1/2 cups all-purpose flour, 1 teaspoon baking soda, 2 teaspoons ground cinnamon, and 1 teaspoon fine-grain sea salt to the sieve and sift the dry ingredients over the wet ingredients.
- Using a spatula, fold the dry ingredients into the wet ingredients gently, stirring just until no streaks of flour remain. Do not overmix.
- Pour the batter into the prepared loaf pan and smooth the top with the spatula.
- Bake until the center is set and a toothpick inserted into the middle comes out clean, about 45–55 minutes. Begin checking at 45 minutes.
- Remove the loaf from the oven and let it cool in the pan for about 10 minutes. Run a butter knife around the sides to loosen the loaf.
- Gently invert the pan to release the loaf and transfer it to a wire rack to cool completely.
- When cooled, wrap the loaf in plastic wrap to store.
What Sets This Recipe Apart
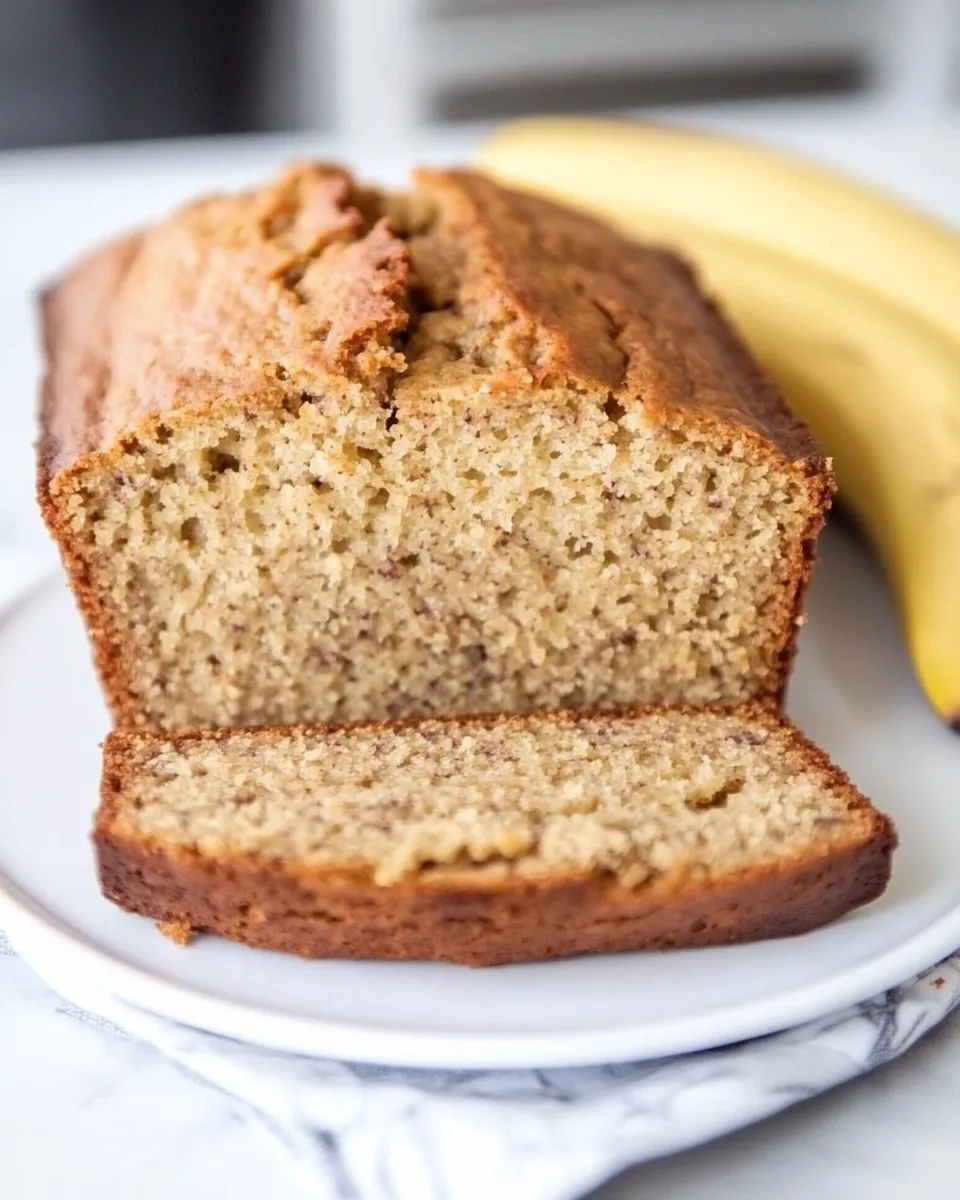
This is a straightforward, dairy-free banana bread that relies on simple swaps to keep texture and flavor intact. Instead of butter or milk, it uses canola oil and plenty of ripe bananas for moisture. The mix of granulated and dark brown sugar gives a balanced sweetness and a hint of caramel. Cinnamon throughout warms the profile without overpowering the banana.
It’s intentionally forgiving. There’s no creaming of butter and sugar, no complicated folds—just mash, mix, and bake. That makes it consistent whether you’re baking with a mixer or by hand.
Dairy-Free/Gluten-Free Swaps
Dairy-free: This recipe is already dairy-free as written—there’s no butter, milk, or yogurt. The oil keeps the crumb tender while avoiding dairy entirely.
Gluten-free: To make it gluten-free, use a 1:1 gluten-free all-purpose flour blend that includes xanthan gum or another binder. Measure the blend the same as called for here (1 1/2 cups). Expect a slightly different crumb—often a bit denser—but still very tasty.
Oil swaps: If you prefer other neutral oils, light olive oil or a mild vegetable oil will work. Keep the quantity the same (1/2 cup). Avoid strongly flavored oils unless you want them to show up in the final loaf.
Appliances & Accessories
- Oven — for baking at 350 degrees Fahrenheit.
- Standard-size loaf pan — ensures the bake time and loaf shape match the recipe.
- Large mixing bowl — room to mash and mix without spilling.
- Potato masher or fork — for mashing the bananas smoothly.
- Fine-mesh sieve — used to sift dry ingredients for even distribution and a light crumb.
- Spatula — for gentle folding and smoothing the batter.
- Wire rack — for cooling the loaf evenly.
Learn from These Mistakes
Under-ripe bananas: If your bananas aren’t very ripe, the loaf will lack sweetness and banana aroma. Wait until they’re speckled and soft.
Overmixing: After you add the dry ingredients, mix only until no streaks of flour remain. Overmixing develops gluten and makes the loaf tough and dense.
Wrong pan size: Using a pan that’s too large will spread the batter thin and shorten bake time; too small will push the center to remain undercooked. A standard loaf pan is the target size here.
Opening the oven early: Resist the urge to check before 45 minutes. Opening the oven door too often cools the oven and can cause the center to collapse or bake unevenly.
Skipping the cooling step: Let the loaf rest in the pan for ~10 minutes, then cool fully on a rack. Trying to slice a hot loaf leads to a gummy texture and crumbs everywhere.
Make It Your Way
Mix-in ideas
- Chopped nuts — walnuts or pecans add crunch and a toasty note.
- Chocolate chips — fold in a handful for a sweeter treat.
- Dried fruit — raisins or chopped dates pair nicely with cinnamon.
Toppings and finishes
- Sliced bananas on top — place thin slices on the batter before baking for a pretty top.
- Light sugar dusting — sift a small amount of powdered sugar over cooled slices for a café-style finish.
Adjust additions to your taste and add them at the folding stage. If you add a lot of mix-ins, keep an eye on bake time as the internal temperature and density can shift slightly.
Pro Tips & Notes
Banana ripeness: The riper the bananas, the better. Blackened skins almost always equal a sweet, fragrant loaf.
Measuring flour: Spoon the flour into the measuring cup and level it off. Packing flour can lead to a dry loaf.
Texture check: A toothpick that comes out with a few moist crumbs (not wet batter) is fine; the loaf continues to set slightly as it cools.
Flavor development: This banana bread tastes great the day it’s made, and the flavors often meld and deepen after a day wrapped at room temperature.
Make Ahead Like a Pro
Short term: Once cooled and wrapped in plastic wrap, the loaf keeps well at room temperature for 2–3 days. Keep it in a cool, dry spot away from direct sunlight.
Refrigeration: If you prefer, refrigerate for up to a week; bring slices to room temperature before serving for the best texture.
Freezing: Slice the loaf and individually wrap slices in plastic, then place them in a freezer bag. Freeze up to 3 months. Thaw slices at room temperature or toast straight from frozen for a quick treat.
Reader Questions
Q: Is this completely dairy-free? A: Yes. There’s no butter, milk, or cream in the ingredient list—only canola oil and banana provide the fat and moisture.
Q: Can I reduce the sugar? A: You can reduce the granulated sugar slightly, but remember the bananas and brown sugar contribute to moisture and caramel notes. Reducing too much can affect texture.
Q: My loaf was gummy in the center. What happened? A: Either underbaking or insufficient cooling. Make sure the toothpick test is clean and allow the loaf to cool on a wire rack to finish setting.
Q: Can I use a different flour? A: For a standard swap, a 1:1 gluten-free blend usually works. Whole wheat will make the loaf denser and may need slightly more moisture—use sparingly.
Before You Go
If you try this Dairy-Free Banana Bread, let me know how you personalize it. I love hearing about unexpected add-ins or timing tweaks that worked in different ovens. Leave a comment with your results or a question and I’ll reply.
Quick recap: use ripe bananas, don’t overmix, and start checking at 45 minutes. That’s all you need for a reliable, dairy-free loaf that’s at home on the breakfast table or the coffee break tray.
Easy Dairy-Free Banana Bread
Equipment
- Loaf Pan
- Mixing Bowl
- Potato Masher
- Fork
- Fine mesh sieve
- Spatula
- Whisk
- Butter Knife
- Wire Rack
Ingredients
Ingredients
- 4 very ripe medium bananas
- 1/2 cupgranulated sugar
- 1/2 cupdark brown sugar
- 1/2 cupcanola oil*
- 2 large eggs
- 2 teaspoonspure vanilla extract
- 1 1/2 cupsall-purpose flour
- 1 teaspoonbaking soda
- 2 teaspoonsground cinnamon
- 1 teaspoonfine-grain sea salt
Instructions
Instructions
- Preheat the oven to 350 degrees Fahrenheit. Grease a standard-size loaf pan and set it aside.
- In a large mixing bowl add 4 very ripe medium bananas. Using a potato masher (or a fork), mash the bananas until as smooth as possible.
- To the mashed bananas, add 1/2 cup granulated sugar and 1/2 cup dark brown sugar. Stir to combine, then add 1/2 cup canola oil and stir until evenly incorporated.
- Add 2 large eggs to the banana mixture and whisk until smooth. Whisk in 2 teaspoons pure vanilla extract.
- Place a fine-mesh sieve over the bowl. Add 1 1/2 cups all-purpose flour, 1 teaspoon baking soda, 2 teaspoons ground cinnamon, and 1 teaspoon fine-grain sea salt to the sieve and sift the dry ingredients over the wet ingredients.
- Using a spatula, fold the dry ingredients into the wet ingredients gently, stirring just until no streaks of flour remain. Do not overmix.
- Pour the batter into the prepared loaf pan and smooth the top with the spatula.
- Bake until the center is set and a toothpick inserted into the middle comes out clean, about 45–55 minutes. Begin checking at 45 minutes.
- Remove the loaf from the oven and let it cool in the pan for about 10 minutes. Run a butter knife around the sides to loosen the loaf.
- Gently invert the pan to release the loaf and transfer it to a wire rack to cool completely.
- When cooled, wrap the loaf in plastic wrap to store.
Notes
* I've also used coconut oil (liquidified) with success.
Adapted from
food.com
.