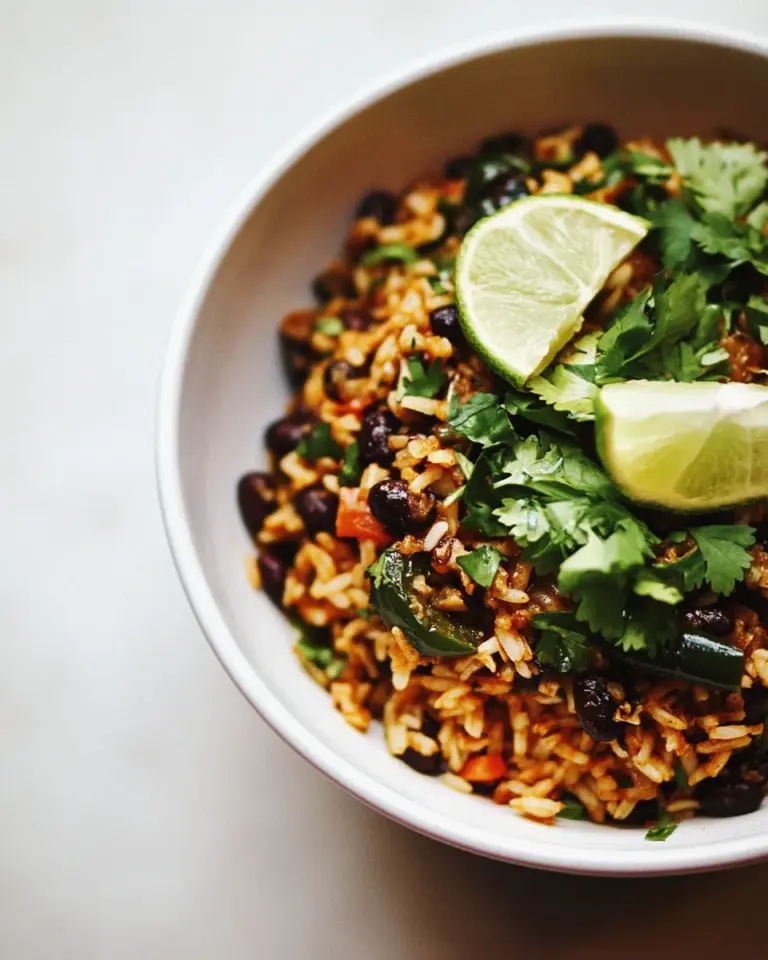
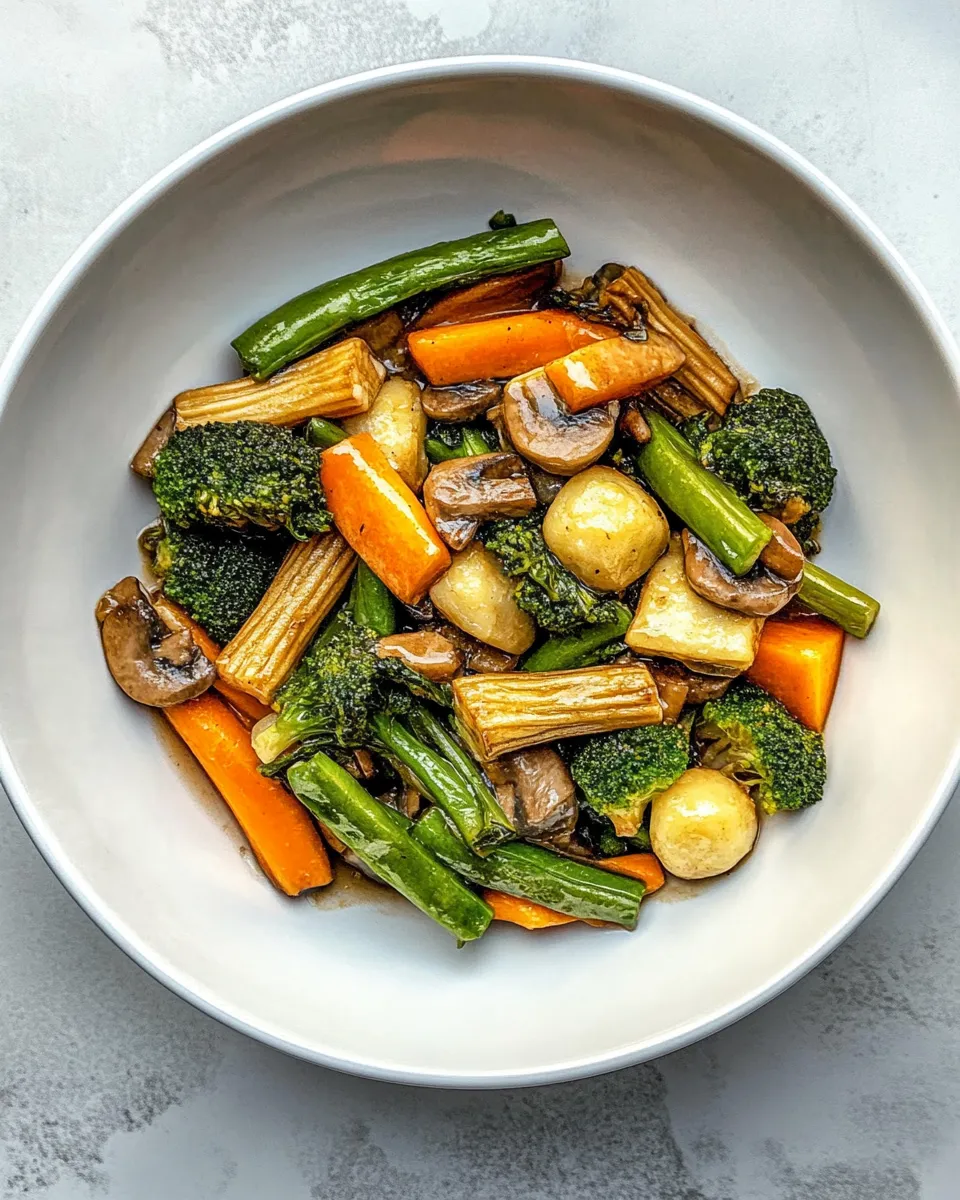
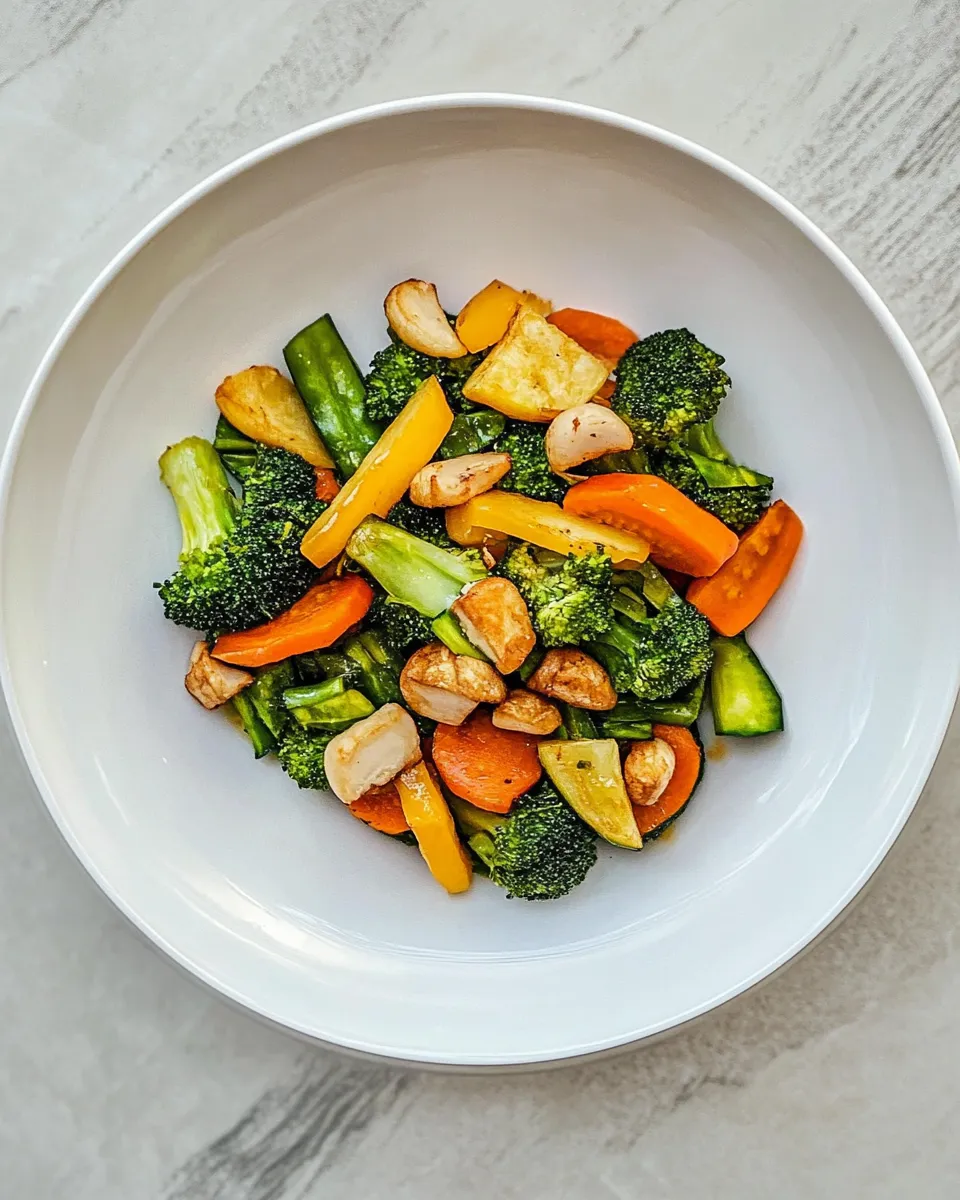
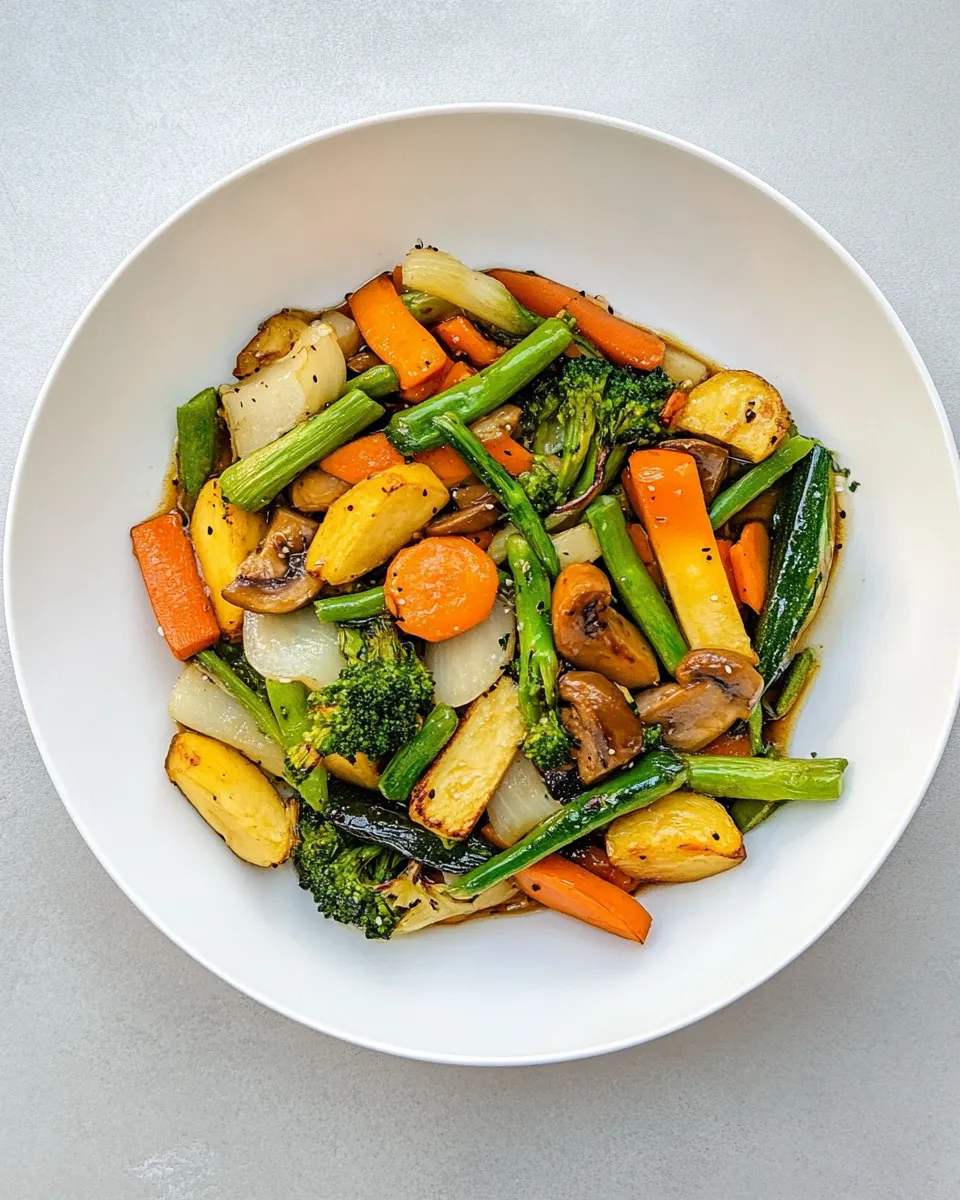
Bright, quick, and very forgiving—these hibachi-style vegetables are the weekday side you’ll reach for again and again. They take the same quick sear you get at the grill house: hot pan, hot fat, and vegetables cut for fast, even cooking. The result is tender-crisp vegetables with toasted edges and a savory finish.
I love this recipe because it’s both reliable and flexible. You can follow it exactly for an authentic hibachi feel, or tweak a little depending on what’s in the fridge. The sauce is minimal but effective: soy and steriyaki sauce (that’s how it’s listed here), a little butter for richness, and oil to raise the smoke point.
Read through the notes below for timing, substitutions, and the few small habits that make the difference between soggy veggies and perfectly seared hibachi vegetables. These steps are simple. Attention to heat and chopping makes them sing.
What Goes In
Ingredients
- 1 1/2tablespoonsunsalted butter — adds richness and helps carry flavor.
- 1 1/2tablespoonsvegetable or olive oil — raises the pan temperature and prevents sticking.
- 2teaspoonsgarlicminced — brightens the dish; add later if you prefer less browned garlic.
- 1small yellow onionroughly chopped — sweetens as it softens, gives body to the mix.
- 1zucchinicut into strips — cooks quickly; cut into similar-size strips for even doneness.
- 1cupsliced carrots — adds color and crunch; slice thin if you want faster cooking.
- 2cupsbroccoli florets — a classic hibachi vegetable; keep florets bite-sized.
- 6ouncesmushroomsquartered — soak up sauce and add savory depth.
- 1tablespoonsoy sauce — the salty backbone; use low-sodium if preferred.
- 2tablespoonsteriyaki sauce — adds sweetness and glaze.
- Salt and pepper to taste — finish and balance the dish.
- Sesame seedsfor garnish (optional) — gives a nutty crunch and a restaurant-style finish.
Hibachi Vegetables in Steps
- Heat a large skillet or wok over medium-high heat until hot.
- Add 1 1/2 tablespoons unsalted butter and 1 1/2 tablespoons vegetable or olive oil. When the butter melts and begins to froth, add 2 teaspoons garlic, minced, and 1 small yellow onion, roughly chopped. Stir constantly and cook about 2 minutes, until the onion softens.
- Add 1 zucchini cut into strips, 1 cup sliced carrots, 2 cups broccoli florets, and 6 ounces mushrooms, quartered. Stir to combine and cook about 1 minute.
- Pour in 1 tablespoon soy sauce and 2 tablespoons steriyaki sauce. Season with salt and pepper to taste. Continue to cook, stirring frequently, for about 10 minutes total, until the vegetables are tender-crisp.
- Remove from heat and transfer the vegetables to a serving dish.
- If using, sprinkle sesame seeds on top. Serve hot.
Why Hibachi Vegetables is Worth Your Time
This recipe is a fast way to get restaurant-style vegetables with minimal fuss. It gives you the contrast every good hibachi side needs: seared edges and tender centers. You get savory, sweet, and lightly caramelized notes from a small list of pantry staples.
It’s also a smart everyday recipe. Prep is minimal. The chopping is straightforward, and the actual cooking takes about 10 minutes. If you can keep a hot pan and watch your veggies, you’ll be rewarded with a side that pairs with grilled proteins, rice, or noodle bowls.
Smart Substitutions
Vegetable swaps
- If you don’t have zucchini, use yellow squash or thinly sliced bell peppers for similar cooking time and texture.
- For carrots, baby carrots or matchstick-cut carrots work if you want less slicing. Par-cook thicker carrot slices briefly in boiling water to match the timing of other vegetables.
- Broccoli can be swapped for broccolini or cauliflower; note cauliflower may take a touch longer to become tender-crisp.
- Mushrooms can be replaced with sliced baby bella, shiitake, or even firm tofu cubes for a different texture.
Sauce & fat swaps
- Use low-sodium soy sauce if you watch your salt. Reduce added salt accordingly.
- Swap steriyaki sauce for a glossy teriyaki or a simple mix of soy + mirin + sugar if you want to DIY a glaze.
- Use toasted sesame oil—sparingly—at the end for nuttiness. Don’t use it as the cooking oil; it burns easily.
Essential Tools for Success
- Large skillet or wok — a wide surface gives vegetables room to sear instead of steam.
- Sharp knife — quick, even cuts are essential so everything cooks at the same rate.
- Spatula or tongs — for active stirring and tossing.
- Heatproof bowl or serving dish — to move cooked vegetables off the hot pan immediately and stop carryover cooking.
Problems & Prevention
Soggy vegetables
Issue: Vegetables release water and steam instead of searing.
Prevention: Make sure the pan is hot before adding any fat. Don’t overcrowd the pan. Cook in batches if necessary so each piece gets contact with the hot surface.
Burnt garlic
Issue: Garlic browns too quickly and turns bitter.
Prevention: Add garlic after the butter melts and begins to froth, and stir constantly. If you prefer milder garlic flavor, add it a little later in the cooking process or reduce to 1 teaspoon.
Uneven cooking
Issue: Some vegetables finish faster than others.
Prevention: Cut vegetables to similar sizes and add denser vegetables (like carrots and broccoli) first if you deviate from the recipe. Keep stirring and watching—timing is short, and attention pays off.
Better Choices & Swaps
Choose firm, fresh vegetables for the best outcome. Avoid limp zucchini or mushrooms that have started to weep. For a lower-sodium dish, pick low-sodium soy sauce and reduce additional salt. If you want a gluten-free option, choose gluten-free soy or tamari and verify your steriyaki sauce is gluten-free.
Use high-smoke-point oils (vegetable, canola) for the main sauté, and add finishing oils like sesame only at the end for aroma. Freshly minced garlic gives the most lively flavor. Pre-minced jarred garlic works in a pinch but has a different profile.
Cook’s Notes
Timing
The recipe specifies about 10 minutes of cooking after the sauce goes in. That total includes the time the vegetables spend in the pan before you add the sauce. If your pan is extremely hot or your vegetables are sliced thinner, watch them at the 7–8 minute mark to prevent overcooking.
Heat management
Medium-high heat is the sweet spot. Too low and you’ll steam. Too high and the butter will burn before the vegetables cook. If the butter starts to brown too fast, lower the heat slightly and add a touch more oil to keep the pan lubricated.
Finishing touches
Sprinkle sesame seeds at the end for texture. A squeeze of fresh lemon or a tiny splash of rice vinegar brightens the whole dish if you want an acid finish.
Meal Prep & Storage Notes
These vegetables are best served immediately, but you can store leftovers for quick meals during the week. Cool completely, then transfer to an airtight container and refrigerate for up to 3 days.
Reheat gently in a skillet over medium heat with a teaspoon of oil to revive some of the sear. Avoid microwaving if you want to keep some texture—microwaves tend to make vegetables limp.
If you plan to meal prep, undercook slightly (remove from heat while still a touch firmer than you want) so reheating finishes them without going mushy.
Helpful Q&A
- Q: Can I make this vegan? A: Yes. Use vegetable oil only (omit the unsalted butter) and check that the steriyaki sauce is vegan.
- Q: Can I add protein to the pan? A: Yes. Sear thin strips of chicken, steak, or tofu first, remove them, then use the same pan to cook the vegetables. Return the protein at the end with the sauce to combine.
- Q: My broccoli is still hard after 10 minutes—why? A: Your florets may be too large or the pan not hot enough. Cut smaller florets or briefly blanch the broccoli (30–60 seconds) before stir-frying.
- Q: What is the steriyaki sauce listed here? A: It’s the sauce named in the ingredients. If you don’t have it, any teriyaki-style glaze or a mix of soy sauce, mirin, and a pinch of sugar will work as a substitute.
Ready, Set, Cook
Heat your skillet, have everything prepped, and move quickly. This recipe rewards small moments of attention: a hot pan, even cuts, and steady stirring. Serve these hibachi vegetables alongside rice, noodles, or your favorite protein. They’ll bring color, crunch, and a little restaurant-style flair to any meal.
When you make them a few times, you’ll find your own tweaks—a preferred vegetable ratio, a finishing splash of citrus, or a personal touch to the sauce. That’s the beauty of a simple, well-executed hibachi vegetable dish: it’s dependable and makes the rest of the meal sing.
Hibachi Vegetables
Equipment
- Large Skillet
- Wok
Ingredients
Ingredients
- 1 1/2 tablespoonsunsalted butter
- 1 1/2 tablespoonsvegetable or olive oil
- 2 teaspoonsgarlicminced
- 1 small yellow onionroughly chopped
- 1 zucchinicut into strips
- 1 cupsliced carrots
- 2 cupsbroccoli florets
- 6 ouncesmushroomsquartered
- 1 tablespoonsoy sauce
- 2 tablespoonsteriyaki sauce
- Salt and pepper to taste
- Sesame seedsfor garnish optional
Instructions
Instructions
- Heat a large skillet or wok over medium-high heat until hot.
- Add 1 1/2 tablespoons unsalted butter and 1 1/2 tablespoons vegetable or olive oil. When the butter melts and begins to froth, add 2 teaspoons garlic, minced, and 1 small yellow onion, roughly chopped. Stir constantly and cook about 2 minutes, until the onion softens.
- Add 1 zucchini cut into strips, 1 cup sliced carrots, 2 cups broccoli florets, and 6 ounces mushrooms, quartered. Stir to combine and cook about 1 minute.
- Pour in 1 tablespoon soy sauce and 2 tablespoons steriyaki sauce. Season with salt and pepper to taste. Continue to cook, stirring frequently, for about 10 minutes total, until the vegetables are tender-crisp.
- Remove from heat and transfer the vegetables to a serving dish.
- If using, sprinkle sesame seeds on top. Serve hot.