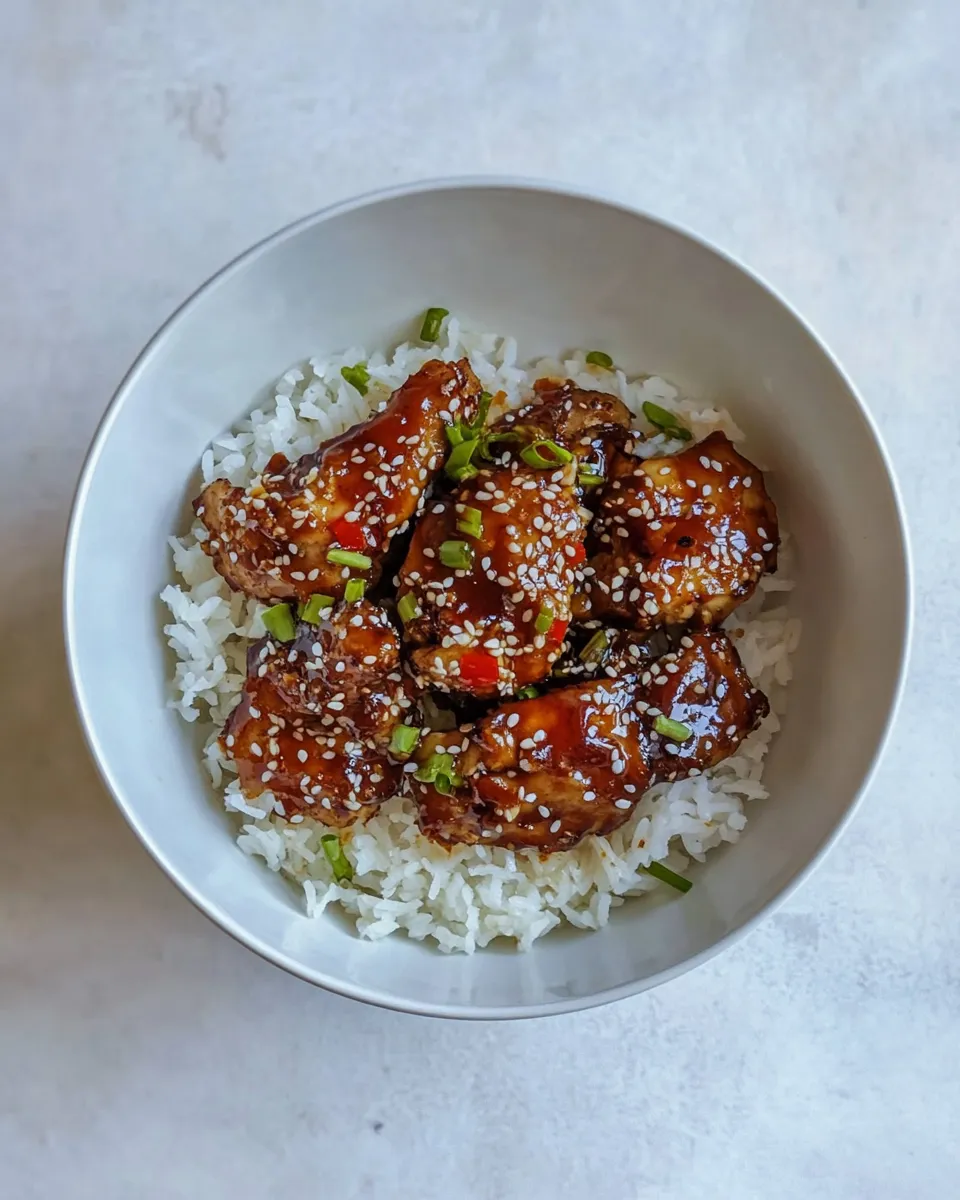
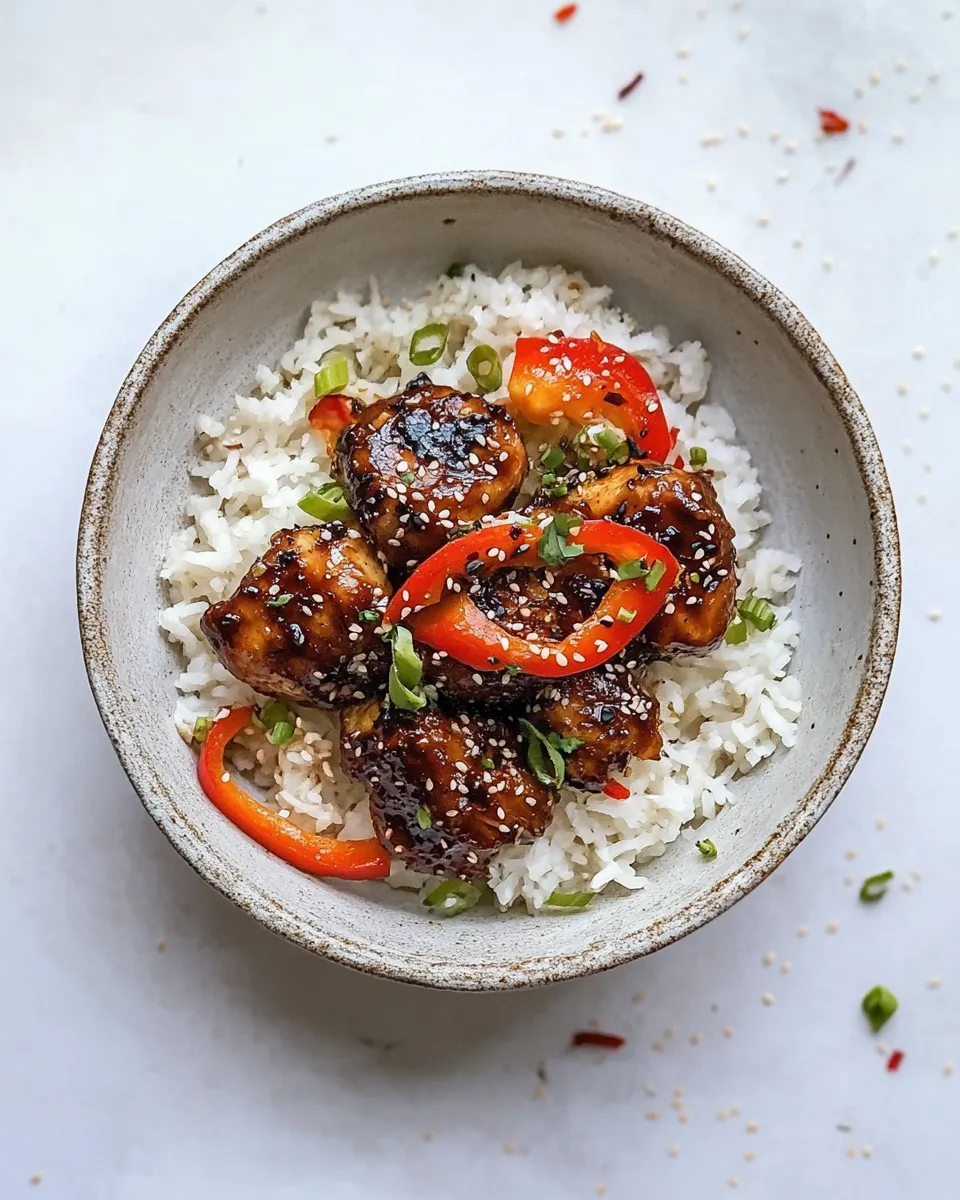
This is the kind of weeknight dinner I fall back on when life gets busy but I still want something that looks and tastes like I cared. It comes together in one skillet, has bright vegetables, a sticky savory-sweet sauce, and that toasty sesame finish that feels a little special without extra fuss. I make it when I need dinner fast but satisfying.
There’s no fussy prep, and clean-up is minimal. You’ll brown the chicken, soften the vegetables, and finish everything in the oven so the sauce thickens and the flavors meld. The recipe lives up to its name: one pan, big payoff.
Below you’ll find a clear shopping guide, the exact ingredients list, step-by-step directions straight from the recipe, and practical tips I use every time I make it. Read through once, then you’ll have everything you need to cook confidently.
Your Shopping Guide
When you head to the market, aim for the few fresh items that make the dish sing: good-quality chicken thighs, crisp carrots, a vibrant red bell pepper, and fresh sugar snap peas. The aromatics—ginger and garlic—should be fragrant. If you can find toasted sesame oil and toasted sesame seeds, buy them; they add depth you don’t want to skip.
Grab low-sodium soy sauce so the dish doesn’t get overly salty; you can always add salt later but you can’t take it away. If your store has multiple chili garlic sauces, pick the one that looks well-balanced (not overly watery). The rest—rice vinegar, honey—are pantry staples in many kitchens and worth keeping on hand.
Bring a skillet that’s ovenproof (cast iron or enamel). If you don’t have one, the shopping run can wait until after you try this once in a heavy-bottomed sauté pan, but the finish will be better with oven-safe cookware.
Ingredients
- 1 ½ tablespoons toasted sesame oil — for browning and a nutty backbone to the dish.
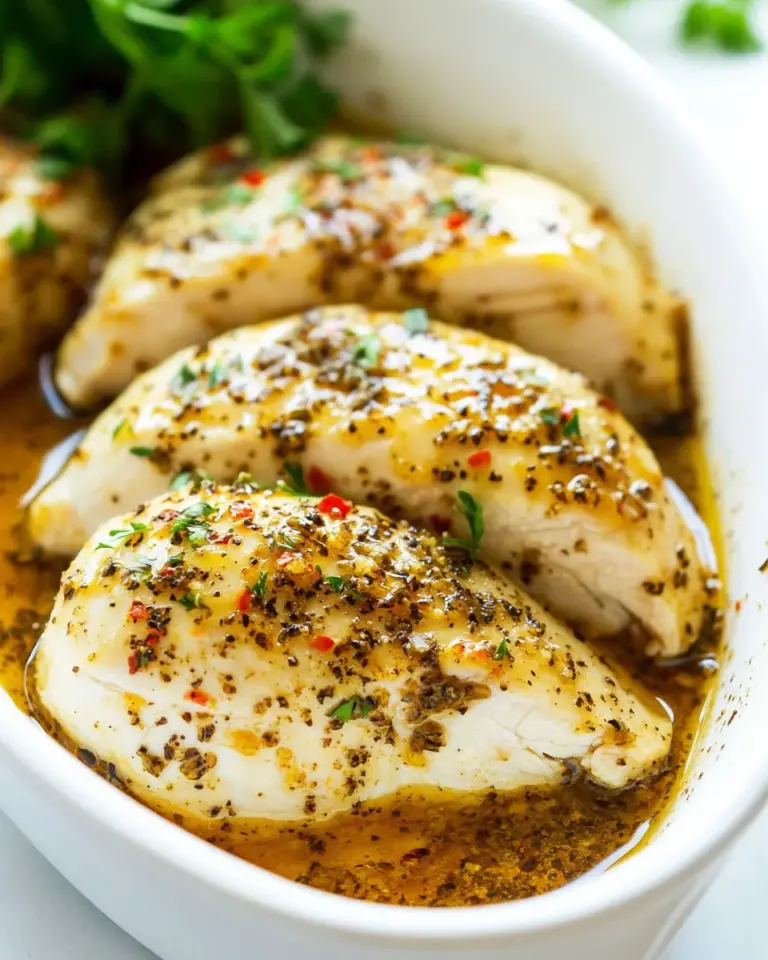
- 1 pound boneless, skinless chicken thighs — juicy, forgiving in the oven, and flavorful.
- pinch of salt and pepper — simple seasoning to highlight the chicken.
- 3 carrots, peeled and sliced — add sweetness and bite; slice evenly for even cooking.
- 1 red bell pepper, thinly sliced — brings color and sweetness.
- 2/3 cup sugar snap peas — quick-cooking crunch and freshness.
- 3 tablespoons low sodium soy sauce — the savory base of the sauce.
- 2 tablespoons chili garlic sauce — adds heat and garlicky depth.
- 1 tablespoon rice vinegar — brightens and balances the sauce.
- 1 tablespoon honey — rounds the sauce with gentle sweetness and helps it glaze.
- 1 teaspoon grated ginger — fresh zing; grate finely for even distribution.
- 1 garlic clove, minced — aromatic backbone; mince finely.
- 1 tablespoon toasted sesame seeds — finish for texture and extra sesame flavor.
Cooking (One Pan Sesame Chicken): The Process
- Preheat the oven to 425°F (use an ovenproof skillet such as cast iron or enamel).
- Pat the 1 pound boneless, skinless chicken thighs dry and season both sides with a pinch of salt and a pinch of pepper.
- Heat the skillet over medium-high heat and add 1 ½ tablespoons toasted sesame oil. When the oil is hot and shimmering, add the chicken in a single layer and brown 1 to 2 minutes per side, until golden. Remove the chicken to a plate.
- Add the 3 peeled, sliced carrots, the 1 thinly sliced red bell pepper, and the 2/3 cup sugar snap peas to the skillet. Toss to coat in the oil and browned bits. Cook, stirring occasionally, until the vegetables begin to soften, about 5 to 6 minutes.
- Turn off the heat and arrange the browned chicken on top of the vegetables in the skillet.
- In a bowl, whisk together 3 tablespoons low sodium soy sauce, 2 tablespoons chili garlic sauce, 1 tablespoon rice vinegar, 1 tablespoon honey, 1 teaspoon grated ginger, and 1 minced garlic clove. Pour the sauce evenly over the chicken and vegetables. Sprinkle 1 tablespoon toasted sesame seeds on top.
- Transfer the skillet to the preheated oven and bake 15 to 20 minutes, until the sauce is bubbly and slightly thickened and the chicken is cooked through.
- Carefully remove the skillet from the oven, let rest a few minutes, then serve.
Quick technique notes
Brown the chicken quickly; you want color, not full cooking. That color is flavor. When the vegetables hit the skillet, use the browned bits to build the sauce’s complexity. Pour the sauce evenly so every piece glazes — it’ll reduce in the oven into that sticky finish we love. Finally, let the pan rest; the juices redistribute and the sauce settles.
Why You’ll Keep Making It

This recipe balances three things I look for in repeat meals: speed, reliability, and flavor. It’s fast to prep—mostly slicing. It’s reliable because the thighs remain tender even if you slightly overbake. And it’s flavorful: sesame oil and seeds give a toasted richness while the chili garlic sauce and ginger add brightness and heat.
It’s also versatile. The vegetable trio here is a great template—you can swap in broccoli or snow peas depending on what’s fresh. The one-skillet finish means fewer dishes, which is a night-saver when the week gets long.
Allergy-Friendly Substitutes
If you have allergies, here are safe swaps that keep the core character of the dish:
- Soy allergy — replace low sodium soy sauce with a gluten-free tamari alternative if you tolerate soy; for soy-free, use coconut aminos (slightly sweeter, so taste and adjust).
- Sesame allergy — omit toasted sesame oil and seeds. Use a neutral oil (canola or avocado) and finish with a squeeze of lime and extra ginger to add complexity.
- Honey allergy — swap honey for maple syrup or agave for similar sweetness and glaze potential.
- Chili garlic sauce intolerance — use a mix of sambal (check ingredients) or a teaspoon of chili flakes plus a touch more minced garlic for heat without the specific condiment.
Prep & Cook Tools
- Ovenproof skillet (cast iron or enameled) — essential for browning on the stovetop and finishing in the oven.
- Chef’s knife and cutting board — for even slicing of carrots and bell pepper.
- Microplane or fine grater — for the grated ginger.
- Small bowl and whisk or fork — to combine the sauce quickly.
- Tongs or spatula — to flip the chicken and toss the vegetables.
- Measuring spoons and cups — to keep the sauce balanced as written.
Things That Go Wrong
Here are common mistakes and how I fix them.
Undercooked chicken: That mostly happens when pieces are very thick. Flatten thighs slightly for even thickness, or check internal temperature (165°F for safety). If they need more time, return to the oven in 3–5 minute increments.
Soggy vegetables: Overcrowding the skillet or cooking at too low a heat leads to limp veg. Keep a single layer when browning, and don’t rush the vegetable step—give them 5–6 minutes to soften but not turn to mush.
Sauce too thin after baking: If the sauce is not glossy and clinging after 20 minutes, remove the chicken and simmer the sauce on the stovetop for a couple of minutes to reduce, then return the chicken to coat.
Too salty: Start with low-sodium soy sauce (as the recipe specifies). If the finished dish is too salty, brighten it with a splash of rice vinegar or a squeeze of lime to balance the saltiness.
Dietary Swaps & Alternatives
Want to tailor this to a diet plan? Here are practical swaps:
- Keto: Keep everything but replace honey with a keto-friendly sweetener like erythritol-based syrup or omit it and add a pinch of powdered sweetener to taste.
- Gluten-free: Use tamari or a certified gluten-free soy alternative in place of low sodium soy sauce.
- Vegetarian/Vegan: Replace chicken with extra-firm tofu (pressed and patted dry) or thick king oyster mushroom slices. Brown the tofu the same way and finish with the same sauce — use maple or agave instead of honey.
- Paleo: Use coconut aminos for the soy sauce and swap honey with a small amount of maple syrup; use a neutral oil instead of sesame oil if avoiding seeds.
Testing Timeline
Here’s the practical timeline I use when I test this recipe in my kitchen so my plating is on time:
- 0–10 minutes: Prep — peel and slice carrots, thinly slice red pepper, trim chicken if needed, mince garlic and grate ginger, measure sauce ingredients.
- 10–18 minutes: Brown chicken (1–2 minutes per side) and remove; cook vegetables 5–6 minutes until beginning to soften.
- 18–20 minutes: Arrange chicken over vegetables, whisk sauce, pour over, sprinkle sesame seeds.
- 20–40 minutes: Bake 15–20 minutes in a 425°F oven until sauce is bubbly and chicken is cooked through.
- 40–45 minutes: Rest the skillet a few minutes, then serve.
Total active time is modest and the oven does most of the finishing work.
Storage & Reheat Guide
Store leftovers in an airtight container in the fridge for up to 3 days. The sauce soaks into the chicken, which makes reheating easy but be mindful not to overcook the chicken a second time.
Reheat in a skillet over medium-low heat with a splash of water or chicken stock to loosen the sauce and prevent drying. Cover the pan for a few minutes until warmed through. Alternatively, reheat in a 350°F oven for 8–12 minutes, covered, until heated.
Do not refreeze once thawed if you’ve cooked it; instead, keep it refrigerated and eat within the recommended storage window.
Ask the Chef
Q: Can I use chicken breasts instead of thighs? A: Yes. Use even-thickness breasts and check doneness carefully — breasts dry out more easily than thighs. Reduce oven time as needed and monitor internal temperature.
Q: My sauce is too spicy. Any quick fix? A: Add a little more honey or a splash of rice vinegar to balance heat. A dollop of plain yogurt on the side can also calm spice for individual servings.
Q: Can I double the recipe? A: You can, but use a larger skillet or transfer to a shallow roasting pan so ingredients roast rather than steam. Keep the same oven temp, and monitor cooking time—larger volume may need a few extra minutes.
The Last Word
This One Pan Sesame Chicken gives you a weeknight win: real flavor with minimal fuss. The method is simple—brown, soften, sauce, and bake—yet it produces a rich, glossy finish that feels homey and a little special at the same time. Make the recipe as written the first time, then tweak the veg or heat level to suit your household. Keep the sesame oil and seeds on hand; they’re the small things that make this dish memorable.
Happy cooking. Let me know how you customize it—favorite swaps and timing tricks always brighten my inbox, and I test new ideas all the time.
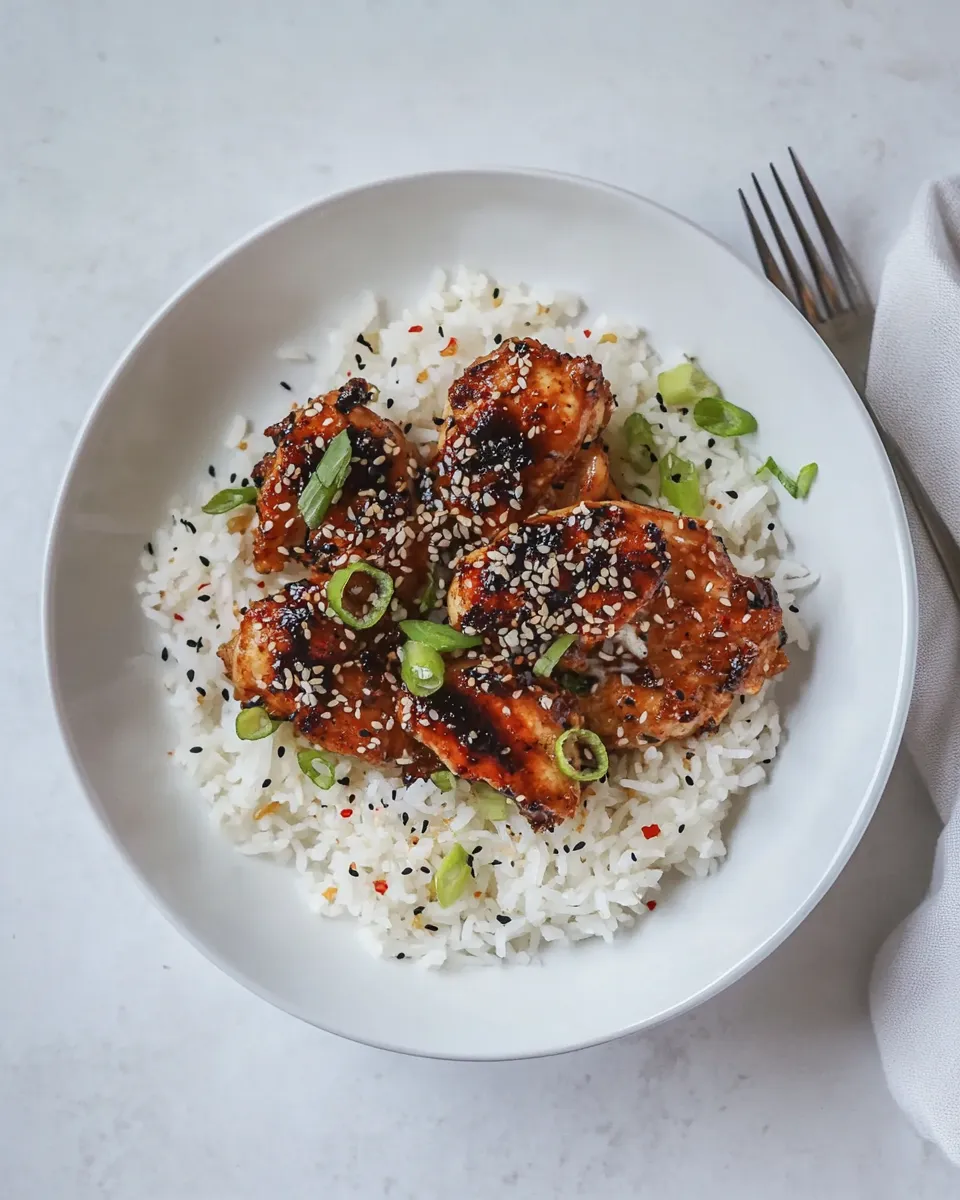
One Pan Sesame Chicken.
Equipment
- ovenproof skillet (cast iron or enamel)
- Stove
- Oven
- Mixing Bowl
Ingredients
Ingredients
- 1 1/2 tablespoons toasted sesame oil
- 1 pound boneless skinless chicken thighs
- pinch of salt and pepper
- 3 carrots peeled and sliced
- 1 red bell pepper thinly sliced
- 2/3 cup sugar snap peas
- 3 tablespoons low sodium soy sauce
- 2 tablespoons chili garlic sauce
- 1 tablespoon rice vinegar
- 1 tablespoon honey
- 1 teaspoon grated ginger
- 1 garlic clove minced
- 1 tablespoon toasted sesame seeds
Instructions
Instructions
- Preheat the oven to 425°F (use an ovenproof skillet such as cast iron or enamel).
- Pat the 1 pound boneless, skinless chicken thighs dry and season both sides with a pinch of salt and a pinch of pepper.
- Heat the skillet over medium-high heat and add 1 ½ tablespoons toasted sesame oil. When the oil is hot and shimmering, add the chicken in a single layer and brown 1 to 2 minutes per side, until golden. Remove the chicken to a plate.
- Add the 3 peeled, sliced carrots, the 1 thinly sliced red bell pepper, and the 2/3 cup sugar snap peas to the skillet. Toss to coat in the oil and browned bits. Cook, stirring occasionally, until the vegetables begin to soften, about 5 to 6 minutes.
- Turn off the heat and arrange the browned chicken on top of the vegetables in the skillet.
- In a bowl, whisk together 3 tablespoons low sodium soy sauce, 2 tablespoons chili garlic sauce, 1 tablespoon rice vinegar, 1 tablespoon honey, 1 teaspoon grated ginger, and 1 minced garlic clove. Pour the sauce evenly over the chicken and vegetables. Sprinkle 1 tablespoon toasted sesame seeds on top.
- Transfer the skillet to the preheated oven and bake 15 to 20 minutes, until the sauce is bubbly and slightly thickened and the chicken is cooked through.
- Carefully remove the skillet from the oven, let rest a few minutes, then serve.