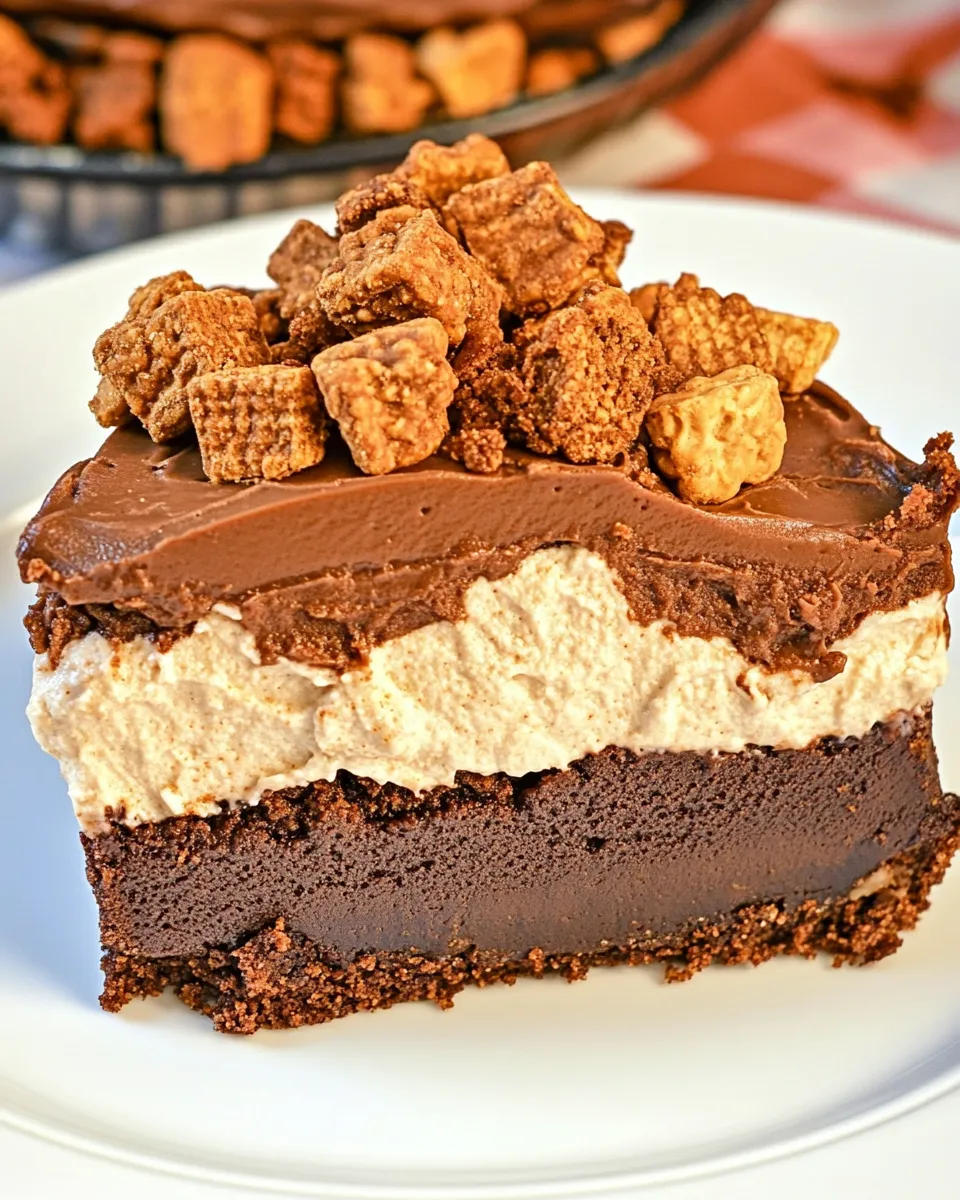
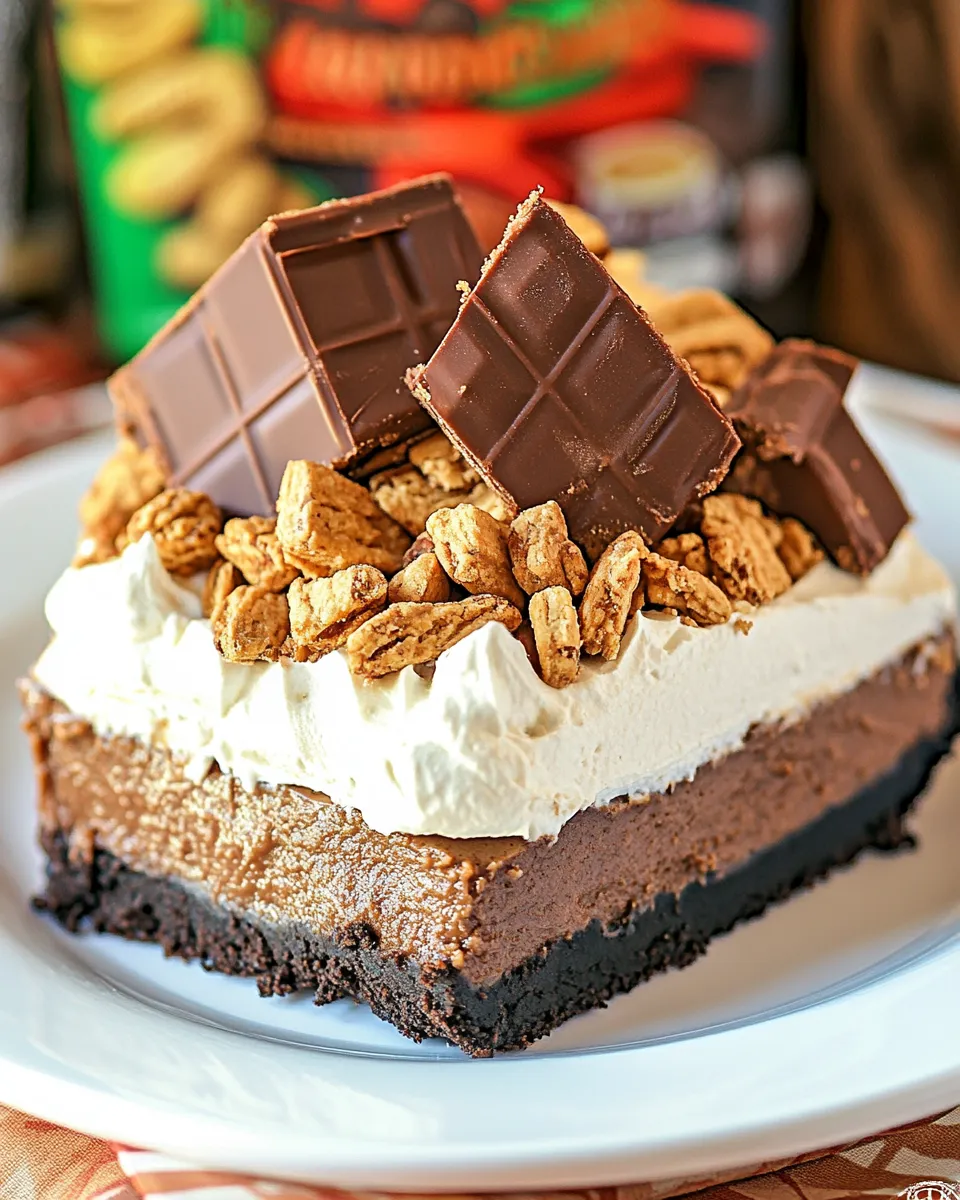
This pie is exactly the kind of dessert I reach for when I need something that reads like a celebration but doesn’t require a bakery run. Dense, fudgy brownie at the bottom. A crunchy peanut-butter–chocolate layer in the middle. A light, cloud-like chocolate marshmallow mousse on top. The contrast in textures is what makes it unforgettable.
I test recipes so you don’t have to. This one is composed from pantry-friendly parts: a boxed brownie base you bake in a springform, a simple stovetop peanut-butter crunch, and a whipped mousse that sets in the fridge. If you can melt chocolate, fold cream, and wait three hours, you’ll have something impressive.
I’ll walk you through what to buy, how to assemble it step by step (exactly as the recipe directs), helpful swaps if you’re out of an ingredient, the equipment you’ll want on hand, and the small mistakes that make a big difference. Read through my troubleshooting notes before you start; they’ll save time and keep the pie tidy.
What to Buy
Shop with a short list in mind: boxed brownie mix and the ingredients it calls for, peanut butter, chocolate chips, butter, corn flakes, semi-sweet chocolate, milk, marshmallows, and whipping cream. Buy slightly better chocolate for the mousse if you can — the mousse only needs a few ounces, but quality shows.
Pick peanut butter you enjoy straight from the jar; its flavor comes through in the crunch layer. For corn flakes, plain unsweetened works fine. If you prefer gluten-free, check the cereal label.
Ingredients
- Your favorite brownie mix and ingredients as listed on the box. — Use whatever mix you trust; it forms the sturdy base and bakes right in the springform pan.
- 1 Cup Peanut Butter — Binds and flavors the crunch layer; creamy or crunchy both work, but the texture will differ slightly.
- 1 Cup Chocolate Chips — Melted with butter to make the peanut-butter crunch rich and chocolate-forward.
- 1/4 Cup Butter — Helps the chocolate chips melt smoothly and gives body to the crunch layer.
- 1 1/2 Cups Crushed Corn Flakes — Provides the crunchy texture; crush them to bite-size pieces but not dust.
- 4 oz semi-sweet chocolate — The base for the mousse; semi-sweet balances the peanut butter and brownie flavors.
- 1/4 cup milk — Loosens the melted chocolate so it blends with marshmallows into a mousse base.
- 1 cup marshmallows chocolate or regular — Melted into the chocolate for sweetness and aeration; chocolate marshmallows add extra depth.
- 1 cup whipping cream — Whipped to stiff peaks and folded into the chocolate mixture to create the mousse texture.
Cook Peanut Butter Crunch Brownie Mousse Pie Like This
- Prepare the brownies according to the directions on the box and bake them in an 8-, 9- or 10-inch springform pan. Allow the brownies to cool completely in the pan; do not remove the sides.
- Make the peanut-butter crunch layer: in a heavy saucepan over low heat, melt 1/4 cup butter and 1 cup chocolate chips, stirring until smooth (or melt slowly in the microwave, stirring frequently). Remove from heat and stir in 1 cup peanut butter until combined. Fold in 1 1/2 cups crushed corn flakes until evenly coated. Spread this mixture evenly over the cooled brownie layer and set aside.
- Make the mousse layer: in a heavy saucepan over low heat, melt 4 oz semi-sweet chocolate with 1/4 cup milk and 1 cup marshmallows (chocolate or regular), stirring until smooth and the marshmallows are fully melted. Remove from heat and let the chocolate mixture cool completely, about 30 minutes, stirring occasionally.
- While the chocolate mixture cools, chill a mixing bowl (optional) and beat 1 cup whipping cream on high speed until stiff peaks form.
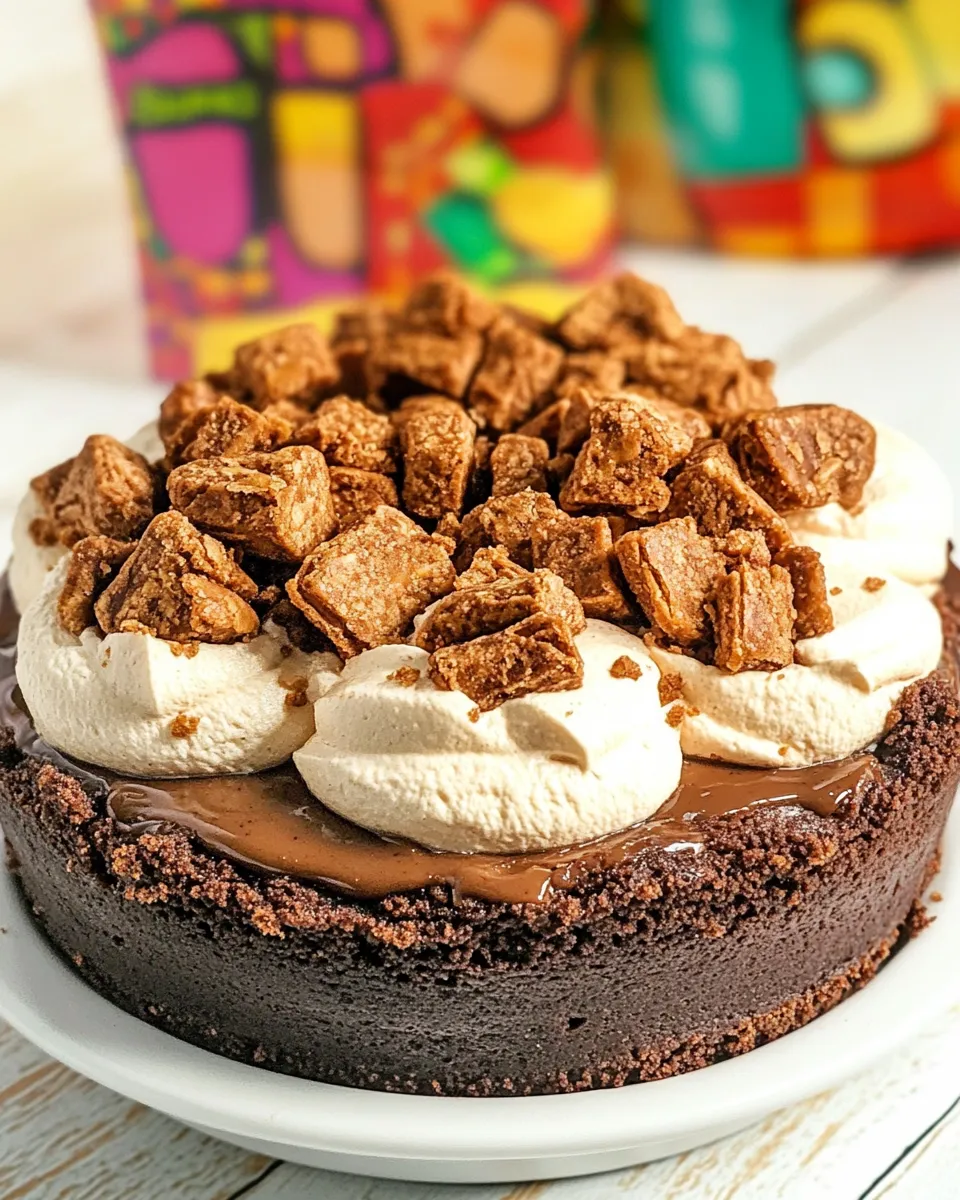
- Gently fold the cooled chocolate–marshmallow mixture into the whipped cream until uniform, keeping as much air as possible in the whipped cream. Spread the mousse evenly over the peanut-butter crunch layer.
- Refrigerate the pie for at least 3 hours to set.
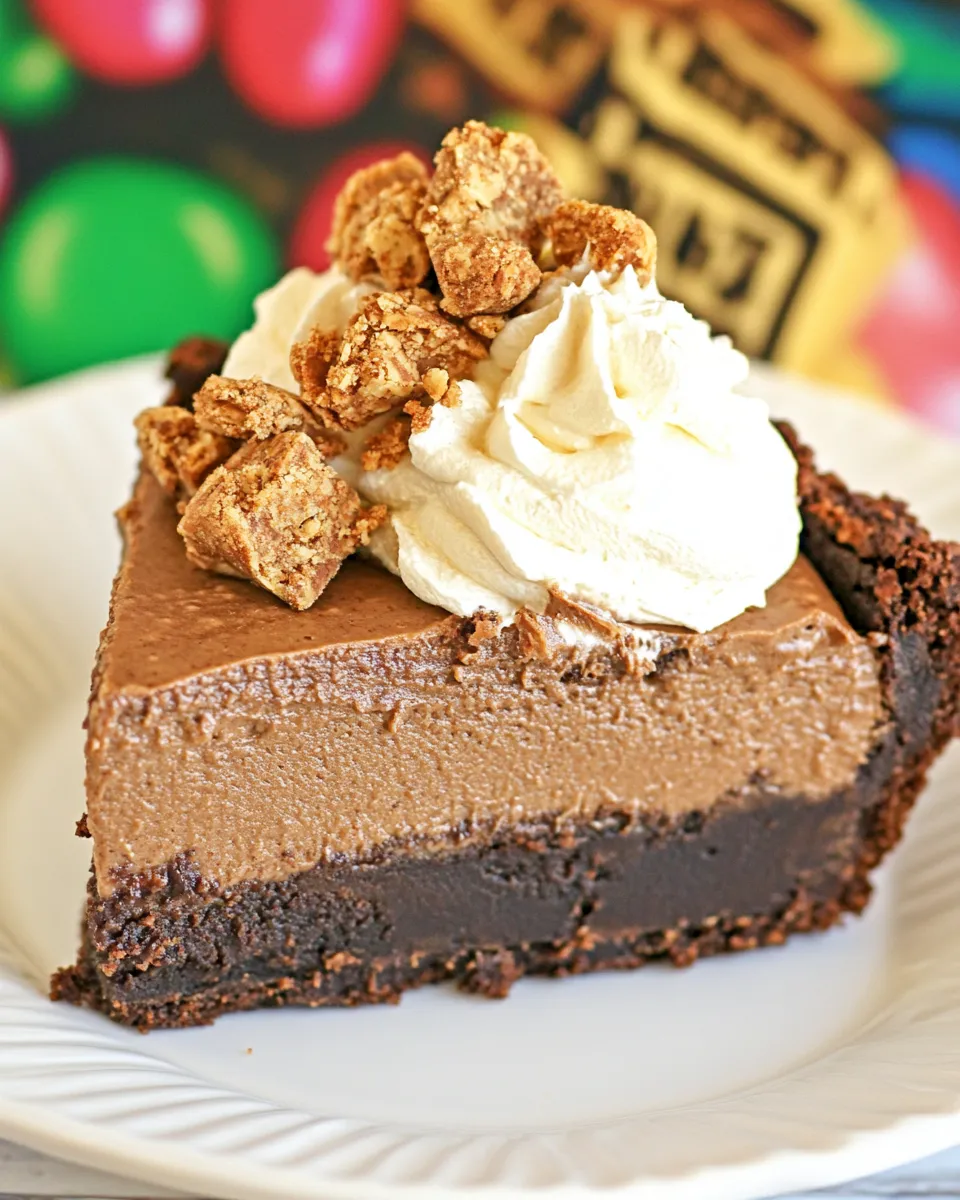
- To serve, run a thin knife around the edge of the springform, release and remove the pan sides, slice, and serve.
Why You’ll Keep Making It
This pie balances decadence and simplicity. Most of the heavy lifting is melting, folding, and waiting for the fridge — no tempering or complicated ribbons. The brownie base gives it real substance, so one slice feels like a legitimate serving, not a dainty amuse-bouche.
People notice textural contrasts. The crunchy peanut layer keeps each bite interesting against the dense brownie and airy mousse. It’s a dessert you can make ahead, travel with if you secure the springform, and serve to guests who expect something thoughtful without fuss.
Easy Ingredient Swaps
Substitutions that work without rewriting the method:
- Brownie mix: Use a homemade brownie batter if you prefer; bake it in the springform and follow the same cooling step.
- Peanut butter: Almond or cashew butter will work, but the flavor will be different; reduce added salt if your nut butter is salted.
- Chocolate chips and semi-sweet chocolate: Use bittersweet if you like less sweetness, or milk chocolate for a sweeter mousse — this changes overall sweetness, so taste accordingly.
- Corn flakes: Substitute Rice Krispies or crushed pretzels for a different crunch profile; pretzels add a salty contrast.
- Marshmallows: If you don’t have marshmallows, melt a little extra chocolate with a tablespoon of corn syrup for chew and shine, though it won’t be identical.
Equipment at a Glance
Minimal, familiar kitchen tools will do:
- 8-, 9- or 10-inch springform pan — essential for easy removal of the pie.
- Heavy saucepan — for melting chocolate and mixing the peanut layer.
- Mixing bowl and electric mixer (or whisk and arm strength) — to whip the cream to stiff peaks.
- Spatula — for folding and spreading layers cleanly.
- Knife and cutting board — to score and slice once chilled.
Mistakes Even Pros Make
Rushing the cooling step for the chocolate mixture. If you fold warm chocolate into whipped cream, it will deflate and become grainy. Let it cool to room temperature; stirring occasionally helps it cool evenly and prevents a skin from forming.
Filling a springform that isn’t fully cooled. If the brownie layer is warm, the peanut-butter crunch will sink in or slide off. Cool completely before adding the next layer.
Over-beating the whipped cream. Stiff peaks are the goal, but once you start seeing butterfat clumps, you’ve gone too far. Stop when peaks hold shape and still look glossy.
Seasonal Spins
Small seasonal touches make this pie holiday-ready or more summery depending on timing:
- Winter: Stir a pinch of cinnamon or a teaspoon of instant espresso into the chocolate for depth.
- Spring: Top with fresh strawberries or a few raspberries to cut the richness.
- Summer: Serve chilled slices with a scoop of vanilla ice cream — the contrast is delightful.
- Fall: Use pumpkin-spiced marshmallows or fold in a spoonful of maple syrup with the peanut butter for warm notes.
Insider Tips
Timing and temperature
Start by baking the brownies. While they cool, make the peanut-butter crunch. Once the crunch is on, let it firm up while you make and cool the mousse. The whole assembly benefits from a patient hand: cool between stages, and refrigerate for at least three hours to let the mousse set fully.
Cleanup and assembly
Line your springform base with a round of parchment before pouring in the brownie batter. It isn’t required, but it makes sliding the pie onto a serving plate cleaner. When you heat chocolate, use a heavy-bottomed pan to prevent hot spots and scorching; low heat is your friend.
Serving
Run a thin knife under hot water, dry it, then slice. Wipe the knife between cuts for neat pieces. If you need perfectly even slices, chill overnight and use a warm, dry knife for each cut.
Save It for Later
Storage is simple: keep the pie covered in the refrigerator for up to 3 days. The mousse holds well but will soften a bit over time. If you need to freeze, wrap individual slices tightly in plastic wrap and store in an airtight container for up to a month. Thaw overnight in the fridge before serving.
Do not freeze the pie assembled in the springform unless you remove the sides and wrap it tightly; the springform seal isn’t airtight and can cause freezer burn.
Your Top Questions
Q: Can I make the pie a day ahead?
A: Yes. In fact, chilling it overnight improves slicing and flavor melding. Just keep it covered in the fridge.
Q: My marshmallows didn’t fully melt — what went wrong?
A: Use low heat and stir constantly. If the pan is too hot, marshmallows can scorch rather than melt. Break the marshmallows into smaller pieces before adding for faster melting.
Q: Can I use whipped topping instead of whipping cream?
A: I recommend real whipping cream for the best texture and stability. Whipped topping may be too soft and can weep more quickly.
Q: Is this safe to transport?
A: Yes, if chilled properly. Place the pie in a snug box or on a flat tray and carry it level. Short trips are no problem; for longer trips, use a cooler pack underneath to keep it stable.
The Last Word
Peanut Butter Crunch Brownie Mousse Pie is a reliable crowd-pleaser that looks composed but is forgiving to make. It rewards patience and clean technique more than showy skills. Follow the provided steps in order, respect the cooling and chilling times, and you’ll get a dessert with great contrast — fudgy, crunchy, and silky — every time.
Try it once exactly as written. After that, you’ll know what to tweak for your pantry and preferences. And when someone asks for the recipe, you’ll be ready with a confident, camera-ready slice.
Peanut Butter Crunch Brownie Mousse Pie
Equipment
- springform pan (8-, 9- or 10-inch)
- Saucepan
- microwave (optional)
- Mixing Bowl
- Electric Mixer
- Knife
Ingredients
Ingredients
- Your favorite brownie mix and ingredients as listed on the box.
- 1 CupPeanut Butter
- 1 CupChocolate Chips
- 1/4 CupButter
- 1 1/2 CupsCrushed Corn Flakes
- 4 ozsemi-sweet chocolate
- 1/4 cupmilk
- 1 cupmarshmallowschocolate or regular
- 1 cupwhipping cream
Instructions
Instructions
- Prepare the brownies according to the directions on the box and bake them in an 8-, 9- or 10-inch springform pan. Allow the brownies to cool completely in the pan; do not remove the sides.
- Make the peanut-butter crunch layer: in a heavy saucepan over low heat, melt 1/4 cup butter and 1 cup chocolate chips, stirring until smooth (or melt slowly in the microwave, stirring frequently). Remove from heat and stir in 1 cup peanut butter until combined. Fold in 1 1/2 cups crushed corn flakes until evenly coated. Spread this mixture evenly over the cooled brownie layer and set aside.
- Make the mousse layer: in a heavy saucepan over low heat, melt 4 oz semi-sweet chocolate with 1/4 cup milk and 1 cup marshmallows (chocolate or regular), stirring until smooth and the marshmallows are fully melted. Remove from heat and let the chocolate mixture cool completely, about 30 minutes, stirring occasionally.
- While the chocolate mixture cools, chill a mixing bowl (optional) and beat 1 cup whipping cream on high speed until stiff peaks form.
- Gently fold the cooled chocolate–marshmallow mixture into the whipped cream until uniform, keeping as much air as possible in the whipped cream. Spread the mousse evenly over the peanut-butter crunch layer.
- Refrigerate the pie for at least 3 hours to set.
- To serve, run a thin knife around the edge of the springform, release and remove the pan sides, slice, and serve.