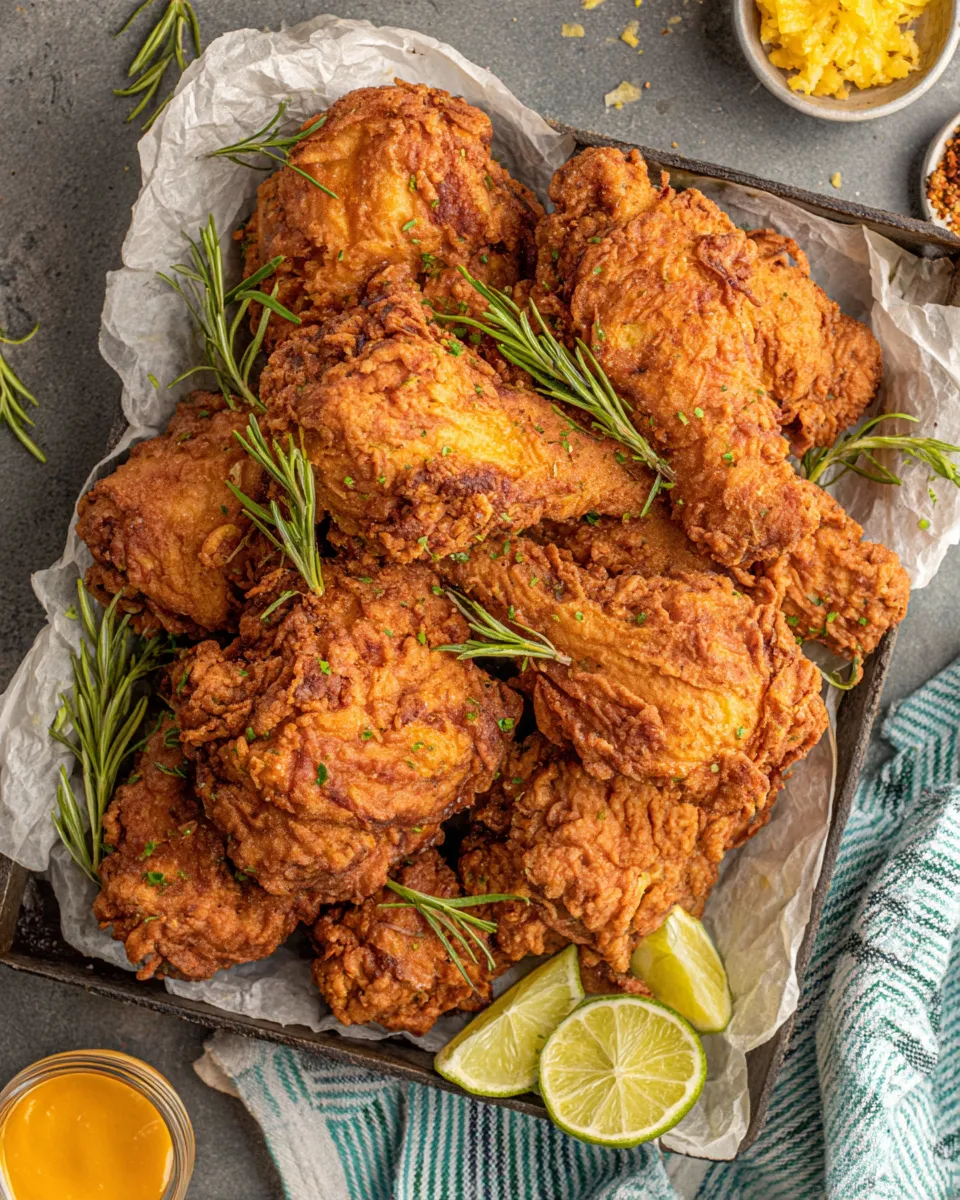
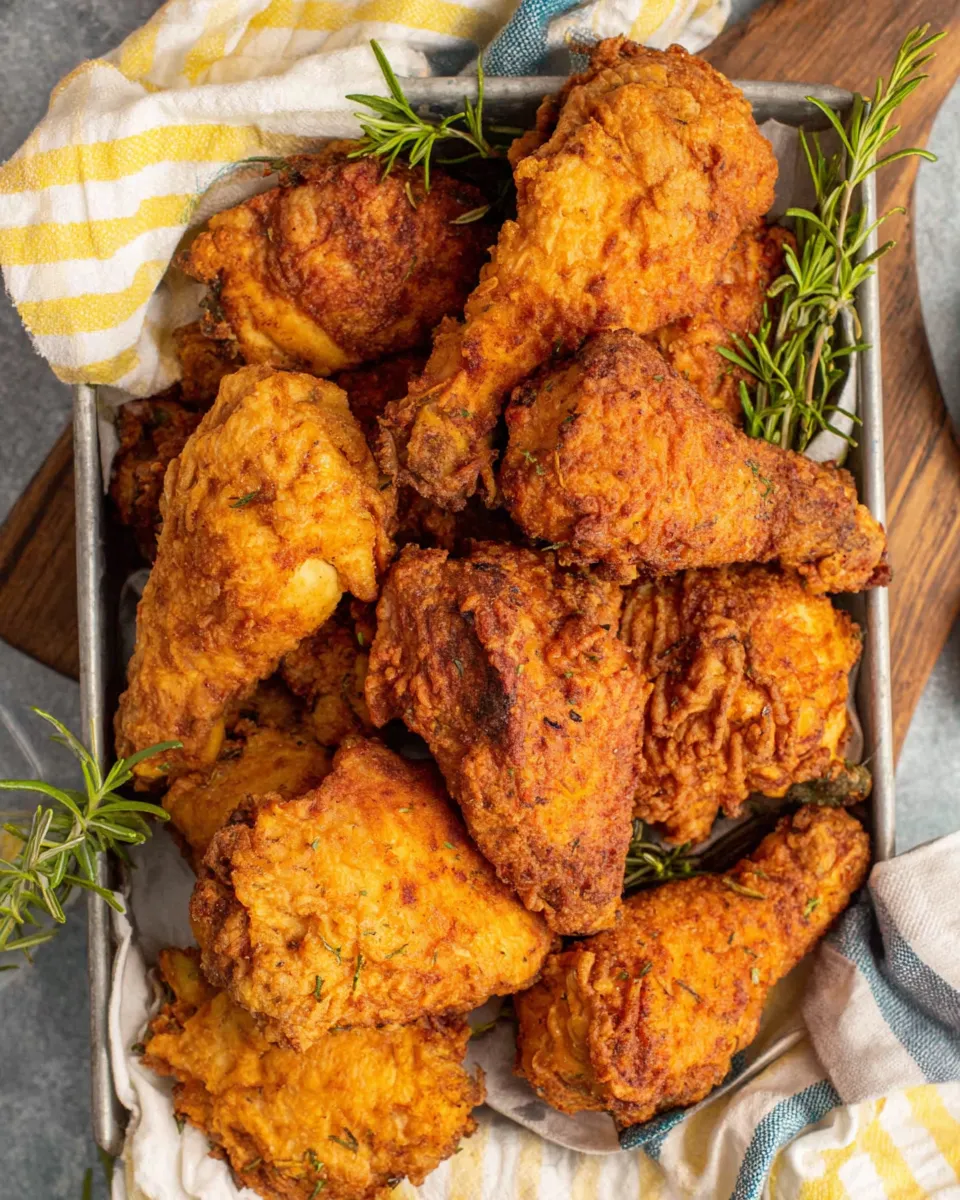
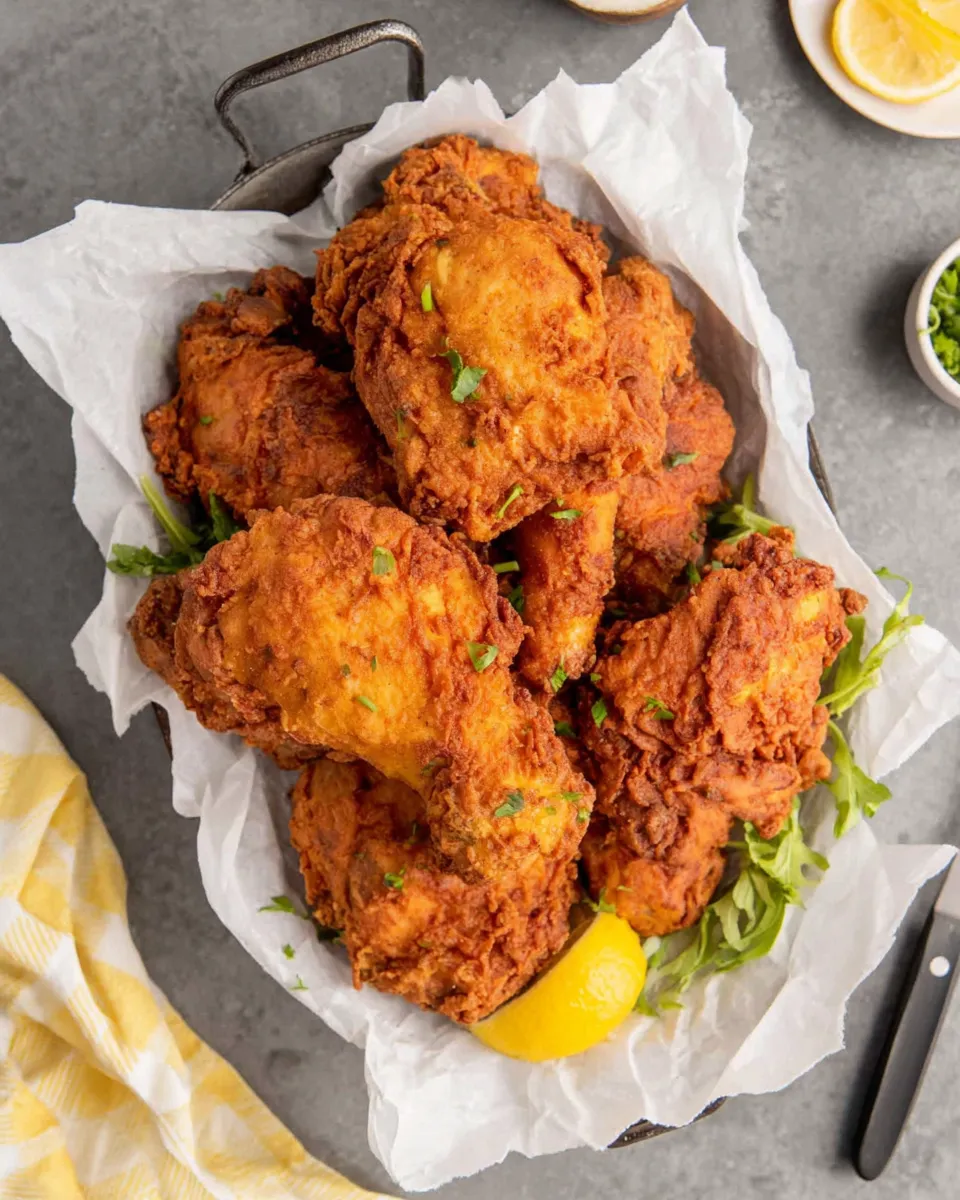
There’s something undeniably comforting about a plate of perfectly crisp, golden fried chicken. This Buttermilk Fried Chicken Recipe brings together a simple brine, a seasoned flour coating, and hot oil to create crunchy skin and tender, juicy meat. It’s the kind of recipe you’ll want to make for a casual family dinner, a backyard gathering, or any time you crave a classic southern-style favorite. With minimal ingredients and straightforward steps, this dish proves that great flavor doesn’t have to be complicated.
Why this Buttermilk Fried Chicken Recipe works
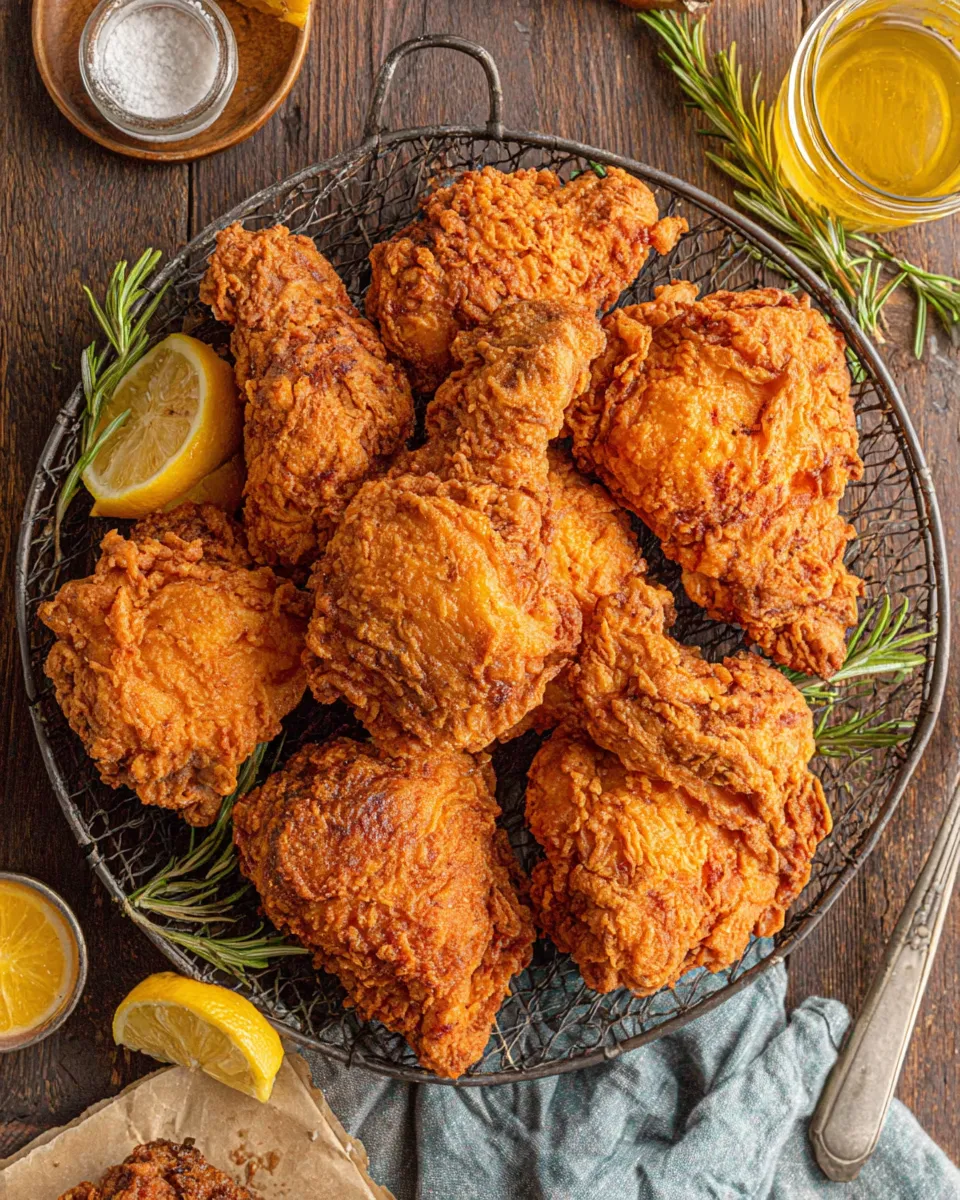
The secret to tender fried chicken is the buttermilk soak. The acidity and enzymes in the buttermilk help break down proteins in the chicken, which results in a more tender bite. Meanwhile, the flour coating with paprika, garlic salt mixed with parsley flakes, and black pepper forms a robust, flavorful crust that turns irresistibly crisp when fried in vegetable oil. The result is contrast: crunchy exterior, juicy interior. That balance is what makes this Buttermilk Fried Chicken Recipe a repeat-worthy favorite.
Ingredients
- ▢4-6 pound whole chicken, cut into pieces
- ▢1 cup buttermilk
- ▢2 cups all-purpose flour, for coating chicken
- ▢1 teaspoon paprika
- ▢garlic salt (with parsley flakes)
- ▢black pepper
- ▢vegetable oil
Equipment you’ll need
- Large mixing bowl or zip-top bag for marinating
- Wide, shallow dish for dredging
- Large, heavy skillet or deep frying pan (cast iron is ideal)
- Instant-read meat thermometer
- Wire rack and baking sheet for resting
- Tongs or a slotted spoon
- Paper towels
Prep and timing
Plan on about 30 minutes active time plus at least 2 hours marinating if you want maximum tenderness; overnight marinating in the refrigerator is even better if you have the time. Frying takes roughly 15–25 minutes depending on the size of the pieces and how many you fit in the pan at once.
Step-by-step instructions
Below is a clear, stepwise version of the directions that follow the original order, adjusted only where clarity or consistency with the ingredient list was needed. All ingredient amounts remain the same as listed above.
- Prepare the chicken: Rinse or pat dry the 4-6 pound whole chicken that has been cut into pieces. Trim any excess fat or loose skin so pieces cook evenly. Place the chicken pieces in a large mixing bowl or a zip-top bag.
- Marinate in buttermilk: Pour 1 cup buttermilk over the chicken pieces, ensuring they are all coated. Press the bag to remove excess air and seal, or cover the bowl tightly with plastic wrap. Refrigerate for at least 2 hours, or ideally overnight. This soak tenderizes the meat and helps the coating adhere.
- Season the flour: In a wide, shallow dish, combine 2 cups all-purpose flour with 1 teaspoon paprika. Sprinkle in garlic salt (with parsley flakes) to taste—start with about 1 to 1 1/2 teaspoons if you want a noticeable savory lift. Add black pepper to taste; roughly 1/2 to 1 teaspoon is a good range. Stir to distribute the spices evenly through the flour.
- Heat the oil: Pour vegetable oil into a large, heavy skillet to a depth of about 1/2 to 1 inch, depending on the size of your pan. Heat the oil over medium-high heat until it reaches about 350°F (175°C) if you’re using a thermometer. If you don’t have a thermometer, test by dropping a pinch of flour into the oil—if it sizzles immediately and the flour browns slowly, the oil is ready.
- Dredge the chicken: Remove one piece of chicken at a time from the buttermilk, letting excess drip back into the bowl. Press each piece into the seasoned flour, turning to coat all sides. Shake off any heavy clumps so you have an even layer. For a thicker crust, you can dip back briefly into the buttermilk and recoat in flour, but the single dredge gives a crisp, not overly bready, crust.
- Fry in batches: Carefully place the coated chicken pieces into the hot oil without overcrowding the pan—work in batches so the oil temperature stays steady. Fry the pieces for about 12–20 minutes total, turning occasionally to brown evenly on all sides. The cooking time depends on piece size: breasts and thighs will take longer, smaller pieces less. Adjust heat as needed to maintain a steady sizzle; too hot and the outside will burn before the inside cooks, too cool and the coating will absorb oil and become greasy.
- Check doneness: Use an instant-read thermometer inserted into the thickest part of the meat without touching bone. Chicken is safely done at 165°F (74°C). If you don’t have a thermometer, pierce near the bone; the juices should run clear, not pink.
- Drain and rest: Transfer cooked pieces to a wire rack set over a baking sheet to drain and stay crisp. Avoid placing the chicken directly on paper towels, which can trap steam and soften the crust. Rest for about 5–10 minutes before serving to let juices redistribute.
- Keep warm if needed: If you’re frying in multiple batches, keep the finished pieces warm in a low oven (about 200°F / 95°C) on the wire rack while you finish frying the rest so they remain crisp and hot when served.
Troubleshooting and tips
- Too greasy: If the coating soaks up oil, your pan is not hot enough. Let the oil come back up to temperature between batches, and fry fewer pieces at once so the oil temperature doesn’t plunge.
- Crust falling off: Make sure you let excess buttermilk drip off before dredging and press the flour onto the surface—this helps the flour adhere. Also, rest the dredged pieces on a tray for 10–15 minutes before frying to give the coating a chance to set.
- Uneven browning: Turn the pieces regularly and maintain medium-high heat. If some pieces are browning too fast, reduce the heat slightly.
- Flavor variations: Try adding a pinch of cayenne to the flour for heat, or a teaspoon of onion powder for depth. Freshly cracked black pepper brightens the crust.
Serving suggestions
This Buttermilk Fried Chicken Recipe pairs wonderfully with classic sides: mashed potatoes, coleslaw, corn on the cob, biscuits, or a crisp green salad. For a lighter plate, serve with lemon wedges and a simple mixed-greens salad dressed with a tangy vinaigrette. Leftovers are delicious cold, in sandwiches, or reheated in a 375°F oven on a wire rack to re-crisp the crust.
Make-ahead and storage
Marinate the chicken in buttermilk up to 24 hours ahead and keep it covered in the refrigerator. After frying, cooled pieces can be stored in an airtight container in the refrigerator for up to 3 days. Reheat in a 375°F oven for 10–15 minutes on a wire rack to avoid sogginess. For longer storage, freeze cooked pieces in a single layer on a baking sheet until solid, then transfer to a freezer-safe bag for up to 2 months. Reheat gently from frozen in a 375°F oven until warmed through.
Notes on ingredients
All ingredients listed are common pantry staples. If you prefer a dairy-free alternative for the buttermilk, you can make a cultured-style substitute by adding 1 tablespoon of white vinegar or lemon juice to a cup of unsweetened dairy-free milk and letting it sit for 5 minutes to thicken slightly. This makes a tangy soak that will still tenderize the chicken and help the coating adhere.
Final thoughts
This Buttermilk Fried Chicken Recipe is an uncomplicated classic—minimal ingredients, straightforward techniques, and big payoff. The buttermilk soak, seasoned flour, and careful frying deliver that coveted contrast: a crunchy, flavorful crust and a juicy interior. Whether you keep it simple with the basic seasoning or add small twists to the flour blend, this method produces reliably delicious results.
Printable recipe
Below is a condensed version you can print or keep on your phone while cooking.
Ingredients
- ▢4-6 pound whole chicken, cut into pieces
- ▢1 cup buttermilk
- ▢2 cups all-purpose flour, for coating chicken
- ▢1 teaspoon paprika
- ▢garlic salt (with parsley flakes)
- ▢black pepper
- ▢vegetable oil
Instructions
- Place chicken pieces in a bowl or bag and pour 1 cup buttermilk over them. Refrigerate at least 2 hours or overnight.
- Combine 2 cups flour, 1 teaspoon paprika, garlic salt, and black pepper in a shallow dish.
- Heat vegetable oil in a large skillet to about 350°F (175°C).
- Remove chicken from buttermilk, let excess drip, then dredge in the seasoned flour. Shake off excess.
- Fry chicken in batches, 12–20 minutes, turning occasionally, until internal temperature reaches 165°F (74°C) and the crust is golden brown.
- Drain on a wire rack and rest 5–10 minutes before serving.
Enjoy this Buttermilk Fried Chicken Recipe with your favorite sides, and don’t be afraid to tweak the seasonings to make it your own. Crispy, juicy, and deeply satisfying—this is comfort food done right.
Buttermilk Fried Chicken Recipe
Equipment
- large skillet or heavy frying pan
- large mixing bowl or zip-top bag
- Tongs
- meat thermometer (deep-fry or candy thermometer)
- Paper Towels
- foil-lined baking sheet
Ingredients
- 4-6 pound whole chicken, cut into pieces skin optional
- 1 cup buttermilk
- 2 cups all-purpose flour for coating chicken
- 1 teaspoon paprika
- garlic salt (with parsley flakes) to taste
- black pepper to taste
- vegetable oil for frying, enough to shallow-fry or partially submerge chicken
Instructions
- Cut the 4–6 pound whole chicken into pieces, removing skin if desired; halve large breasts so pieces cook evenly, then set aside.
- Pour 1 cup buttermilk into a bowl or shallow dish and add the chicken pieces, turning to coat well.
- In a large zip-top bag or bowl, combine 2 cups all-purpose flour, 1 teaspoon paprika, garlic salt to taste, and black pepper to taste; seal or mix to evenly distribute seasonings.
- One at a time, remove chicken from the buttermilk and shake off excess, then place into the flour mixture and shake or toss to fully coat each piece; transfer coated pieces to a foil-lined baking sheet and cover with wax paper for a few minutes until the coating becomes paste-like.
- Pour enough vegetable oil into a large skillet to come partway up the sides of the chicken (for shallow frying) and heat over medium-high until hot but not smoking; use a thermometer to monitor oil temperature.
- Add chicken pieces to the hot oil in a single layer without overcrowding and brown on both sides, adjusting heat as needed so the coating browns but does not burn.
- Reduce heat to maintain a steady cooking temperature and continue cooking until the internal temperature of the thickest parts reaches 165°F (use a meat thermometer); wings and legs take about 15 minutes, thighs and breast halves about 20 minutes, and cook in batches as needed.
- If desired, increase heat to medium-high for a few minutes at the end of cooking to crisp the coating, then remove chicken and drain on paper towels.
- Keep cooked chicken warm in the oven until serving.
Notes
- Store leftover fried chicken in an airtight container in the refrigerator for 3–4 days.
- Freeze leftovers for up to 3 months.
- Thaw frozen chicken before reheating.
- Reheat in a 400°F oven for about 15 minutes or until hot.