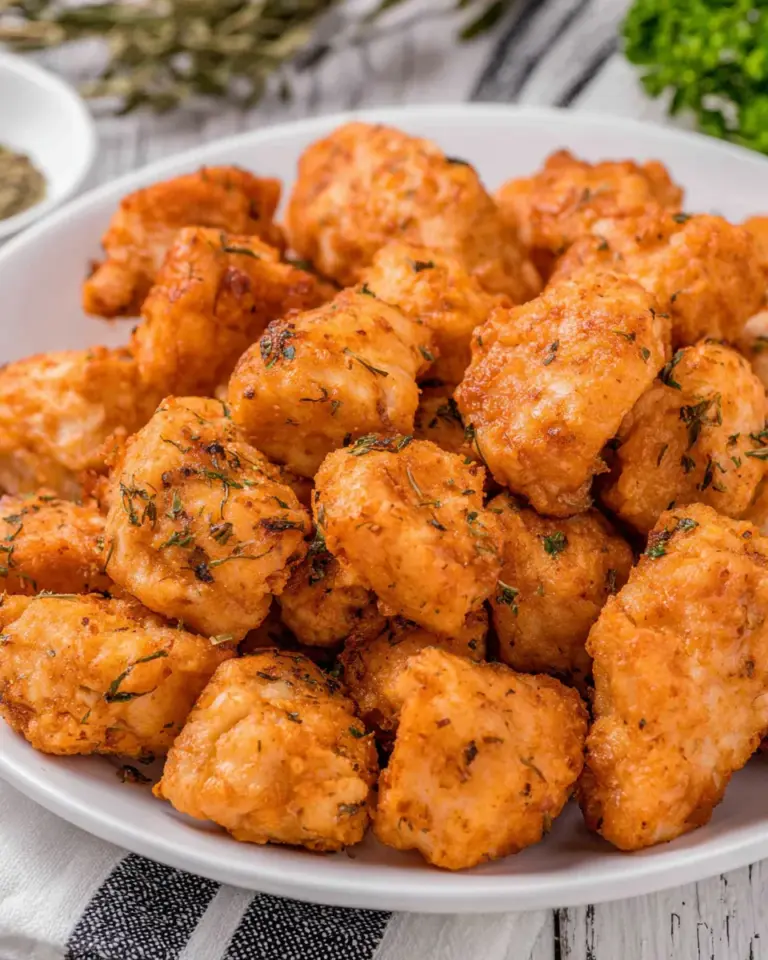
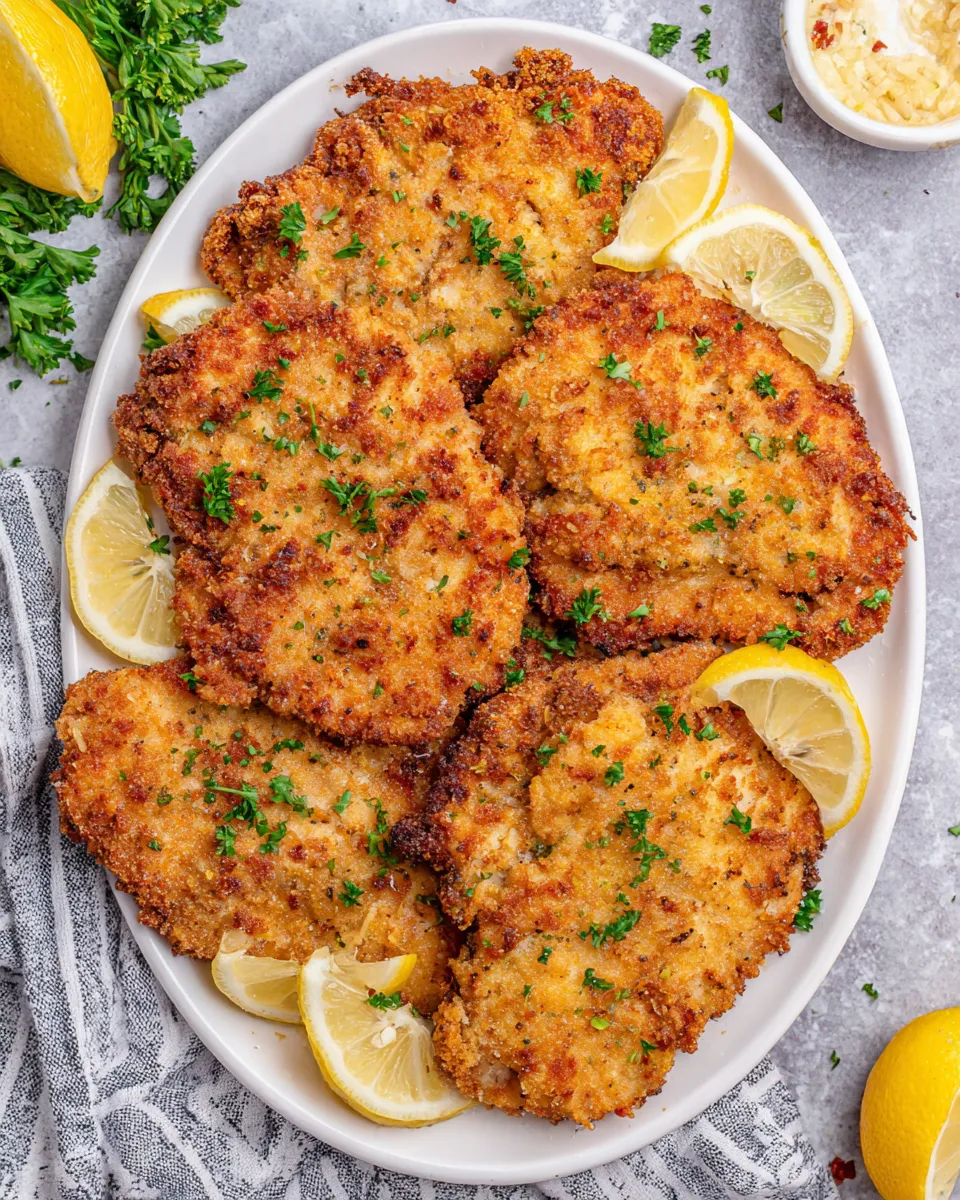
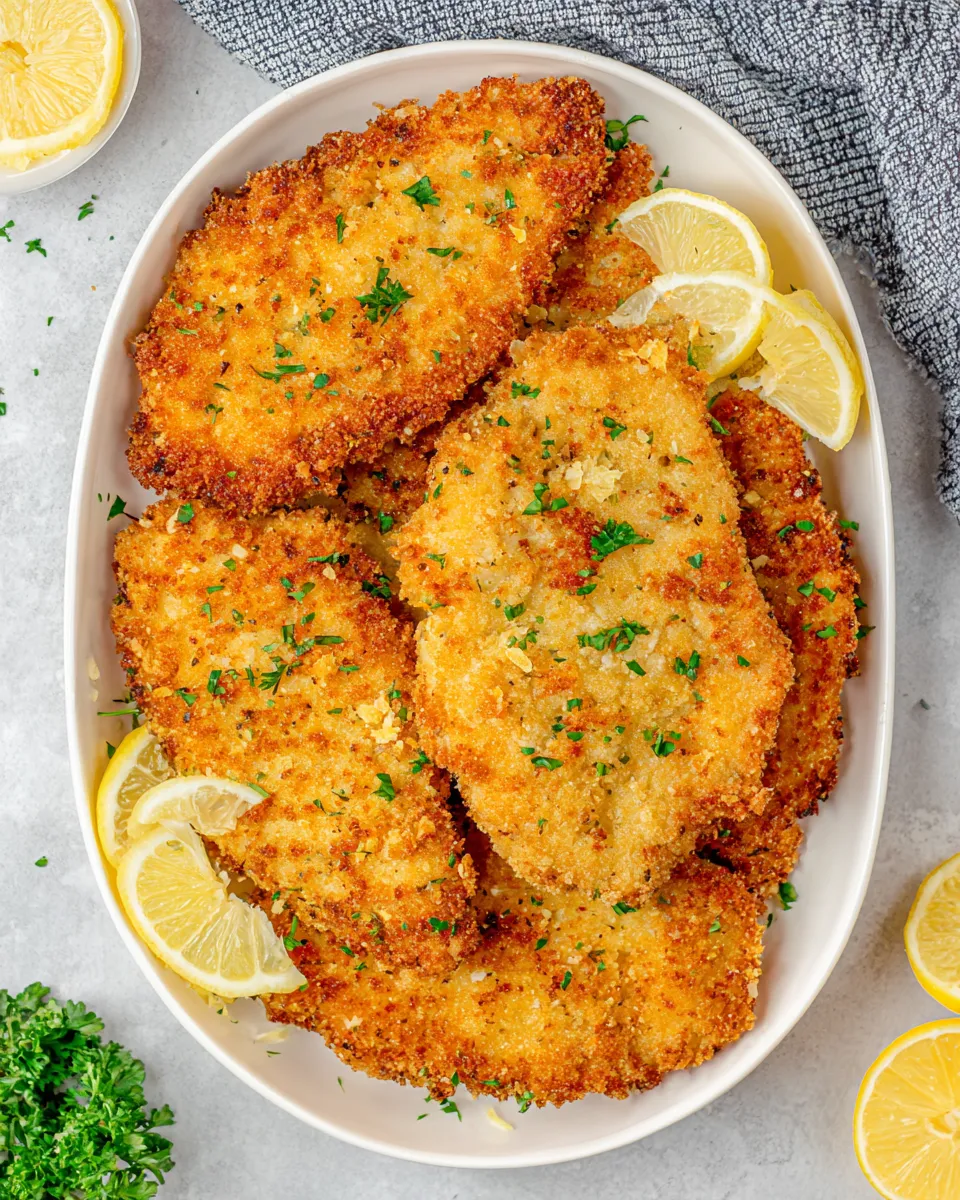
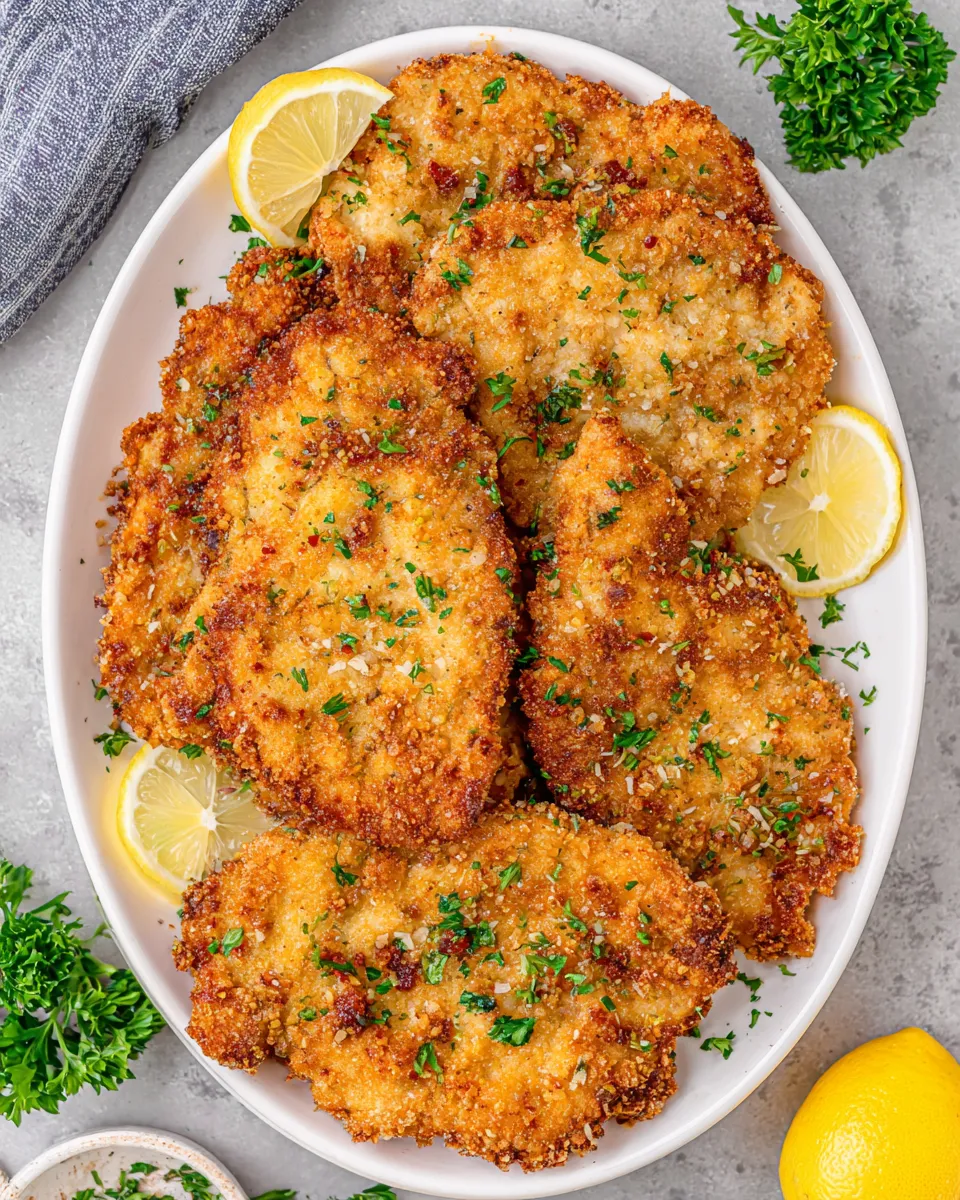
There’s something undeniably comforting about a golden, crunchy cutlet: crackling exterior, juicy interior, and a quick pan-fry that delivers big flavor without fuss. In this recipe for Crispy Chicken Cutlets, we’re keeping things simple, pantry-friendly, and reliably crisp. Panko breadcrumbs give the crust that crackle we all crave, while a Parmesan and spice mix brings savory depth. These cutlets are perfect on their own, tucked into a sandwich, or served alongside a bright salad or quick lemony slaw.
Before we jump in, know that this method is flexible: if you prefer oven-baked rather than pan-fried, scroll to the note near the end for that option. But if you want the fastest route to that irresistible crunch, frying in vegetable oil is the ticket. The ingredient list below is precise—measurements are important for consistent results—and the directions are rewritten into clear, step-by-step instructions so you can get great results every time.
Why this recipe works
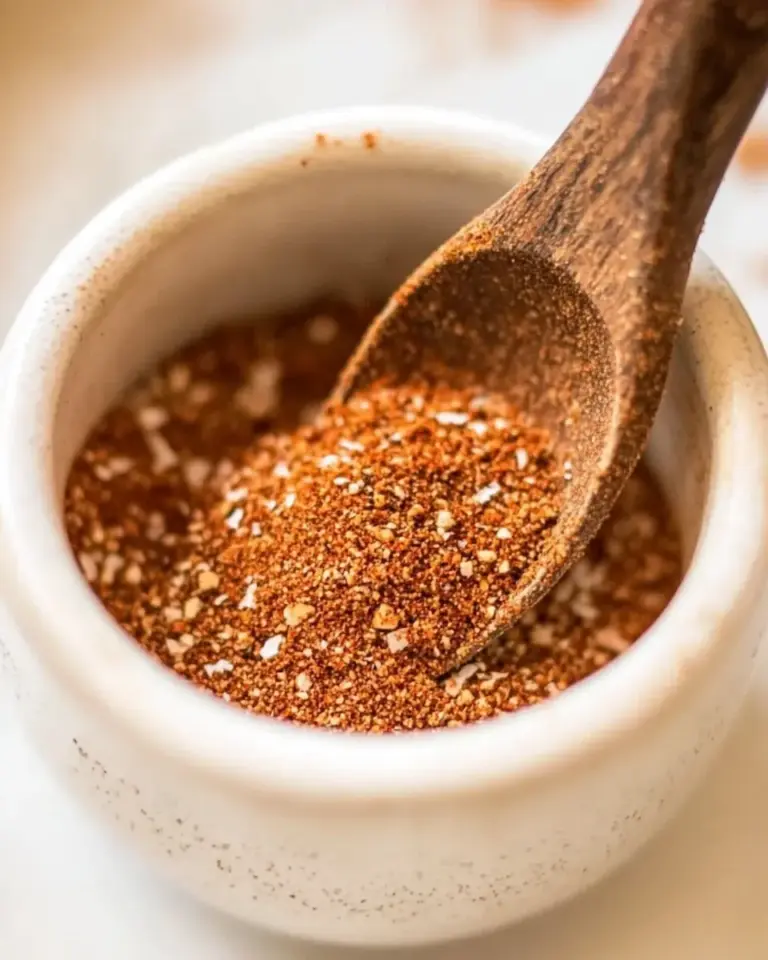
This Crispy Chicken Cutlets recipe uses three standard dredging stations—flour, egg wash, and seasoned breadcrumbs—which creates a sturdy coating that browns evenly and stays attached to the chicken. Panko breadcrumbs are coarser than traditional fine breadcrumbs, so they fry up lighter and crispier. Adding grated Parmesan to the breadcrumbs gives a salty, umami boost that bakes into the crust. A touch of garlic powder and paprika layers in flavor without overpowering the chicken itself. Using boneless, skinless chicken breasts keeps the cutlets lean and quick to cook, and pounding them to an even thickness helps the cutlets cook through evenly with a tender interior.
Ingredients
- ▢4 chicken breast (boneless and skinless)
- ▢salt and pepper (to taste)
- ▢1 cup all-purpose flour
- ▢2 large eggs
- ▢2 tablespoons water
- ▢2 cups breadcrumbs (preferably Panko)
- ▢1 teaspoon garlic powder
- ▢1 teaspoon paprika
- ▢½ cup Parmesan cheese (grated)
- ▢vegetable oil (for frying)
Equipment
- Large cutting board and a sharp knife
- Meat mallet or rolling pin (for pounding chicken)
- Three shallow bowls or pie plates
- Large skillet (preferably heavy-bottomed) or frying pan
- Tongs and a wire rack or plate lined with paper towels
- Instant-read thermometer (optional but helpful)
Prep steps (important)

Putting a little prep work up front makes the cooking stage fast and fun. Pat the chicken breasts dry with paper towels. If any breasts are particularly thick on one end, trim them or slice them in half horizontally to create more even pieces. Place each breast between two sheets of plastic wrap or inside a large zip-top bag and gently pound with a meat mallet or rolling pin until each piece is about 1/4- to 1/2-inch thick. Even thickness ensures quick, even cooking and avoids drying out the edges before the center cooks through.
Rewritten step-by-step directions
- Season the chicken: Lightly season both sides of each chicken breast with salt and pepper to taste. Set the seasoned breasts aside on a plate while you prepare the dredging stations.
- Set up the dredging stations: In the first shallow bowl, add the 1 cup of all-purpose flour. Spread it so the chicken can be lightly coated. In the second bowl, whisk together the 2 large eggs and 2 tablespoons water until smooth to create the egg wash. In the third shallow bowl, combine 2 cups breadcrumbs (preferably Panko), 1 teaspoon garlic powder, 1 teaspoon paprika, and ½ cup grated Parmesan cheese; mix until evenly blended.
- Dredge the chicken, one piece at a time: Working with one breast at a time, first press it into the flour, coating both sides and shaking off any excess. Next, dip the floured breast into the egg wash, letting any extra drip back into the bowl. Finally, press the egg-coated breast into the breadcrumb mixture, coating thoroughly and pressing gently so the breadcrumbs adhere. Place the breaded cutlet on a clean plate. Repeat with the remaining breasts.
- Heat the oil: Pour enough vegetable oil into a large skillet so it comes about 1/8 to 1/4 inch up the sides—enough for shallow frying. Heat the oil over medium heat until it shimmers but is not smoking. A small piece of breadcrumb dropped into the oil should sizzle immediately.
- Fry the cutlets: Add the breaded chicken cutlets to the hot oil in a single layer without overcrowding the pan; you may need to cook in batches. Fry each cutlet for about 3–4 minutes per side, or until the coating is deep golden brown and the internal temperature of the chicken reaches 165°F (74°C) if using a thermometer. Adjust the heat as needed so the crust browns without burning.
- Drain and rest: Use tongs to transfer cooked cutlets to a wire rack set over a baking sheet or to a plate lined with paper towels to drain excess oil. Let them rest for 3–5 minutes; this keeps the juices locked in and lets the crust set so it stays crisp.
- Serve: Serve the cutlets hot. They’re delicious with a squeeze of fresh lemon, a simple green salad, mashed potatoes, or tucked into a sandwich. Leftover cutlets can be cooled, stored in an airtight container in the refrigerator for up to 3 days, and reheated in a 375°F oven for 8–10 minutes to restore crispness.
Troubleshooting and tips for success
- Even thickness matters: pounding the chicken to a uniform thickness ensures each cutlet cooks in the same amount of time.
- Keep oil temperature steady: too hot and the coating will burn before the center cooks; too cool and the cutlets will absorb excess oil and become greasy. Medium heat is usually ideal for this amount of oil in a skillet.
- Don’t overcrowd the pan: giving each cutlet space prevents steaming and helps the crust stay crisp.
- Make the crust stick: pressing the breadcrumbs onto the egg-coated chicken helps create a sturdy crust that won’t flake off while cooking.
- Use a thermometer: for foolproof results, check that the thickest part of each cutlet reaches 165°F (74°C).
Optional variations
- Lemon-Parmesan: Add a teaspoon of lemon zest to the breadcrumb mixture for a bright citrus note that complements the Parmesan.
- Herb crunch: Stir 2 tablespoons of finely chopped fresh parsley into the breadcrumbs just before dredging for a fresh, green lift.
- Spicy kick: Add 1/2 teaspoon cayenne pepper to the breadcrumb mixture for a subtle, warming heat.
- Baked option: If you’d rather bake, preheat the oven to 425°F (220°C). Place a wire rack on a baking sheet and lightly coat it with oil or nonstick spray. Arrange the breaded cutlets on the rack and spray the tops lightly with oil. Bake for 12–15 minutes, flipping halfway, until golden and cooked through. This method yields a crisp crust with less oil.
Make-ahead and storage
You can bread the cutlets and place them on a tray covered with plastic wrap in the refrigerator for up to 4 hours before frying. This can help the coating adhere even better. Cooked cutlets will keep in an airtight container in the refrigerator for up to 3 days. To reheat while preserving crunch, warm them in a 375°F (190°C) oven for about 8–10 minutes, or until heated through and crisp.
Serving ideas
These Crispy Chicken Cutlets are wonderfully versatile. Try:
- Classic plate: cutlet with roasted vegetables and mashed potatoes.
- Bright and light: serve over a bed of mixed greens, shaved fennel, and a lemon vinaigrette.
- Sandwich: place sliced cutlet on a toasted bun with mayonnaise, lettuce, tomato, and pickles.
- Pasta twist: slice the cutlet and serve over spaghetti tossed with a light tomato sauce or garlic butter and herbs.
Nutrition snapshot (per cutlet, approximate)
Calories will vary based on the exact size of your chicken breasts and the amount of oil absorbed during frying, but expect roughly 350–450 calories per cutlet with a balanced mix of protein, carbs from the breadcrumb coating, and fat from the frying oil.
Final notes
This recipe for Crispy Chicken Cutlets is built on straightforward technique and a handful of pantry staples. The result is reliably crisp, flavorful cutlets that are ready in about 20–25 minutes from start to finish once the chicken is pounded and the dredging stations are set up. Follow the step-by-step directions above for consistent results, and feel free to experiment with the suggested variations to make this golden-crusted favorite your own.
Ready to cook? Gather your ingredients and set up those three bowls—once the oil is shimmering, there’s nothing quite as satisfying as that first golden slice. Enjoy!
Crispy Chicken Cutlets
Equipment
- Meat Mallet or Rolling Pin
- 3 shallow dishes
- Large Skillet
- Tongs
- Wire Rack
- Paper Towels
Ingredients
- 4 chicken breasts (boneless, skinless) pounded to 1/2-inch thickness if needed
- salt to taste
- black pepper to taste
- 1 cup all-purpose flour
- 2 large eggs
- 2 tablespoons water
- 2 cups breadcrumbs preferably Panko
- 1 teaspoon garlic powder
- 1 teaspoon paprika
- 1/2 cup Parmesan cheese grated
- vegetable oil for frying, about 1/4-inch deep in the skillet
Instructions
- If any chicken breasts are thick, place them between plastic wrap and gently pound to an even 1/2-inch thickness; season both sides with salt and pepper.
- Set up three shallow dishes: one with the flour, one with the eggs beaten with the water, and one with the breadcrumbs mixed with garlic powder, paprika, and grated Parmesan.
- Dredge each breast in flour, shaking off excess, then dip into the egg mixture and press into the breadcrumb mixture to coat completely.
- Let the breaded cutlets rest on a plate for about 10 minutes to help the coating set.
- Heat about 1/4 inch of vegetable oil in a large skillet over medium-high heat until shimmering but not smoking.
- Fry the cutlets in batches for 4–5 minutes per side, or until golden brown and an instant-read thermometer inserted into the thickest part reads 165°F (75°C).
- Transfer cooked cutlets to a wire rack set over a baking sheet to drain briefly before serving.
Notes
- Bread the cutlets up to 4 hours ahead and refrigerate before frying.
- To bake, cook at 425°F (220°C) for about 20 minutes, flipping once and spraying with oil.
- Air-fryer option: 375°F (190°C) for 10–12 minutes, flipping halfway.
- Store cooked leftovers in the fridge for up to 3 days.
- Freeze cooked cutlets in a single layer, then transfer to a freezer bag.
- Customize with different spices, lemon zest, or use chicken thighs if desired.