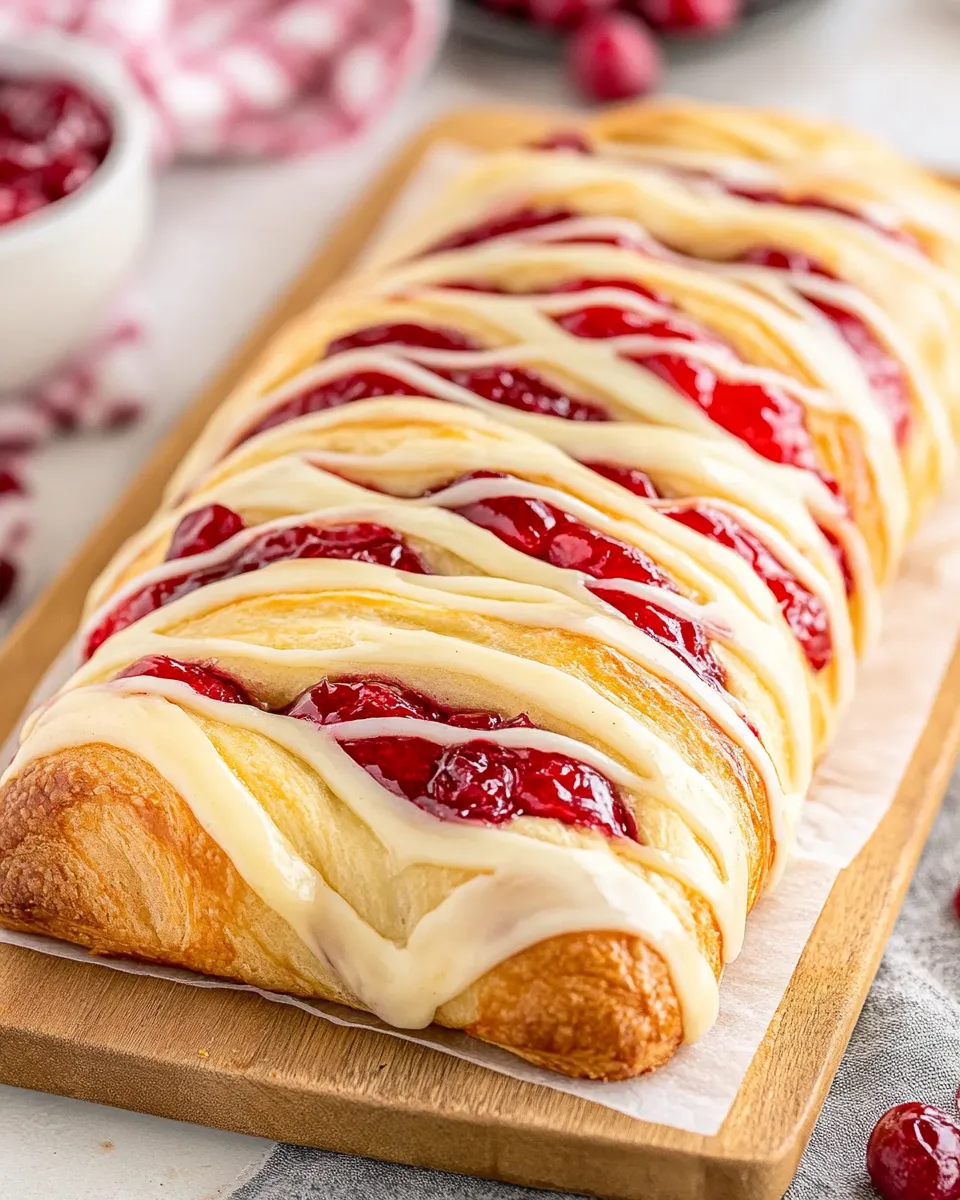
If you’re on the lookout for a delightful breakfast treat or a sweet afternoon snack, you’ve landed on the right recipe! This Crescent Roll Cream Cheese Danish, often affectionately known as Cherry Danish Braid, is a crowd-pleaser that combines creamy, rich cream cheese with the sweet-tart goodness of cherry filling, all wrapped up in flaky crescent dough.
It’s easy to make, beautifully presented, and perfect for sharing, whether it’s at brunch, a potluck, or just a cozy treat at home with your morning coffee.
Let’s dive right into this delicious recipe that you won’t want to miss!
Why This Recipe Is a Must-Try
This delicious Danish is not only super easy to prepare, but it also looks impressive enough to be the star of your brunch table.
The combination of cream cheese and cherry pie filling brings a refreshing blend of flavors that is simply irresistible.
The best part? You can whip it up in under an hour, and most of that time involves letting it bake in the oven while your kitchen fills with a heavenly aroma.
Plus, it’s great for those busy mornings when you want something special without spending all day in the kitchen.
Trust me; this dish will quickly become a favorite in your home!
Ingredients
- 1 8-oz can (225 g) refrigerated crescent dough
- 4 ounces (113 g) cream cheese, softened
- 1 ⅔ cups (210 g) powdered sugar, divided
- 1 large egg yolk
- 1 teaspoon vanilla extract, divided
- ¾ cup cherry pie filling
- 1 tablespoon (15 ml) lemon juice
- 1-2 tablespoons (15-30 ml) milk
How To Make Crescent Roll Cream Cheese Danish (Cherry Danish Braid)
Step 1: Preheat Your Oven
Before you start, preheat your oven to 375°F (190°C).
This will ensure your Danish bakes evenly and comes out perfectly golden.
Step 2: Prepare the Cream Cheese Filling
In a mixing bowl, combine the softened cream cheese, 1 cup of powdered sugar, 1 teaspoon of vanilla extract, and lemon juice.
Using a hand mixer or a whisk, blend the ingredients until smooth and creamy.
This will be the star filling that complements the cherry topping beautifully.
Step 3: Roll Out the Crescent Dough
Open the can of refrigerated crescent dough and roll it out on a lightly floured surface.
You will want to pinch the seams together to form a single sheet.
Don’t worry if it’s not perfect; it will still taste amazing!
Step 4: Create the Braid
Using a sharp knife or kitchen scissors, make cuts down each side of the dough, about 1 inch apart, leaving the center part intact.
This will create strips that we will fold over to form the braid.
Step 5: Add the Cream Cheese Mixture
Spread the cream cheese mixture evenly down the center of the dough.
Make sure to leave some space at the edges so everything stays nice inside.
Step 6: Top with Cherry Filling
Spoon the cherry pie filling over the cream cheese mixture.
You can use more or less depending on how much cherry flavor you want in each bite—just be careful not to overfill!
Step 7: Braid the Dough
Now comes the fun part! Starting at one end, fold the strips over the filling, alternating sides to create a braid pattern.
It’s okay if it’s not perfect; rustic looks are always charming!
Step 8: Brush with Egg Yolk
In a small bowl, beat the egg yolk with a splash of water.
Brush this egg wash over the Danish braid to give it a beautiful golden color as it bakes.
Step 9: Bake the Danish
Carefully transfer the Danish to a baking sheet lined with parchment paper.
Bake in your preheated oven for about 20-25 minutes, or until golden brown.
Step 10: Make the Glaze
While the Danish is baking, you can prepare the glaze.
In a small bowl, whisk together the remaining powdered sugar, 1 teaspoon of vanilla extract, and enough milk to reach your desired glaze consistency.
You want it to be pourable but not too runny.
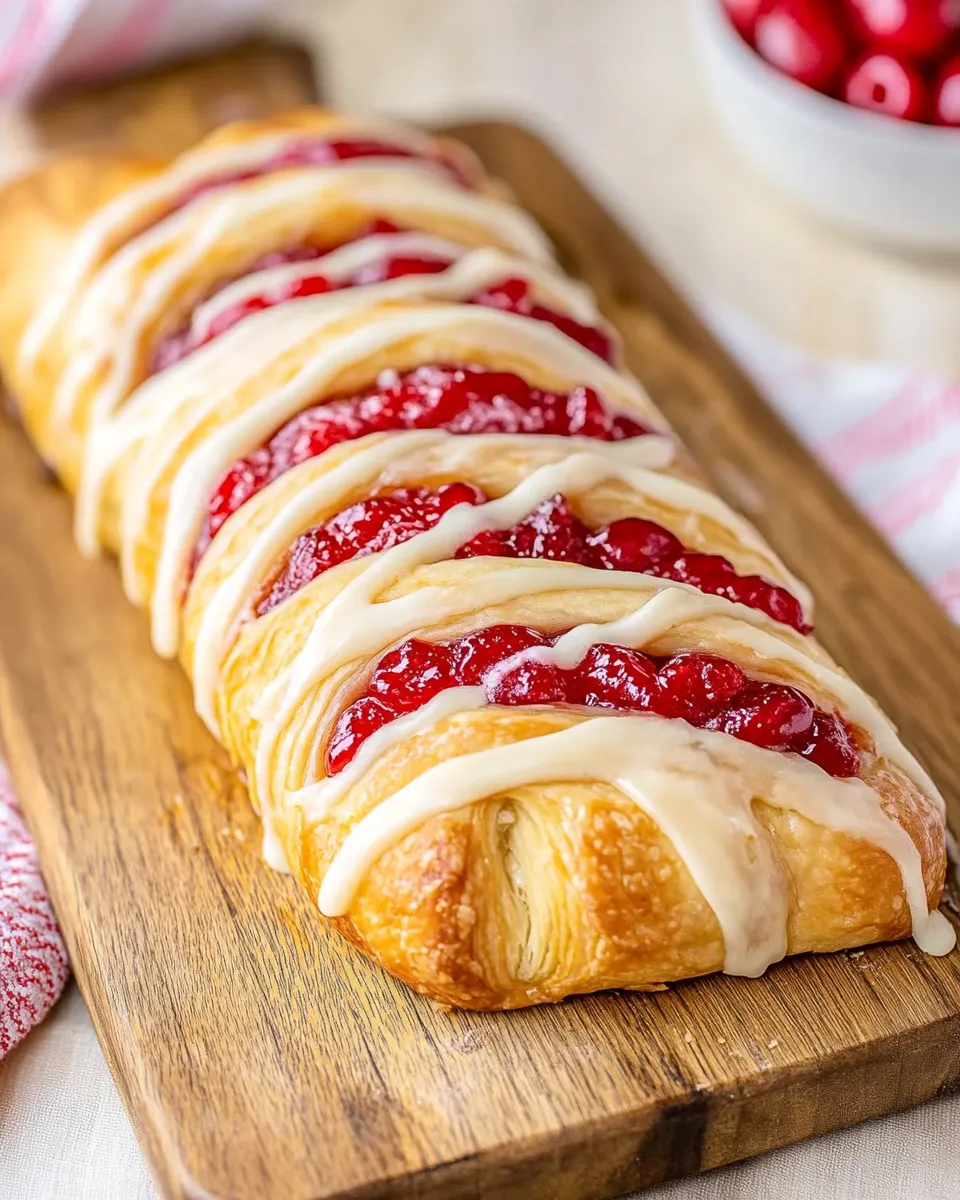
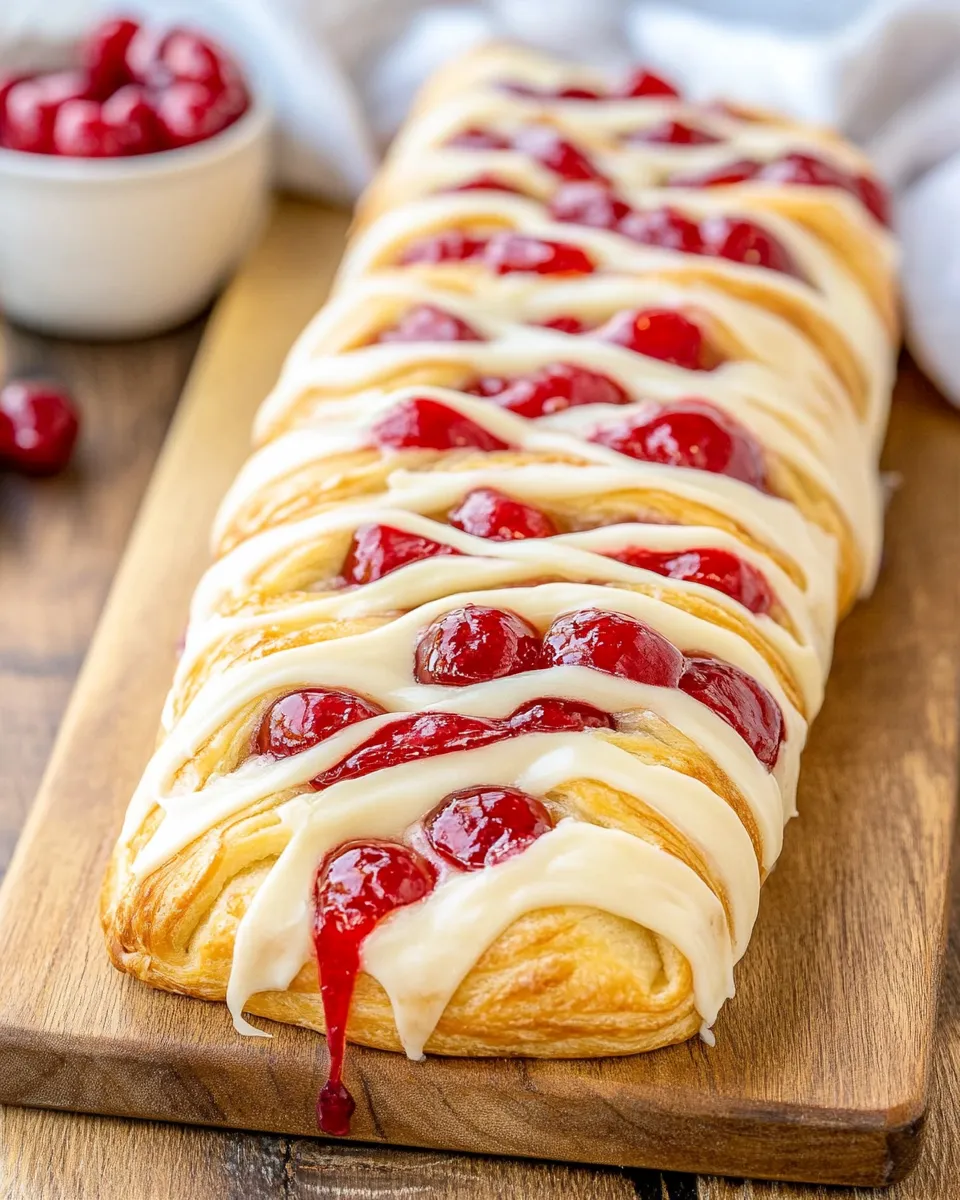
Step 11: Finish and Enjoy
Once the Danish is done baking, allow it to cool for a few minutes before drizzling the glaze over the top.
Slice it up, serve it warm or at room temperature, and get ready for some compliments!
Expert Tips
- Feel free to experiment with different pie fillings! Blueberry, raspberry, or peach also work great.
- Make sure your cream cheese is softened for easy mixing; this helps achieve a smooth filling.
- If you have leftovers, cover the Danish with plastic wrap to keep it fresh for the next day.
- For an extra touch, sprinkle some chopped nuts or coconut on top of the glaze.
Variations and Customizations
- Switch out the cherry filling with your favorite fruit preserves or fresh fruit.
- Mix in some lemon zest or almond extract into the cream cheese filling for added flavor.
- Substitute half of the cream cheese with Greek yogurt for a tangy twist.
- Make mini versions of the Danish for a bite-sized treat perfect for parties or gatherings.
How to Store Leftovers
To store any leftovers, simply cover the Danish with plastic wrap or place it in an airtight container.
It will keep well at room temperature for about 2 days.
If you need to store it longer, consider refrigerating it, where it should last for about a week.
For best results, reheat it in the oven or microwave before enjoying!
FAQ
Can I make this Danish ahead of time?
Absolutely! You can prepare the dough and filling ahead of time and store them separately in the fridge.
When you’re ready to bake, simply assemble and bake as directed.
What can I use instead of cherry pie filling?
You can use any pie filling of your choice, such as peach, blueberry, or even fresh fruit mixed with a bit of sugar.
Can I freeze the Crescent Roll Cream Cheese Danish?
Yes, you can freeze the assembled Danish before baking.
Just wrap it tightly in plastic wrap and foil, and freeze for up to a month.
When ready to bake, thaw in the fridge overnight and then bake as usual.
Is there a way to make this recipe healthier?
You can reduce the sugar in the filling and glaze, use reduced-fat cream cheese, or swap in whole wheat crescent dough for a healthier option.
Enjoying it in moderation is also key!
Conclusion
Making this Crescent Roll Cream Cheese Danish (Cherry Danish Braid) is an enjoyable and rewarding experience.
With its flaky layers and creamy filling topped with sweet cherry goodness, it’s sure to impress anyone who takes a bite.
Whether you serve it for breakfast, dessert, or a special occasion, this recipe is bound to bring smiles and satisfaction.
So, grab your ingredients and get baking! You’ll love the results.

Crescent Roll Cream Cheese Danish
Equipment
- Mixing Bowl
- Baking Sheet
- Parchment Paper
- Whisk
Ingredients
Danish Ingredients
- 1 can refrigerated crescent dough 8-oz can
- 4 oz cream cheese softened
- 1 ⅔ cups powdered sugar divided
- 1 large egg yolk
- 1 teaspoon vanilla extract divided
- ¾ cup cherry pie filling
- 1 tablespoon lemon juice
- 1-2 tablespoons milk
Instructions
- Step 1: Preheat your oven to 375°F (190°C).
- Step 2: In a mixing bowl, combine the softened cream cheese, 1 cup of powdered sugar, 1 teaspoon of vanilla extract, and lemon juice. Blend until smooth and creamy.
- Step 3: Roll out the crescent dough on a lightly floured surface and pinch the seams together to form a single sheet.
- Step 4: Make cuts down each side of the dough, about 1 inch apart, leaving the center intact to create strips.
- Step 5: Spread the cream cheese mixture evenly down the center of the dough.
- Step 6: Spoon the cherry pie filling over the cream cheese mixture.
- Step 7: Fold the strips over the filling, alternating sides to create a braid pattern.
- Step 8: Beat the egg yolk with a splash of water and brush it over the Danish braid.
- Step 9: Transfer the Danish to a baking sheet lined with parchment paper and bake for about 20-25 minutes, or until golden brown.
- Step 10: While baking, whisk together the remaining powdered sugar, 1 teaspoon of vanilla extract, and enough milk to reach desired glaze consistency.
- Step 11: Once baked, allow to cool for a few minutes before drizzling the glaze over the top.