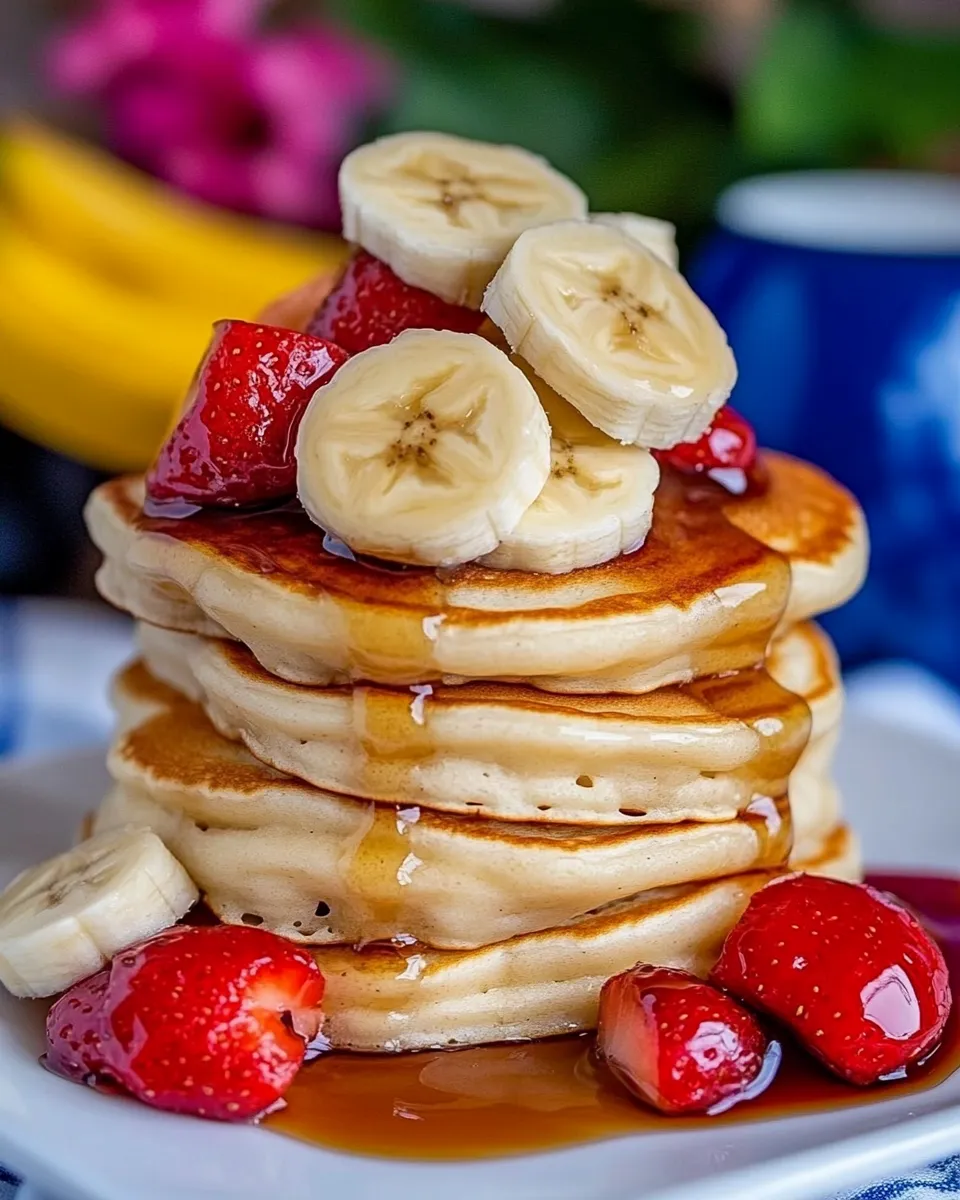
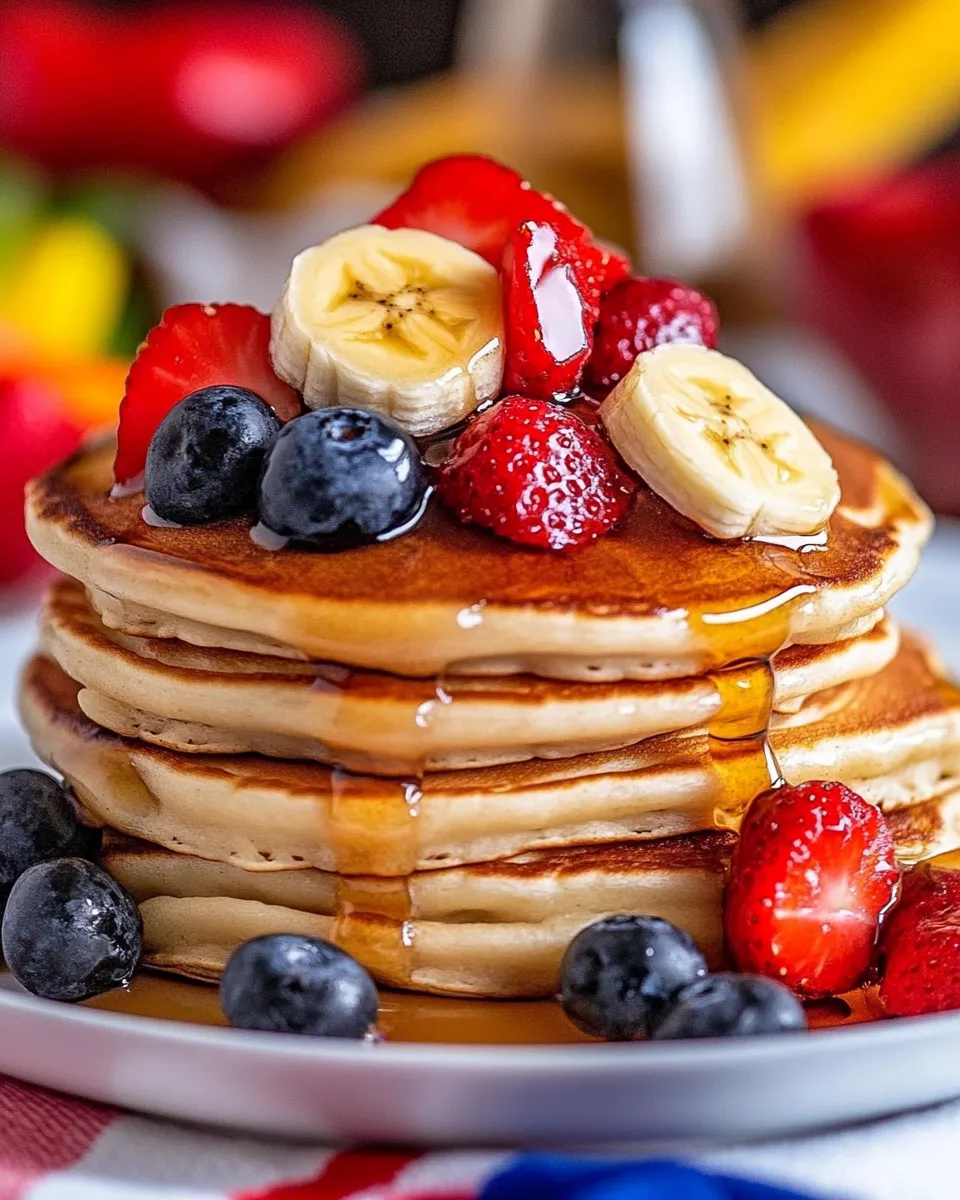
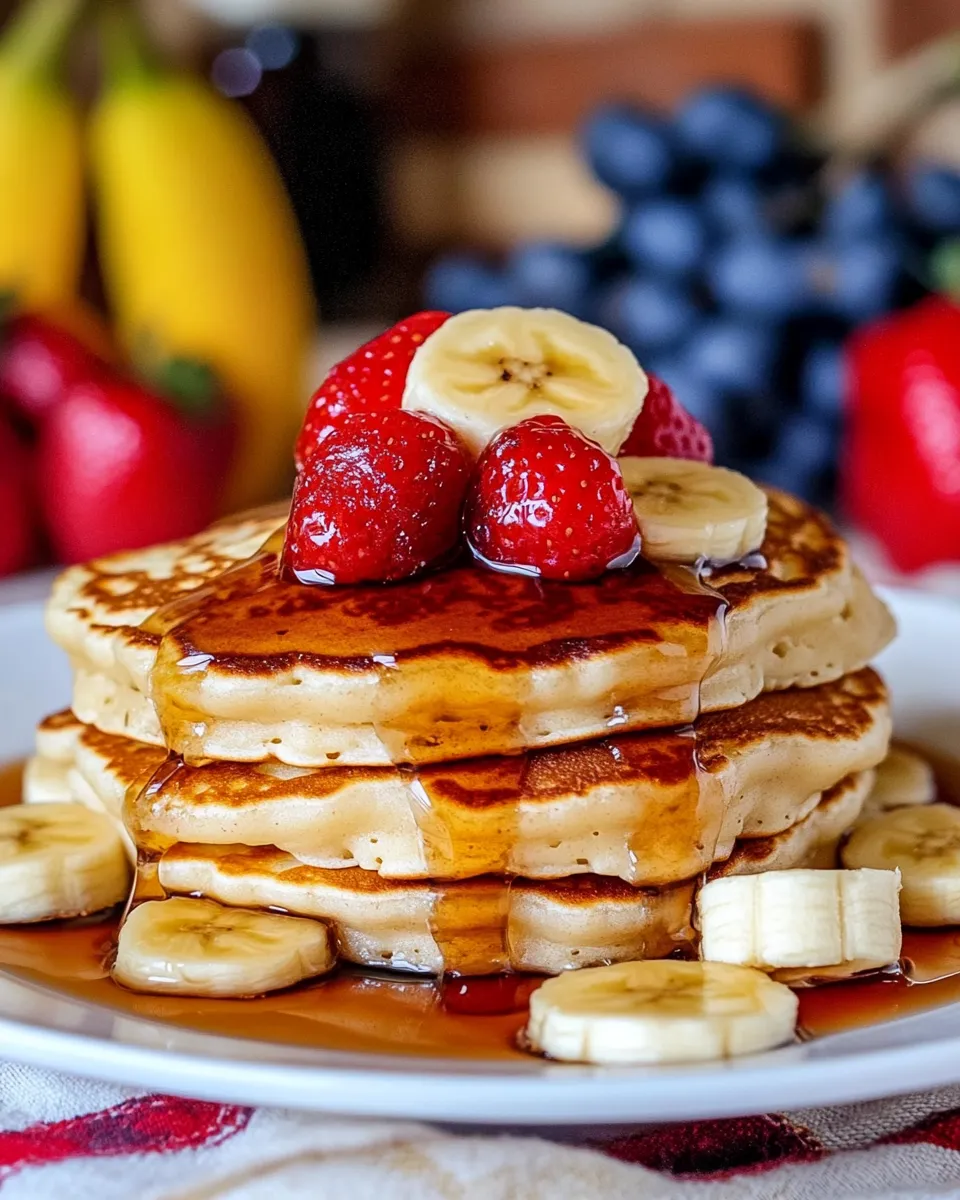
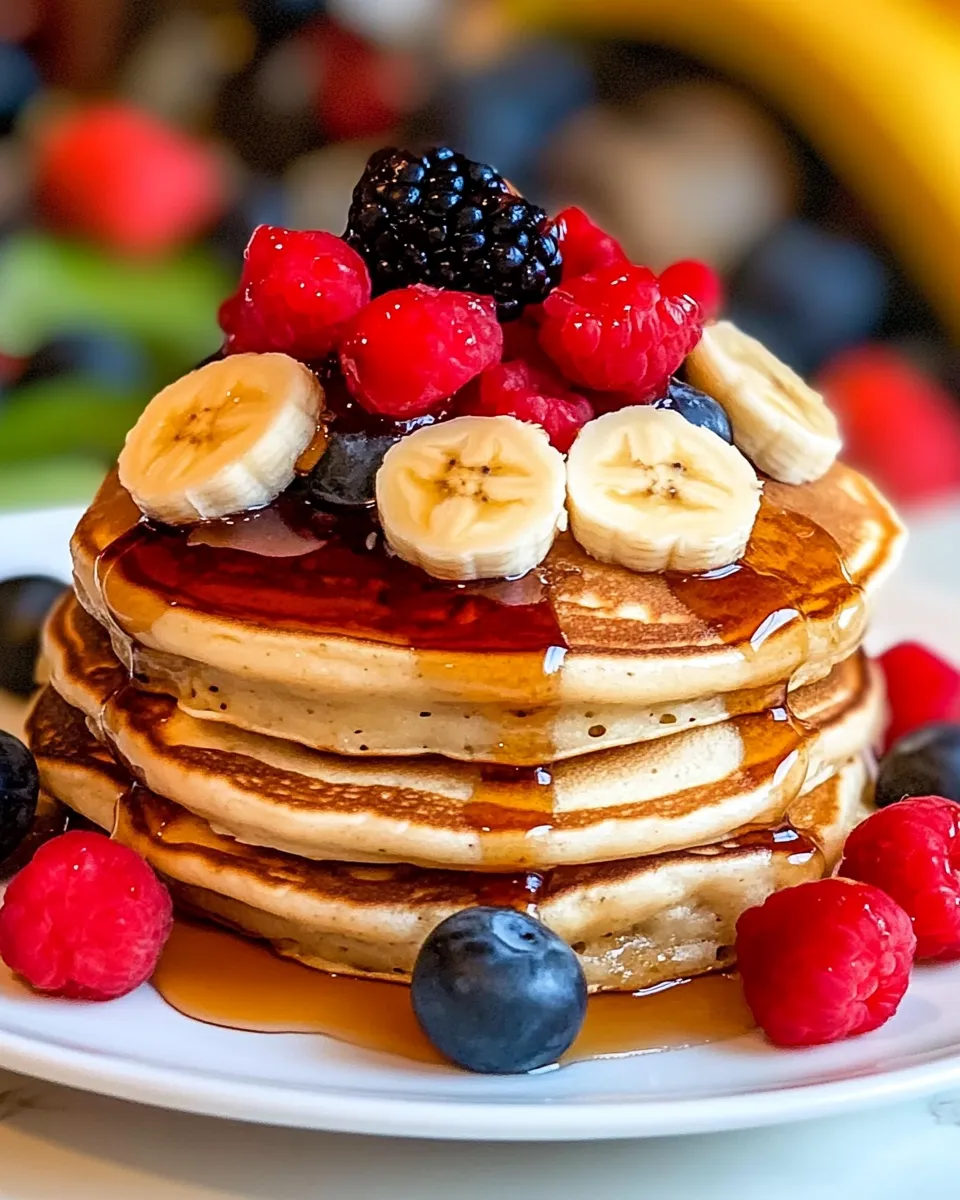
These banana pancakes are the kind of recipe I turn to when mornings need rescuing. They come together fast, rely on pantry staples, and use ripe bananas to give natural sweetness and tender texture. No need for complicated techniques—just measured ingredients and a gentle hand.
I like them because they feel homemade without drama. The batter is forgiving, the pancakes cook reliably on a medium-hot pan, and the short resting time helps them puff up. They’re a weekday breakfast that can easily feel like a treat.
Below you’ll find an exact ingredient list and a step-by-step method that follows a tested sequence. I also include practical shopping, storage, and troubleshooting tips so you get consistent results every time.
Ingredients
- 1 1/4 cups all-purpose flour — provides structure and lightness; measure by spooning into the cup and leveling for accuracy.
- 2 tbsp sugar — adds a touch of sweetness and helps with browning.
- 3 tsp baking powder — the leavening agent that makes the pancakes lift and become fluffy.
- 1/4 tsp salt — balances flavor and enhances the other ingredients.
- 1 large egg, beaten — binds the batter and gives richness.
- 1/2 cup milk — hydrates the dry ingredients; contributes to tenderness.
- 1/2 cup buttermilk* — adds tang and reacts with baking powder for extra lift.
- 2 tbsp melted butter, cooled — adds flavor and a tender crumb; let it cool so it doesn’t cook the egg.
- 2 medium bananas, mashed — natural sweetener and moisture; the riper, the better.
- 1 tsp vanilla extract — rounds flavors and complements the bananas.
Your Shopping Guide
Stick to the basics on your grocery run. The recipe leans on the quality of a few items: ripe bananas, fresh baking powder, and good butter. Check the baking powder’s date—old leavening gives flat pancakes. For bananas, choose ones with brown speckles; they mash easily and bring concentrated sweetness.
Milk and buttermilk are both called for. If you only have one, you can still make the recipe (see swaps later), but buying small containers ensures you’re not stuck with leftovers. For butter, unsalted is fine; use what you normally keep in the fridge. A neutral-flavored butter keeps the banana taste front and center.
How to Prepare (Banana Pancake)
- In a large bowl, whisk together 1 1/4 cups all-purpose flour, 2 tbsp sugar, 3 tsp baking powder, and 1/4 tsp salt until evenly combined. Set aside.
- In a separate bowl, combine 1 large beaten egg, 1/2 cup milk, 1/2 cup buttermilk, 2 tbsp melted butter (cooled), 2 medium mashed bananas, and 1 tsp vanilla extract. Stir until the wet ingredients are evenly mixed; do not overmix.
- Pour the wet mixture into the dry ingredients. Fold gently with a spatula or spoon until the dry ingredients are just incorporated and the batter is still slightly lumpy. Stop mixing as soon as you no longer see dry flour.
- Let the batter rest for at least 3 minutes without stirring to allow it to slightly bubble and develop air pockets. While the batter rests, heat a non-stick griddle or frying pan over medium heat until hot (a drop of water should sizzle).
- Lightly grease the hot pan with a small amount of the melted butter from the ingredients, or use the pan as-is if sufficiently non-stick.
- Scoop about 1/4 cup batter per pancake onto the hot pan, leaving space between pancakes. Cook until the pancakes begin to puff, bubbles form on the surface, and the edges look set, about 2–3 minutes.
- Flip each pancake and cook the second side until golden brown, about 1–2 minutes more. Adjust heat as needed to prevent burning.
- Transfer cooked pancakes to a plate and serve immediately.
Why This Recipe Belongs in Your Rotation
It’s fast. From bowl to plate in under 20 minutes when your bananas are ready. The method minimizes fuss: whisk dry, mix wet, fold, rest, cook. That short rest develops tiny air pockets for better texture without complex techniques.
The recipe is adaptable. It balances wet-to-dry ratios so the batter stays forgiving. Ripe bananas provide sweetness and moisture, cutting down on added sugar and eliminating the need for advanced mixing. This makes it a reliable go-to for busy mornings, weekend breakfasts, or when guests pop in.
Dairy-Free/Gluten-Free Swaps
If you need to avoid dairy, use your usual nondairy milk in place of the milk and a cultured nondairy option in place of the buttermilk, or make a quick cultured substitute with a neutral nondairy milk and a splash of vinegar or acid as you prefer. Replace melted butter with a neutral oil or a solid plant-based spread that behaves like butter when melted.
For gluten-free, swap the all-purpose flour for a cup-for-cup gluten-free flour blend that includes a binder. Keep the same measurements and expect a slightly different crumb—still tasty and satisfying. Keep the baking powder and the rest of the method the same; the technique transfers well.
Tools of the Trade
- Large mixing bowl — room to whisk the dry ingredients so everything blends evenly.
- Separate mixing bowl — keeps wet ingredients together before combining.
- Rubber spatula or wooden spoon — for gentle folding without overworking the batter.
- Non-stick griddle or frying pan — provides even heat and easy flipping.
- 1/4-cup measure or ice cream scoop — for consistent pancake size and even cooking.
- Whisk and measuring spoons/cups — accurate measuring matters more than showy technique.
Missteps & Fixes
Pancakes are a forgiving breakfast, but a few things can go wrong. If your batter becomes too thin, it usually means the bananas were extra runny or the wet ingredients were over-measured. Counter that by folding in a tablespoon of flour at a time until the batter holds a slight mound.
If pancakes brown too quickly on the outside but stay raw inside, the pan is too hot. Lower the heat by one notch, let the pan cool briefly, and finish the batch at medium. If they’re rubbery, you probably overmixed; remember that a slightly lumpy batter is okay and preferred.
Flat, dense pancakes often point to expired baking powder. Replace it and try again. Also, don’t skip the brief rest—the tiny air pockets that form help with lift during cooking.
Seasonal Flavor Boosts
You can coax different moods from this base without changing measurements. In cooler months, warm the batter with a small pinch of a cozy spice. In summer, brighten the plate with something fresh on the side, letting the banana flavor remain central.
Small additions make an outsized difference: a touch of warmth or brightness complements the bananas without overpowering them. Make any additions sparingly and taste as you go when experimenting.
Pro Perspective
Heat control wins here. Aim for a pan that’s hot enough to sizzle a drop of water but not so hot that the pancakes burn before the interior cooks. Medium to medium-high does the trick; adjust after your first pancake—the first is your test pancake and can teach you about heat and timing.
Don’t flip too early. Wait until bubbles form across the surface and edges look set. Flip with a quick wrist motion to preserve the pancake’s shape. Stack cooked pancakes on a warm plate but don’t seal them under a lid for long—the steam will soften crisp edges.
Refrigerate, Freeze, Reheat
To refrigerate: cool pancakes to room temperature, then stack with parchment between layers and store in an airtight container for up to 3 days. For longer storage, place them in a freezer-safe bag with layers separated and freeze up to 2 months.
To reheat refrigerated pancakes, warm gently in a skillet over low heat or in a toaster until heated through. From frozen, reheat directly in a low oven or toaster oven until warmed. Avoid microwaving for long intervals; quick bursts work but can make them gummy.
Banana Pancake FAQs
Q: Can I make the batter ahead?
A: You can mix the batter and refrigerate it briefly for up to 2 hours, but give it a gentle stir before cooking. Extended refrigeration can affect the leavening, so for best lift, cook soon after mixing.
Q: My bananas are not ripe—what then?
A: Slightly underripe bananas will be firmer and less sweet. If you only have firm bananas, allow them to sit at room temperature until they develop brown speckles, or speed ripening by placing them in a paper bag for a day.
Q: Can I omit the buttermilk?
A: The buttermilk adds tang and tenderness. If you don’t have it, you can use extra milk in its place; the texture will be slightly different but still fine. For a similar tang, add a small splash of acid to the milk and let it sit briefly.
Q: Why is my batter lumpy?
A: Lumps are good. Overmixing develops gluten and gives tough pancakes. Fold until you no longer see dry flour and stop—slight lumps mean you did it right.
Q: How do I keep pancakes warm while finishing a batch?
A: Keep a low oven (about 200°F / 95°C) and place cooked pancakes on a baking sheet in a single layer while you finish. This keeps them warm without steaming them dry.
The Takeaway
This Banana Pancake recipe is straightforward, forgiving, and fast. It uses ripe bananas to sweeten and moisten, simple pantry staples for structure, and a short resting step to help the pancakes puff. Follow the exact ingredient amounts and the ordered method, watch your pan temperature, and you’ll have consistent, tender pancakes that work any morning.
Keep the method bookmarked for busy days and slow mornings alike. With a little practice and attention to heat, you’ll turn out great pancakes every time.
Banana Pancake Recipe
Equipment
- Large Bowl
- Mixing Bowl
- non-stick griddle or frying pan
- Spatula
Ingredients
Ingredients
- 1 1/4 cupall-purpose flour
- 2 tbspsugar
- 3 tspbaking powder
- 1/4 tspsalt
- 1 largeeggbeaten
- 1/2 cupmilk
- 1/2 cupbuttermilk*
- 2 tbspmelted buttercooled
- 2 mediumbananas mashedthe riper, the better
- 1 tspvanilla extract
Instructions
Instructions
- In a large bowl, whisk together 1 1/4 cups all-purpose flour, 2 tbsp sugar, 3 tsp baking powder, and 1/4 tsp salt until evenly combined. Set aside.
- In a separate bowl, combine 1 large beaten egg, 1/2 cup milk, 1/2 cup buttermilk, 2 tbsp melted butter (cooled), 2 medium mashed bananas, and 1 tsp vanilla extract. Stir until the wet ingredients are evenly mixed; do not overmix.
- Pour the wet mixture into the dry ingredients. Fold gently with a spatula or spoon until the dry ingredients are just incorporated and the batter is still slightly lumpy. Stop mixing as soon as you no longer see dry flour.
- Let the batter rest for at least 3 minutes without stirring to allow it to slightly bubble and develop air pockets. While the batter rests, heat a non-stick griddle or frying pan over medium heat until hot (a drop of water should sizzle).
- Lightly grease the hot pan with a small amount of the melted butter from the ingredients, or use the pan as-is if sufficiently non-stick.
- Scoop about 1/4 cup batter per pancake onto the hot pan, leaving space between pancakes. Cook until the pancakes begin to puff, bubbles form on the surface, and the edges look set, about 2–3 minutes.
- Flip each pancake and cook the second side until golden brown, about 1–2 minutes more. Adjust heat as needed to prevent burning.
- Transfer cooked pancakes to a plate and serve immediately.
Notes
*If you do not have buttermilk, you can make your own with this simple
buttermilk recipe
, or substitute milk. When possible use buttermilk as it helps with both the rise and the flavor.
These are great topped with fresh fruit, syrup or even peanut butter!