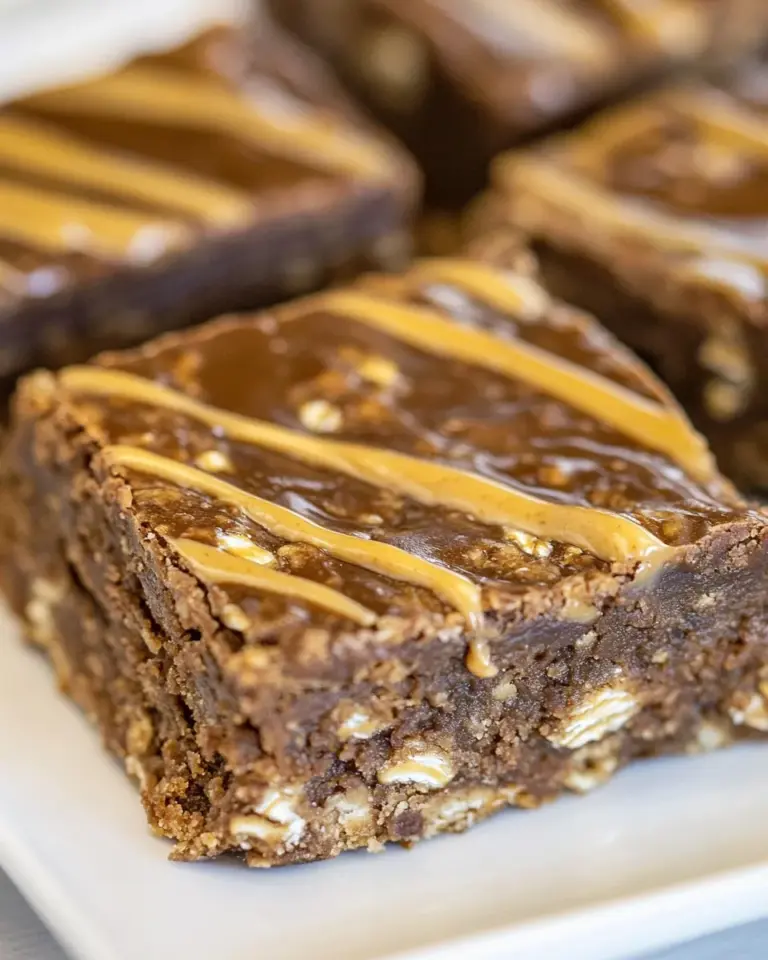
These brownies are the kind of recipe I turn to when I want something chocolatey, fast, and a little bit unexpected. They use a can of chickpeas (or white beans) as the base instead of eggs or a large amount of flour, which gives the brownies a dense, fudgy texture without extra fuss. They’re forgiving, quick to put together, and they set beautifully when chilled.
I keep a food processor on the counter for recipes like this because it makes everything smooth and satiny in minutes. A blender will work, but the texture and flavor come out best with a processor. The ingredient list is short, and the steps are straightforward: pulse, bake briefly, chill, and slice.
No complicated melting or tempering. No long wait. If you want a brownie that hits the chocolate craving while using a can of pantry beans, these are worth keeping in rotation.
The Ingredient Lineup
Ingredients
- 1 can chickpeas or white beans — the pantry base that provides body and moisture; drain and rinse well.
- 2 tbsp cocoa powder — for chocolate flavor and structure.
- 2 tbsp Dutch-process cocoa or additional regular — deepens chocolate notes; use Dutch for a darker, rounder flavor or another 2 tbsp regular cocoa if that’s what you have.
- 1/3 cup flour (white, oat, spelt, almond, sorghum, etc.) — a small amount to give the brownies structure; choose flour based on dietary needs.
- 3 tbsp milk of choice or applesauce — adds moisture; applesauce keeps it lower in fat and adds natural sweetness.
- 3 tbsp oil or nut butter of choice — fat for richness and chew; nut butter will add flavor and density.
- 1 tsp pure vanilla extract — brightens chocolate and rounds flavors.
- 1 tsp baking powder — a little lift so brownies aren’t heavy like a dense fudge bar.
- 1/4 tsp baking soda — works with other ingredients for subtle rise and texture.
- 1/4 tsp salt — balances sweetness and enhances chocolate.
- 1/2 cup sugar — sweetens and helps with structure; recipe notes mention options for refined-sugar-free approaches in alternate bean-brownie versions.
- 1/2 cup chocolate chips– not optional (omit at own risk) — melt pockets of chocolate throughout; reserve a handful if you want them sprinkled on top before baking.
Cook Chocolate Chickpea Brownies Like This
- Preheat the oven to 330°F. Grease or line an 8-inch square pan (parchment with an overhang works well).
- Drain and rinse the can of chickpeas (or white beans) very well. Pat the beans dry with a paper towel or let sit briefly to remove excess water.
- Add the drained beans to a food processor. Add the remaining ingredients exactly as listed: 2 tbsp cocoa powder, 2 tbsp Dutch-process cocoa (or an additional 2 tbsp regular cocoa), 1/3 cup flour, 3 tbsp milk of choice or applesauce, 3 tbsp oil or nut butter of choice, 1 tsp pure vanilla extract, 1 tsp baking powder, 1/4 tsp baking soda, 1/4 tsp salt, 1/2 cup sugar, and 1/2 cup chocolate chips. (If you want chocolate chips on top, reserve a small handful to sprinkle before baking.)
- Process the mixture until completely smooth, stopping to scrape down the sides of the bowl as needed. A blender can be used, but a food processor gives better texture and flavor.
- Transfer the smooth batter into the prepared 8-inch pan and spread it into an even layer. Sprinkle reserved chocolate chips on top if you set any aside.
- Bake on the center oven rack for 14 minutes.
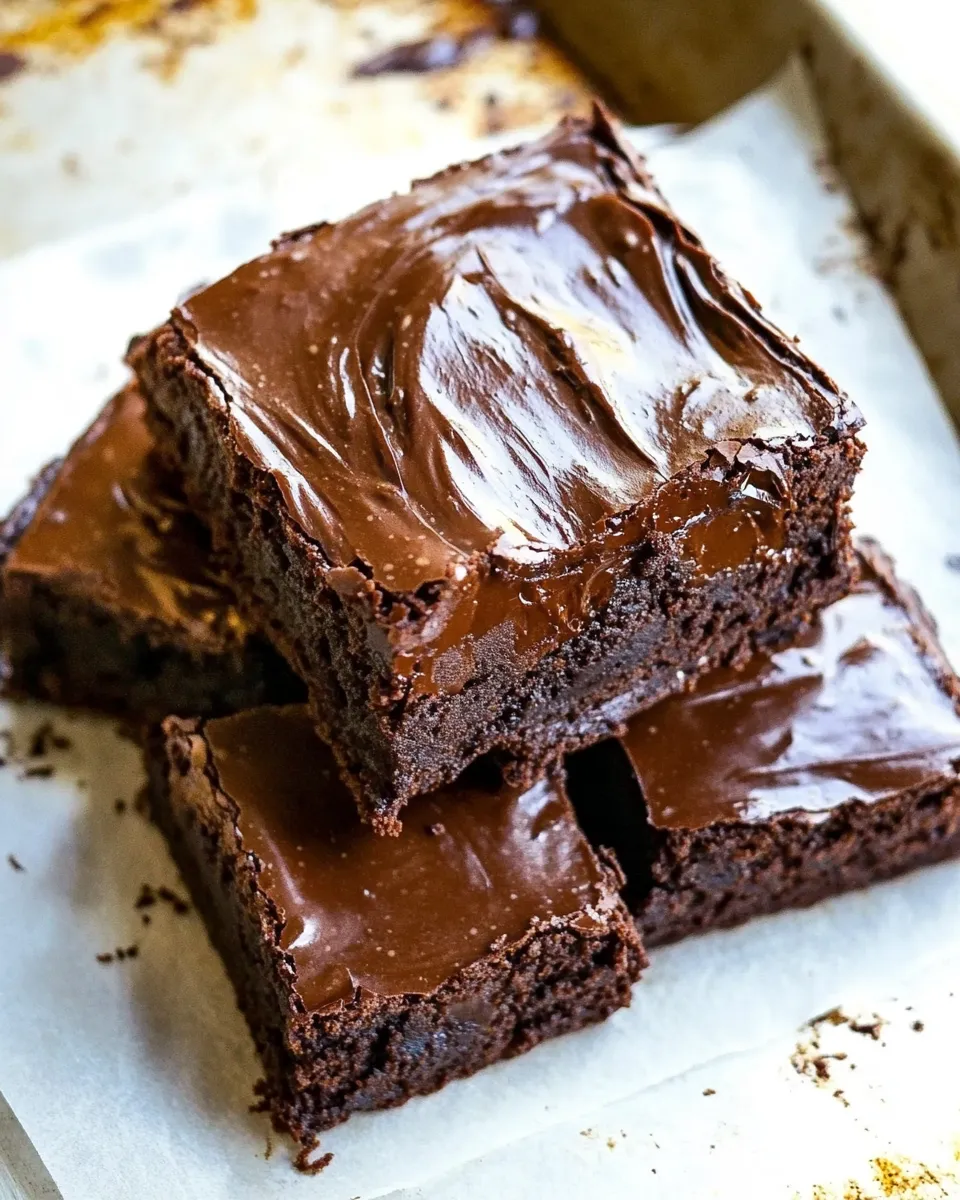
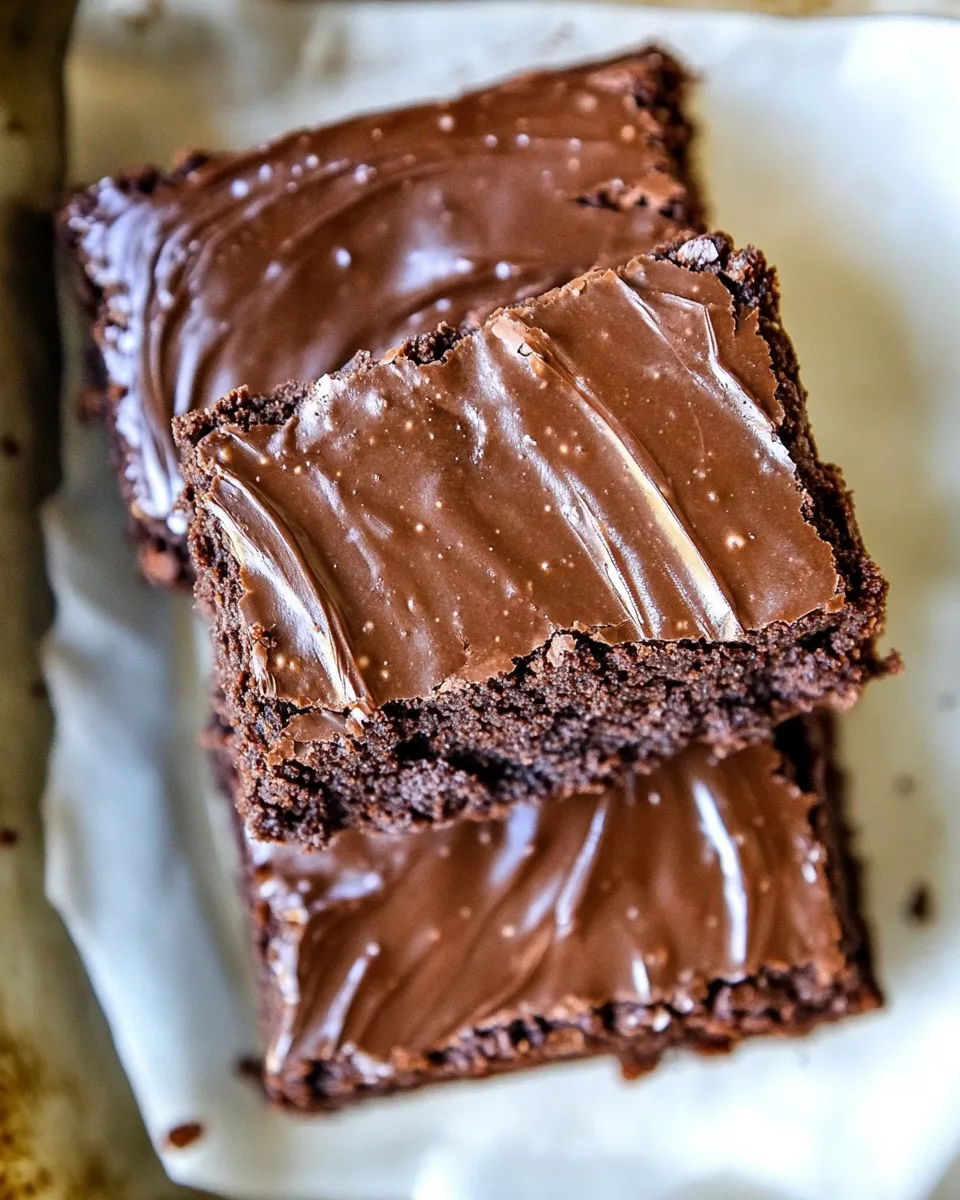
- Remove the pan from the oven and let the brownies cool in the pan on a wire rack until they are no longer hot. Then chill the pan in the refrigerator until the brownies are firm (they set better when chilled; chilling overnight is recommended).
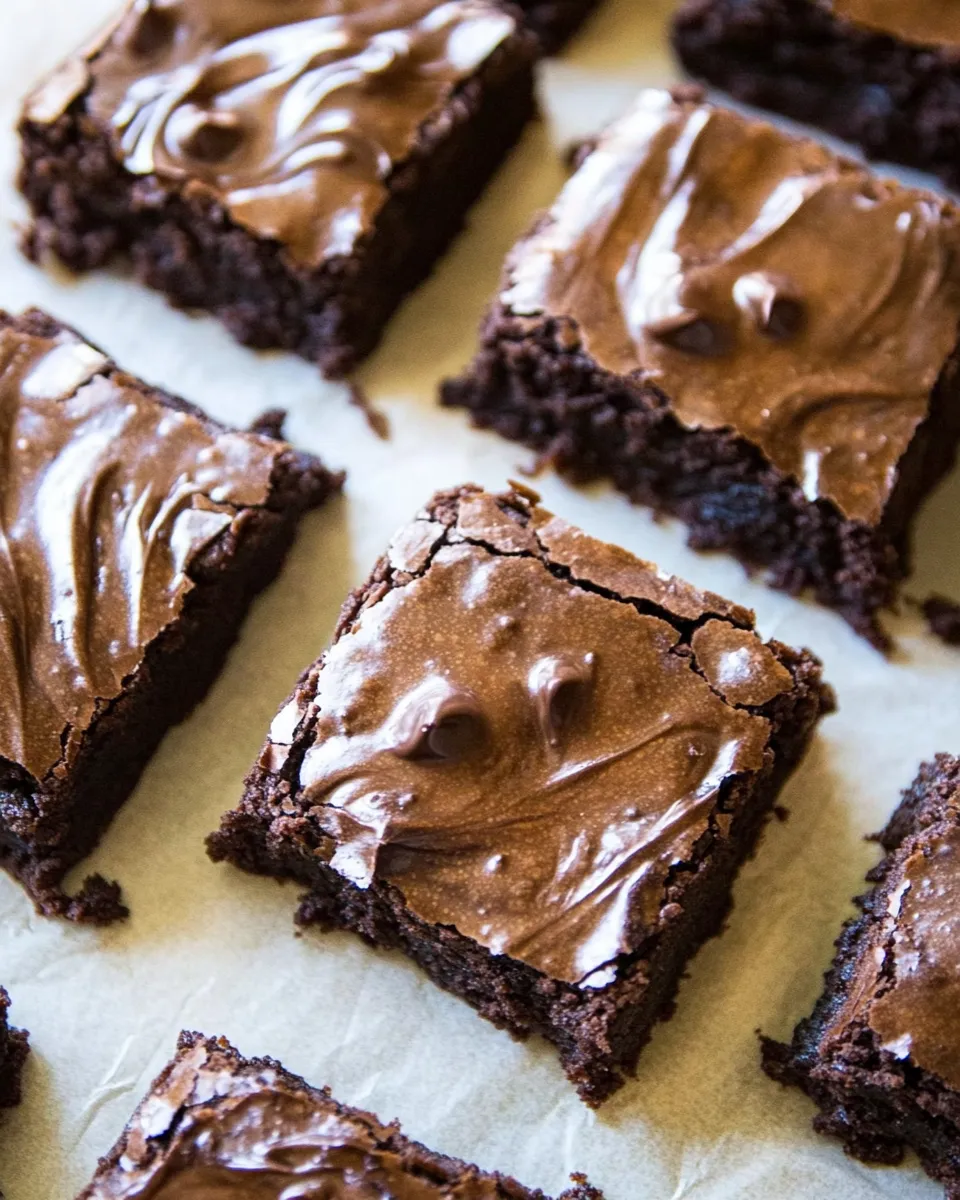
- Once firm, lift the brownies from the pan (using the parchment overhang if used), slice, and serve. Optional: frost with melted chocolate chips or your preferred frosting after chilling.
Why It Works Every Time
The recipe is built around a few reliable principles. First, chickpeas (or white beans) bring starch, protein, and viscosity that mimic some of the structural roles eggs and heavier flours play in traditional brownies. When processed thoroughly, they produce a smooth matrix that sets into a fudgy bite rather than a cake crumb.
Two kinds of cocoa—regular and Dutch-process—give flexibility in flavor. Dutch-process cocoa has been alkalized, which mellows acidity and creates a darker, rounder chocolate note. The small amount of flour keeps the texture cohesive without becoming cakey. Fat from oil or nut butter plus melted pockets of chocolate chips deliver richness and the classic brownie chew.
Finally, the short bake time and mandatory chilling are crucial. The brief bake cooks the batter through but keeps it moist; chilling firms the structure so you get clean slices with a dense, fudgy center rather than a crumbly, wet middle.
Ingredient Flex Options
- Beans: Chickpeas or white beans are called for; either works. White beans will be milder, chickpeas add a touch more savory depth.
- Flour: The recipe accepts white, oat, spelt, almond, or sorghum flour—use what you tolerate. Gluten-free flour blends generally work if they’re not too absorbent.
- Cocoa: Swap Dutch-process for regular cocoa if that’s what you have; the recipe lists both options.
- Liquid and fat: Use milk of choice or applesauce for the wet measure and oil or nut butter for fat. Applesauce is great for a slightly lighter, lower-fat version; nut butter will make the batter denser and more flavorful.
- Sweetener: The recipe specifies 1/2 cup sugar. If you’re aiming for refined-sugar-free, the original notes reference an alternative black-bean brownie approach—use that as a base for swaps rather than improvising large changes mid-recipe.
- Chocolate chips: The chips are listed as required. You can choose dark, semisweet, or dairy-free chips depending on diet, but keep the 1/2 cup measure for balance.
Recommended Tools
- Food processor — best for a silky batter and even texture.
- 8-inch square pan — the recipe is scaled for this size for proper thickness and bake time.
- Parchment paper — with an overhang so you can lift the set brownies out cleanly.
- Measuring cups and spoons — accuracy matters here; small changes affect texture.
- Wire rack — cool the pan briefly before chilling so condensation doesn’t make the top soggy.
- Refrigerator — chilling is part of the finish; these brownies set much better cold.
Easy-to-Miss Gotchas
- Not rinsing the beans thoroughly: Excess liquid makes the batter thin and can throw off bake time and texture. Drain and pat dry.
- Skipping the chill: These brownies literally need the refrigerator to firm up. Don’t skip chilling if you want sliceable bars.
- Overbaking: The bake is just 14 minutes. Bake longer and you’ll lose the fudgy center.
- Under-processing: If the mixture isn’t completely smooth you’ll get bean bits and a slightly grainy texture—process until silky.
- Changing the pan size: An 8-inch square pan is specified. Smaller or larger pans will change thickness and bake time.
Health-Conscious Tweaks
If you want to nudge these brownies toward a healthier profile without losing the essential texture:
- Use applesauce instead of milk to slightly reduce fat while keeping moisture.
- Choose oil carefully: Use a neutral oil or a heart-healthier option like light olive oil; or use nut butter for additional protein and flavor.
- Flour swaps: Almond or oat flour reduce gluten and boost protein/fiber. Be mindful that absorbency varies—stick to the 1/3 cup measure for this recipe.
- Sugar: The recipe uses 1/2 cup sugar; if you need refined-sugar-free alternatives, consult bean-brownie variations designed for that purpose so structure isn’t compromised.
Cook’s Notes
Process until truly smooth. Little bean flecks can be a surprise in a fudgy brownie, and a fully homogenized batter is what gives these brownies their silky mouthfeel. Use a spatula to scrape the bowl a couple of times during processing.
If you like a glossy top, sprinkle the reserved chocolate chips on top right before baking. If you want a fudgier, more uniform interior, fold the chips into the batter instead.
After baking, let the pan cool to warm—not piping hot—before moving it to the fridge. Cooling briefly reduces the shock of temperature change and helps avoid condensation pooling on top of the brownies.
Prep Ahead & Store
Make the batter and store it, covered, in the refrigerator for up to 24 hours before baking if you want to prep in advance. Once baked and chilled, these brownies keep well in the refrigerator for several days in an airtight container. For longer storage, slice and freeze portions individually wrapped; thaw in the fridge before serving.
Quick Q&A
Q: Can I use a blender instead of a food processor?
A: Yes. A blender will work, but you may need to stop and scrape more often and the texture may be slightly different—food processors give the best result.
Q: Are these vegan?
A: Yes, if you use non-dairy milk and ensure your chocolate chips are dairy-free.
Q: Can I omit the chocolate chips?
A: The recipe explicitly calls for 1/2 cup chocolate chips and notes they’re not optional—omit at your own risk. They provide pockets of melted chocolate that are central to the experience.
Q: Why chill them?
A: Chilling firms the bean-based matrix and makes clean slicing possible. The brownies set much better when chilled; chilling overnight gives the best texture.
Final Thoughts
These Chocolate Chickpea Brownies are a practical, pantry-friendly fix for a chocolate craving. They’re not trying to be a replica of a butter-and-egg brownie; they’re dense, chocolate-forward, and reliable. If you keep a can of chickpeas and a bag of chocolate chips around, you can make these at a moment’s notice.
Follow the steps, don’t skip the chill, and you’ll have slices that look and taste indulgent without a long ingredient list or complicated technique. I make these when I want chocolate and convenience in one neat pan—and they never disappoint.

Chocolate Chickpea Brownies
Equipment
- 8-inch square pan
- Parchment Paper
- Food processor or blender
- Oven
- Wire Rack
Ingredients
Ingredients
- 1 can chickpeas or white beans
- 2 tbspcocoa powder
- 2 tbspdutch cocoaor additional regular
- 1/3 cupflour white, oat, spelt, almond, sorghum, etc.
- 3 tbspmilk of choice or applesauce
- 3 tbspoil or nut butter of choice
- 1 tsppure vanilla extract
- 1 tspbaking powder
- 1/4 tspeach: salt and baking soda
- 1/2 cupsugar for refined-sugar-free, try theseBlack Bean Brownies
- 1/2 cupchocolate chips– not optional omit at own risk
Instructions
Instructions
- Preheat the oven to 330°F. Grease or line an 8-inch square pan (parchment with an overhang works well).
- Drain and rinse the can of chickpeas (or white beans) very well. Pat the beans dry with a paper towel or let sit briefly to remove excess water.
- Add the drained beans to a food processor. Add the remaining ingredients exactly as listed: 2 tbsp cocoa powder, 2 tbsp Dutch-process cocoa (or an additional 2 tbsp regular cocoa), 1/3 cup flour, 3 tbsp milk of choice or applesauce, 3 tbsp oil or nut butter of choice, 1 tsp pure vanilla extract, 1 tsp baking powder, 1/4 tsp baking soda, 1/4 tsp salt, 1/2 cup sugar, and 1/2 cup chocolate chips. (If you want chocolate chips on top, reserve a small handful to sprinkle before baking.)
- Process the mixture until completely smooth, stopping to scrape down the sides of the bowl as needed. A blender can be used, but a food processor gives better texture and flavor.
- Transfer the smooth batter into the prepared 8-inch pan and spread it into an even layer. Sprinkle reserved chocolate chips on top if you set any aside.
- Bake on the center oven rack for 14 minutes.
- Remove the pan from the oven and let the brownies cool in the pan on a wire rack until they are no longer hot. Then chill the pan in the refrigerator until the brownies are firm (they set better when chilled; chilling overnight is recommended).
- Once firm, lift the brownies from the pan (using the parchment overhang if used), slice, and serve. Optional: frost with melted chocolate chips or your preferred frosting after chilling.
Notes
*Most flours will work in the recipe, including almond flour for a grain-free option. Readers also had success with coconut flour – use 2 tbsp instead of 1/3 cup, because coconut flour is so absorbent.
Also try these
Chocolate Coconut Fudge Bars
.