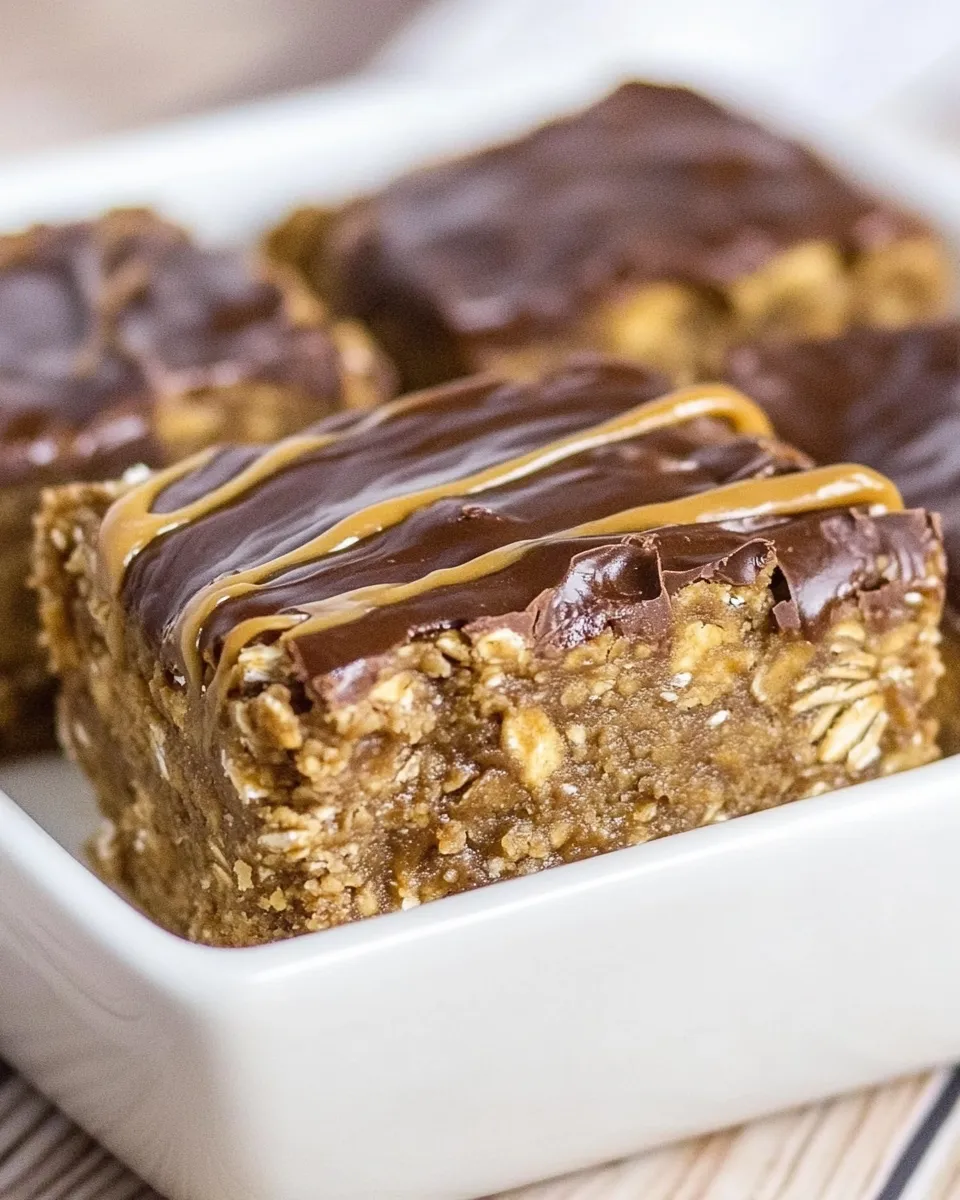
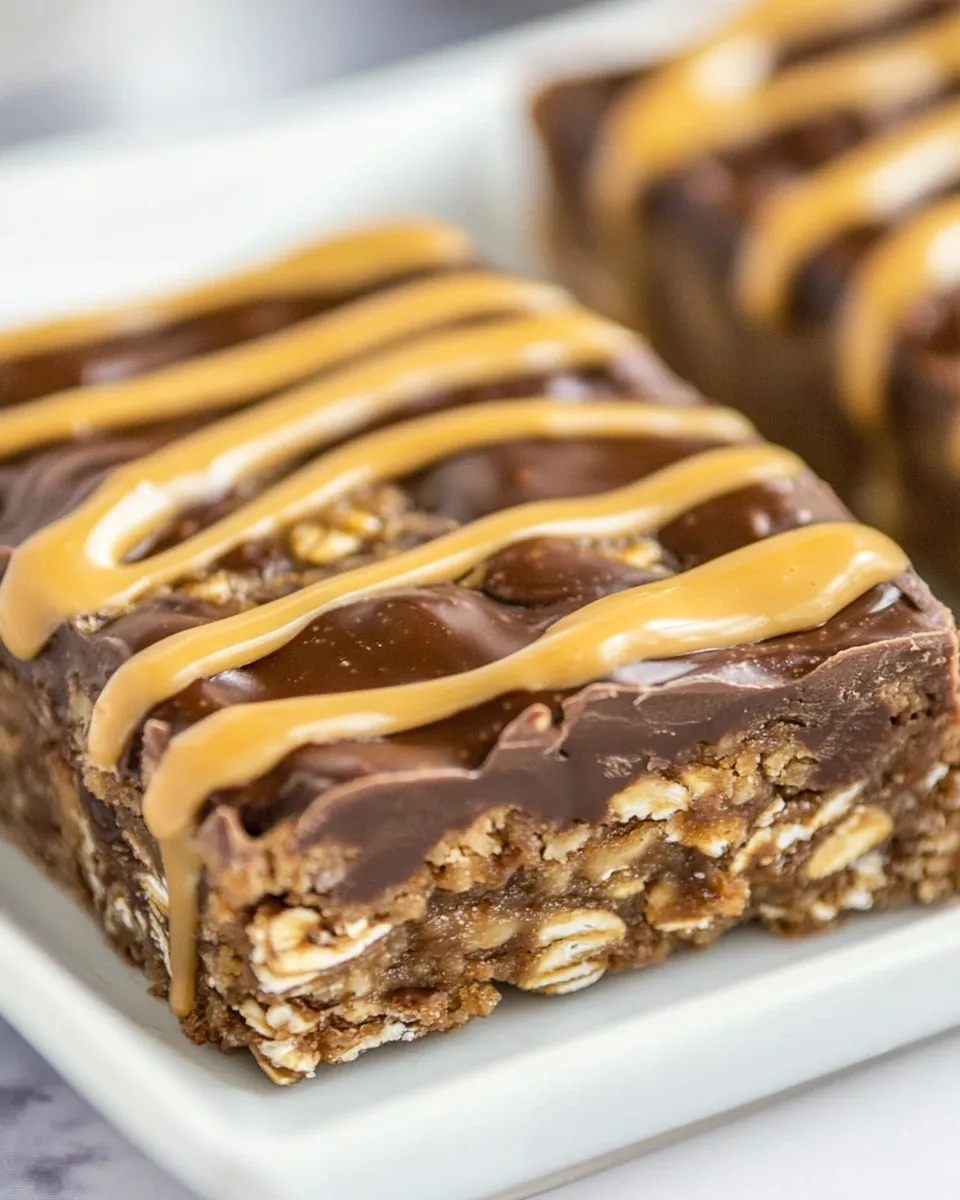
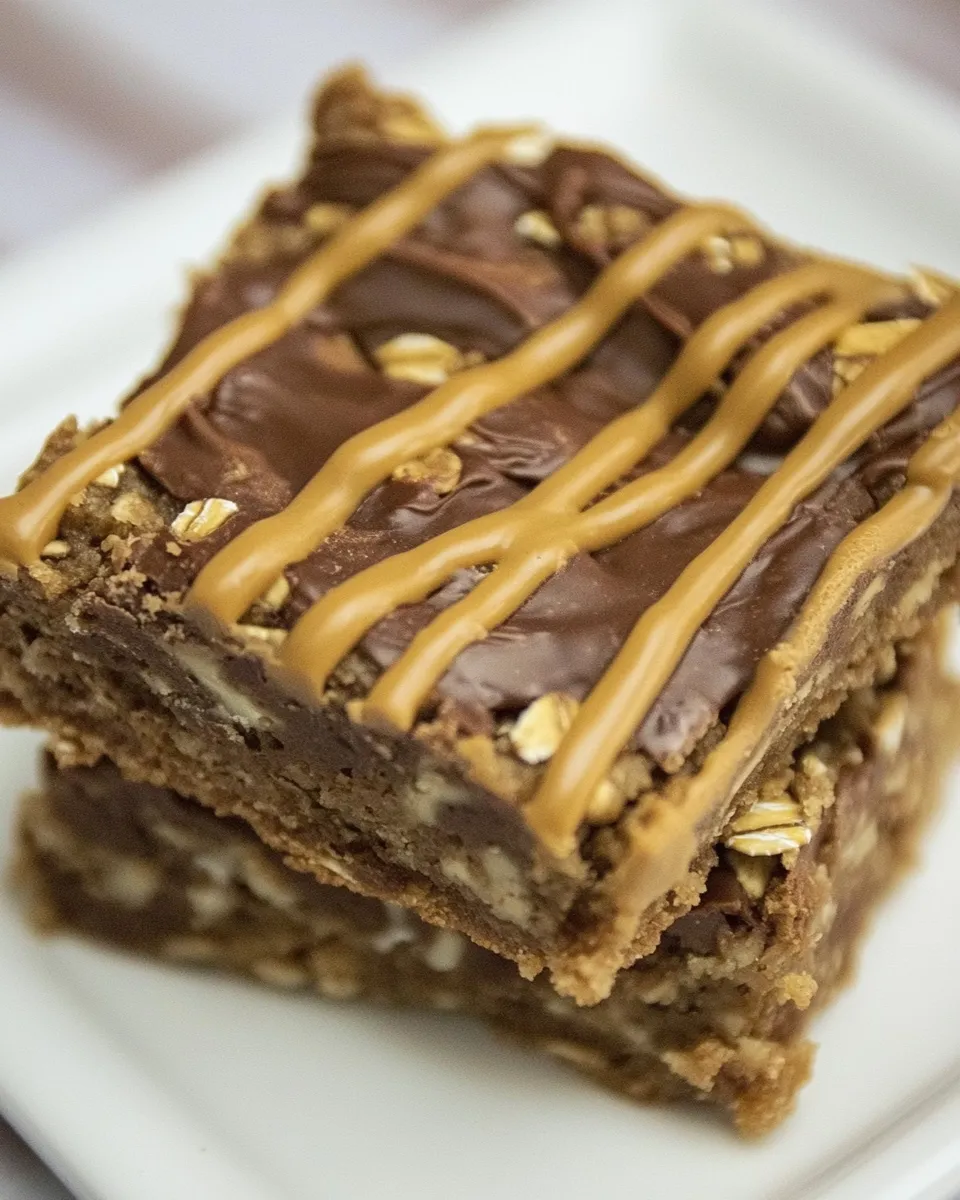
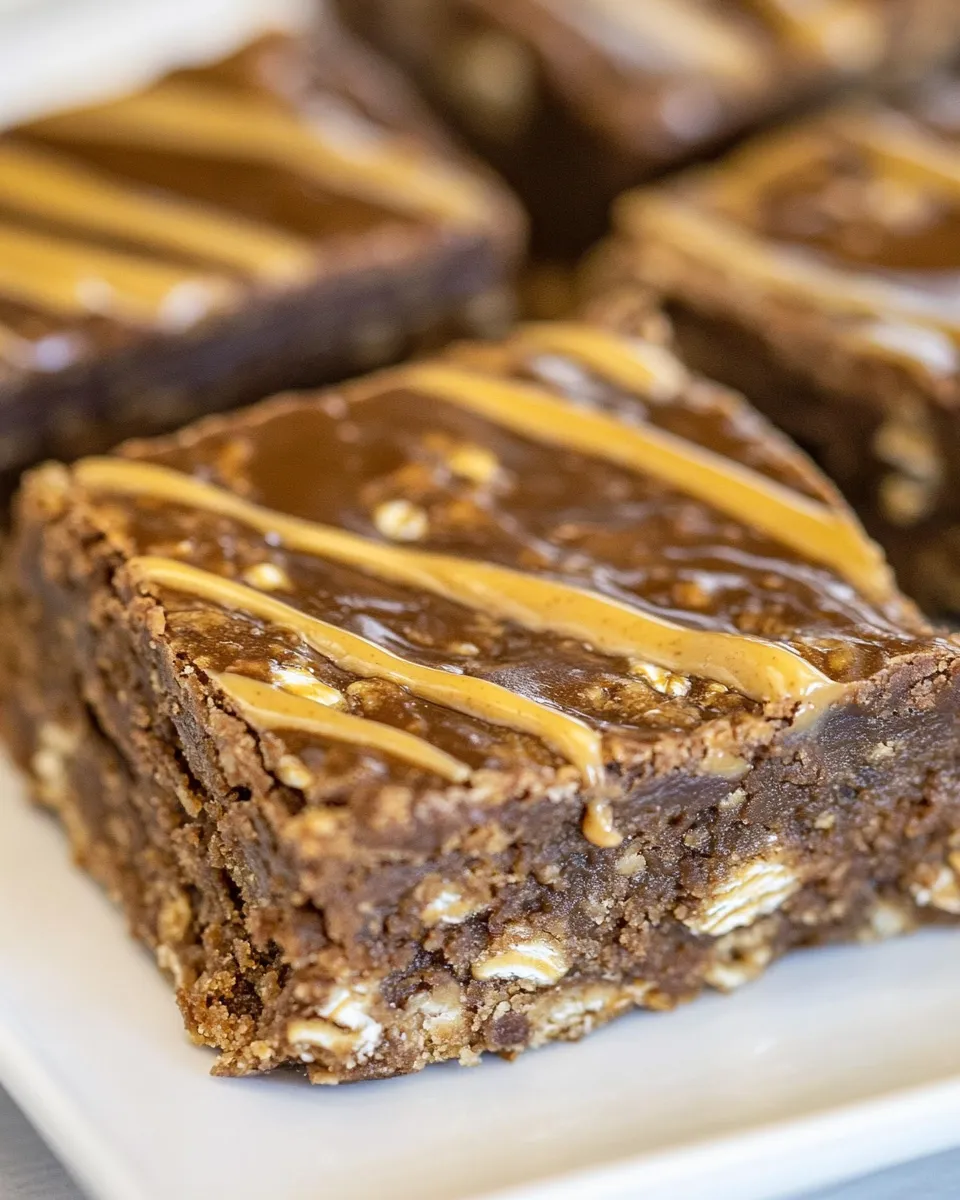
These bars live somewhere between candy and breakfast — they’re substantial enough to feel like a treat and honest enough to tuck into a lunchbox. Dense, chewy oat base, nutty peanut butter binding everything together, and a shiny dark chocolate layer on top. They’re the kind of thing I make when I want something tidy, no-fuss, and reliably delicious.
I’ll be blunt: you don’t need a dozen steps or fancy equipment. The whole recipe comes together mostly in two bowls and a microwave. That’s why I keep this one in heavy rotation — for last-minute dessert, midweek snack, or a portable pick-me-up. The texture is forgiving, and the flavor hits the sweet-salty notes everyone loves.
Below you’ll find the precise ingredients and step-by-step directions, followed by practical tips, common pitfalls, storage advice, and ideas for seasonal tweaks. Read straight through if you like, or skip to the section you need. Either way, these bars are fast, satisfying, and worth a try.
What Goes Into Chocolate Peanut Butter Oatmeal Bars
Ingredients
- 1 ½ cups (360 g) creamy peanut butter — the primary binder and source of rich peanut flavor; use smooth for a consistent texture.
- ½ cup (80 ml) maple syrup or honey — sweetener and helps hold the oat layer together; choose maple for a deeper note, honey for a brighter sweetness.
- 1 ½ cups (150 g) old-fashioned oats — provides structure and chew; rolled oats work best (not instant).
- 1 teaspoon pure vanilla extract — lifts the flavors and rounds out the sweetness.
- 1 ½ cups dark chocolate chips — melts into a glossy, slightly bitter topping that balances the sweet oat base.
- ¼ cup creamy peanut butter — stirred into the melted chocolate for richness and a cohesive top layer.
Chocolate Peanut Butter Oatmeal Bars in Steps
- Grease a 9×9-inch square pan and line it with parchment paper, leaving an overhang on two sides for easy removal.
- In a microwave-safe bowl, add 1 ½ cups (360 g) creamy peanut butter. Microwave for 60 seconds, then stir until smooth (microwave a few more seconds if needed to fully loosen).
- Add ½ cup (80 ml) maple syrup or honey, 1 ½ cups (150 g) old-fashioned oats, and 1 teaspoon pure vanilla extract to the melted peanut butter. Stir with a spatula until all ingredients are evenly combined.
- Transfer the peanut butter–oat mixture to the prepared pan and press it down firmly and evenly with the back of a spatula or your hands to form a compact layer.
- In a medium microwave-safe bowl, combine 1 ½ cups dark chocolate chips and ¼ cup creamy peanut butter. Microwave in 30-second increments, stirring between each interval, until the mixture is fully melted and smooth.
- Pour and spread the melted chocolate-peanut butter mixture evenly over the peanut butter–oat layer. If desired, drag a toothpick through the topping to create decorative patterns.
- Refrigerate the pan until the bars are firm, about 2–3 hours.
- Use the parchment overhang to lift the cooled slab from the pan. Let it sit at room temperature for about 15 minutes, then cut into 9, 12, or 18 squares as desired.
Why Cooks Rave About It
These bars are a study in contrast: a chewy, slightly dense base with a silky chocolate cap. The peanut butter acts as both flavor and mortar. Dark chocolate cuts through the sweetness and keeps the bars from tasting cloying, which is why many home cooks and bakers reach for this combination.
They’re also outrageously flexible. The base requires no flour or eggs, which simplifies pantry management and keeps the whole thing very accessible. Because the recipe comes together quickly and uses ingredients most people have on hand, it’s a reliable solution when you want homemade without the fuss.
Finally, they travel well. The firm chocolate top keeps the bars tidy during transit, and they hold their shape once refrigerated. Whether you need an office cookie, a picnic offering, or a bake sale staple, these bars hit the sweet spot between simple and satisfying.
Allergy-Friendly Substitutes
- Nut-free option: Swap the peanut butter for a seed butter such as sunflower seed butter. It behaves similarly in texture and binding; taste will be slightly different but still rich.
- Bee-free sweetener: Use maple syrup in place of honey to keep the recipe vegan and safe for those avoiding honey.
- Gluten concern: Ensure you buy certified gluten-free old-fashioned oats. Oats themselves are naturally gluten-free but can be cross-contaminated during processing.
- Dairy-free chocolate: Choose dark chocolate chips labeled dairy-free or vegan chocolate to make the topping dairy-free. The rest of the recipe is already neutral.
Setup & Equipment
One thing I love about this recipe is its minimal kit. You’ll need:
- 9×9-inch square pan (or similar size). If yours is a touch bigger, the bars will be thinner — that’s fine.
- Parchment paper that can overhang two sides for easy removal.
- Two microwave-safe bowls (or one and wash between uses) and a spatula.
- A serrated knife or sharp chef’s knife for clean cuts.
Optional but handy: a small offset spatula to smooth the chocolate layer, and a kitchen scale if you prefer to weigh ingredients. Otherwise, measuring cups work perfectly.
Things That Go Wrong
Even simple recipes can misbehave. Here are the typical issues I see and how to avoid them.
- Oats not holding together: If the oat layer crumbles, it usually means the peanut butter wasn’t warm or loose enough when mixed. Warm the peanut butter until it’s fluid and stir thoroughly so the syrup distributes evenly.
- Chocolate topping streaky or gritty: Overheating chocolate in the microwave can scorch it. Use thirty-second bursts and stir between each. If it gets grainy, a teaspoon of neutral oil can smooth it briefly, but it’s better to heat gently.
- Bars too soft at room temperature: They should be refrigerated for the full 2–3 hours. If you cut them too early they’ll be messy. Let them firm in the fridge, then sit at room temperature for 15 minutes before slicing.
- Topping slips off the base: Press the oat layer firmly and evenly into the pan so the chocolate has a stable surface to rest on. If the base is uneven, the top can crack or slide when cutting.
Holiday & Seasonal Touches
These bars play well with small festive adjustments that don’t complicate the base recipe.
- Winter: Sprinkle the chocolate with flaky sea salt and chopped toasted pecans before it sets for contrast and crunch.
- Spring: Add a little lemon zest to the base mixture for a subtle bright note — it pairs surprisingly well with dark chocolate.
- Summer: Top with finely chopped freeze-dried raspberries for a tart pop against the rich chocolate.
- Fall: Stir a pinch of cinnamon into the oat mixture or swap half the chocolate for a caramelized white chocolate to warm the flavor profile.
Insider Tips
Little adjustments make a big difference in texture and presentation.
- Warm the peanut butter slowly: Microwave just until loosest, then stir vigorously to fully loosen. Overheating can separate oils.
- Press firmly: When packing the oat layer into the pan, press with the back of a spatula or use a piece of parchment over the mixture and press with a flat-bottomed glass for a compact, even base.
- Thin vs. thick bars: If you prefer a thicker oat layer, use a smaller pan or don’t spread the mixture as thin. For thinner, use a slightly larger pan.
- Neat slices: Let the slab sit 15 minutes at room temp after removing from the fridge. Run a warm knife under hot water, dry it, and make confident cuts; wipe between slices.
Keep It Fresh: Storage Guide
Refrigerator
Store cut bars in an airtight container in the fridge for up to 1 week. If you stack them, place parchment between layers to prevent sticking. Chilled bars hold their shape and are pleasantly firm.
Freezer
For longer storage, freeze bars in a single layer on a baking sheet until solid, then transfer to a freezer-safe bag or container. They’ll keep for up to 3 months. Thaw in the fridge or at room temperature for 20–30 minutes before serving.
Room Temperature
If your kitchen is cool, you can keep them in an airtight container at room temperature for 2–3 days. Warmer climates or summer heat means the fridge is the safer option so the chocolate doesn’t soften too much.
Questions People Ask
- Can I use crunchy peanut butter? Yes, but the texture will be chunkier and the bars may be slightly less cohesive. Crunchy can be nice for extra bite.
- Can I bake these? No need — the recipe is designed to be no-bake. Baking would change the texture and dryness.
- Can I reduce the sweetener? You can try slightly less maple syrup or honey, but that liquid is part of what binds the oats. Reduce too much and the bars will be crumbly.
- How do I make the chocolate shine? Gently tempering chocolate creates a glossy finish, but for home ease, melt slowly and avoid overheating; the peanut butter added to the chocolate also helps the finish set nicely.
Time to Try It
If you’ve read this far, the next step is simple: prep your pan, measure the ingredients, and give these a go. They’re forgiving, fast, and satisfying — and once you’ve made them you’ll understand why they’re a pantry favorite. I keep a batch on hand for snack emergencies and last-minute guests. Let me know how you like to customize them.
Chocolate Peanut Butter Oatmeal Bars
Equipment
- 9×9 pan
- Mixing Bowl
- Measuring cups and spoons
Ingredients
Ingredients
- ?1 1/2 cups 360 gcreamy peanut butter
- ??cup 80 mlmaple syrupor honey
- ?1 1/2 cup 150 gold fashioned oats
- ?1 teaspoonpure vanilla extract
- ?1 1/2 cupsdark chocolate chips
- ?1/4 cupcreamy peanut butter
Instructions
Instructions
- Grease a 9×9-inch square pan and line it with parchment paper, leaving an overhang on two sides for easy removal.
- In a microwave-safe bowl, add 1 ½ cups (360 g) creamy peanut butter. Microwave for 60 seconds, then stir until smooth (microwave a few more seconds if needed to fully loosen).
- Add ½ cup (80 ml) maple syrup or honey, 1 ½ cups (150 g) old-fashioned oats, and 1 teaspoon pure vanilla extract to the melted peanut butter. Stir with a spatula until all ingredients are evenly combined.
- Transfer the peanut butter–oat mixture to the prepared pan and press it down firmly and evenly with the back of a spatula or your hands to form a compact layer.
- In a medium microwave-safe bowl, combine 1 ½ cups dark chocolate chips and ¼ cup creamy peanut butter. Microwave in 30-second increments, stirring between each interval, until the mixture is fully melted and smooth.
- Pour and spread the melted chocolate-peanut butter mixture evenly over the peanut butter–oat layer. If desired, drag a toothpick through the topping to create decorative patterns.
- Refrigerate the pan until the bars are firm, about 2–3 hours.
- Use the parchment overhang to lift the cooled slab from the pan. Let it sit at room temperature for about 15 minutes, then cut into 9, 12, or 18 squares as desired.
Notes
Add coconut:replace½cup of the oats with the same amount of shredded coconut for a different flavor.
To Store:Keep these in an airtight container in the fridge for up to 1 week, or freeze for up to 3 months.