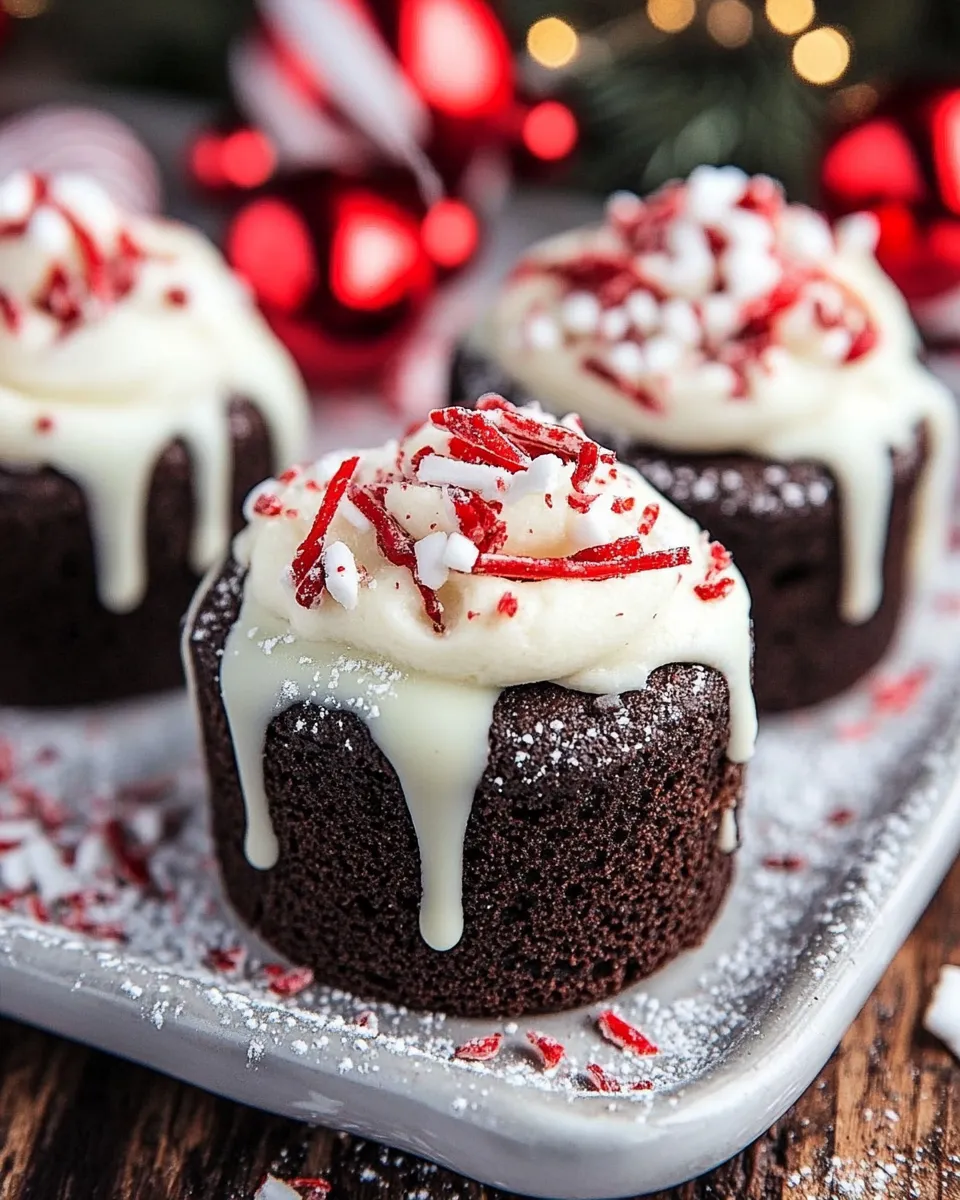
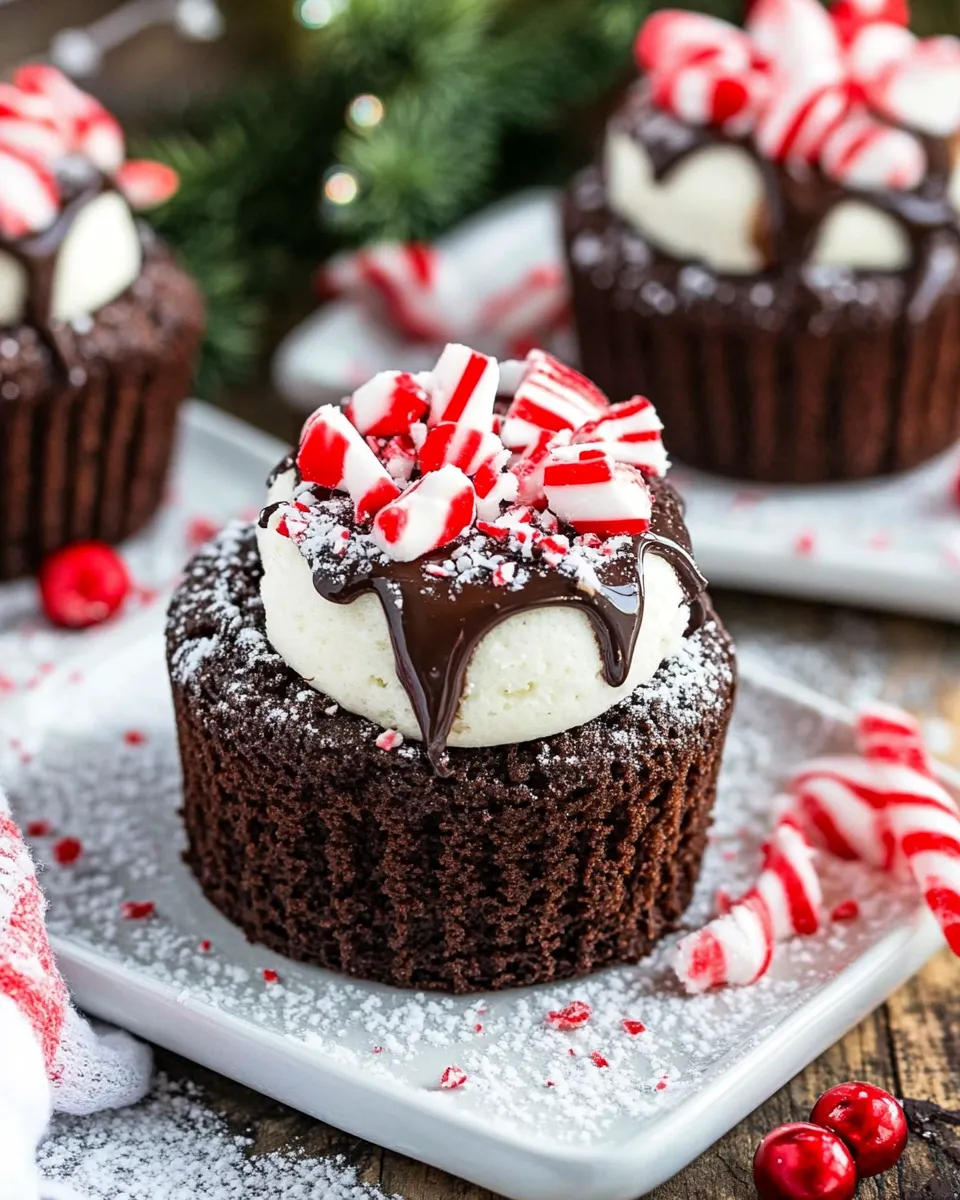
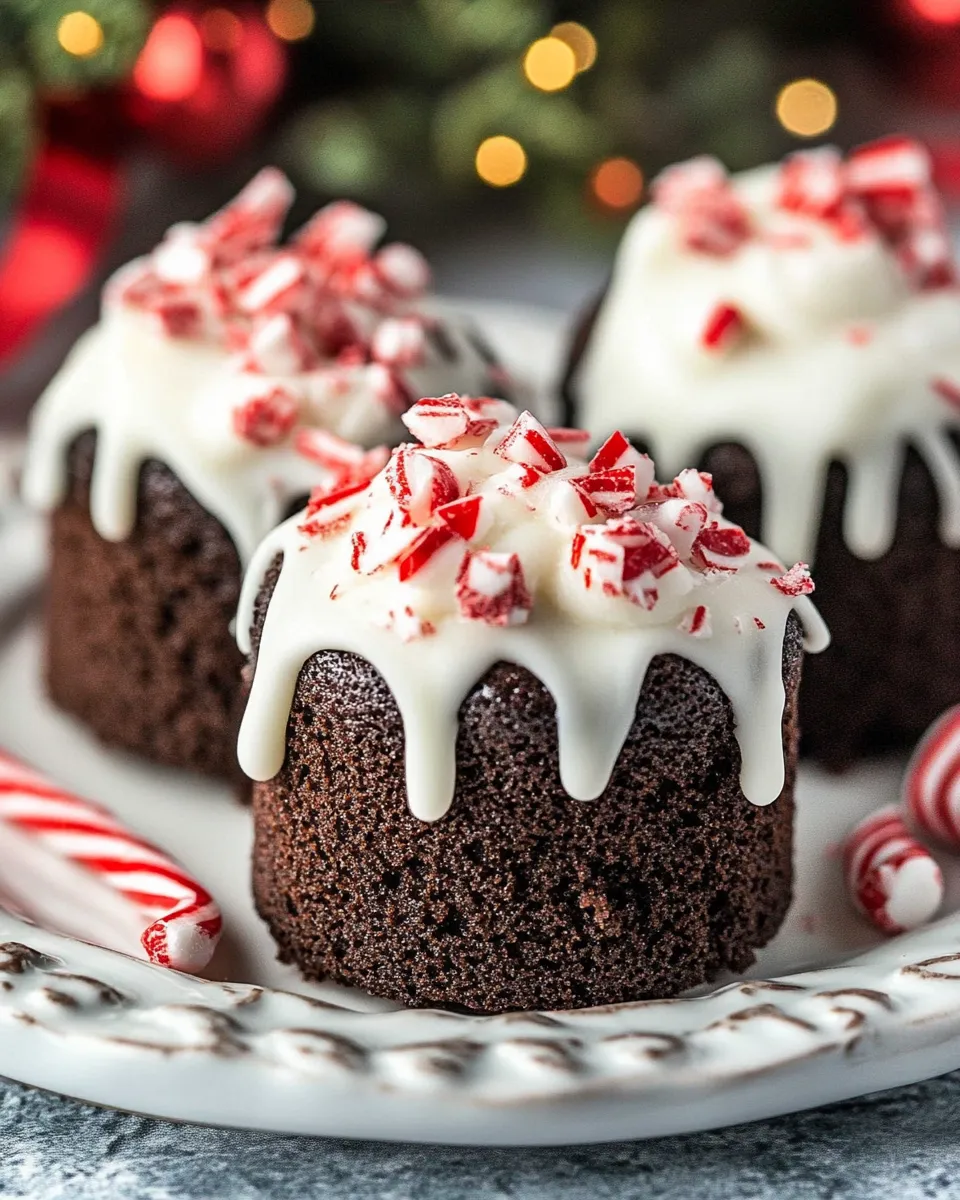
Who doesn’t love the combination of rich chocolate and refreshing peppermint? These Chocolate Peppermint Mini Cakes are the perfect treat to satisfy your sweet tooth, especially during the festive season or whenever you’re in need of a chocolate fix.
Soft, moist, and bursting with flavor, these mini cakes are easy to whip up and are sure to impress your family and friends.
With just a handful of ingredients, we’re going to create a dessert that’s not only adorable but incredibly delicious!
Why This Recipe Is a Must-Try
This recipe stands out for several reasons.
First of all, the mini cakes are super cute, making them perfect for parties, holidays, or just because! They balance the rich, dense chocolate with the cool, crisp bite of peppermint, creating a delightful flavor experience.
Plus, the baking process fills your kitchen with a mouth-watering aroma that draws everyone in.
These cakes are also incredibly easy to make; even beginner bakers will find success with this recipe.
They’re not just tasty, but they’re fun to decorate too!
Ingredients
To make these delightful Chocolate Peppermint Mini Cakes, you will need the following ingredients:
- 1 cup (120 g) all purpose flour
- ½ cup (50 g) unsweetened cocoa powder
- ½ teaspoon baking powder
- ½ teaspoon baking soda
- ½ teaspoon salt
- 2 large eggs
- ½ cup (120 ml) canola oil
- 1 cup (200 g) granulated sugar
- ½ teaspoon pure vanilla extract
- ¼ teaspoon peppermint extract
- ½ cup (120 ml) whole milk or 2% or buttermilk
These ingredients work beautifully together, creating a decadent cake with just the right amount of peppermint.
Let’s get to baking!
How To Make Chocolate Peppermint Mini Cakes
Step 1: Preheat Your Oven
First things first, let’s get that oven preheated to 350°F (175°C).
This ensures that your cakes will bake evenly and rise beautifully.
Step 2: Prepare Your Mini Cake Pans
While your oven is warming up, prepare your mini cake pans.
You can either grease them with a little canola oil or use some non-stick cooking spray.
If you have cute mini cake liners, feel free to use those too!
Step 3: Mix the Dry Ingredients
In a medium-sized bowl, whisk together the all-purpose flour, unsweetened cocoa powder, baking powder, baking soda, and salt.
This will help to distribute the leavening agents evenly throughout the batter.
Step 4: Combine the Wet Ingredients
In another large bowl, beat the eggs until they are fluffy.
Then, add in the canola oil, granulated sugar, pure vanilla extract, and peppermint extract.
Mix everything together until well combined.
Step 5: Add the Milk
Pour in the whole milk (or your choice of milk) into the wet mixture and stir until everything is well blended.
Step 6: Combine the Wet and Dry Mixtures
Gradually add the dry ingredients to the wet ingredients, mixing gently until just combined.
Be careful not to overmix; a few lumps are perfectly fine!
Step 7: Fill Your Mini Cake Pans
Now, divide your batter evenly among the mini cake pans.
You can fill them about two-thirds full to allow for rising.
Step 8: Bake the Cakes
Place the filled mini cake pans in the preheated oven and bake for about 15-20 minutes.
To check if they’re done, insert a toothpick into the center of a cake; if it comes out clean, they’re ready!
Step 9: Cool the Cakes
Once baked, remove the mini cakes from the oven and let them cool in the pans for about 5 minutes.
Then, carefully remove them from the pans and transfer them to a wire rack to cool completely.
Expert Tips
- Make sure your ingredients are at room temperature. This helps the batter mix together more smoothly.
- Do not overmix your batter. A little bit of lumps is okay and keeps the mini cakes fluffy.
- For an extra kick of peppermint, you can add a bit of peppermint extract to your frosting as well!
- If you like, feel free to add chocolate chips into the batter for added texture and richness!
Variations and Customizations

- Top the cakes with a fluffy peppermint frosting for a festive touch.
- Drizzle some chocolate ganache on top for an even richer dessert.
- Add crushed candy canes to the frosting or as a topping for a crunchy texture.
- For a gluten-free option, substitute the all-purpose flour with a gluten-free baking blend.
How to Store Leftovers
If you have any mini cakes leftover (which is unlikely once you taste them!), store them in an airtight container.
They can be left at room temperature for up to two days.
For longer storage, you can refrigerate them for up to a week.
Just make sure they’re well-sealed to keep them from drying out.
You can also freeze them for up to two months.
Just let them thaw at room temperature before serving.
FAQ
Can I use a different type of milk for this recipe?
Absolutely! You can use any milk you prefer, such as almond milk, soy milk, or oat milk.
Just make sure it’s unsweetened for the best results.
Can I make this recipe as a full-sized cake?
Yes! You can easily use this batter for a full-sized cake.
Just pour the batter into a greased 9-inch round cake pan and adjust the baking time to about 25-30 minutes.
What can I use instead of peppermint extract?
If you’re not a fan of peppermint, you can replace it with almond extract for a different flavor profile, or simply omit it if you prefer plain chocolate cakes.
Can I add frosting to these cakes?
Definitely! A rich chocolate frosting or a simple buttercream with a hint of peppermint would be amazing on these mini cakes.
Feel free to get creative with your toppings!
Conclusion
These Chocolate Peppermint Mini Cakes are not just a delightful dessert; they’re a celebration of flavor, texture, and festive cheer.
Whether you’re hosting a gathering or just want to indulge yourself, these mini cakes will be a hit.
Their irresistible combination of chocolate and peppermint will leave everyone asking for more.
So grab your ingredients, get baking, and enjoy every bite of these delicious treats!
Chocolate Peppermint Mini Cakes
Equipment
- Mixing Bowl
- Mini Cake Pans
- Whisk
- Oven
- Wire Rack
Ingredients
Dry Ingredients
- 1 cup all purpose flour
- ½ cup unsweetened cocoa powder
- ½ teaspoon baking powder
- ½ teaspoon baking soda
- ½ teaspoon salt
Wet Ingredients
- 2 large eggs
- ½ cup canola oil
- 1 cup granulated sugar
- ½ teaspoon pure vanilla extract
- ¼ teaspoon peppermint extract
- ½ cup whole milk or 2% or buttermilk
Instructions
- Step 1: Preheat your oven to 350°F (175°C).
- Step 2: Prepare your mini cake pans by greasing them with canola oil or using non-stick cooking spray.
- Step 3: In a medium-sized bowl, whisk together the all-purpose flour, unsweetened cocoa powder, baking powder, baking soda, and salt.
- Step 4: In another large bowl, beat the eggs until fluffy. Add in the canola oil, granulated sugar, pure vanilla extract, and peppermint extract. Mix until well combined.
- Step 5: Pour in the milk into the wet mixture and stir until well blended.
- Step 6: Gradually add the dry ingredients to the wet ingredients, mixing gently until just combined.
- Step 7: Divide your batter evenly among the mini cake pans, filling them about two-thirds full.
- Step 8: Bake the cakes in the preheated oven for about 15-20 minutes. Check for doneness with a toothpick.
- Step 9: Once baked, let the mini cakes cool in the pans for about 5 minutes before transferring them to a wire rack to cool completely.