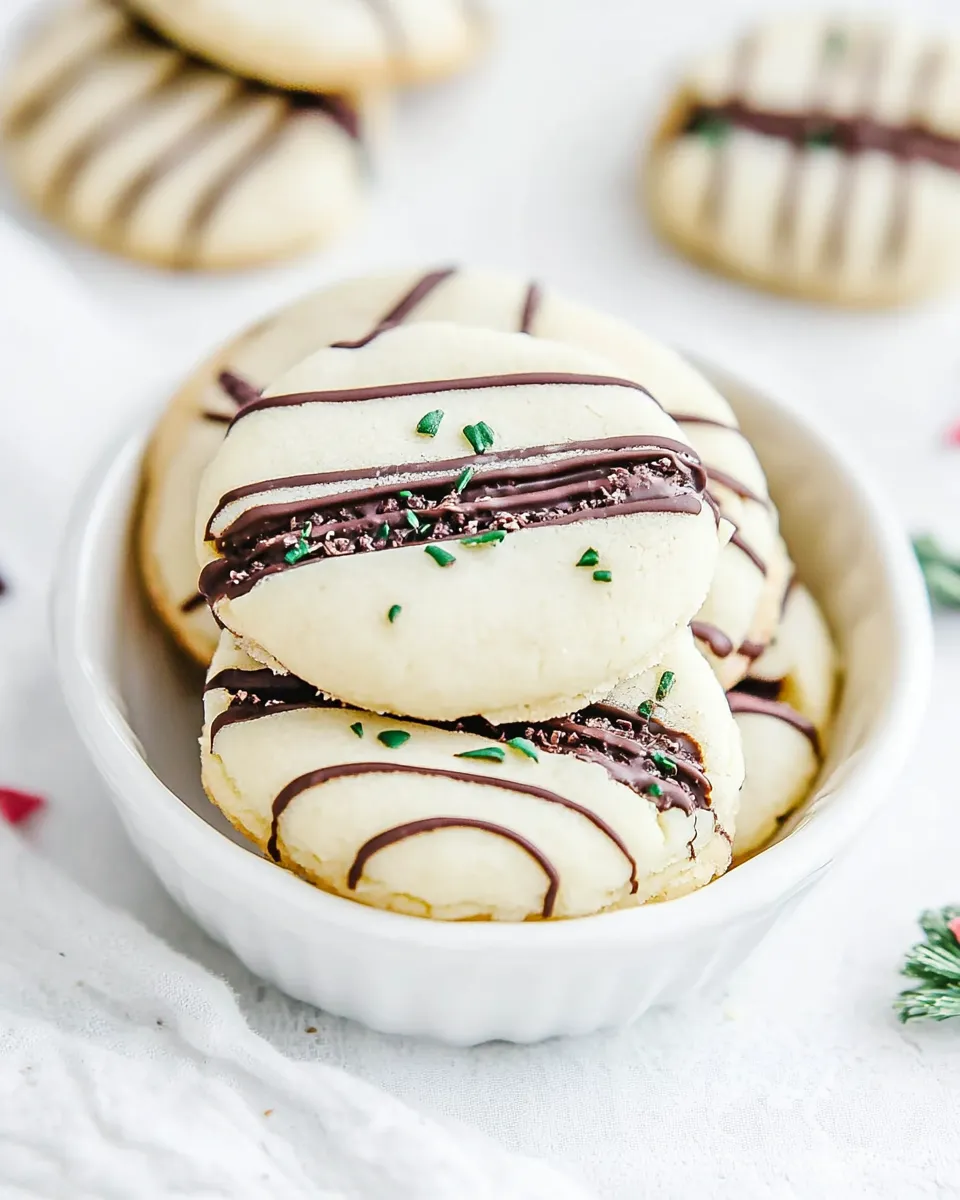
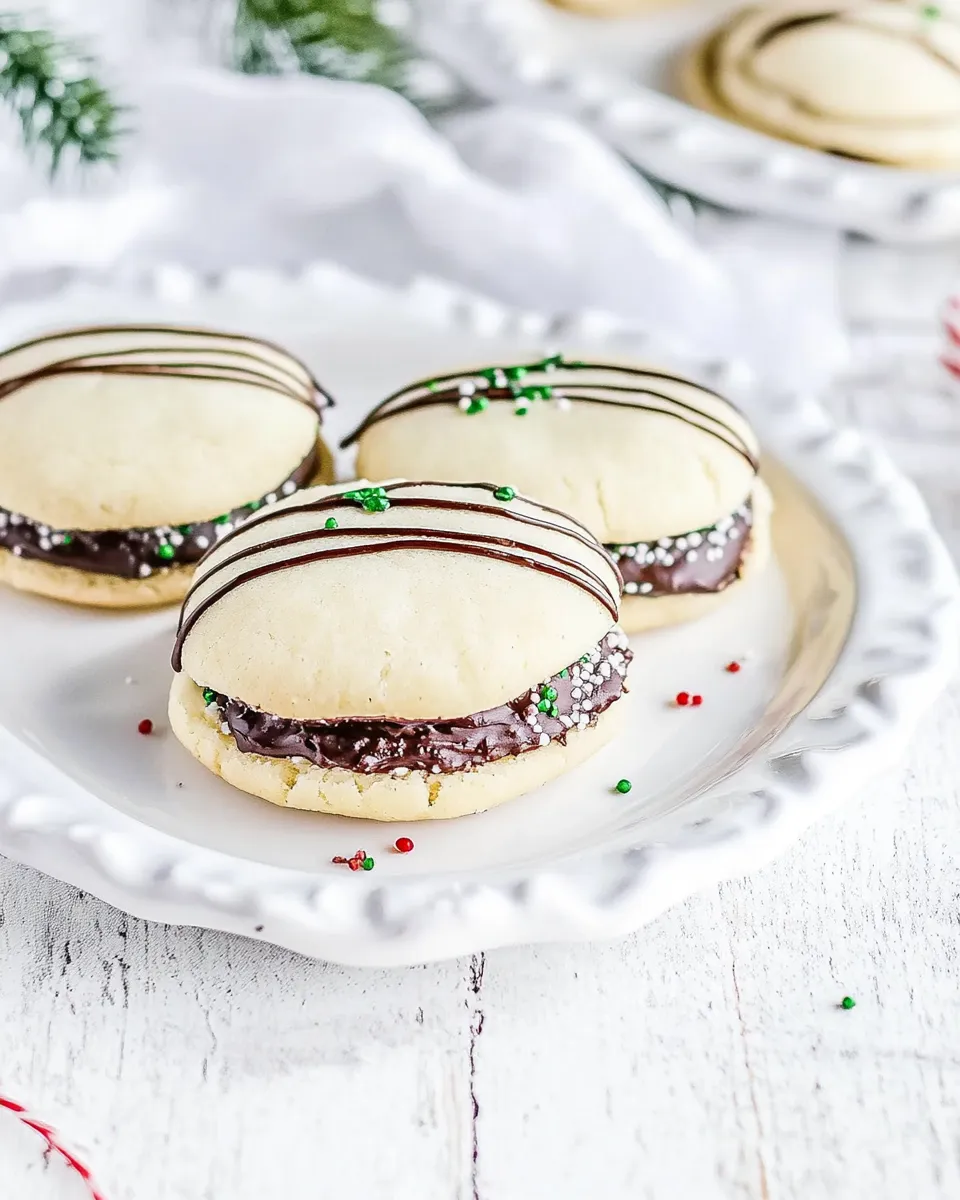
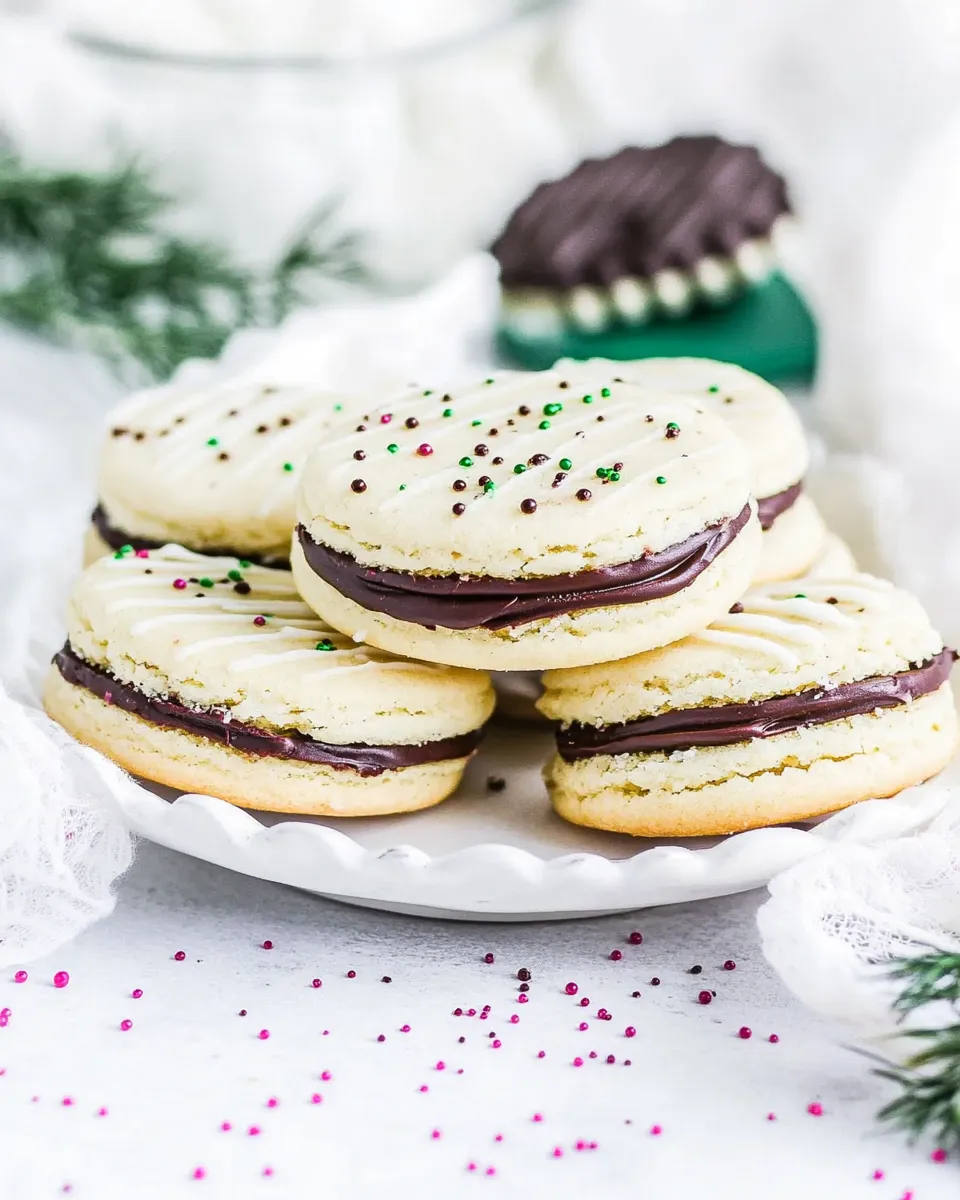
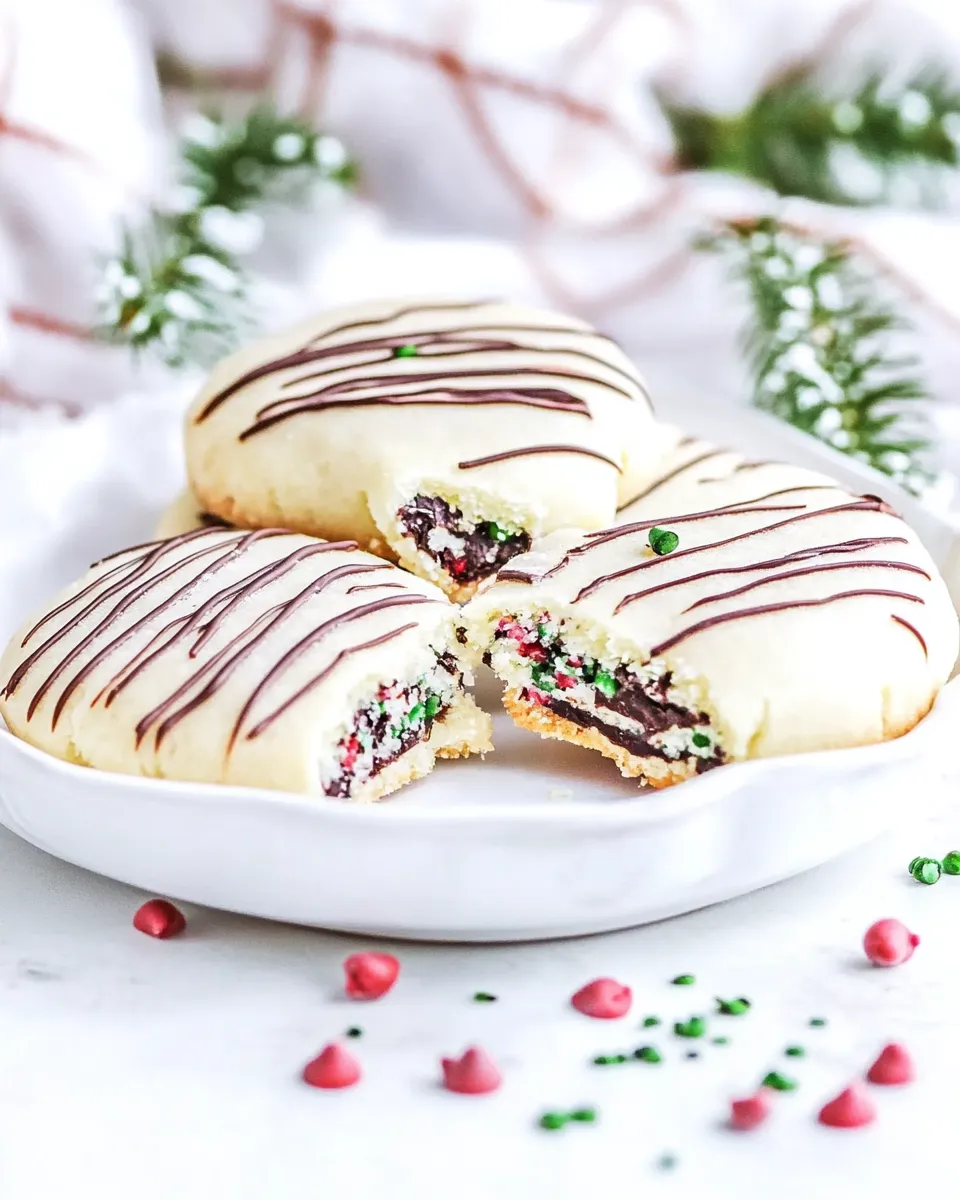
These cookies are straightforward, comforting, and exactly the kind of bake I reach for when I want a tidy, dependable dessert with a little showmanship. Crisp shortbread shells hold a glossy semi-sweet chocolate center, then the whole sandwich gets cloaked in white candy coating. They’re simple to assemble, and the result looks and tastes like you spent more time on them than you did.
I keep the technique practical: a soft butter-based dough that’s easy to roll, a quick chill so shapes hold up in the oven, and two melting stations in the microwave for fillings and coatings. There are a few small timing details—chill before baking, cool completely before filling, and let coatings set—that make a big difference in texture.
If you’re baking for a crowd or making gifts, you can make the dough ahead, freeze the rounds, or finish the coats at the last minute. Below you’ll find a clear ingredient checklist, the exact step-by-step method, common mistakes to avoid, equipment notes, storage tips, and answers to the small questions that come up when you bake these.
Ingredient Checklist
- 12 tablespoons unsalted butter, softened — provides the rich, tender shortbread base; soften to room temperature for easy creaming.
- 2 large eggs — binds the dough and adds lift.
- 1 teaspoon vanilla extract — simple flavor lift that complements the chocolate.
- 2¼ cups all-purpose flour — structure for the cookies; measure by spooning into the cup and leveling for accuracy.
- ¾ cups powdered sugar, plus more for sprinkling — powdered sugar keeps the dough tender and gives a fine, melt-in-your-mouth crumb; reserve a little for dusting after the coatings set.
- ¼ teaspoon baking powder — a touch of leavening to keep the shortbread slightly light.
- ¼ teaspoon kosher salt — balances sweetness and enhances flavor.
- ¾ cup semi-sweet chocolate chips — the filling; melt and spread for a glossy sandwich center.
- 1 tablespoon unsalted butter — added to the melted chocolate filling for shine and spreadability.
- 2½ cups white chocolate candy coating — the outer shell; melts smoothly to cover each sandwich.
- ½ cup colored candy coating, optional — for decorative drizzles or accents; optional but useful for presentation.
Chocolate Stuffed Shortbread Cookies — Do This Next
- Line two baking sheets with parchment paper and set aside.
- In a large bowl (or the bowl of a stand mixer) cream 12 tablespoons unsalted butter, softened, with a hand mixer or paddle attachment until light and fluffy.
- Add 2 large eggs and 1 teaspoon vanilla extract to the butter and mix until combined.
- In a medium bowl, whisk together 2¼ cups all-purpose flour, ¾ cup powdered sugar, ¼ teaspoon baking powder, and ¼ teaspoon kosher salt.
- Gradually add the dry mixture to the butter mixture and mix on low speed until the dough just comes together.
- Lightly flour your work surface. Turn the dough out onto the floured surface and knead briefly by hand until smooth and uniform.
- Using a floured rolling pin, roll the dough to about 1/4 inch thickness.
- Use a small round cookie cutter to cut out an even number of cookies. Transfer the cut cookies to the prepared baking sheets, spacing them about 1 inch apart.
- Chill the prepared cookie rounds on the baking sheets in the refrigerator for 30 minutes. While they chill, preheat your oven to 350°F.
- Bake the chilled cookies at 350°F for 15–18 minutes, or until the edges are lightly golden. Remove from the oven and cool completely on a wire rack before assembling.
- Make the chocolate filling: place ¾ cup semi-sweet chocolate chips and 1 tablespoon unsalted butter in a microwave-safe bowl. Microwave in 20-second intervals, stirring between intervals, until smooth and fully melted. Let cool slightly until spreadable.
- Spread a thin layer of the melted semi-sweet chocolate onto the flat side of half of the cooled cookies. Top each with a remaining cookie to form a sandwich. Press gently to seal.
- Place the sandwich cookies on a baking sheet and refrigerate or leave at room temperature until the semi-sweet chocolate filling is set (about 10–15 minutes).
- Melt the white chocolate coating: place 2½ cups white chocolate candy coating in a microwave-safe bowl and microwave in 20-second intervals, stirring between intervals, until smooth and fully melted.
- If using the optional colored candy coating (½ cup), melt it in a separate microwave-safe bowl in 20-second intervals until smooth. Transfer the melted colored coating to a small piping bag or a resealable plastic bag and snip a tiny corner for drizzling.
- Dip each sandwich cookie into the melted white chocolate coating (or spoon the coating over the top), letting excess drip off, and return to parchment-lined baking sheets.
- Immediately drizzle the melted colored candy coating over the white-coated cookies, if using.
- Allow the coatings to set completely at room temperature or speed up setting in the refrigerator. Once set, dust the cookies with additional powdered sugar, if desired.
Reasons to Love Chocolate Stuffed Shortbread Cookies
- They look elegant with minimal effort — a white chocolate shell and a simple drizzle elevate plain shortbread.
- Texture contrast: crisp shortbread exterior, creamy chocolate center, and a smooth candy coating.
- Make-ahead friendly: dough, baked cookies, and even assembled sandwiches can be stored or frozen at different stages.
- Flexible decoration: use the optional colored coating for seasonal colors or keep them classic with a powdered-sugar dusting.
Ingredient Flex Options
This recipe keeps the core ingredients tight, but within those limits you can adjust presentation and minor technique.
- Omit the ½ cup colored candy coating if you prefer a plain white finish; the white candy coating alone is enough for a polished look.
- If you want a deeper chocolate flavor in the filling, use the full ¾ cup semi-sweet chocolate chips as written and be sure to let the melted mixture cool slightly before spreading so it sets smoothly.
- Reserve the extra powdered sugar listed for a final dusting; skipping it is fine if you’re using a colored drizzle for decoration.
Equipment & Tools
- Baking sheets — two, for chilling and baking batches.
- Parchment paper — lines the sheets and makes coating and cleanup easier.
- Large mixing bowl or stand mixer with paddle attachment — for creaming the butter and combining dough.
- Hand mixer (optional) — a good alternative to a stand mixer for creaming.
- Medium bowl — for whisking dry ingredients.
- Measuring cups and spoons — accurate measurements matter for texture.
- Floured work surface and rolling pin — to roll dough to 1/4 inch thickness.
- Small round cookie cutter — for uniform cookies; any cutter will work as long as it makes matching tops and bottoms.
- Wire rack — for cooling baked cookies completely before filling.
- Microwave-safe bowls — for melting the semi-sweet filling and white/colored candy coatings.
- Small piping or resealable plastic bag — for drizzling the colored coating.
- Refrigerator — for chilling dough and setting fillings/coatings, if desired.
Learn from These Mistakes
- Not chilling the rounds before baking: dough spreads too much. Chill the cut rounds on the sheet for the full 30 minutes so they keep a clean edge in the oven.
- Filling warm cookies: the chocolate filling will run. Always cool the baked cookies completely before adding the semi-sweet filling.
- Overheating the coatings: candy coatings can seize if microwaved too aggressively. Use 20-second intervals and stir between each interval for smooth melting.
- Rushing the setting: if you try to dip or handle the sandwiches before the filling has set, you’ll get misshapen cookies. Wait the 10–15 minutes or pop them into the fridge briefly.
Seasonal Serving Ideas
These cookies adapt well to holidays and gatherings because the visual details are what change, not the technique. For winter holidays, use red or green colored candy coating for a festive drizzle. For Valentine’s Day, drizzle in pink. For a simple party tray, leave them white and dust them lightly with powdered sugar for a snow-dusted look.
They make tidy edible gifts: package several in a small box with parchment and tissue. Because they look special, you don’t need many to make a strong impression—three to six per package is enough.
Author’s Commentary
I test recipes that fit into a busy life: reasonable prep time and reliable results. This one hits both. The shortbread dough is forgiving, and the chocolate center adds a confident, clean flavor that contrasts with the sweet white coating. I like assembling these while listening to music—there’s a pleasant rhythm to spreading, sandwiching, and dipping.
If you bake them for friends, they’ll ask how you made that glossy filling and perfect coating. The answer is simple: don’t rush the chill-and-set steps. That’s where the professional look comes from.
Cooling, Storing & Rewarming
Cool the cookies completely on a wire rack before filling. After assembly and coating, let them set at room temperature until the coatings are firm. You can speed that up in the refrigerator.
Store finished cookies in an airtight container at room temperature for up to 3 days. If your kitchen is warm, keep them in the refrigerator for up to 5 days to prevent the coatings from softening. For longer storage, freeze the sandwich cookies (before coating or after coating) in a single layer on a parchment-lined sheet, then transfer to a freezer-safe container; they keep well for up to 1 month. Thaw in the refrigerator before serving.
Top Questions & Answers
- Can I skip chilling the dough? You can, but the cookies will spread and lose their clean edges. Chilling for 30 minutes is worth the extra step.
- Do I have to use white candy coating? The recipe calls for 2½ cups white chocolate candy coating. It melts smoothly and sets with a glossy finish; you can omit the colored coating if you prefer a simpler presentation.
- How do I fix seized chocolate or coating? Gently warm it over very low heat or add a tiny bit of neutral oil and stir. Better yet, melt slowly in the microwave in short intervals and stir frequently to prevent seizing.
- Can I make the dough ahead? Yes. You can shape and chill the dough, then wrap and refrigerate for up to 48 hours or freeze for longer. Thaw in the refrigerator before rolling.
See You at the Table
These Chocolate Stuffed Shortbread Cookies are straightforward to make and rewarding to serve. Follow the chilling and cooling steps, be gentle with your melting, and you’ll have neat, delicious sandwich cookies that feel more special than their effort level. Try them plain or add a celebratory drizzle for gatherings. If you bake a batch, tell me how you decorated them—I love hearing which colors or occasions bring these cookies to life.
Chocolate Stuffed Shortbread Cookies
Equipment
- Ghirardelli White Melting Wafers
- Baking Sheet Pan
- Biscuit/Cookie Cutters Set
Ingredients
Ingredients
- 12 tablespoonsunsalted butter softened
- 2 largeeggs
- 1 teaspoonvanilla extract
- 2 1/4 cupsall-purpose flour
- 3/4 cupspowdered sugar plus more for sprinkling
- 1/4 teaspoonbaking powder
- 1/4 teaspoonkosher salt
- 3/4 cupsemi sweet chocolate chips
- 1 tablespoonunsalted butter
- 2 1/2 cupswhite chocolate candy coating
- 1/2 cupcolored candy coating optional
Instructions
Instructions
- Line two baking sheets with parchment paper and set aside.
- In a large bowl (or the bowl of a stand mixer) cream 12 tablespoons unsalted butter, softened, with a hand mixer or paddle attachment until light and fluffy.
- Add 2 large eggs and 1 teaspoon vanilla extract to the butter and mix until combined.
- In a medium bowl, whisk together 2¼ cups all-purpose flour, ¾ cup powdered sugar, ¼ teaspoon baking powder, and ¼ teaspoon kosher salt.
- Gradually add the dry mixture to the butter mixture and mix on low speed until the dough just comes together.
- Lightly flour your work surface. Turn the dough out onto the floured surface and knead briefly by hand until smooth and uniform.
- Using a floured rolling pin, roll the dough to about 1/4 inch thickness.
- Use a small round cookie cutter to cut out an even number of cookies. Transfer the cut cookies to the prepared baking sheets, spacing them about 1 inch apart.
- Chill the prepared cookie rounds on the baking sheets in the refrigerator for 30 minutes. While they chill, preheat your oven to 350°F.
- Bake the chilled cookies at 350°F for 15–18 minutes, or until the edges are lightly golden. Remove from the oven and cool completely on a wire rack before assembling.
- Make the chocolate filling: place ¾ cup semi-sweet chocolate chips and 1 tablespoon unsalted butter in a microwave-safe bowl. Microwave in 20-second intervals, stirring between intervals, until smooth and fully melted. Let cool slightly until spreadable.
- Spread a thin layer of the melted semi-sweet chocolate onto the flat side of half of the cooled cookies. Top each with a remaining cookie to form a sandwich. Press gently to seal.
- Place the sandwich cookies on a baking sheet and refrigerate or leave at room temperature until the semi-sweet chocolate filling is set (about 10–15 minutes).
- Melt the white chocolate coating: place 2½ cups white chocolate candy coating in a microwave-safe bowl and microwave in 20-second intervals, stirring between intervals, until smooth and fully melted.
- If using the optional colored candy coating (½ cup), melt it in a separate microwave-safe bowl in 20-second intervals until smooth. Transfer the melted colored coating to a small piping bag or a resealable plastic bag and snip a tiny corner for drizzling.
- Dip each sandwich cookie into the melted white chocolate coating (or spoon the coating over the top), letting excess drip off, and return to parchment-lined baking sheets.
- Immediately drizzle the melted colored candy coating over the white-coated cookies, if using.
- Allow the coatings to set completely at room temperature or speed up setting in the refrigerator. Once set, dust the cookies with additional powdered sugar, if desired.