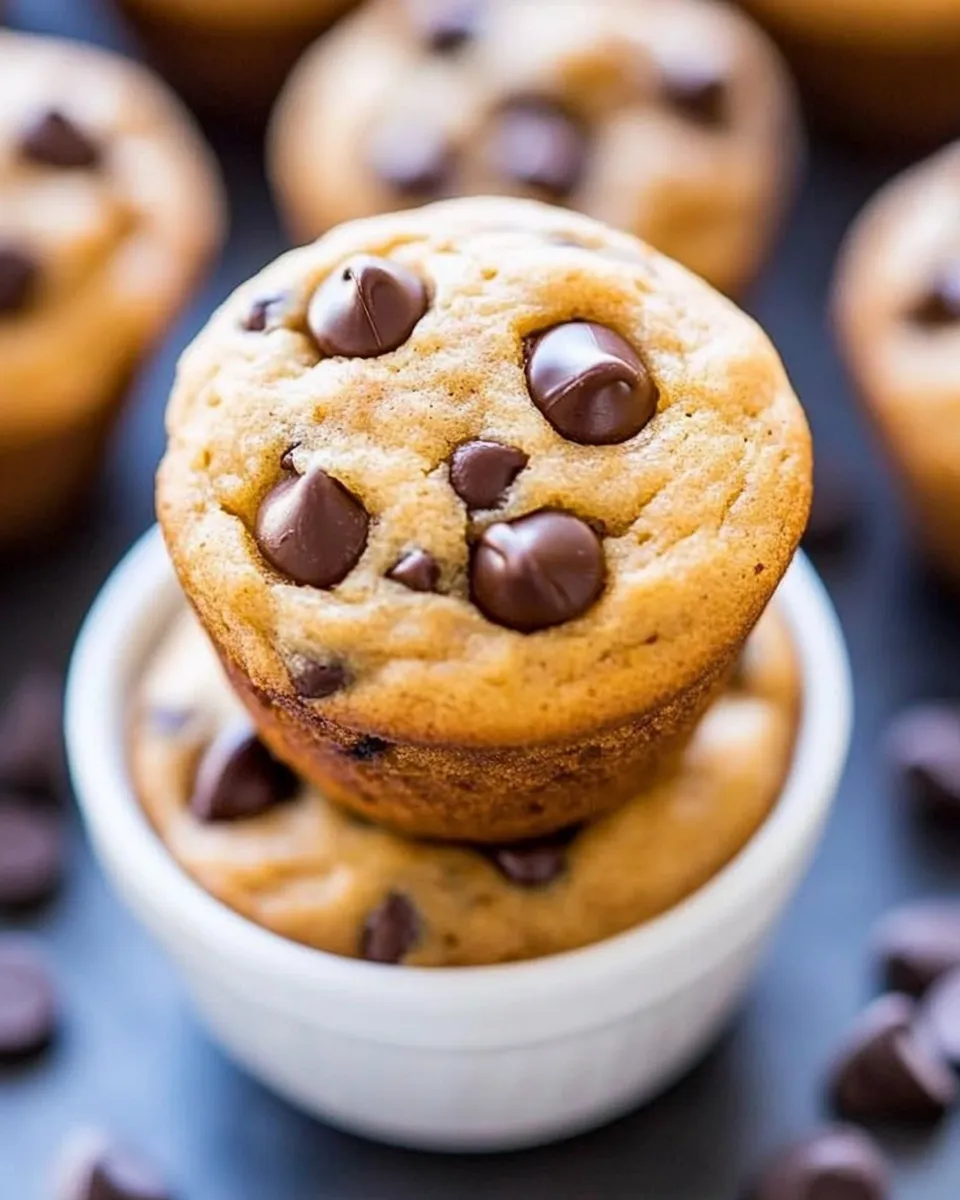
These little muffins are proof that great baking doesn’t need a cabinet full of flours or a long ingredient list. They’re made in the blender, take about 10 minutes to bake, and are the kind of snack that disappears fast — usually faster than I can photograph them. They’re soft, peanut-butter-forward, and dotted with melty mini chocolate chips.
I love these for rushed mornings, after-school snacks, or when you want a portable treat that feels a little indulgent but is still simple. The batter comes together in one container, and the mini format means portion control without sacrificing satisfaction.
Below you’ll find everything you need: the exact ingredients, step-by-step instructions straight from the blender, troubleshooting tips, storage notes, and quick answers to the questions I get most often. No fluff — just reliable, practical guidance so your first batch looks and tastes like it came from a tiny neighborhood bakery.
Gather These Ingredients
- 1medium ripe banana,peeled — soft, ripe banana provides sweetness, moisture, and structure in place of flour.
- 1large egg — binds the batter and helps the muffins set; don’t skip it unless following a specific egg-free swap.
- heaping 1/2 cup creamy peanut butter,I recommend using classic storebought peanut butter, and not natural or homemade — the main flavor and fat source; use the recommended style for consistency and texture.
- 3tablespoonshoney,agave or maple syrup may be substituted — sweetener and a touch of extra moisture; honey is pictured in the original recipe.
- 1tablespoonvanilla extract — lifts flavors and rounds out the sweetness.
- ¼teaspoonbaking soda — a small amount gives the muffins a gentle rise and a lighter texture.
- pinchsalt,optional and to taste — salt balances the sweetness and enhances the peanut butter; use if you like a slightly savory edge.
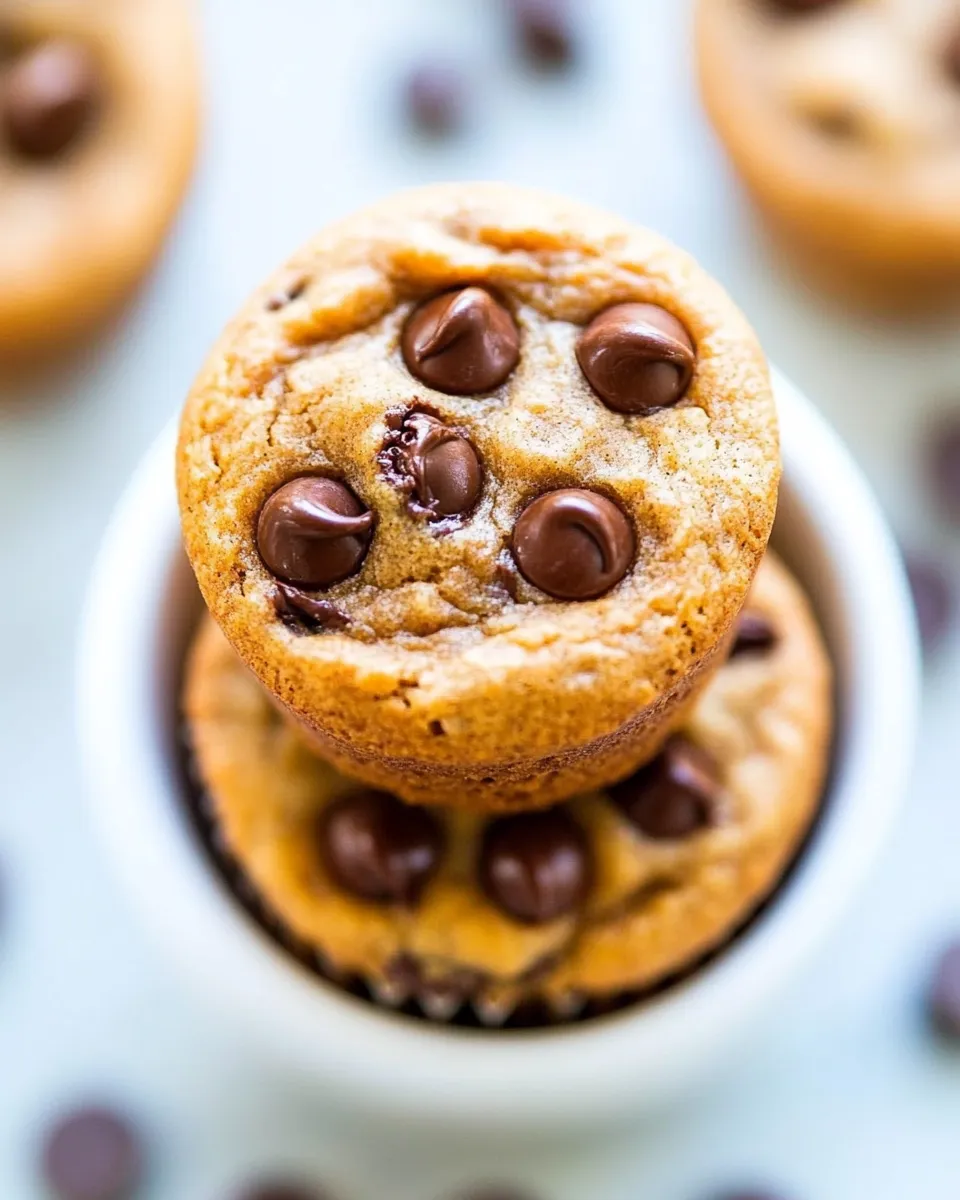
- heaping 1/2 cup mini semi-sweet chocolate chips — chocolate throughout the batter; mini chips distribute evenly in small muffins and melt nicely.
Cooking (Flourless Peanut Butter Chocolate Chip Mini Blender Muffins): The Process
- Preheat oven to 400°F. Spray mini muffin pan(s) very well with nonstick cooking spray or lightly grease them; do not flour the pans.
- Place the banana, egg, heaping 1/2 cup creamy peanut butter, 3 tablespoons honey (or agave/maple), 1 tablespoon vanilla extract, 1/4 teaspoon baking soda, and a pinch of salt (if using) into the blender canister.
- Blend on high until the batter is smooth and creamy, about 1 minute. If needed, stop and scrape down the sides, then blend briefly again.
- Transfer the batter to a bowl (or remove the blender blade) and fold in the heaping 1/2 cup mini semi-sweet chocolate chips by hand so the chips remain intact.
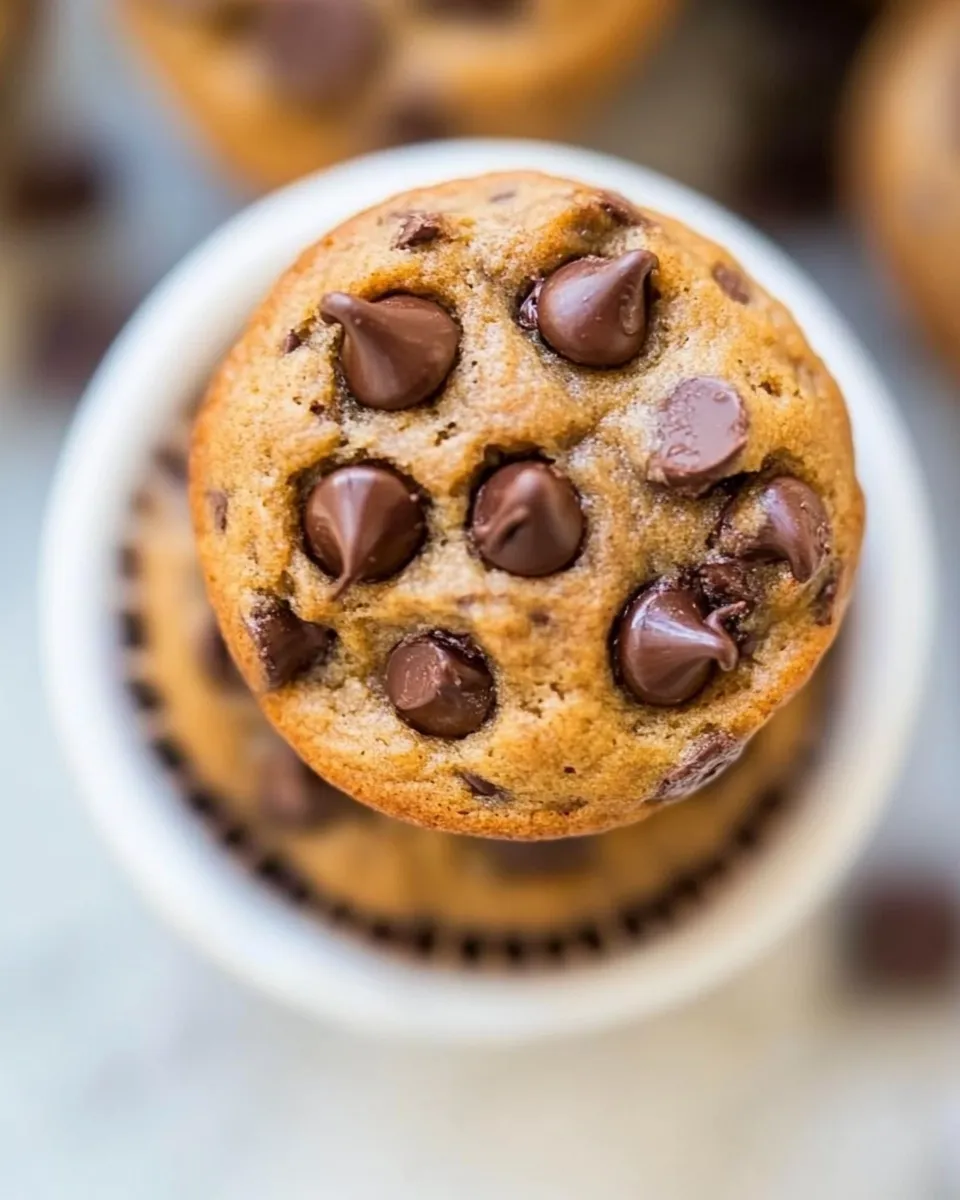
- Lightly spray a tablespoon or small cookie scoop with cooking spray. Use it to portion rounded 1-tablespoon mounds of batter into the prepared mini muffin cavities, filling each about 3/4 full.
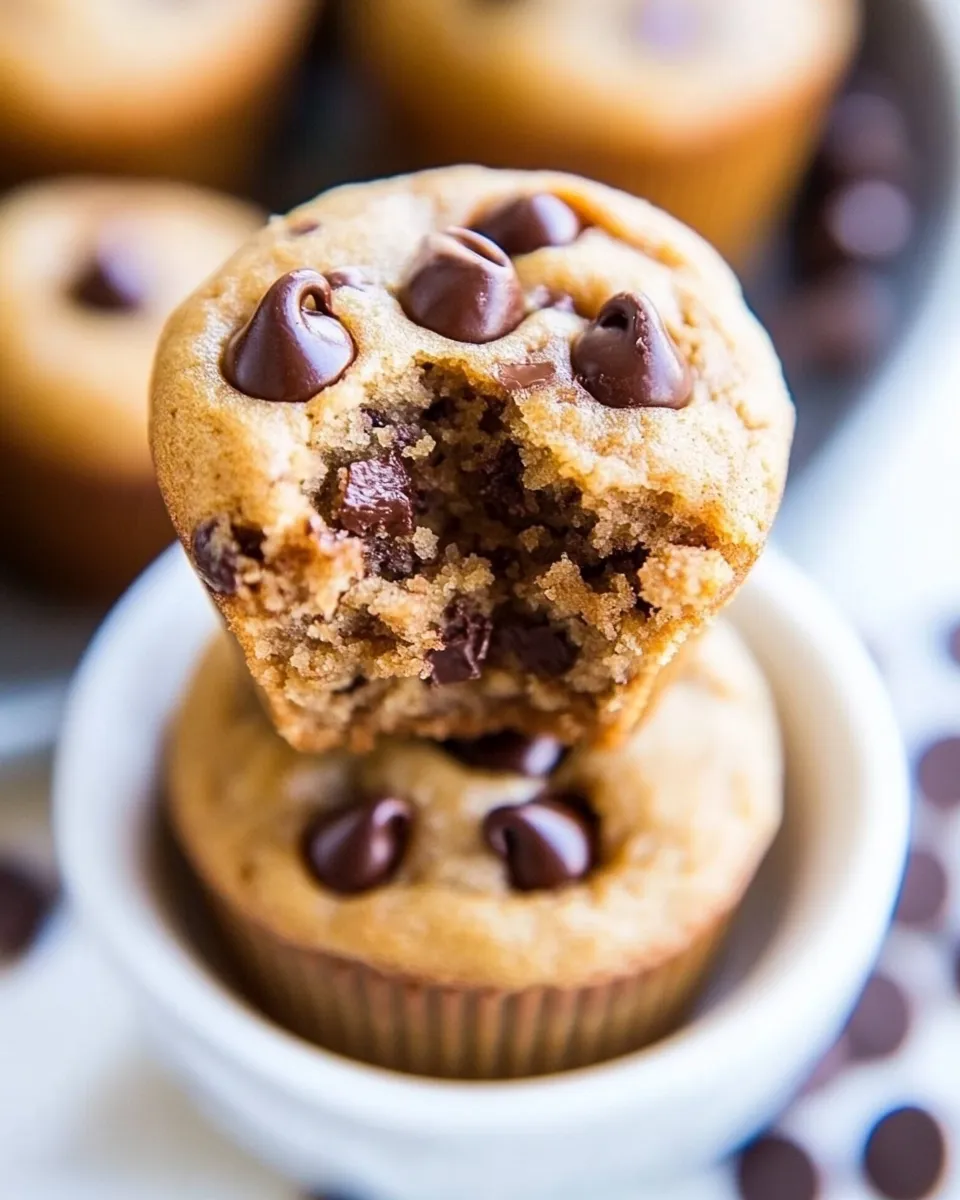
- Bake for 8–9 minutes, watching closely. The muffins are done when tops are set, domed, springy to the touch, and a toothpick inserted in the center comes out clean or with a few moist crumbs but no raw batter.
- Let the muffins cool in the pan for about 10 minutes, until firm enough to handle, then remove them to a wire rack or plate to finish cooling.
- Store airtight at room temperature for up to 5 days, or freeze for up to 4 months.
Why This Recipe is a Keeper
It’s fast. Batter goes straight into the blender and into the oven within minutes. That alone makes this a repeat weeknight or weekend-batch favorite. The texture is moist and tender thanks to the banana and peanut butter, and the mini chocolate chips give perfect little hits of chocolate without overpowering the peanut butter.
The recipe is forgiving. Overripe bananas, slight differences in peanut butter brands, or a few seconds more blending won’t ruin the result. Because there’s no flour, you won’t worry about overmixing gluten; the batter is smooth, simple, and predictable.
Mini muffins mean small, shareable bites that are great for portion control, packed lunches, or passing around at a brunch. They store well and freeze cleanly, so you can make a big batch and pull a couple out when the peanut butter craving hits.
Dairy-Free/Gluten-Free Swaps
These muffins are inherently flourless, so they’re naturally gluten-free as long as you use certified gluten-free chocolate chips and ensure your peanut butter and other packaged items are labeled gluten-free. The recipe contains no dairy ingredients by default; the mini semi-sweet chocolate chips may contain dairy or be processed on shared equipment, so choose dairy-free chocolate chips if you need a strict dairy-free version.
If you need to avoid eggs, I don’t recommend a direct swap here without testing: the egg helps set the muffins. For strict dietary needs, try an egg replacer that’s tested in baked goods, but expect slight changes in texture. For vegan sweetness, use maple syrup or agave as the written substitute for honey.
Equipment at a Glance
- Blender or high-powered blender — for emulsifying banana, peanut butter, and wet ingredients into a smooth batter.
- Mini muffin pan(s) — the recipe is written for mini cavities; don’t use a standard muffin tin without adjusting bake time and portion size.
- Nonstick cooking spray or neutral oil for greasing — prevents sticking; do not flour the pan.
- Tablespoon or small cookie scoop — helps portion consistent 1-tablespoon mounds so muffins bake evenly.
- Mixing bowl and spatula — for folding in chocolate chips and transferring batter.
- Wire cooling rack and toothpick — for testing doneness and cooling properly.
Common Errors (and Fixes)
Muffins are dense or undercooked
If the center is raw but tops are set, your oven temperature could be off. Use an oven thermometer to check calibration. Also ensure you portion batter as directed — overfilling will make centers take longer to set. Test with a toothpick: it should come out with a few moist crumbs but no raw batter.
Muffins stick to the pan
Even with nonstick pans, a generous spray or light greasing is essential. The recipe explicitly says to spray very well. Allow the muffins to cool about 10 minutes in the pan before attempting removal — rushing this step can cause tearing.
Too salty or not flavored enough
Salt is optional in this recipe; omit it if your peanut butter is already salty. If peanut butter flavor isn’t pronounced, use the recommended classic store-bought creamy peanut butter (not natural), and consider slightly warmer bananas — ripeness increases sweetness and flavor.
Chocolate chips clump or sink
Fold the chips in by hand gently, as instructed, so they don’t break down in the blender. Using mini chips helps them distribute evenly and reduces sinking compared with large chips.
Make It Year-Round
These muffins are versatile through every season. In cooler months, serve warm with a smear of jam or a thin drizzle of warmed peanut butter for extra comfort. In summer, freeze a tray and pull them out for quick lunchbox treats or to pair with cold yogurt.
For seasonal spins, fold in a few toasted chopped nuts for crunch in autumn, or sprinkle a tiny pinch of flaky sea salt on warm muffins for a sophisticated contrast. You can also press a miniature peanut butter cup into the top of each muffin before baking for a holiday twist — just be mindful that this adds a new ingredient.
Recipe Notes & Chef’s Commentary
Use a ripe banana — not overripe to the point of fermentation, but soft, spotted, and sweet. It mashes and blends easily and contributes natural sweetness and moisture. The recipe specifically recommends classic store-bought creamy peanut butter rather than natural or homemade varieties. Natural peanut butter tends to separate and has a different texture and oil content, which can change the batter’s consistency.
Blending time is short. About a minute on high should do it; stop and scrape if needed. The goal is a smooth, creamy batter. Don’t blend the chips — the hand-folding step preserves their shape so you get little pockets of chocolate in every mini muffin.
Portioning matters. Use a lightly sprayed tablespoon or small scoop and fill cavities about 3/4 full to avoid overflow and to get the nice domed tops described in the bake step. Baking time is brief; watch ovens closely between minutes 8 and 9 to avoid overbaking, which can dry these out.
How to Store & Reheat
Store airtight at room temperature for up to 5 days, as noted in the original directions. Keep them in a single layer or separate layers with parchment to prevent sticking. For longer storage, freeze in a sealed container for up to 4 months. To thaw, leave at room temperature for 30–60 minutes or microwave single muffins for 10–15 seconds if you want them warm right away.
To refresh a batch that’s lost a bit of bounce, warm in a 300°F oven for 5–7 minutes or zap in the microwave briefly — they’ll soften and regain that just-baked feel.
Frequently Asked Questions
Are these gluten-free? Yes — the recipe is flourless. Use certified gluten-free chocolate chips and check labels to ensure all packaged ingredients are gluten-free.
Can I make them larger? You can try a standard muffin tin, but you’ll need to increase baking time significantly and adjust batter proportions. I recommend keeping them mini for best texture and timing.
Can I use crunchy peanut butter? Crunchy will work but will change mouthfeel and may create small pockets of peanut chunks. The recipe recommends creamy for consistency and a smoother batter.
Can I make them nut-free? This recipe is peanut-butter based, so it’s not suitable for nut-free needs without a tested swap. I don’t recommend substituting a different butter without testing because texture and flavor change significantly.
Can I prep batter ahead? You can blend and store the batter in the fridge for one day, but note that texture may change slightly; mini chips may soften if folded in too early.
Next Steps
Make a test batch following the steps exactly once to get a baseline. After that, tweak small variables — banana ripeness, brand of peanut butter, or an extra pinch of salt — to dial in your preferred balance of sweet and savory. If you love them, double or triple the batch and freeze portions for busy mornings.
If you try a variation that works particularly well, leave a note for yourself (or in the recipe card if you print it) so you can replicate it next time. These are the kind of muffins that survive experimentation and still taste like a win.
Flourless Peanut Butter Chocolate Chip Mini Blender Muffins
Equipment
- Blender
- mini muffin pan
- Nonstick cooking spray
- tablespoon or small cookie scoop
- Wire Rack
Ingredients
Ingredients
- 1 medium ripe banana peeled
- 1 large egg
- heaping 1/2 cup creamy peanut butter I recommend using classic storebought peanut butter, and not natural or homemade
- 3 tablespoonshoney agave or maple syrup may be substituted
- 1 tablespoonvanilla extract
- 1/4 teaspoonbaking soda
- pinchsalt optional and to taste
- heaping 1/2 cup mini semi-sweet chocolate chips
Instructions
Instructions
- Preheat oven to 400°F. Spray mini muffin pan(s) very well with nonstick cooking spray or lightly grease them; do not flour the pans.
- Place the banana, egg, heaping 1/2 cup creamy peanut butter, 3 tablespoons honey (or agave/maple), 1 tablespoon vanilla extract, 1/4 teaspoon baking soda, and a pinch of salt (if using) into the blender canister.
- Blend on high until the batter is smooth and creamy, about 1 minute. If needed, stop and scrape down the sides, then blend briefly again.
- Transfer the batter to a bowl (or remove the blender blade) and fold in the heaping 1/2 cup mini semi-sweet chocolate chips by hand so the chips remain intact.
- Lightly spray a tablespoon or small cookie scoop with cooking spray. Use it to portion rounded 1-tablespoon mounds of batter into the prepared mini muffin cavities, filling each about 3/4 full.
- Bake for 8–9 minutes, watching closely. The muffins are done when tops are set, domed, springy to the touch, and a toothpick inserted in the center comes out clean or with a few moist crumbs but no raw batter.
- Let the muffins cool in the pan for about 10 minutes, until firm enough to handle, then remove them to a wire rack or plate to finish cooling.
- Store airtight at room temperature for up to 5 days, or freeze for up to 4 months.