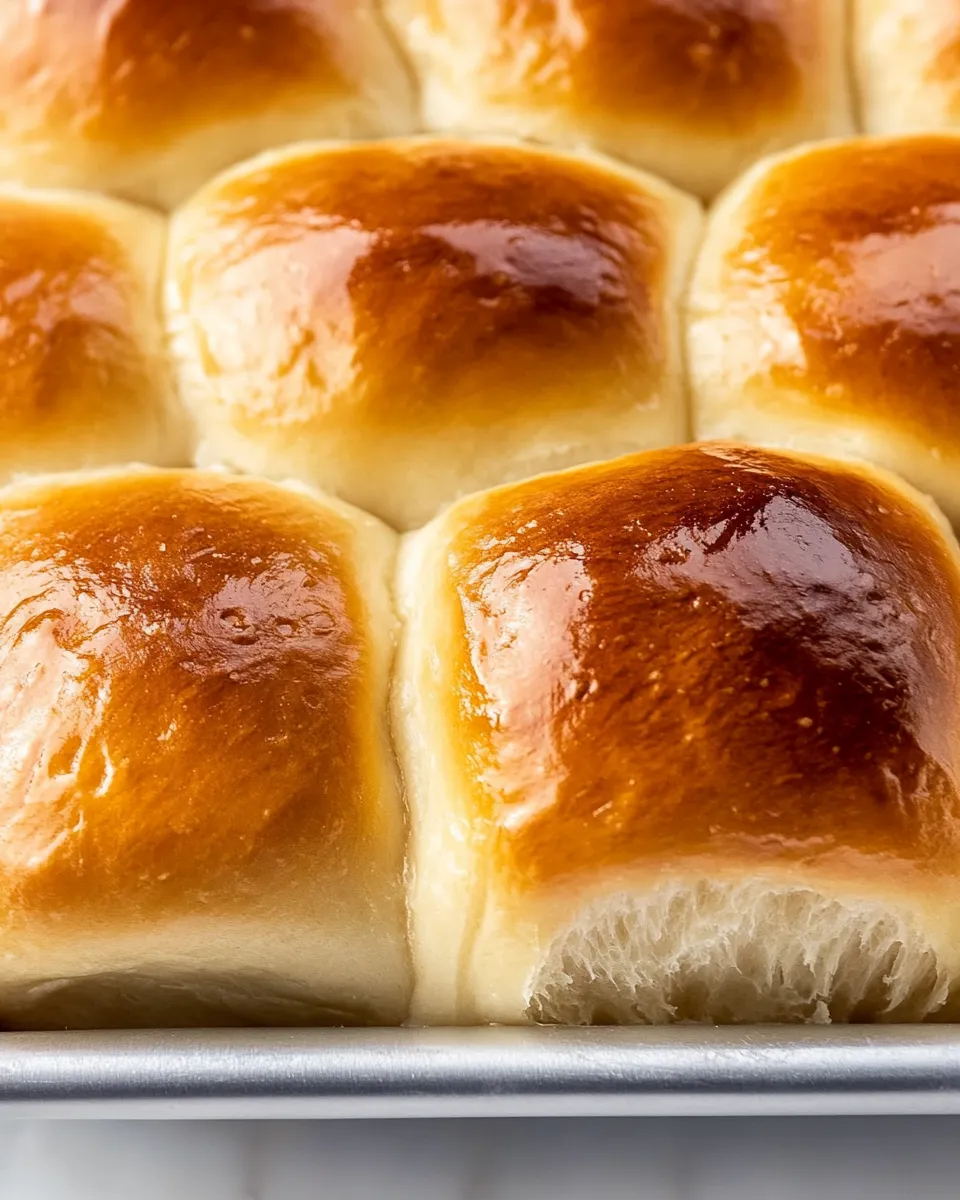
There’s something truly magical about Hawaiian rolls. These soft, pillowy buns are a delightful addition to any meal, whether you’re enjoying them warm with butter or using them for sliders and sandwiches. Their subtly sweet flavor pairs beautifully with savory dishes, making them a versatile staple in any kitchen. In this recipe, we’ll guide you through creating your very own Hawaiian rolls from scratch, using fresh ingredients that pack a punch of flavor.
Why This Recipe Belongs in Your Rotation
Hawaiian rolls are not just a treat for special occasions; they can easily become a weeknight staple. Their sweet, buttery taste and soft texture make them perfect for pairing with barbecue, soups, or even as a breakfast option with some jam. They are also an excellent choice for gatherings, adding a touch of tropical flair to your dining table. Plus, making them at home means you can control the ingredients and tailor the flavors to your liking.
Ingredient Checklist
To make the most delicious Hawaiian rolls, gather the following ingredients:
- 8 tablespoons unsalted butter (melted – 1 stick)
- 1 cup pineapple juice
- 1 cup buttermilk
- 1 cup brown sugar (packed)
- 1 teaspoon coconut extract
- 1 teaspoon vanilla extract
- 4 cups all-purpose flour
- 2 teaspoons instant yeast
- 1 teaspoon salt
- 1 teaspoon ground ginger
- 2 eggs (room temperature)
- 1 egg yolk
- 1 egg (for egg wash)
Tools & Equipment Needed
To whip up these delightful Hawaiian rolls, you’ll need a few essential tools:
- Mixing bowls: For combining your ingredients.
- Measuring cups and spoons: To ensure accurate measurements.
- Stand mixer or hand mixer: For kneading the dough (optional but helpful).
- Baking sheet: To bake the rolls on.
- Parchment paper: For easy clean-up and to prevent sticking.
- Kitchen towel: To cover the dough while it rises.
From Start to Finish: Hawaiian Rolls
Step 1: Prepare Your Ingredients
Start by measuring out all your ingredients. This makes the process smoother and ensures you don’t miss anything.
Step 2: Activate the Yeast
In a small bowl, combine the warm pineapple juice and brown sugar. Sprinkle the instant yeast over the mixture and let it sit for about 5-10 minutes until it becomes frothy. This signals that the yeast is active and ready to work its magic.
Step 3: Mix Wet Ingredients
In a large mixing bowl, whisk together the melted butter, buttermilk, coconut extract, and vanilla extract. Once the yeast mixture is frothy, add it to this bowl.
Step 4: Combine Dry Ingredients
In another bowl, whisk together the all-purpose flour, salt, and ground ginger. Gradually add the dry ingredients to the wet mixture, mixing until just combined.
Step 5: Add Eggs
Beat the eggs in a separate bowl and then fold them into the dough until fully incorporated. The dough will be sticky, which is normal.
Step 6: Knead the Dough
If using a stand mixer, knead the dough on medium speed for about 5-7 minutes until smooth and elastic. If kneading by hand, transfer the dough to a floured surface and knead for about 10 minutes.
Step 7: First Rise
Place the dough in a lightly greased bowl, cover it with a kitchen towel, and let it rise in a warm place for about 1-2 hours, or until it has doubled in size.
Step 8: Shape the Rolls
Once risen, punch down the dough and turn it out onto a floured surface. Divide the dough into 12 equal pieces and shape each piece into a smooth ball. Place them on a parchment-lined baking sheet, leaving some space between each roll.
Step 9: Second Rise
Cover the shaped rolls with the kitchen towel again and let them rise for another 30-45 minutes, or until puffy.
Step 10: Preheat the Oven
While the rolls are rising, preheat your oven to 350°F (175°C).
Step 11: Egg Wash
In a small bowl, whisk together the egg and egg yolk. Brush this mixture over the top of each roll for a beautiful golden-brown finish.
Step 12: Bake
Bake the rolls in the preheated oven for 20-25 minutes, or until they are golden brown and sound hollow when tapped.
Step 13: Cool and Serve
Remove the rolls from the oven and let them cool on a wire rack for a few minutes before serving. Enjoy them warm with butter or use them in your favorite recipes.
Texture-Safe Substitutions
If you need to modify this recipe for dietary preferences or availability, consider these substitutions:
- Gluten-free flour: Use a 1:1 gluten-free flour blend.
- Non-dairy milk: Substitute buttermilk with a dairy-free alternative like almond milk mixed with vinegar.
- Maple syrup: Swap brown sugar for maple syrup for a different sweet flavor.
- Egg replacer: Use flaxseed meal or a commercial egg replacer for a vegan option.
Cook’s Notes
Hawaiian rolls are best enjoyed fresh out of the oven, but they can also be stored for later. Here are some tips:
- For added flavor, consider incorporating shredded coconut or crushed pineapple into the dough.
- If you have leftover rolls, they can be frozen for up to 3 months. Just make sure to wrap them tightly.
- To refresh day-old rolls, warm them in the oven wrapped in foil for about 10 minutes.
Storage & Reheat Guide
To store your Hawaiian rolls:
- Keep them in an airtight container at room temperature for up to 3 days.
- For longer storage, freeze the rolls in a zip-top bag. They will maintain best quality for about 3 months.
- To reheat, simply place frozen rolls in a preheated oven at 350°F (175°C) for about 10-15 minutes or until warmed through.
Reader Q&A
Can I use whole wheat flour instead of all-purpose flour?
While you can use whole wheat flour, it may result in denser rolls. A mix of all-purpose and whole wheat flour can provide a better texture.
What can I do if my dough doesn’t rise?
If your dough isn’t rising, it may be due to inactive yeast. Ensure your yeast is fresh and that the liquids are warm but not hot, as high temperatures can kill the yeast.
Can I make these rolls ahead of time?
Absolutely! You can prepare the dough and shape the rolls, then place them in the refrigerator overnight before baking. Just allow them some time to rise at room temperature before baking.
What’s the best way to serve Hawaiian rolls?
These rolls are delicious on their own, but they also make a fantastic base for sliders, sandwiches, or even as a side for soups and stews.
If you’re inspired by this Hawaiian rolls recipe and want to try your hand at more weekend baking, check out these delightful projects:
Ready, Set, Cook
Now that you have all the knowledge and tools at your fingertips, it’s time to roll up your sleeves and dive into the world of homemade Hawaiian rolls. With just a few simple steps, you’ll have a batch of irresistibly soft and sweet rolls that are sure to impress family and friends. Whether you serve them warm with butter or as a delicious base for sliders, they are bound to be a hit. Happy baking!
Hawaiian Rolls
Equipment
- Mixing Bowls
- Measuring cups and spoons
- Stand Mixer or Hand Mixer
- Baking Sheet
- Parchment Paper
- Kitchen towel
Ingredients
- 8 tablespoons unsalted butter melted –1 stick
- 1 cup pineapple juice
- 1 cup buttermilk
- 1 cup brown sugar packed
- 1 teaspoon coconut extract
- 1 teaspoon vanilla extract
- 4 cups all-purpose flour
- 2 teaspoons instant yeast
- 1 teaspoon salt
- 1 teaspoon ground ginger
- 2 eggs room temperature
- 1 egg yolk
- 1 egg for egg wash
Instructions
- Start by measuring out all your ingredients. This makes the process smoother and ensures you don’t miss anything.
- In a small bowl, combine the warm pineapple juice and brown sugar. Sprinkle the instant yeast over the mixture and let it sit for about 5-10 minutes until it becomes frothy.
- In a large mixing bowl, whisk together the melted butter, buttermilk, coconut extract, and vanilla extract. Once the yeast mixture is frothy, add it to this bowl.
- In another bowl, whisk together the all-purpose flour, salt, and ground ginger. Gradually add the dry ingredients to the wet mixture, mixing until just combined.
- Beat the eggs in a separate bowl and then fold them into the dough until fully incorporated. The dough will be sticky, which is normal.
- If using a stand mixer, knead the dough on medium speed for about 5-7 minutes until smooth and elastic. If kneading by hand, transfer the dough to a floured surface and knead for about 10 minutes.
- Place the dough in a lightly greased bowl, cover it with a kitchen towel, and let it rise in a warm place for about 1-2 hours, or until it has doubled in size.
- Punch down the dough and turn it out onto a floured surface. Divide the dough into 12 equal pieces and shape each piece into a smooth ball. Place them on a parchment-lined baking sheet, leaving some space between each roll.
- Cover the shaped rolls with the kitchen towel again and let them rise for another 30-45 minutes, or until puffy.
- While the rolls are rising, preheat your oven to 350°F (175°C).
- In a small bowl, whisk together the egg and egg yolk. Brush this mixture over the top of each roll for a beautiful golden-brown finish.
- Bake the rolls in the preheated oven for 20-25 minutes, or until they are golden brown and sound hollow when tapped.
- Remove the rolls from the oven and let them cool on a wire rack for a few minutes before serving. Enjoy them warm with butter or use them in your favorite recipes.
Notes
- For added flavor, try incorporating shredded coconut or crushed pineapple into the dough.
- Leftover rolls can be frozen for up to 3 months if wrapped tightly.
- To refresh day-old rolls, warm them wrapped in foil in the oven for about 10 minutes.