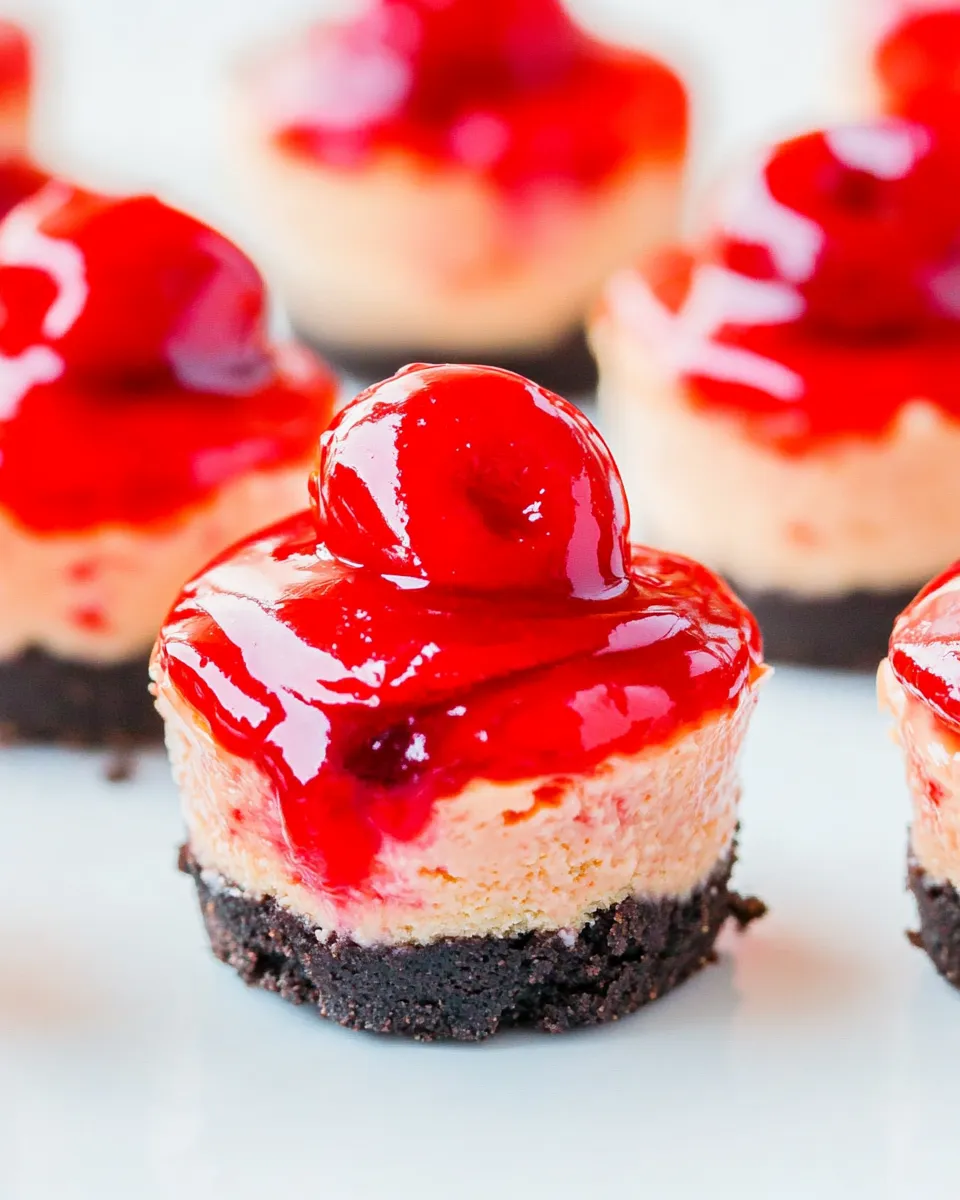
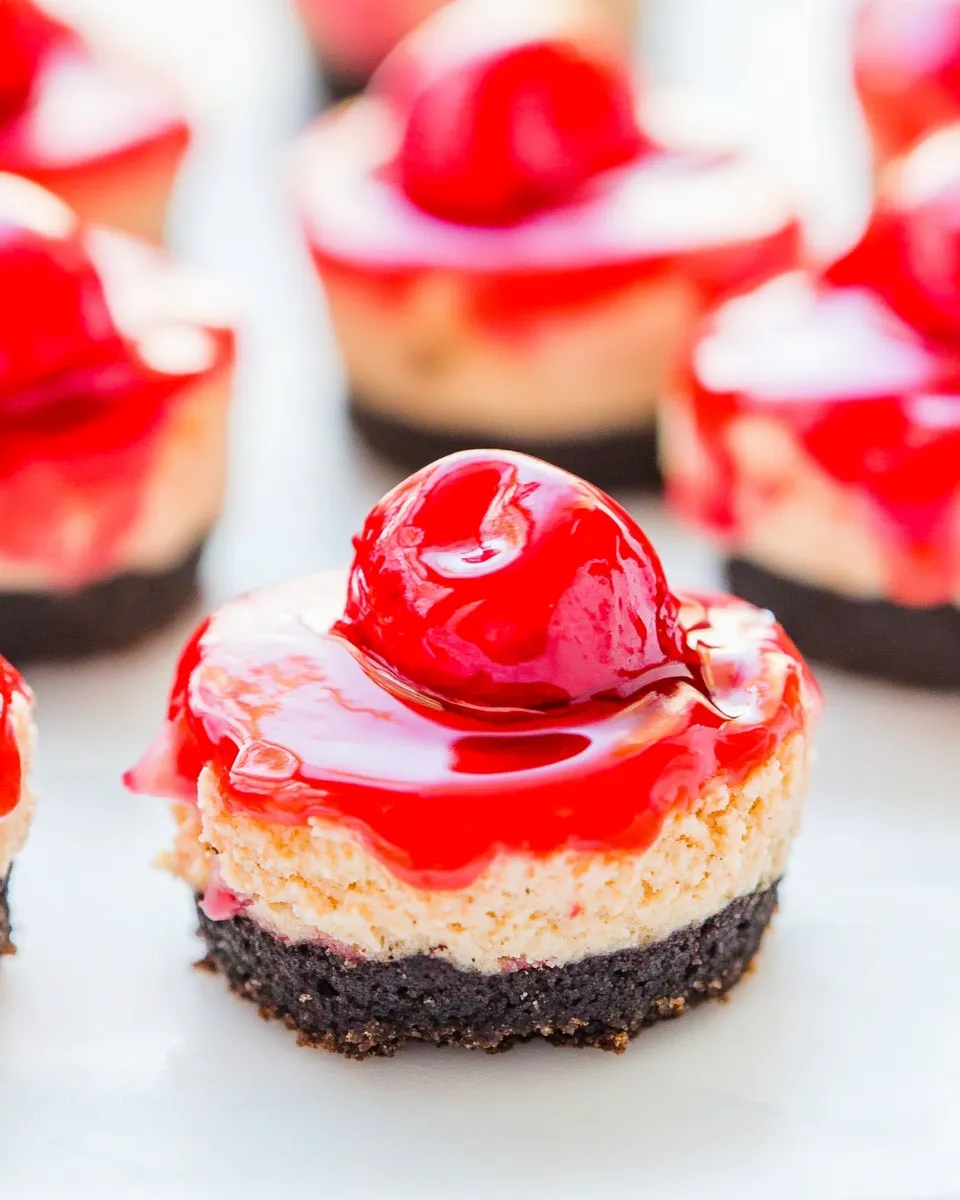
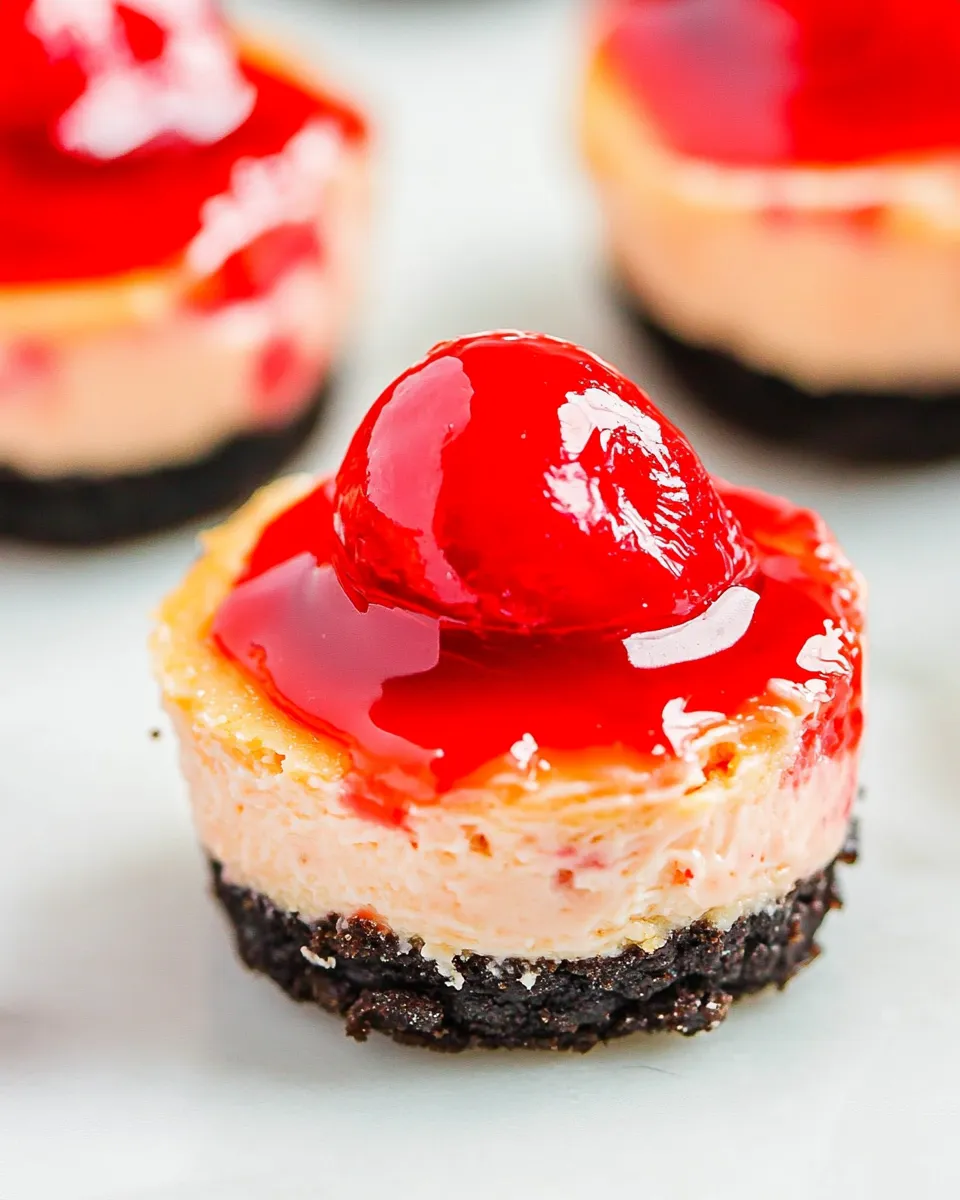
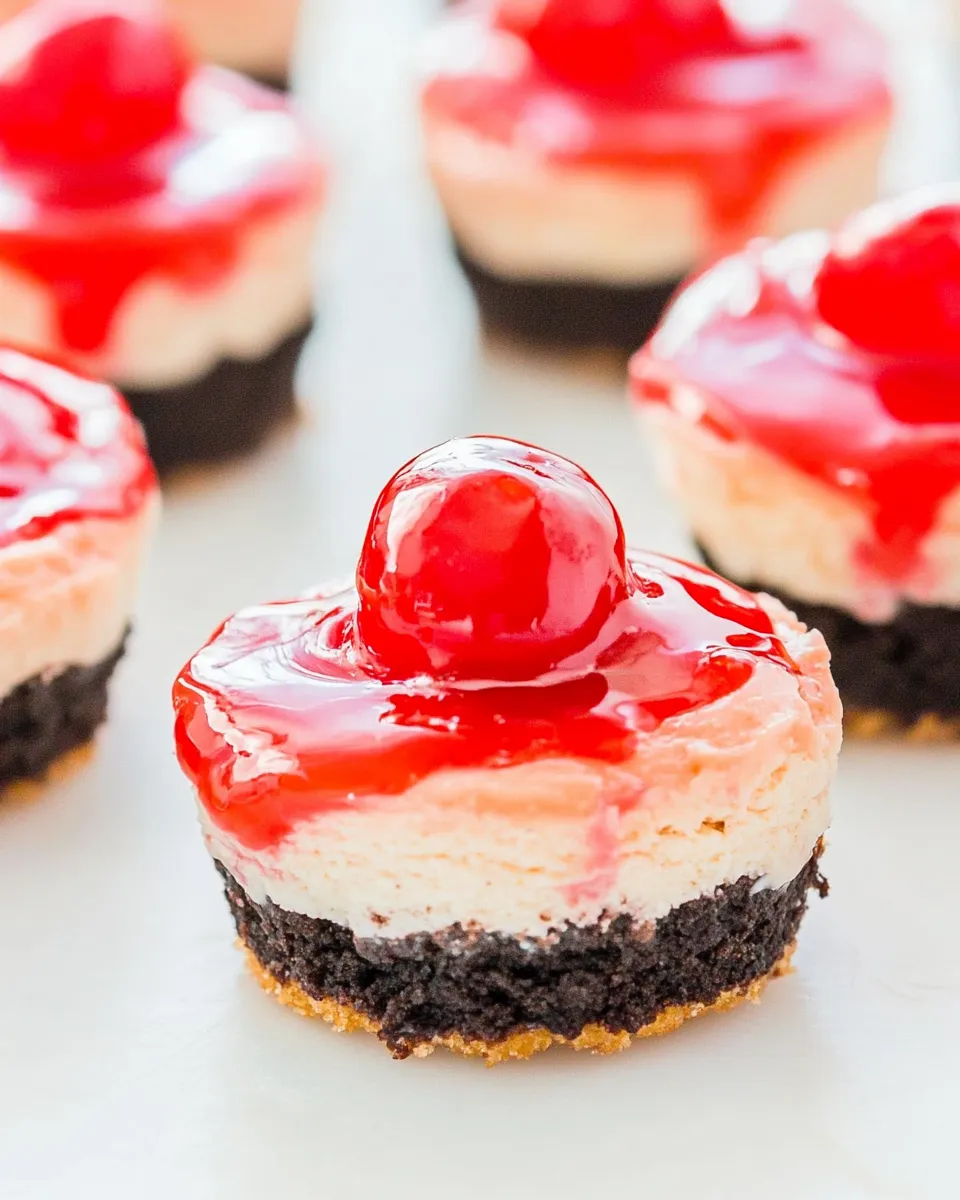
These little cheesecakes are the kind of dessert I make when I want something that feels special but doesn’t demand a full day in the kitchen. Bite-sized, buttery Oreo bases topped with a creamy cherry-studded filling—each one is portable, pretty, and reliably comforting. They hold up well for parties, school events, or a quiet cup of coffee at home.
I like to keep the process straightforward: one bowl, a hand mixer, and a muffin pan. The recipe uses pantry-friendly items and leans on a canned cherry pie filling to keep the texture and flavor consistent. The result is a smooth cheesecake that sets nicely and finishes with a glossy cherry topping everyone recognizes and loves.
This post walks you through exactly what you need, step-by-step directions from the original recipe source, practical substitutions, equipment tips, troubleshooting, and storage guidance so your batch is as delicious on day three as it is out of the oven.
What Goes Into Mini Cherry Oreo Cheesecakes
- 18Oreo cookies — the crunchy base for each mini cheesecake; one fits neatly in each muffin cavity.
- two 8-ounce packages cream cheese,softened (I used 1 regular and 1 lite) — the primary structure and creamy texture of the filling; softened is key for a lump-free batter.
- 2large eggs — bind the filling and help it set while keeping the texture tender.
- ⅓cupgranulated sugar — sweetens and balances the tang of the cream cheese without overpowering the cherry flavor.
- 1 to 2teaspoonsalmond extract,vanilla extract may be substituted — provides a bright, nutty note; vanilla works as an easy swap.
- one 20-ounce can cherry pie filling with more fruit,divided — half is folded into the batter for cherry flavor throughout; the other half is reserved for topping.
Directions: Mini Cherry Oreo Cheesecakes
- Preheat oven to 350°F. Line either an 18-count muffin pan with paper liners OR line a 12-count muffin pan with paper liners and an 8×4-inch loaf pan with parchment paper.
- Place 1 Oreo in the bottom of each muffin cavity. If using the 8×4-inch loaf pan, place about 6 Oreos in the bottom of the loaf pan (this uses all 18 Oreos).
- In a large bowl, add the two 8-ounce packages of softened cream cheese, 2 large eggs, 1/3 cup granulated sugar, and 1 to 2 teaspoons almond extract. Beat with a handheld electric mixer on high for about 5 minutes, until the mixture is very smooth and lump-free.
- Open the 20-ounce can of cherry pie filling. Reserve half the can for topping and add the other half to the cream cheese mixture. Gently stir or fold by hand until the filling is evenly distributed in the batter.
- Spoon the batter into the prepared muffin liners, filling each about 3/4 full. If using the loaf pan, pour any remaining batter into the prepared loaf pan.
- Bake at 350°F: the mini cheesecakes (muffin pan) for about 30 minutes and the loaf pan for about 45 minutes. Bake until the tops are slightly domed and the centers are set but still a little jiggly — they will fall and firm as they cool. Light, even browning on top indicates doneness.
- Remove the pans from the oven and set them aside to cool to room temperature. Refrigerate if you want the cheesecakes to firm further before serving.
- After cooling (or chilling), add a generous dollop of the reserved cherry pie filling to the top of each mini cheesecake or spread it over the loaf. Serve immediately or chill until serving. Store airtight in the refrigerator for up to 1 week; if saving them for several days, add the final cherry topping just before serving.
Reasons to Love Mini Cherry Oreo Cheesecakes
These cheesecakes hit several satisfying notes: familiar, nostalgic flavors; a no-fuss approach to mixing and baking; and a format that’s perfect for sharing. The Oreo base gives stability and crunch, while the cherry folded into the batter gives every bite a pop of fruit without drying the filling. They look elegant plated but are forgiving enough for weeknight baking. Because they’re mini, portion control is easy and they chill quickly in the fridge.
This recipe is also flexible: bake all mini cups for a crowd, or use the loaf option when you want a sliceable dessert. The canned cherry filling shortens prep time, but also delivers consistent texture and color—great when you want a reliable result every time.
Ingredient Swaps & Substitutions
Quick substitutions that still keep the integrity of the recipe:
- Swap almond extract with vanilla extract — use the same amount if you prefer a more classic flavor.
- For a different cookie base, use chocolate sandwich cookies other than Oreos; keep the count to 18 if using the same pan setup.
- Use two full-fat cream cheese packages or one full-fat and one light as written; texture will be essentially the same but slightly less rich with a lite option.
- If cherry pie filling isn’t available, use another canned fruit pie filling (strawberry or blueberry work well) keeping the same can size and division.
Before You Start: Equipment
Minimal, approachable gear is all you need:
- 18-count muffin pan (or 12-count plus an 8×4-inch loaf pan as the recipe allows).
- Paper liners (for easy release) or parchment for the loaf pan.
- Handheld electric mixer — it helps reach a lump-free cream cheese batter in about 5 minutes.
- Mixing bowls, measuring cups, and spoons.
- Offset spatula or spoon for filling liners evenly.
Problems & Prevention
Cracked or overbaked tops
Avoid overmixing after adding eggs; beat cream cheese mixture until smooth, then fold gently after adding the cherry filling. Use the bake times suggested: about 30 minutes for minis and 45 minutes for the loaf, and look for centers that are set but slightly jiggly. They’ll settle as they cool.
Soggy bottoms
Make sure the Oreos are placed directly in the muffin liner bottom; don’t crush them into crumbs unless you want to change texture. If you notice sogginess, allow cheesecakes to cool completely to room temperature and then chill; refrigeration helps firm the base and filling.
Lumpy batter
Softened cream cheese is non-negotiable for a smooth batter. Let it sit at room temperature until it yields to gentle pressure. Beat thoroughly with the hand mixer before adding eggs and sugar.
Make It Diet-Friendly
If you need to reduce calories or sugar, consider these mindful adjustments:
- Use two light cream cheese packages as noted in the ingredient list—this reduces fat and calories while keeping the basic texture.
- Swap granulated sugar with a granulated sugar substitute suitable for baking (follow the substitute’s conversion ratio). This will change sweetness slightly but keeps structure.
- Use a low-sugar or no-sugar-added cherry topping if available, or make a quick fresh cherry compote with fewer sweeteners to top the cheesecakes.
- Serve smaller portions—mini size already helps portion control.
Notes on Ingredients
Small details about the provided ingredients make a big difference in the final dessert. The recipe calls for two 8-ounce packages of cream cheese—this is standard and makes the filling rich and stable. One regular and one lite can be used without significant texture loss, but using two light packages will make a noticeably lighter mouthfeel.
The almond extract is optional between 1 to 2 teaspoons; I usually stick with 1 teaspoon for a subtle note that complements cherry. If you or your guests are sensitive to almond flavor, vanilla is an excellent swap and won’t interfere with the cherry profile.
About the cherry pie filling: the recipe specifies a 20-ounce can with “more fruit.” That means choose a filling that’s visibly studded with whole or large cherry pieces rather than a smooth sauce. Reserve half the can exactly as instructed so you’ll have enough batter flavor and enough topping.
Leftovers & Meal Prep
These mini cheesecakes store very well. Place them in an airtight container in the refrigerator for up to 1 week. If you plan to store them for several days, keep the reserved cherry topping separate and add it just before serving to avoid soggy tops. The loaf version should also be wrapped tightly in plastic wrap and stored refrigerated; slice as needed.
For make-ahead serving, bake and chill the cheesecakes the day before. Add the cherry topping right before you set them out. If you need to freeze, freeze without the final cherry topping: place the cooled cheesecakes on a tray, freeze until solid, then transfer to a freezer-safe container for up to 2 months. Thaw overnight in the refrigerator and add topping before serving.
Popular Questions
Q: Can I crush the Oreos and press them as crumbs for a firmer base?
A: Yes—if you prefer a pressed crumb crust, pulse the Oreos in a food processor, press about a tablespoon into each liner, and bake for a couple minutes before adding the filling. This changes the texture but works fine.
Q: Why did my cheesecakes sink after baking?
A: Slight sinking is normal—these are small cheesecakes and the centers will be a little jiggly when removed. If they deflate dramatically, you may have overbeaten the batter (incorporating too much air) or overbaked them so that they rise and collapse.
Q: Can I use fresh cherries instead of canned pie filling?
A: You can, but fresh cherries will need to be sweetened and thickened to mimic pie filling. Simmer pitted cherries with sugar and a bit of cornstarch until thickened, cool, and use half in the batter and half for topping. This requires additional steps and testing for sweetness/thickness.
Ready, Set, Cook
Gather your ingredients and give the cream cheese time to soften. Follow the directions in order, and you’ll have a tray of glossy, creamy mini cheesecakes that are ready for anything from a weekday treat to a party platter. The process is straightforward and forgiving—small things like chilled tops and slight jiggle in the center are part of the cheesecake charm. Once they’re chilled and topped with cherries, they’re best enjoyed within the week or frozen for longer storage. Happy baking—these are the kind of treats that disappear fast, and that’s exactly the point.
Mini Cherry Oreo Cheesecakes
Equipment
- Oven
- 18-count muffin pan
- 12-count muffin pan
- 8x4-inch loaf pan
- Paper liners
- Parchment Paper
- Large Mixing Bowl
- handheld electric mixer
- Spoon
Ingredients
Ingredients
- 18 Oreo cookies
- two 8-ounce packages cream cheese softened (I used 1 regular and 1 lite)
- 2 large eggs
- 1/3 cupgranulated sugar
- 1 to 2 teaspoonsalmond extract vanilla extract may be substituted
- one 20-ounce can cherry pie filling with more fruit divided
Instructions
Instructions
- Preheat oven to 350°F. Line either an 18-count muffin pan with paper liners OR line a 12-count muffin pan with paper liners and an 8x4-inch loaf pan with parchment paper.
- Place 1 Oreo in the bottom of each muffin cavity. If using the 8x4-inch loaf pan, place about 6 Oreos in the bottom of the loaf pan (this uses all 18 Oreos).
- In a large bowl, add the two 8-ounce packages of softened cream cheese, 2 large eggs, 1/3 cup granulated sugar, and 1 to 2 teaspoons almond extract. Beat with a handheld electric mixer on high for about 5 minutes, until the mixture is very smooth and lump-free.
- Open the 20-ounce can of cherry pie filling. Reserve half the can for topping and add the other half to the cream cheese mixture. Gently stir or fold by hand until the filling is evenly distributed in the batter.
- Spoon the batter into the prepared muffin liners, filling each about 3/4 full. If using the loaf pan, pour any remaining batter into the prepared loaf pan.
- Bake at 350°F: the mini cheesecakes (muffin pan) for about 30 minutes and the loaf pan for about 45 minutes. Bake until the tops are slightly domed and the centers are set but still a little jiggly — they will fall and firm as they cool. Light, even browning on top indicates doneness.
- Remove the pans from the oven and set them aside to cool to room temperature. Refrigerate if you want the cheesecakes to firm further before serving.
- After cooling (or chilling), add a generous dollop of the reserved cherry pie filling to the top of each mini cheesecake or spread it over the loaf. Serve immediately or chill until serving. Store airtight in the refrigerator for up to 1 week; if saving them for several days, add the final cherry topping just before serving.