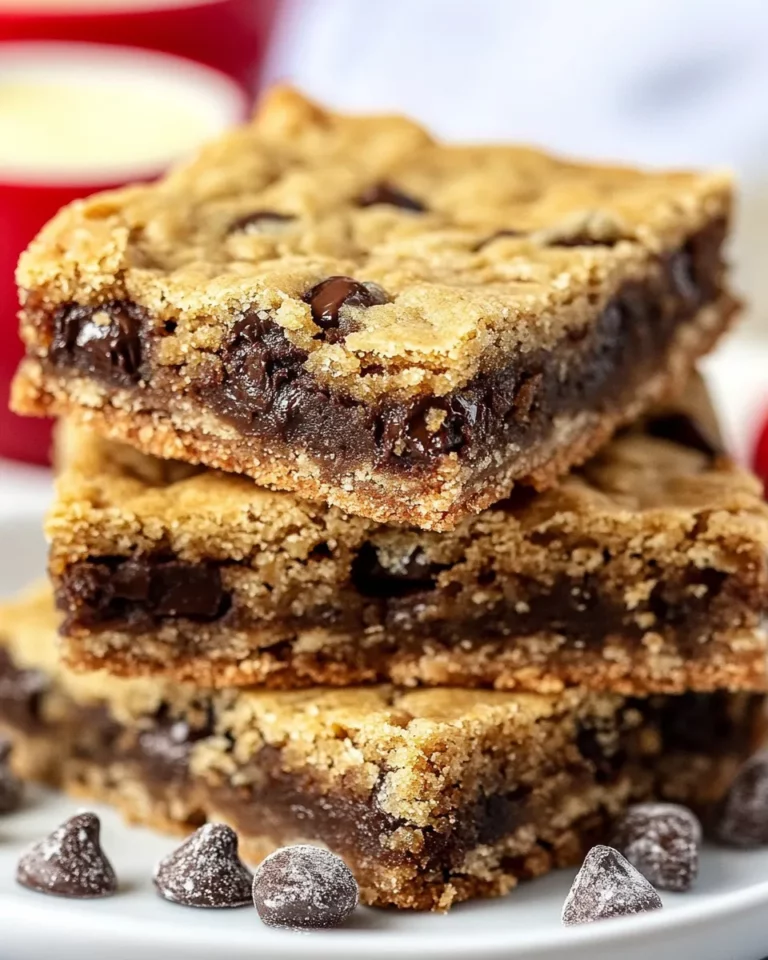
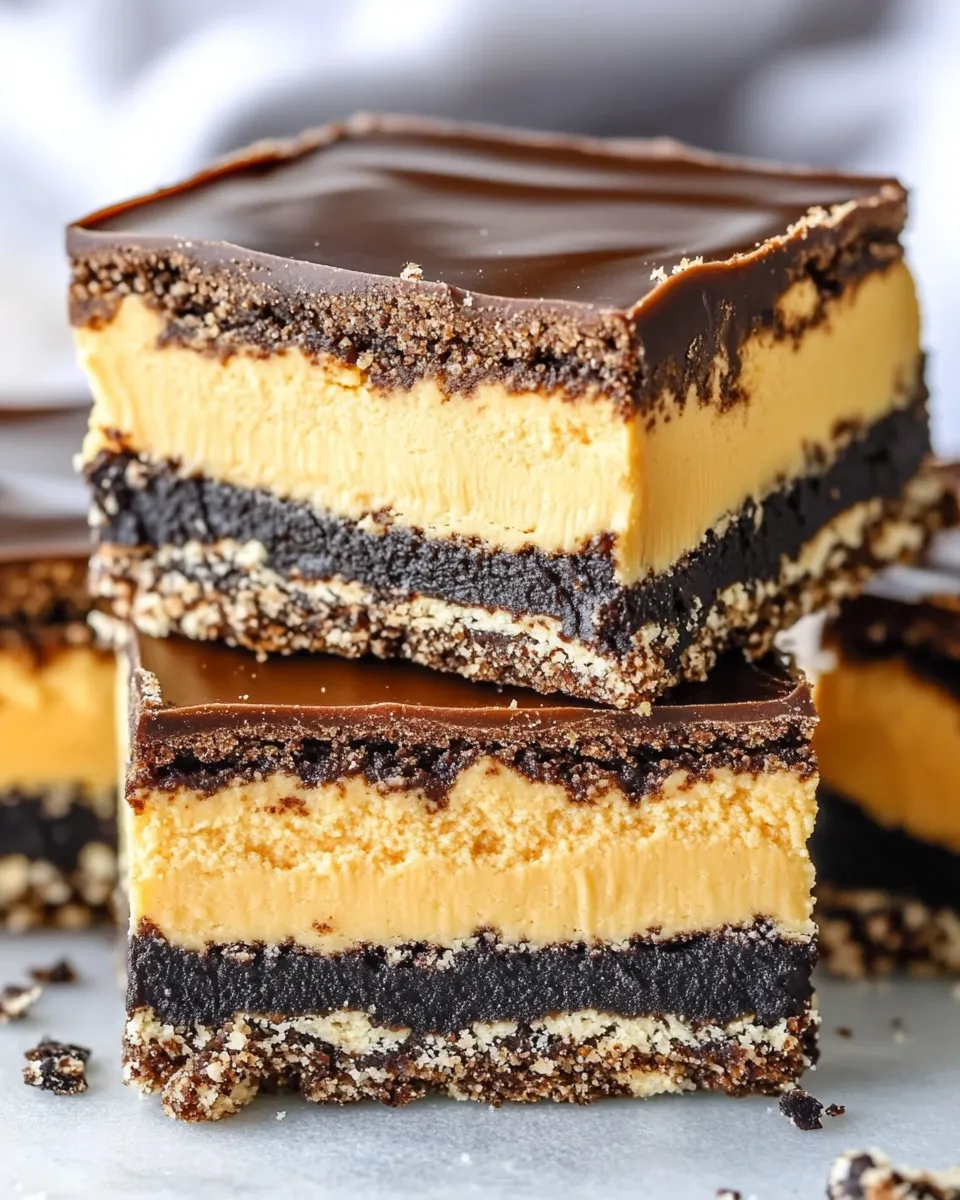
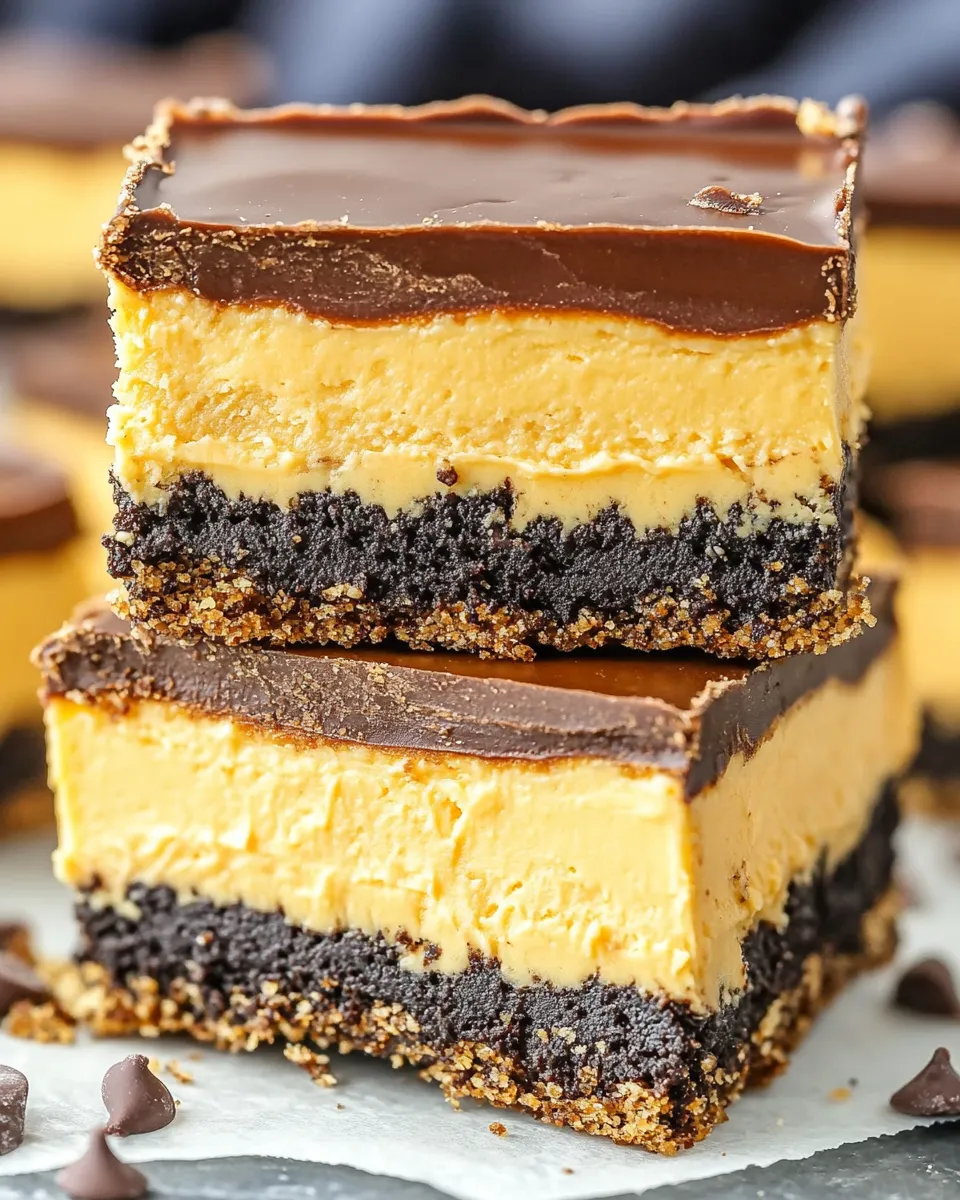
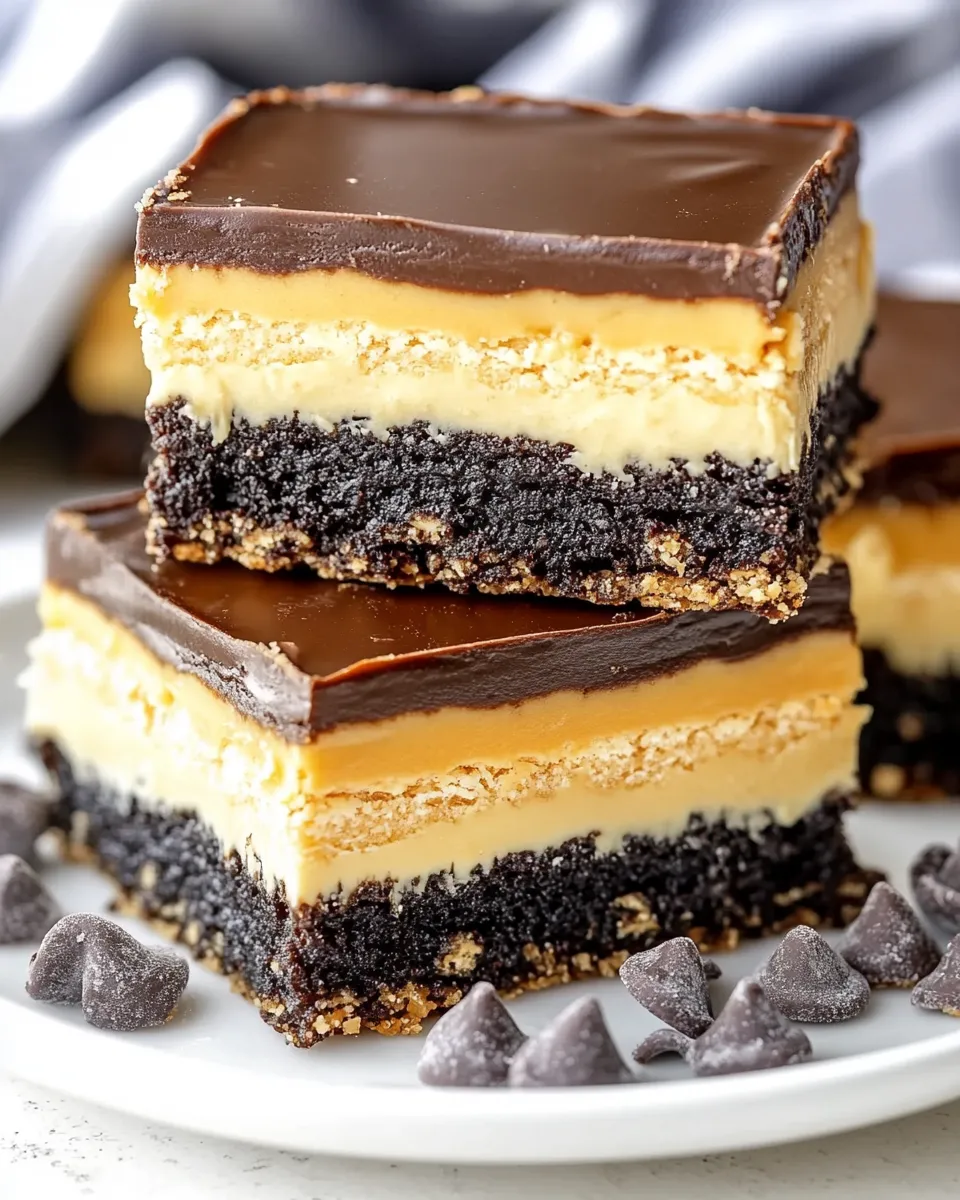
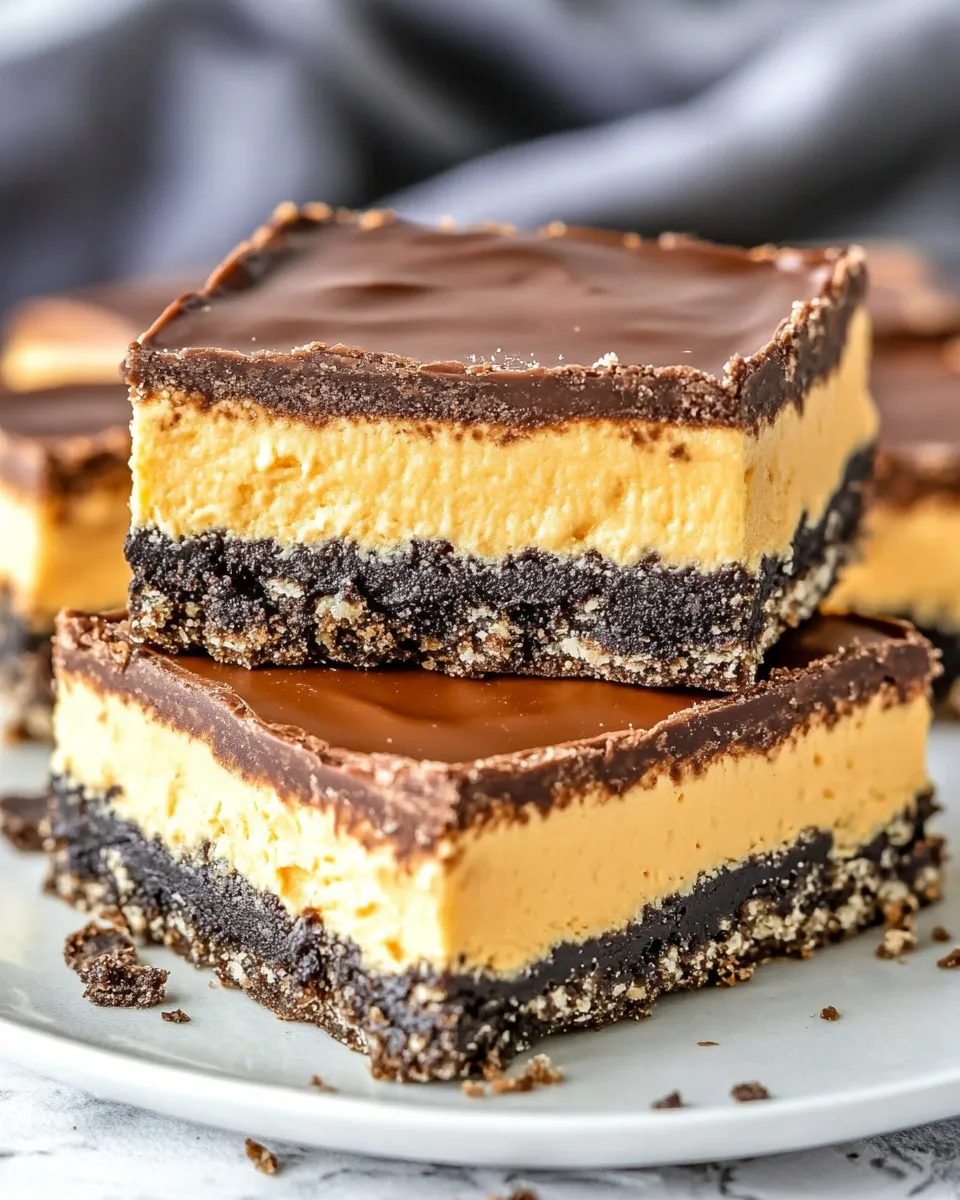
Nanaimo Bars are a true crowd-pleaser, bringing the best of chocolate, cream, and a delightful crunch in every bite.
Originating from Nanaimo, British Columbia, these no-bake treats have layers that combine rich flavors and textures, making them an irresistible dessert choice.
Whether you want something sweet to enjoy with your afternoon coffee or a delicious addition to a potluck, Nanaimo Bars are your go-to.
With a straightforward recipe that you can follow easily, you’ll be serving these delightful bars in no time!
Why This Recipe Is a Must-Try
This Nanaimo Bar recipe is a must-try for several reasons.
First, it’s incredibly easy to make, requiring no baking, which means less mess and a quicker cleanup.
The combination of chocolate, creamy filling, and crunchy base creates a perfect balance of flavors and textures.
Additionally, you have the freedom to customize these bars according to your taste.
Lastly, they are perfect for sharing with friends and family, making them a wonderful addition to any gathering.
Ingredients
- ½ cup (113 g) unsalted butter, softened
- ⅓ cup (34 g) unsweetened cocoa powder
- ⅓ cup (67 g) granulated sugar
- 1 large egg, at room temperature
- 1 sleeve graham crackers, crushed (about 9 to 10 crackers)
- 1 cup sweetened shredded coconut
- ⅓ cup chopped nuts of your choice (like pecans, almonds, or walnuts)
These ingredients combine to create the perfect treat.
Each layer is essential to getting that classic Nanaimo Bar taste, so be sure to follow the recipe closely.
How To Make Nanaimo Bars
Step 1: Prepare Your Pan
Start by lining an 8×8-inch baking dish with parchment paper, leaving some overhang on the sides.
This overhang will help you lift the bars out once they are set.
Lightly grease the parchment paper for easier removal.
Step 2: Make the Base Layer
In a medium saucepan over low heat, melt the
unsalted butter
.
Once melted, remove it from the heat and stir in the
granulated sugar
and
unsweetened cocoa powder
until well combined.
Next, add the
large egg
and mix quickly to incorporate it fully.
Stir in the
crushed graham crackers
,
shredded coconut
, and
chopped nuts
.
Mix until everything is evenly coated and combined.
Spread this mixture into the prepared baking dish and press it down firmly to create an even layer.
Place it in the refrigerator while you prepare the next layer.
Step 3: Make the Creamy Filling
In a bowl, beat together some softened butter until creamy.
Gradually mix in powdered sugar and a splash of vanilla extract you can add if you like.
Blend until smooth.
Remove the base from the fridge and spread the creamy filling evenly over the chilled base layer.
Smooth it out with a spatula, making sure it reaches all the corners.
Step 4: Make the Chocolate Topping
Melt more
unsalted butter
and
cocoa powder
together in a small saucepan over low heat or use the microwave in short intervals.
Stir until melted and smooth.
Pour this mixture over the creamy filling and spread it out evenly.
Step 5: Chill and Slice
Cover the baking dish with plastic wrap or foil and place it in the refrigerator for at least 3 to 4 hours or until set.
Once fully chilled, lift the bars out using the parchment paper overhang.
Cut into squares or rectangles, and serve chilled or at room temperature.
Enjoy your homemade Nanaimo Bars!
Expert Tips
- Make sure to use room-temperature egg for easy blending.
- For best results, chill each layer before adding the next one.
- Feel free to experiment with different nuts for added flavor and crunch.
- Don’t skip the parchment paper; it makes removing the bars so much easier.
Variations and Customizations
- Add a hint of peppermint extract to the creamy filling for a festive twist.
- Swap the shredded coconut for crushed cookies for an extra crunchy texture.
- Drizzle chocolate or white chocolate over the top layer for an added decorative touch.
- Use different types of nuts or omit them entirely if you prefer.
How to Store Leftovers
To store your delicious Nanaimo Bars, place them in an airtight container in the refrigerator.
They will stay fresh for about a week.
If you want to keep them longer, you can freeze the bars for up to a month.
Just make sure to layer them with parchment paper in between to prevent sticking.
When you’re ready to enjoy, let them thaw in the fridge for a few hours before serving.
FAQ
Can I make Nanaimo Bars gluten-free?
Yes! To make these bars gluten-free, simply substitute the graham crackers with gluten-free graham crackers or crushed gluten-free cookies.
What can I use instead of butter?
If you’re looking for a dairy-free option, you can use a non-dairy spread or coconut oil in place of butter.
Just make sure it’s softened or melted as needed.
Can I skip the nuts?
Absolutely! If nuts aren’t your thing or if you have allergies, you can simply leave them out.
The bars will still be delicious without them.
Can I use other types of chocolate for the topping?
Yes! You can use dark chocolate, milk chocolate, or even white chocolate for the topping.
Just melt it and pour it over the creamy filling in the same way.
Conclusion
In conclusion, Nanaimo Bars are a delightful treat that everyone will love.
With their rich layers of chocolate, creamy filling, and the crunch of nuts and coconut, they offer a little something for everyone.
Follow this simple recipe to create a delectable dessert that’s perfect for sharing or enjoying all on your own.
Don’t forget to get creative with different variations and make it your own.
Happy baking!
Nanaimo Bars
Equipment
- 8x8 inch Baking Dish
- Medium Saucepan
- Mixing Bowl
Ingredients
Base Layer
- ½ cup unsalted butter softened
- ⅓ cup unsweetened cocoa powder
- ⅓ cup granulated sugar
- 1 large egg at room temperature
- 1 sleeve graham crackers crushed (about 9 to 10 crackers)
- 1 cup sweetened shredded coconut
- ⅓ cup chopped nuts of your choice (like pecans, almonds, or walnuts)
Creamy Filling
- ½ cup unsalted butter softened
- 2 cups powdered sugar
- 1 teaspoon vanilla extract optional
Chocolate Topping
- ¼ cup unsalted butter
- ⅓ cup unsweetened cocoa powder
Instructions
- Step 1: Prepare Your Pan - Start by lining an 8×8-inch baking dish with parchment paper, leaving some overhang on the sides. Lightly grease the parchment paper for easier removal.
- Step 2: Make the Base Layer - In a medium saucepan over low heat, melt the unsalted butter. Once melted, remove it from the heat and stir in the granulated sugar and unsweetened cocoa powder until well combined. Next, add the large egg and mix quickly to incorporate it fully. Stir in the crushed graham crackers, shredded coconut, and chopped nuts. Mix until everything is evenly coated and combined. Spread this mixture into the prepared baking dish and press it down firmly to create an even layer. Place it in the refrigerator while you prepare the next layer.
- Step 3: Make the Creamy Filling - In a bowl, beat together some softened butter until creamy. Gradually mix in powdered sugar and a splash of vanilla extract. Blend until smooth. Remove the base from the fridge and spread the creamy filling evenly over the chilled base layer. Smooth it out with a spatula, making sure it reaches all the corners.
- Step 4: Make the Chocolate Topping - Melt more unsalted butter and cocoa powder together in a small saucepan over low heat or use the microwave in short intervals. Stir until melted and smooth. Pour this mixture over the creamy filling and spread it out evenly.
- Step 5: Chill and Slice - Cover the baking dish with plastic wrap or foil and place it in the refrigerator for at least 3 to 4 hours or until set. Once fully chilled, lift the bars out using the parchment paper overhang. Cut into squares or rectangles, and serve chilled or at room temperature.