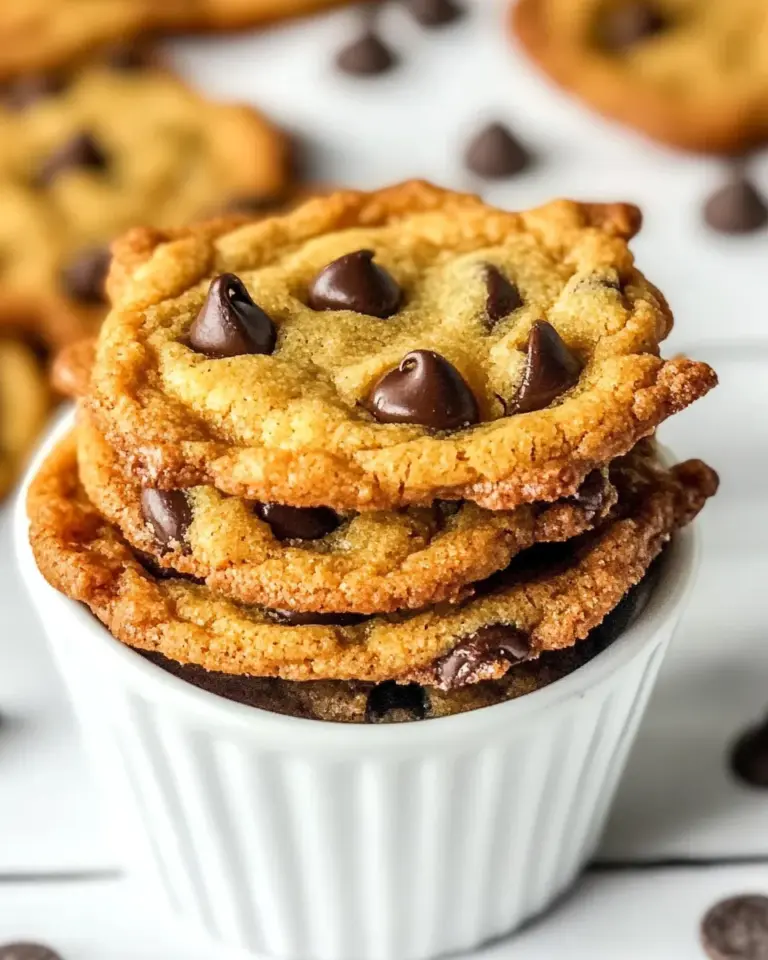
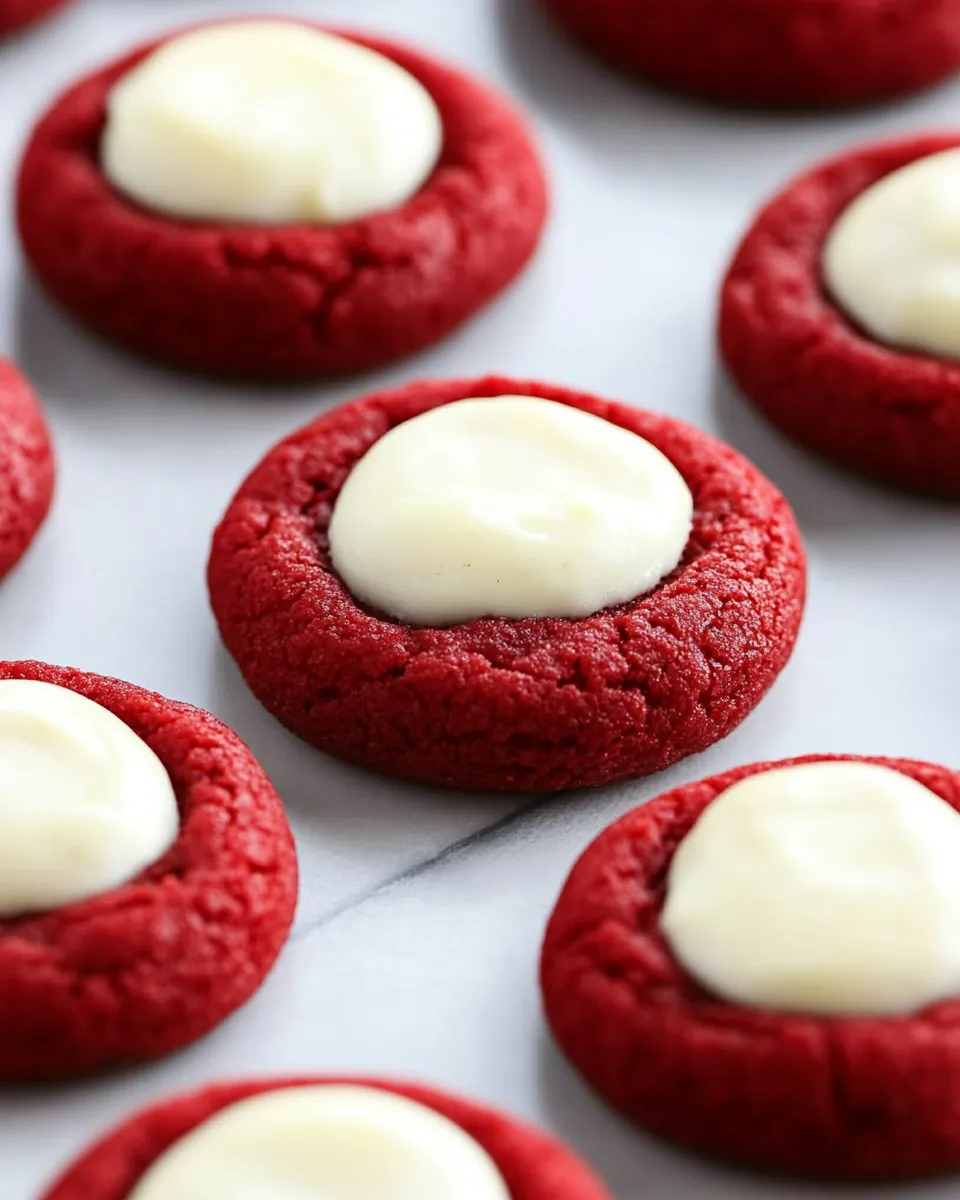
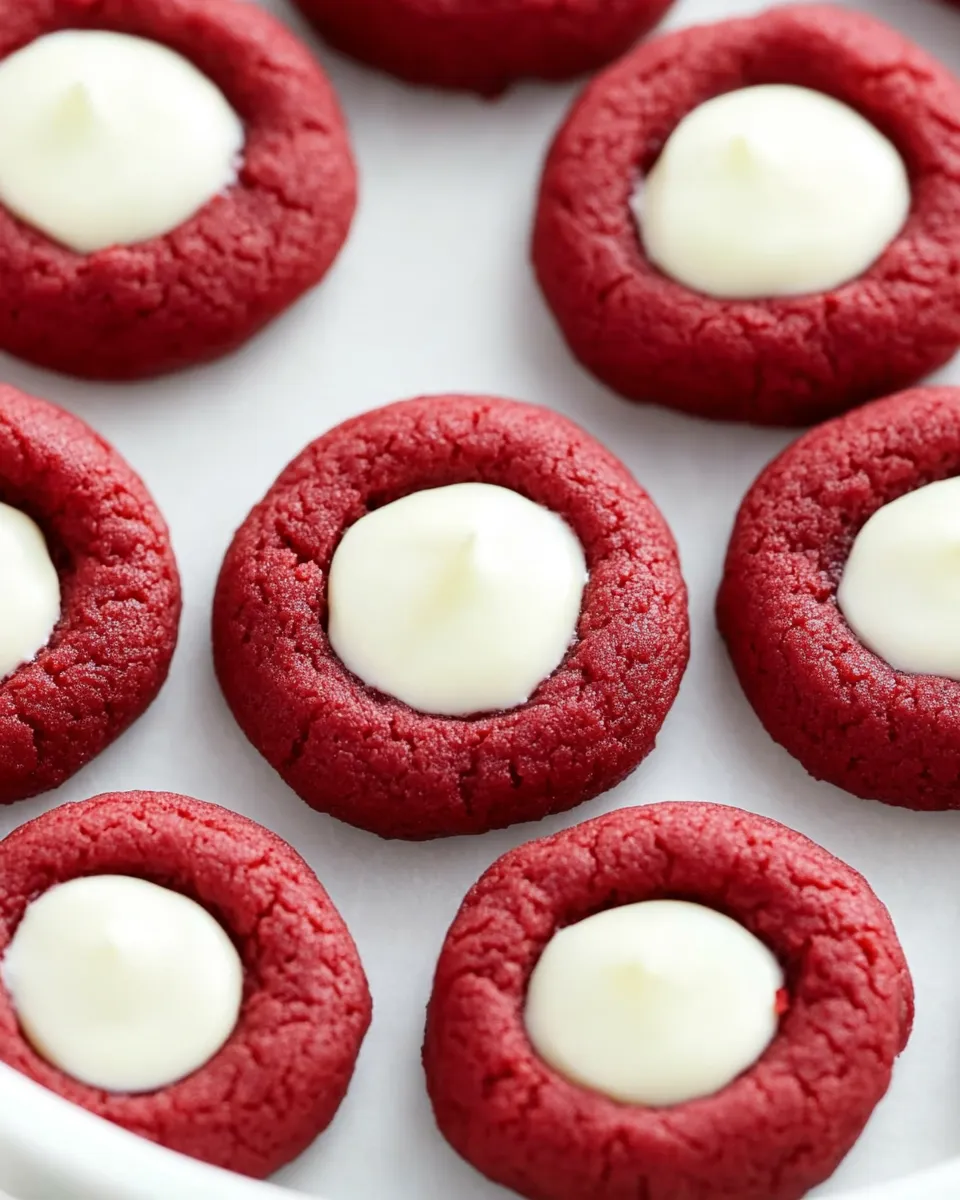
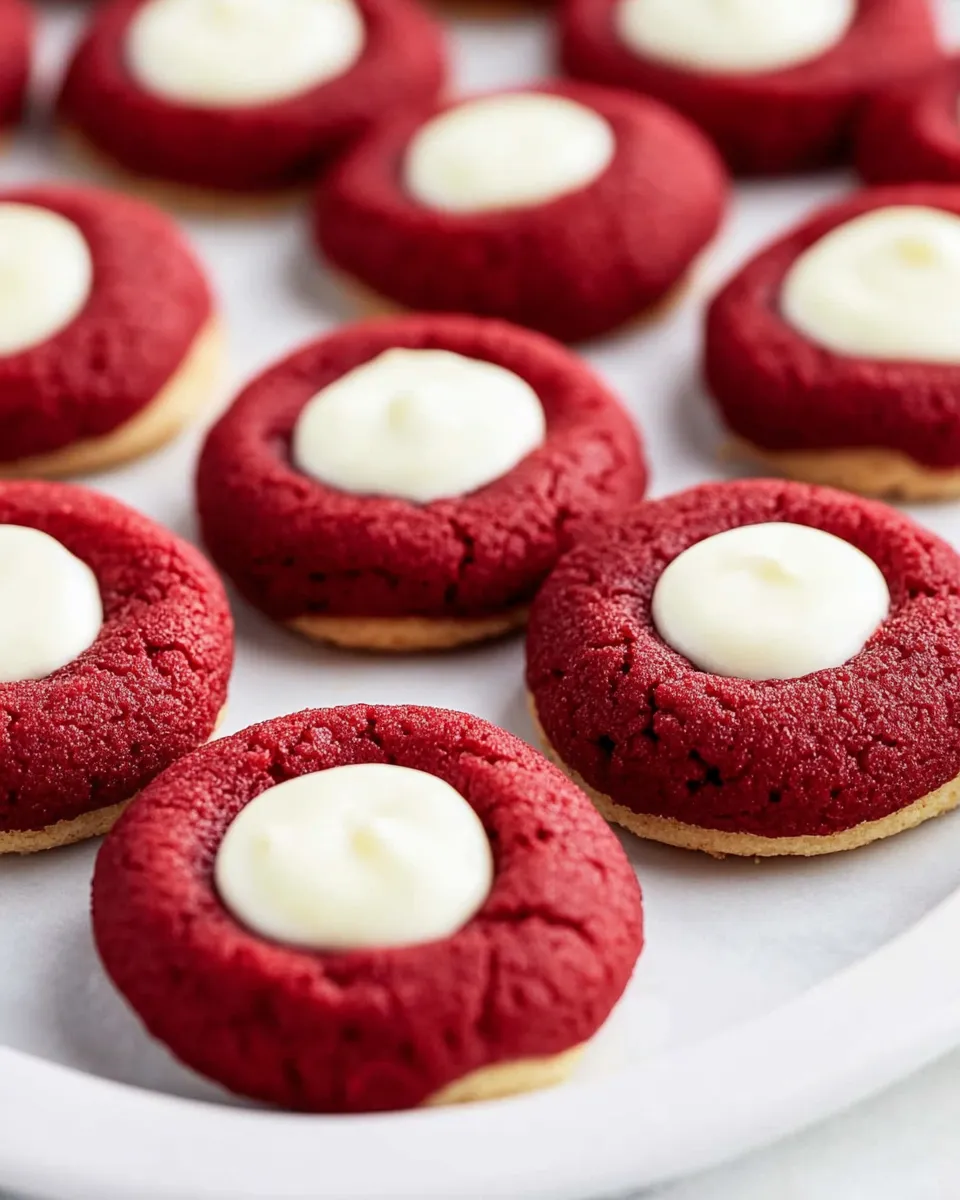
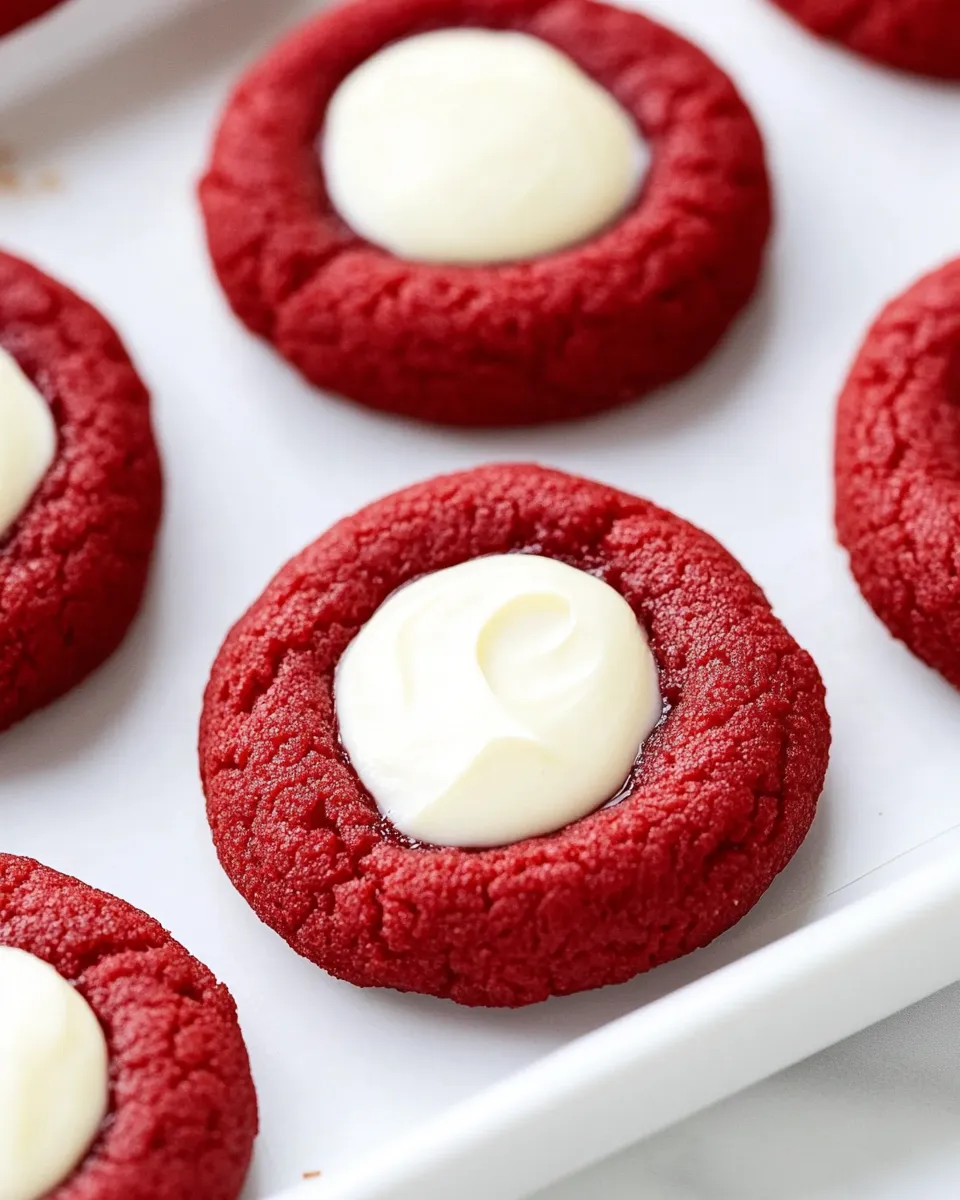
I bake with a purpose: cookies that are easy to share, look festive, and actually taste comforting. These red velvet thumbprint cookies hit that sweet spot. They’re tender, slightly cocoa-kissed, and filled with a smooth cream cheese center that makes every bite feel like a little celebration.
I’ll keep this practical. I’ll walk you through the exact ingredients, the step-by-step method, and the small tricks that keep the cookies uniform and the filling silky. No fluff—just what you need to bake confidently and get consistent results.
What Goes Into Red Velvet Thumbprint Cookies with Cream Cheese Filling
Ingredients
- 1 cup softened butter — the primary fat; creams with sugar to create structure and tender crumb.
- 1 cup sugar — sweetens and helps with browning and texture during creaming.
- 1 egg — binds the dough and adds moisture and a bit of lift.
- 1 tablespoon red food coloring — gives the cookies their signature red velvet color.
- 1 teaspoon vanilla — flavor backbone that rounds out the chocolate notes.
- 2 ½ cups all-purpose flour — the structure; measure accurately for the right dough consistency.
- 3 tablespoons unsweetened cocoa powder — provides a subtle chocolate flavor typical of red velvet.
- ¼ teaspoon salt — balances sweetness and enhances flavor.
- 2 tablespoons softened butter — used in the filling for a richer, pipeable texture.
- 2 ounces softened cream cheese — the filling’s base; contributes tang, richness, and softness.
- ½ teaspoon vanilla — added to the filling for a gentle vanilla lift.
- 2 cups powdered sugar — sweetens and thickens the filling so it can be piped or spooned.
Mastering Red Velvet Thumbprint Cookies with Cream Cheese Filling: How-To
- Preheat oven to 350°F (175°C) and lightly spray a baking sheet with non-stick cooking spray.
- In a large bowl, beat 1 cup softened butter and 1 cup sugar together for about 2 minutes, until creamy.
- Stir in 1 egg, 1 tablespoon red food coloring, and 1 teaspoon vanilla until completely blended.
- In a separate bowl, whisk together 2 ½ cups all-purpose flour, 3 tablespoons unsweetened cocoa powder, and ¼ teaspoon salt. Add the dry mixture to the wet mixture and stir until a uniform dough forms.
- Roll the dough into 1-inch balls and place them about 2 inches apart on the prepared baking sheet.
- Press a thumb into the center of each dough ball to create an indentation, being careful not to press all the way through to the baking sheet.
- Bake the cookies for 10–12 minutes. Remove from oven and let the cookies cool on the baking sheet for about 5 minutes, then transfer them to a wire cooling rack to cool completely.
- To make the filling, in a medium bowl whisk 2 tablespoons softened butter and 2 ounces softened cream cheese together for 1–2 minutes until light and fluffy. Add ½ teaspoon vanilla and stir to combine.
- Gradually add 2 cups powdered sugar to the cream cheese mixture, mixing until fully incorporated and the filling is smooth enough to pipe or spoon.
- Pipe or spoon the cream cheese filling into the thumbprint indentation of each cooled cookie.
- If desired, add sprinkles on top of the filling before it sets.
Why It Works Every Time
The technique is simple and the chemistry is forgiving. Creaming the butter and sugar incorporates air and creates a soft lift. The single egg brings moisture and cohesion without making the dough cakey. Cocoa powder is used sparingly; it gives the red velvet character without turning the cookie into a dense chocolate bite. The flour-to-fat ratio leaves the dough firm enough to shape into uniform balls yet soft enough to make a clean thumb impression.
The thumbprint method does two things: it gives the cookie a defined center for the filling and prevents excessive spread while baking. Making the indentation just before baking preserves shape; if you do it after, the cookie can crack or crumble. Cooling on the baking sheet for a few minutes lets the cookie set so it moves safely to the rack without breaking. Finally, piping the filling into fully cooled cookies ensures the cream cheese mixture won’t melt or become runny—texture is everything.
No-Store Runs Needed
This recipe leans on pantry staples: butter, sugar, flour, cocoa, and an egg. The only specialty items are red food coloring and cream cheese. If you bake regularly, you likely already have most items. If you’re missing the food coloring, the cookies will still be chocolatey and delicious—just less festive. The core components are very standard, so you shouldn’t need an emergency run once you’ve checked your basics.
If you do need to substitute, keep changes minimal and deliberate—this recipe depends on proportions. For example, skipping the food coloring doesn’t change baking behavior; substituting the cream cheese will alter the filling texture and possibly shelf life, so plan accordingly.
Appliances & Accessories
What you’ll need
- An oven capable of holding 350°F (175°C) steady.
- Baking sheets and a way to line or spray them—non-stick cooking spray is called for in the recipe.
- Mixing bowls: one large for creaming and one for the dry ingredients.
- A hand mixer or stand mixer speeds creaming but a sturdy wooden spoon or spatula will work with a bit more elbow grease.
- Measuring cups and spoons for precise quantities.
- A wire cooling rack to finish the cookies properly.
- A piping bag or a small spoon to fill the thumbprints cleanly.
What Not to Do
- Do not overmix once the dry ingredients hit the butter mixture. Overworking develops gluten and leads to tough cookies.
- Don’t press the indentations all the way through the dough—aim for a shallow well that still has a rim to hold the filling.
- Avoid piping or filling while the cookies are warm. The filling will melt and run out.
- Resist the urge to overbake. These are small cookies; 10–12 minutes is enough. They’ll firm up as they cool.
- Don’t skip the brief cool-on-sheet step. Moving piping-cold cookies too soon increases the risk of breakage.
Fit It to Your Goals
Make these cookies for gifting, holiday platters, or weekend baking projects. The recipe scales—double for a party or halve for a smaller batch. For tidy presentation when gifting, pipe a centered dollop of filling and top with a single sprinkle or leave plain for a minimal look.
If you want them more portable, set them in an airtight tin with parchment between layers. For a dessert table, arrange them on a tray with small labels so guests know they hold a cream cheese center. Want to make ahead? Bake and cool the cookies, then store filled cookies in the refrigerator for short-term serving or freeze unfilled cookies for longer storage.
Insider Tips
- Soften butter and cream cheese to room temperature for smooth creaming and easier incorporation—cold fat lumps will result in uneven dough or gritty filling.
- Measure flour by spooning it into the cup and leveling—scooping directly from the bag packs flour and yields dry, dense cookies.
- If the dough feels too soft to roll, chill it briefly (10–15 minutes). Slightly firmer dough rolls and holds its shape better during baking.
- A small, clean measuring spoon makes perfectly even indentations; press gently for uniform wells.
- To keep the filling silky, sift the powdered sugar if it’s clumpy before adding it to the cream cheese mixture.
Shelf Life & Storage
Filled cookies should be refrigerated because of the cream cheese. Store them in an airtight container for up to 3–4 days in the refrigerator. Let them come closer to room temperature for 15–20 minutes before serving so the filling softens slightly.
Unfilled baked cookies (just the thumbprints) can be stored at room temperature in an airtight container for 2–3 days or frozen for up to 1 month. If you freeze, wrap them well and thaw fully before filling to avoid condensation spoiling the filling.
For longer-term storage, shape and freeze the raw dough balls on a parchment-lined tray until solid, then transfer to a freezer bag. Bake from frozen adding a minute or two to the bake time.
Top Questions & Answers
- My dough is too sticky to roll—what now? If the dough sticks to your hands, chill it for 10–15 minutes to firm up. Lightly flour your hands and work surface if needed, but avoid adding a lot more flour.
- My indentations spread out while baking—why? If you press too hard or make the indentation too wide, the edges can collapse. Make a modest well and place the sheet in the oven promptly to preserve shape.
- Can I pipe the filling instead of spooning it? Yes. The filling is designed to be smooth enough to pipe, which yields neater results.
- How do I keep the filling from being gritty? Make sure the powdered sugar is fully incorporated and sift it first if it’s clumpy. Beat the butter and cream cheese until light before adding sugar.
- Are these freezer-friendly? Unfilled cookies freeze well. Filled cookies keep best refrigerated for short-term use.
Next Steps
Set aside a couple of hours, gather the ingredients, and follow the method step by step. If you’re making these for a gathering, bake a test batch first to dial in your oven timing and indentation technique. Share a photo or notes on what you changed—small tweaks can make them your own signature cookie. Happy baking, and enjoy the little pockets of cream cheese joy in every bite.
Red Velvet Thumbprint Cookies with Cream Cheese Filling
Equipment
- Baking Sheet
- Mixing Bowl
- Electric mixer or hand mixer
- Whisk
- Wire Rack
- Piping bag or spoon
Ingredients
Ingredients
- 1 cupsoftened butter
- 1 cupsugar
- 1 egg
- 1 tablespoonred food coloring
- 1 teaspoonvanilla
- 2 1/2 cupsall-purpose flour
- 3 tablespoonsunsweetened cocoa powder
- 1/4 teaspoonsalt
- 2 tablespoonssoftened butter
- 2 ouncessoftened cream cheese
- 1/2 teaspoonvanilla
- 2 cupspowdered sugar
Instructions
Instructions
- Preheat oven to 350°F (175°C) and lightly spray a baking sheet with non-stick cooking spray.
- In a large bowl, beat 1 cup softened butter and 1 cup sugar together for about 2 minutes, until creamy.
- Stir in 1 egg, 1 tablespoon red food coloring, and 1 teaspoon vanilla until completely blended.
- In a separate bowl, whisk together 2 ½ cups all-purpose flour, 3 tablespoons unsweetened cocoa powder, and ¼ teaspoon salt. Add the dry mixture to the wet mixture and stir until a uniform dough forms.
- Roll the dough into 1-inch balls and place them about 2 inches apart on the prepared baking sheet.
- Press a thumb into the center of each dough ball to create an indentation, being careful not to press all the way through to the baking sheet.
- Bake the cookies for 10–12 minutes. Remove from oven and let the cookies cool on the baking sheet for about 5 minutes, then transfer them to a wire cooling rack to cool completely.
- To make the filling, in a medium bowl whisk 2 tablespoons softened butter and 2 ounces softened cream cheese together for 1–2 minutes until light and fluffy. Add ½ teaspoon vanilla and stir to combine.
- Gradually add 2 cups powdered sugar to the cream cheese mixture, mixing until fully incorporated and the filling is smooth enough to pipe or spoon.
- Pipe or spoon the cream cheese filling into the thumbprint indentation of each cooled cookie.
- If desired, add sprinkles on top of the filling before it sets.