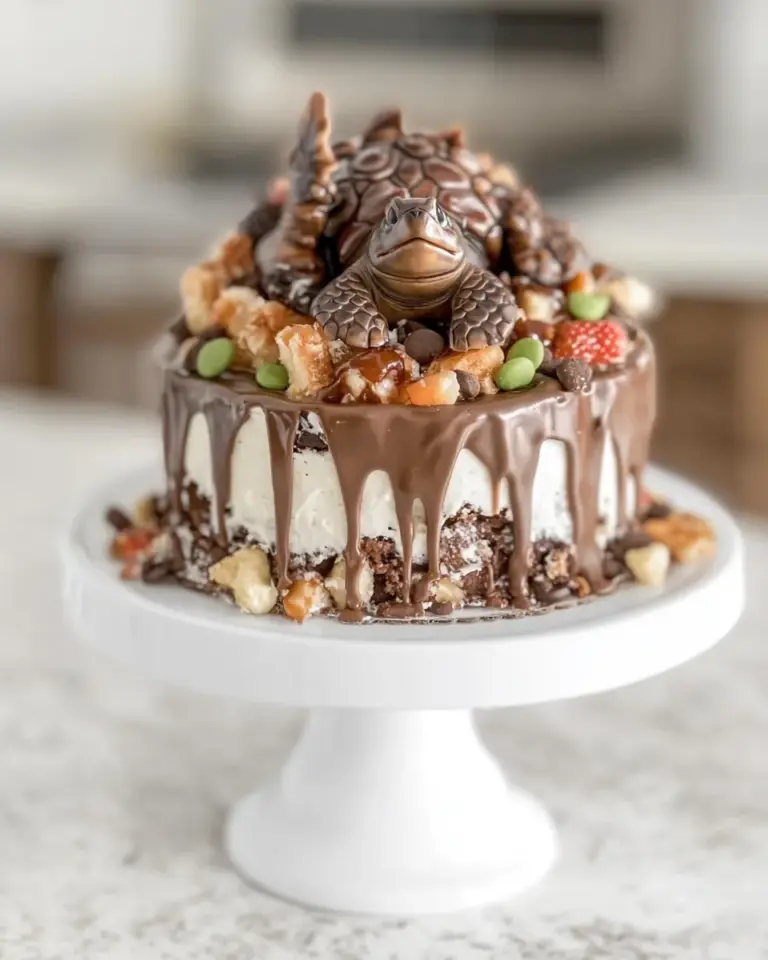
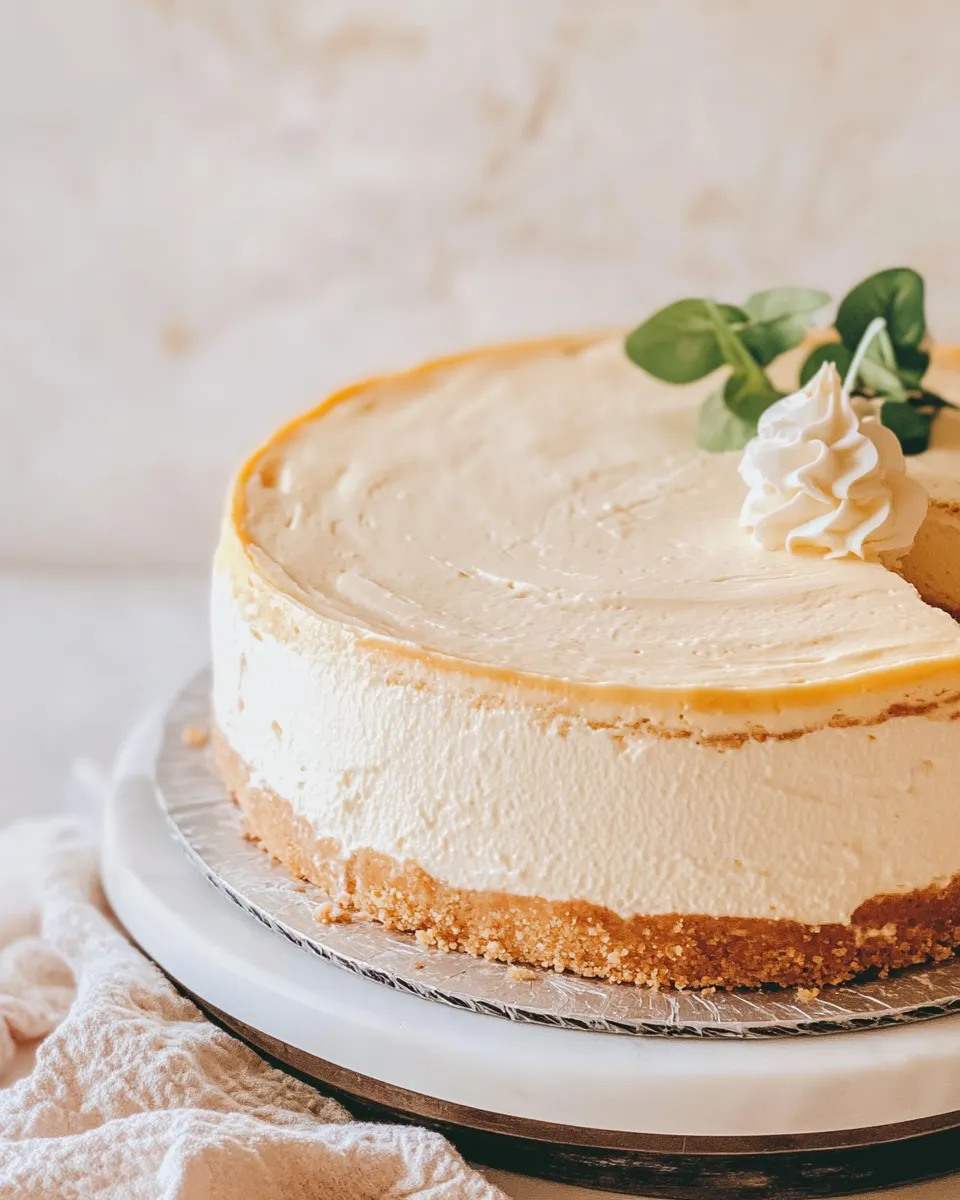
I make this cheesecake when I want something that reads like celebration but lands like comfort. It’s rich and poised—the kind of dessert that feels deliberate without being fussy. The vanilla beans give it floral depth while the white chocolate layer adds a soft, creamy sweetness that makes every forkful sing.
This post walks you through the whole process: the exact ingredients, step-by-step baking instructions, troubleshooting tips and sensible shortcuts. I’ve written the method so a home baker with a busy evening can follow it and get consistent results.
Read through the full instructions once before you begin, gather your pans and ingredients, and give yourself the time to chill the cake properly. The waiting is part of the payoff.
What You’ll Need
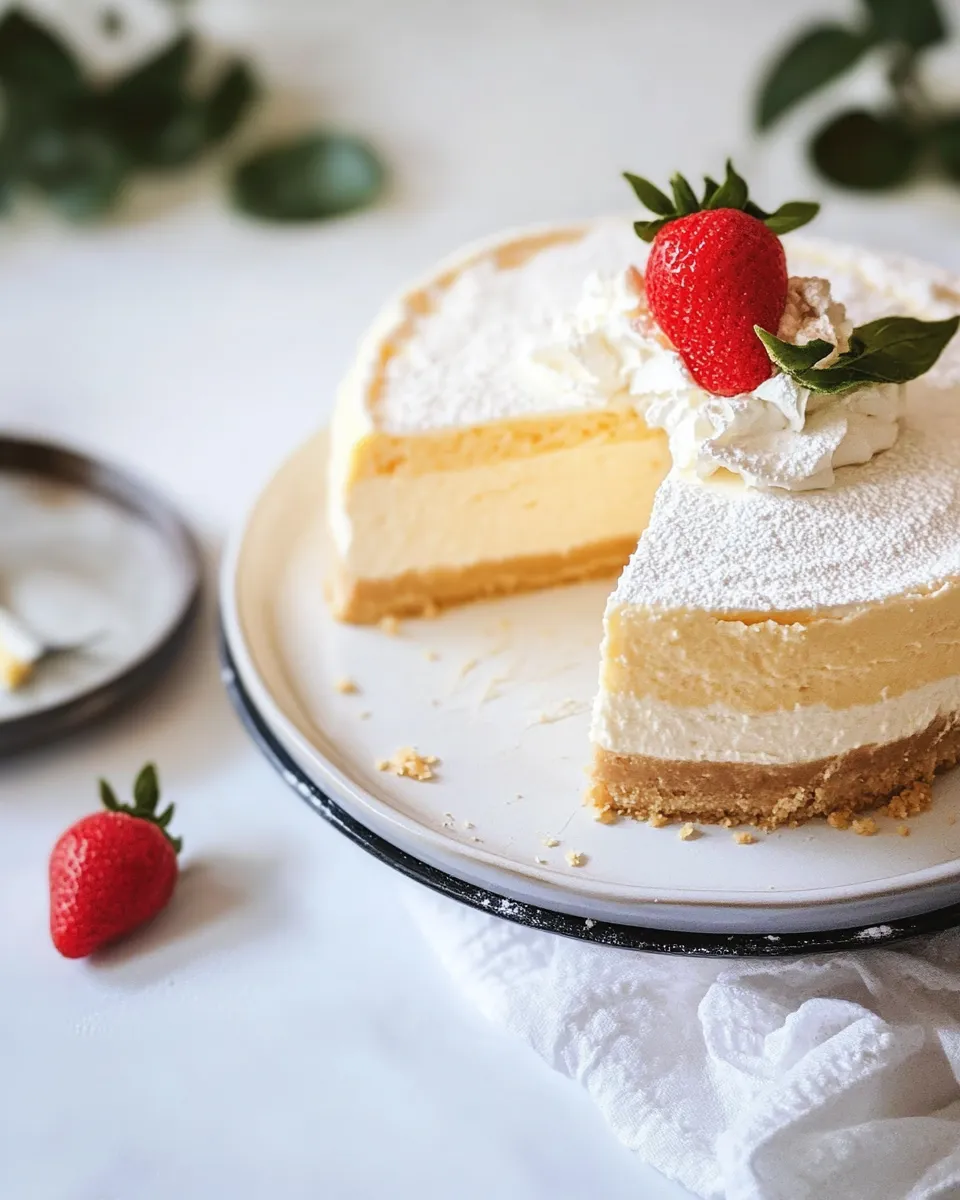
Time and a bit of patience matter more than advanced technique. You’ll bake the crust, make a straightforward cream cheese filling flavored with real vanilla seeds, and finish the cake with a white chocolate mousse and a final whipped cream layer. Chill times are long, but hands-on time is reasonable.
Ingredients
- 1 1/4 cups graham cracker crumbs — forms the crunchy, buttery base; press firmly for structure.
- 1/4 cup granulated sugar — adds sweetness to the crust and balances richness.
- 1/3 cup melted butter — binds the crumbs; use unsalted so salt level stays predictable.
- 24 oz cream cheese at room temperature (three 8 oz packages) — the foundation of the cheesecake; room temperature ensures a lump-free batter.
- 3/4 cup sour cream at room temperature — keeps the filling tender and adds a slight tang.
- 1/3 cup heavy whipping cream at room temperature — lightens the filling texture slightly when combined.
- 1 cup granulated sugar — sweetens the filling; add as directed to avoid over-sweetness.
- 2 vanilla beans seeds only — split and scrape the beans for intense, speckled vanilla flavor.
- 3 large eggs at room temperature — incorporate gently to preserve a smooth texture.
- 7 oz white chocolate chips or white chocolate bar, roughly chopped — melted and folded into the mousse layer for creamy sweetness.
- 1 1/2 cups heavy whipping cream cold — whipped into the mousse to add lightness; keep cold for stability.
- 1 tablespoon powdered sugar — sweetens the mousse whipping without grittiness.
- 1 vanilla bean seeds only — seeds to flavor the mousse; keep the pod for another use if desired.
- 8 oz cream cheese at room temperature — for the white chocolate mousse base; smooths the texture and adds tang.
- 1 cup heavy whipping cream cold — for the final whipped cream topping; cold bowls and beaters give the best volume.
- 1/4 cup powdered sugar — sweetens the final whipped cream; dissolves easily for a silky finish.
- 1 vanilla bean seeds only — seeds to flavor the final whipped cream for visual specks and real vanilla taste.
Vanilla Bean Cheesecake: From Prep to Plate
- Place an oven rack in the center of the oven and preheat to 350°F (175°C).
- Make the crust: in a medium bowl combine 1 1/4 cups graham cracker crumbs, 1/4 cup granulated sugar, and 1/3 cup melted butter. Stir until the mixture resembles damp sand.
- Press the crumb mixture into the bottom and about halfway up the sides of a 9-inch springform pan using the bottom of a measuring cup or a flat-bottomed glass. Bake the crust 7 minutes at 350°F. Remove from the oven and set aside. Reduce oven temperature to 325°F.
- Prepare the cheesecake filling: in a large bowl or the bowl of a stand mixer, beat 24 oz cream cheese (room temperature) on medium speed about 30 seconds until smooth and lump-free. Scrape down the sides and bottom of the bowl.
- Add 1 cup granulated sugar, 3/4 cup sour cream (room temperature), 1/3 cup heavy whipping cream (room temperature), and the seeds from 2 vanilla beans (split beans and scrape seeds only). Mix on medium-low just until incorporated. Scrape the sides and bottom of the bowl very well.
- Crack 3 large eggs (room temperature) into a liquid measuring cup and lightly beat with a fork until combined. With the mixer on low speed, slowly pour the eggs into the cream cheese mixture in a thin stream and stop mixing as soon as the eggs are incorporated. Scrape the bowl again and fold with a rubber spatula to ensure the batter is smooth; gently work out any small lumps.
- Tap the bowl on the counter for 30–45 seconds to help release air bubbles. Pour the batter into the prepared crust and smooth the top gently.
- Bake the cheesecake 30 minutes at 325°F. After 30 minutes, reduce the oven temperature to 250°F and continue baking for 45 minutes.
- After baking, turn the oven off and leave the cheesecake inside with the oven door closed for 30 minutes. Then crack the oven door open and let the cheesecake cool inside for 1 hour. Remove the cheesecake from the oven and bring to room temperature on the counter for 3–4 hours.
- Cover the cheesecake loosely with plastic wrap and refrigerate until completely chilled, at least 6 hours or overnight.
- Prepare the white chocolate mousse layer: melt 7 oz white chocolate chips (or chopped white chocolate bar) in a double boiler over low heat, stirring constantly until smooth, or microwave in 10–15 second bursts, stirring between intervals until melted. Set the melted chocolate aside to cool slightly.
- In a chilled bowl, whip 1 1/2 cups cold heavy whipping cream with 1 tablespoon powdered sugar and the seeds from 1 vanilla bean until stiff peaks form.
- In a separate bowl, beat 8 oz cream cheese (room temperature) until smooth. Add the cooled melted white chocolate and mix until combined.
- Fold the whipped cream (from step 12) into the white chocolate–cream cheese mixture a few spoonfuls at a time until no streaks remain and the mixture is homogeneous.
- Remove the chilled cheesecake from the refrigerator and spread the white chocolate mousse evenly over the top. Smooth the surface, cover loosely with foil or plastic wrap, and chill at least 1 1/2 hours.
- Make the final whipped cream topping: in a chilled bowl, whip 1 cup cold heavy whipping cream with 1/4 cup powdered sugar and the seeds from 1 vanilla bean until stiff peaks form.
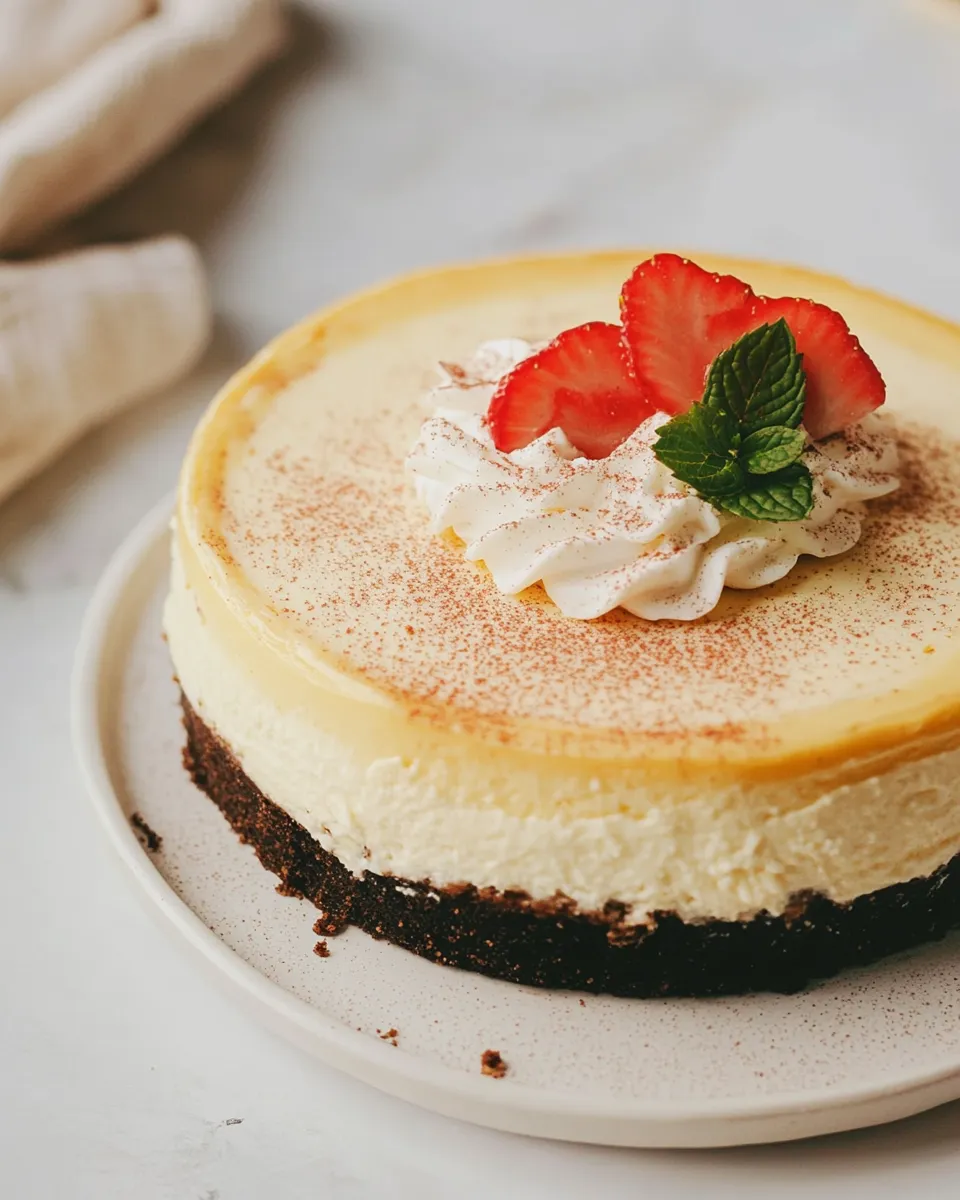
- Spread the whipped cream evenly over the mousse layer. Serve immediately or refrigerate until ready to serve.
- To serve, release and remove the springform collar. For clean slices, dip a sharp knife in hot water, wipe off excess water, and slice; repeat dipping and wiping between slices. Enjoy.
Why This Recipe is a Keeper
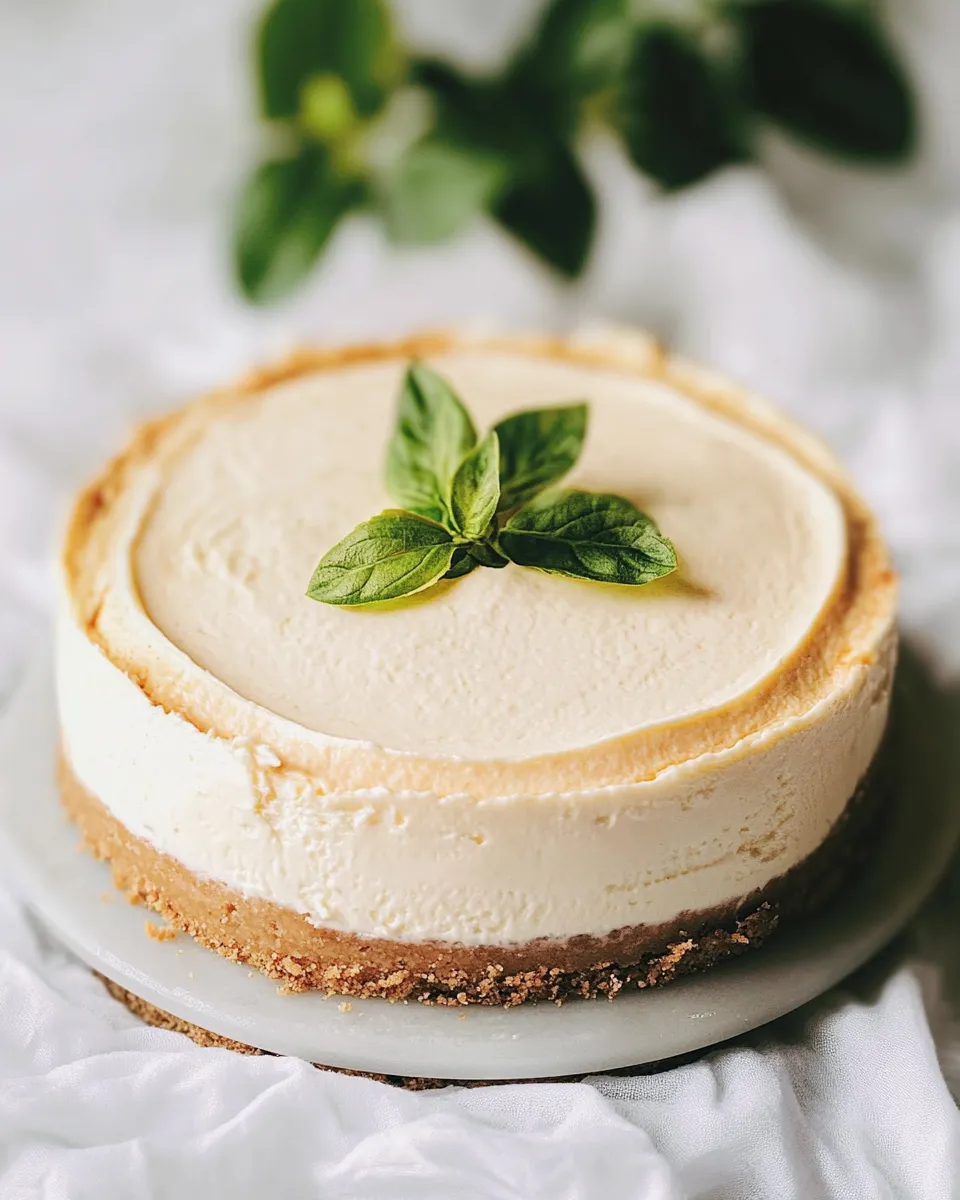
This cheesecake balances real vanilla flavor with the creamy, tangy lift of cream cheese and sour cream. The double-cream layers—white chocolate mousse and then whipped cream—give texture contrast without being heavy. It’s a recipe that rewards patience: those long chill times produce clean slices and a supremely smooth mouthfeel.
It’s reliable. The method separates key steps that commonly cause cracks or dense texture (beating the cream cheese briefly, folding in eggs slowly, tempering chilled vs room-temp ingredients), which helps you avoid the usual cheesecake pitfalls.
International Equivalents
- Oven temperatures: 350°F ≈ 175°C and 325°F ≈ 163°C. If your oven has a fan, reduce the temperature by about 10–15°C and watch the bake time.
- Volumes: if you prefer metric or use a scale, measure by weight for the most consistent cream cheese and chocolate results. A kitchen scale is the best way to match texture across kitchens.
- Ingredient notes: “cup” measures are standard U.S. cups. If you’re converting, follow your usual conversion tools—accuracy matters most for the cream cheese and chocolate.
Kitchen Gear Checklist
- 9-inch springform pan (essential for removal without damaging sides)
- Mixing bowls (one large for batter, one chilled for whipping cream)
- Stand mixer or hand mixer (you need reliable, low-speed mixing)
- Measuring cups and spoons
- Flat-bottomed glass or measuring cup (to press crust)
- Rubber spatula and wooden spoon
- Double boiler or microwave-safe bowl for melting white chocolate
- Sharp chef’s knife and a pot of hot water for clean slicing
- Plastic wrap and foil for chilling
Frequent Missteps to Avoid
- Beating cream cheese too long or too fast — that traps air and makes cracks. Beat just until smooth as directed.
- Adding eggs too quickly — pour them in slowly on low speed so the batter stays smooth.
- Skipping the oven-cool steps — removing a hot cheesecake too quickly invites cracks and sinking.
- Using cold eggs or cold cream cheese — room temperature ingredients mix more evenly and prevent lumps.
- Rushing the chill times — slicing early gives sloppy layers and less-than-clean cuts.
Customize for Your Needs
Want to tweak the flavor? Add a thin layer of fruit compote between the crust and cheesecake or spoon a berry sauce at serving time. If you prefer less sweetness, reduce the white chocolate slightly in the mousse or omit the extra powdered sugar in the final whipped cream. For a more pronounced vanilla profile, use fresh, high-quality vanilla beans as called for.
If someone in your group has dietary needs, the structure of this recipe makes it adaptable: you can swap the graham crust for a gluten-free cookie crumb crust, or use a sugar substitute in the crust and filling, but keep in mind texture changes and that I haven’t tested those swaps here.
If You’re Curious
Why real vanilla beans? The tiny seeds distribute flavor and give speckles—both visual and aromatic signals of quality. White chocolate in the mousse brings a round sweetness that tames the tang from the cream cheese without overpowering the vanilla. The sour cream in the filling keeps the center pleasantly soft.
One practical note: white chocolate temperature matters. If it’s too hot when added to the cream cheese for the mousse, it can loosen the structure. Allow it to cool slightly, as the method directs.
Storing, Freezing & Reheating
Store the finished cheesecake in the refrigerator, covered loosely, for up to 3–4 days. For the best texture, slice only what you need and return the rest to the fridge promptly. The layers can hold their structure well if chilled properly.
Freezing: you can freeze the fully assembled cheesecake, wrapped tightly in plastic wrap then foil, for up to 1 month. Thaw in the refrigerator overnight before serving. If you prefer to freeze before the final whipped cream topping, do so and add the final whipped layer after thawing to maintain a fresh appearance.
Reheating: cheesecake is served cold. If you prefer it slightly less chilled, let slices sit at room temperature for 10–15 minutes before serving; don’t microwave—heat will alter texture.
Quick Q&A
- Can I use vanilla extract instead of vanilla beans? You can, but beans give visible specks and a more complex aroma. If substituting, use high-quality extract and add it with the other liquids.
- Why do I need room-temperature eggs and dairy? Room temperature ingredients blend more smoothly and reduce the chance of overmixing or curdling when combined.
- How do I avoid cracks? Follow the gentle mixing steps, bake at the temperatures and times listed, and use the cooling sequence; opening the oven too soon or rapid temperature changes are common causes.
- Can I make this ahead? Yes. It actually benefits from being made a day ahead so flavors and texture fully settle.
Let’s Eat
When you’re ready to serve, release the springform rim, place the cheesecake on a platter, and slice with a hot, wiped knife for the cleanest presentation. A few fresh berries or a light dusting of powdered sugar is a nice finish if you like, but the cake stands on its own.
Make time for the chilling steps and you’ll be rewarded with a slice that’s silky, balanced, and remarkably vanilla-forward. Invite friends, pop on a favorite playlist, and enjoy the calm ceremony of passing slices around the table.
Vanilla Bean Cheesecake
Equipment
- 19" Springform Pan
Ingredients
Ingredients
- 1 1/4 cupsgraham cracker crumbs
- 1/4 cupgranulated sugar
- 1/3 cupmelted butter
- 24 ozcream cheeseat room temperature three 8 oz packages
- 3/4 cupsour creamat room temperature
- 1/3 cupheavy whipping creamat room temperature
- 1 cupgranulated sugar
- 2 vanilla beansseeds only
- 3 largeeggsat room temperature
- 7 ozwhite chocolate chipsor white chocolate bar roughly chopped
- 1 1/2 cupsheavy whipping creamcold
- 1 tablespoonpowdered sugar
- 1 vanilla beanseeds only
- 8 ozcream cheeseat room temperature
- 1 cupheavy whipping creamcold
- 1/4 cuppowdered sugar
- 1 vanilla beanseeds only
Instructions
Instructions
- Place an oven rack in the center of the oven and preheat to 350°F (175°C).
- Make the crust: in a medium bowl combine 1 1/4 cups graham cracker crumbs, 1/4 cup granulated sugar, and 1/3 cup melted butter. Stir until the mixture resembles damp sand.
- Press the crumb mixture into the bottom and about halfway up the sides of a 9-inch springform pan using the bottom of a measuring cup or a flat-bottomed glass. Bake the crust 7 minutes at 350°F. Remove from the oven and set aside. Reduce oven temperature to 325°F.
- Prepare the cheesecake filling: in a large bowl or the bowl of a stand mixer, beat 24 oz cream cheese (room temperature) on medium speed about 30 seconds until smooth and lump-free. Scrape down the sides and bottom of the bowl.
- Add 1 cup granulated sugar, 3/4 cup sour cream (room temperature), 1/3 cup heavy whipping cream (room temperature), and the seeds from 2 vanilla beans (split beans and scrape seeds only). Mix on medium-low just until incorporated. Scrape the sides and bottom of the bowl very well.
- Crack 3 large eggs (room temperature) into a liquid measuring cup and lightly beat with a fork until combined. With the mixer on low speed, slowly pour the eggs into the cream cheese mixture in a thin stream and stop mixing as soon as the eggs are incorporated. Scrape the bowl again and fold with a rubber spatula to ensure the batter is smooth; gently work out any small lumps.
- Tap the bowl on the counter for 30–45 seconds to help release air bubbles. Pour the batter into the prepared crust and smooth the top gently.
- Bake the cheesecake 30 minutes at 325°F. After 30 minutes, reduce the oven temperature to 250°F and continue baking for 45 minutes.
- After baking, turn the oven off and leave the cheesecake inside with the oven door closed for 30 minutes. Then crack the oven door open and let the cheesecake cool inside for 1 hour. Remove the cheesecake from the oven and bring to room temperature on the counter for 3–4 hours.
- Cover the cheesecake loosely with plastic wrap and refrigerate until completely chilled, at least 6 hours or overnight.
- Prepare the white chocolate mousse layer: melt 7 oz white chocolate chips (or chopped white chocolate bar) in a double boiler over low heat, stirring constantly until smooth, or microwave in 10–15 second bursts, stirring between intervals until melted. Set the melted chocolate aside to cool slightly.
- In a chilled bowl, whip 1 1/2 cups cold heavy whipping cream with 1 tablespoon powdered sugar and the seeds from 1 vanilla bean until stiff peaks form.
- In a separate bowl, beat 8 oz cream cheese (room temperature) until smooth. Add the cooled melted white chocolate and mix until combined.
- Fold the whipped cream (from step 12) into the white chocolate–cream cheese mixture a few spoonfuls at a time until no streaks remain and the mixture is homogeneous.
- Remove the chilled cheesecake from the refrigerator and spread the white chocolate mousse evenly over the top. Smooth the surface, cover loosely with foil or plastic wrap, and chill at least 1 1/2 hours.
- Make the final whipped cream topping: in a chilled bowl, whip 1 cup cold heavy whipping cream with 1/4 cup powdered sugar and the seeds from 1 vanilla bean until stiff peaks form.
- Spread the whipped cream evenly over the mousse layer. Serve immediately or refrigerate until ready to serve.
- To serve, release and remove the springform collar. For clean slices, dip a sharp knife in hot water, wipe off excess water, and slice; repeat dipping and wiping between slices. Enjoy.