These Pepperoni Rolls are exactly the kind of thing I reach for when I want something fast, comforting, and handheld. They’re simple to pull together, bake quickly, and hit that salty, cheesy spot every time. No complicated dough to measure or rise — the canned pizza dough does the heavy lifting so you can get to the best part: melty mozzarella and pepperoni wrapped up in golden bread.
I developed this version to be dependable on busy weeknights, but it works just as well for a party platter or an after-school snack. The steps are short, the assembly is almost meditative, and the finishing touch — garlic butter, Italian seasoning, and grated parmesan — turns them from good to memorable.
Read through the shop list, the short gear section, and the cooking guide below. I’ll also share small mistakes to avoid, how I tested the baking time, and sensible leftover strategies so you can make these ahead without losing texture or flavor.
What to Buy
Buy ingredients that make assembly quick and predictable. The canned pizza dough is the key convenience item — it gives you uniform portions and consistent baking behavior. For pepperoni, packaged sliced pepperoni from the deli or grocery aisle works fine; the recipe specifies 36 slices, so grab a standard-sized package.
For finishing, pick a garlic butter you trust (or melt real butter with a clove of minced garlic if you prefer). A jar of grated parmesan and a small shaker of Italian seasoning are pantry staples that will dress these rolls up in a flash.
Ingredients
- 1(8-oz)can pizza dough,(I use Pillsbury thin crust) — the foundation; gives consistent size and quick baking.
- 36pepperoni slices — salty and flavorful, they provide the main savory punch.
- 9mozzarella cheese slices — melts into the dough and pairs with pepperoni for that classic combo.
- 2Tbspmelted garlic butter — brushed on after baking for shine, aroma, and extra richness.
- ¼tspItaliain seasoning — a light herbal finish that balances the richness.
- grated parmesan cheese — added at the end for salty, nutty contrast.
Pepperoni Rolls Cooking Guide
- Preheat oven to 425°F. Line a baking sheet with parchment paper and set aside.
- Open the can of pizza dough and unroll it into a rectangle.
- Cut the rectangle into six equal pieces.
- Cut three of the mozzarella slices in half. For each dough piece, place 1 whole mozzarella slice on the dough, arrange six pepperoni slices on top, then place one mozzarella half on the pepperoni.
- Roll each piece of dough up and place seam-side down on the prepared baking sheet, leaving space between rolls.
- Bake for 15 minutes, or until the rolls are golden brown.
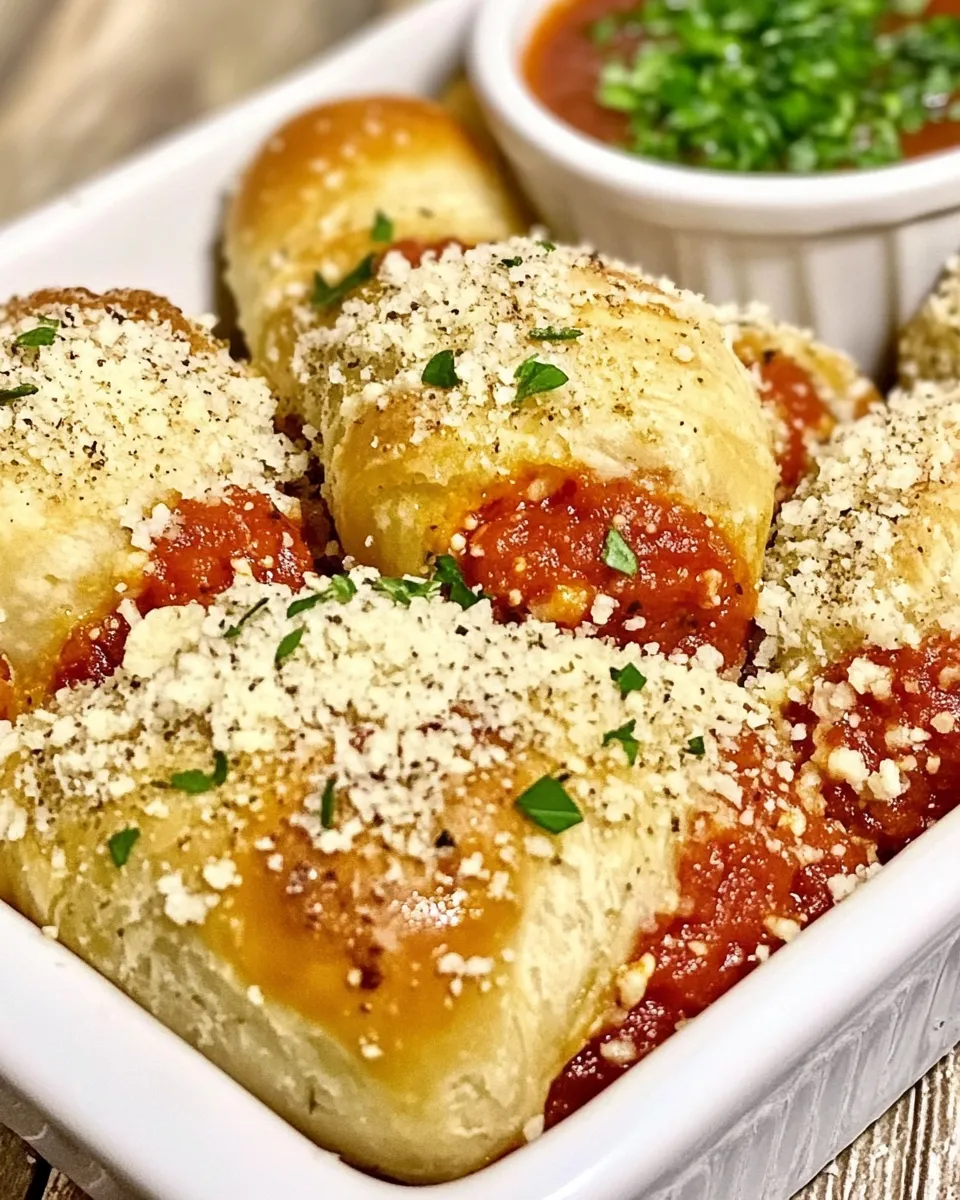
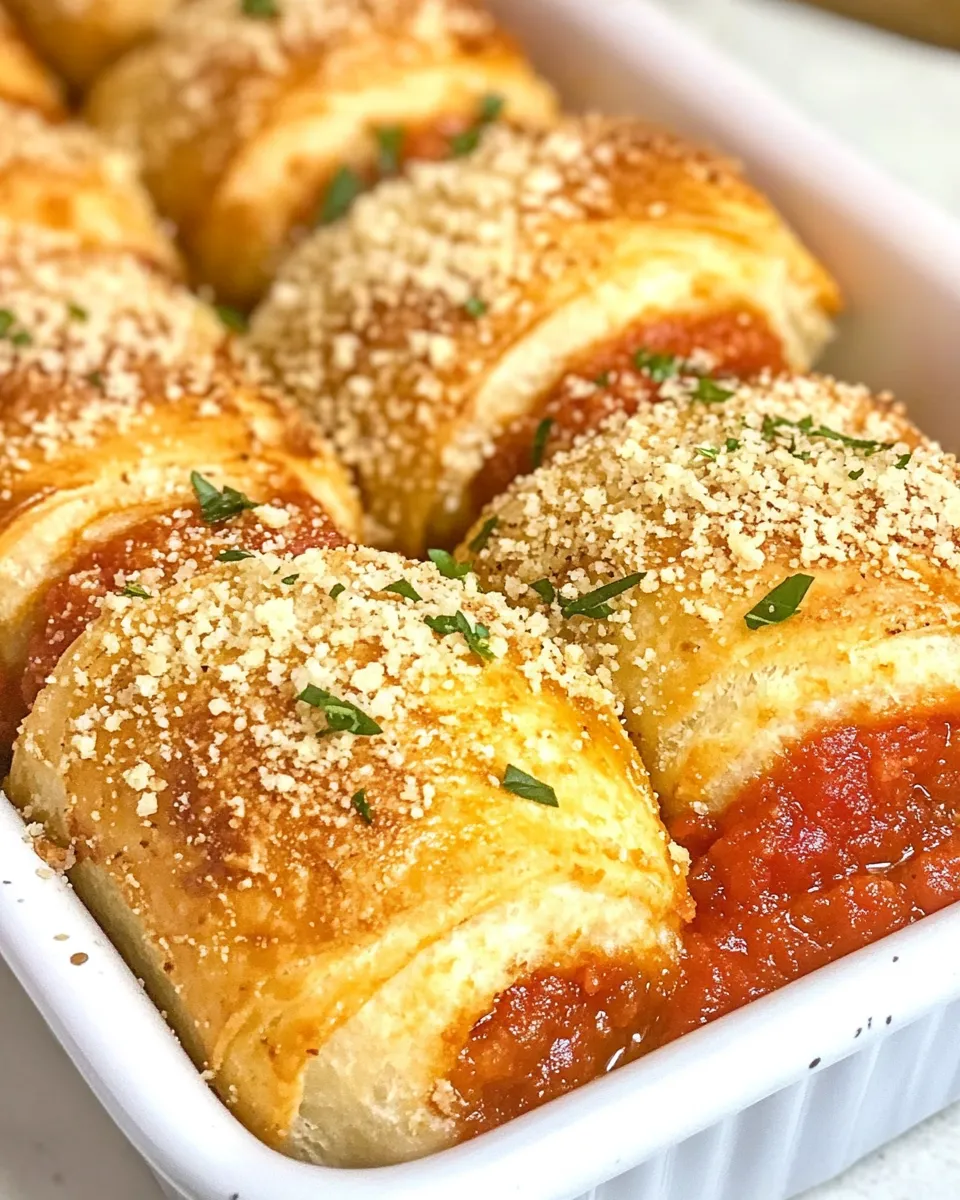
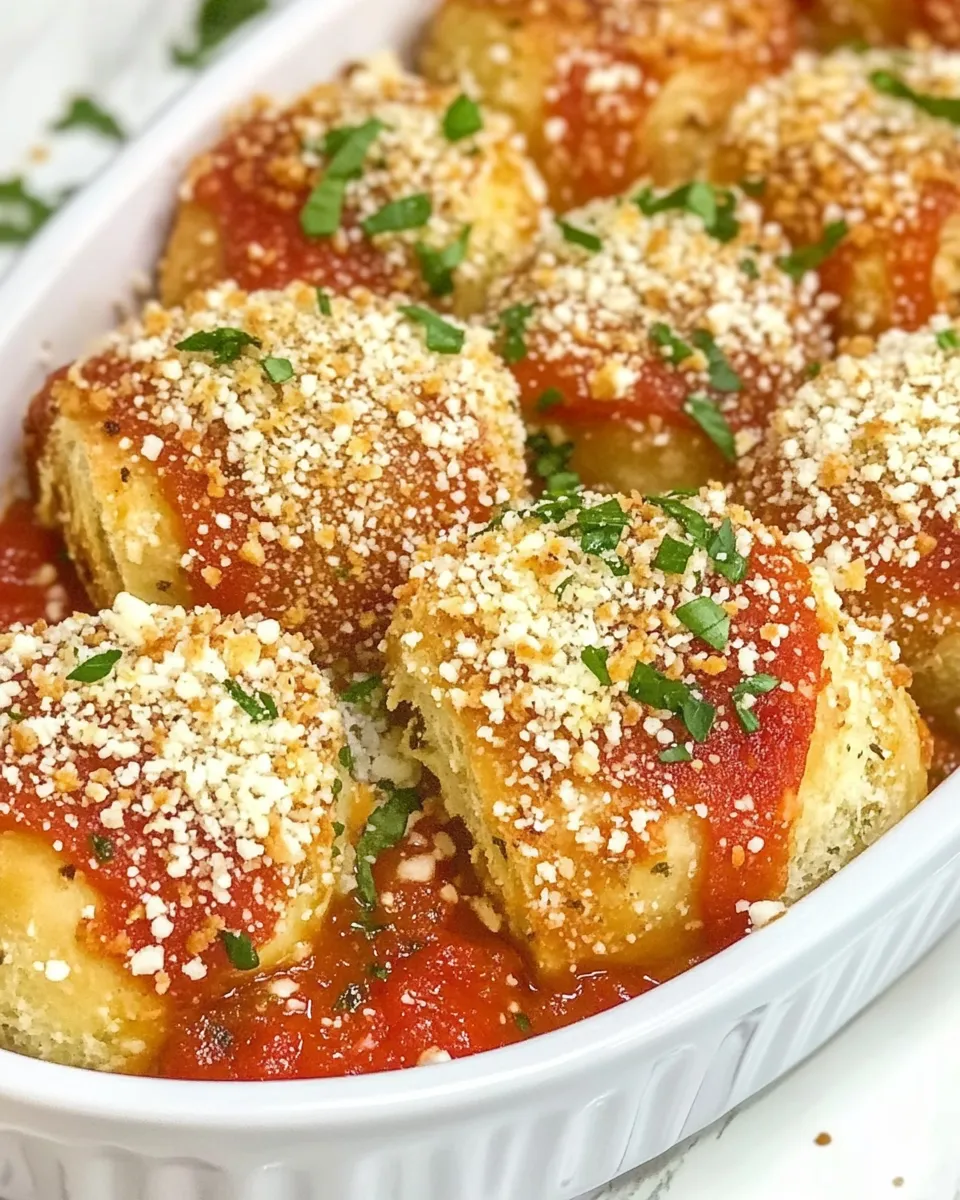
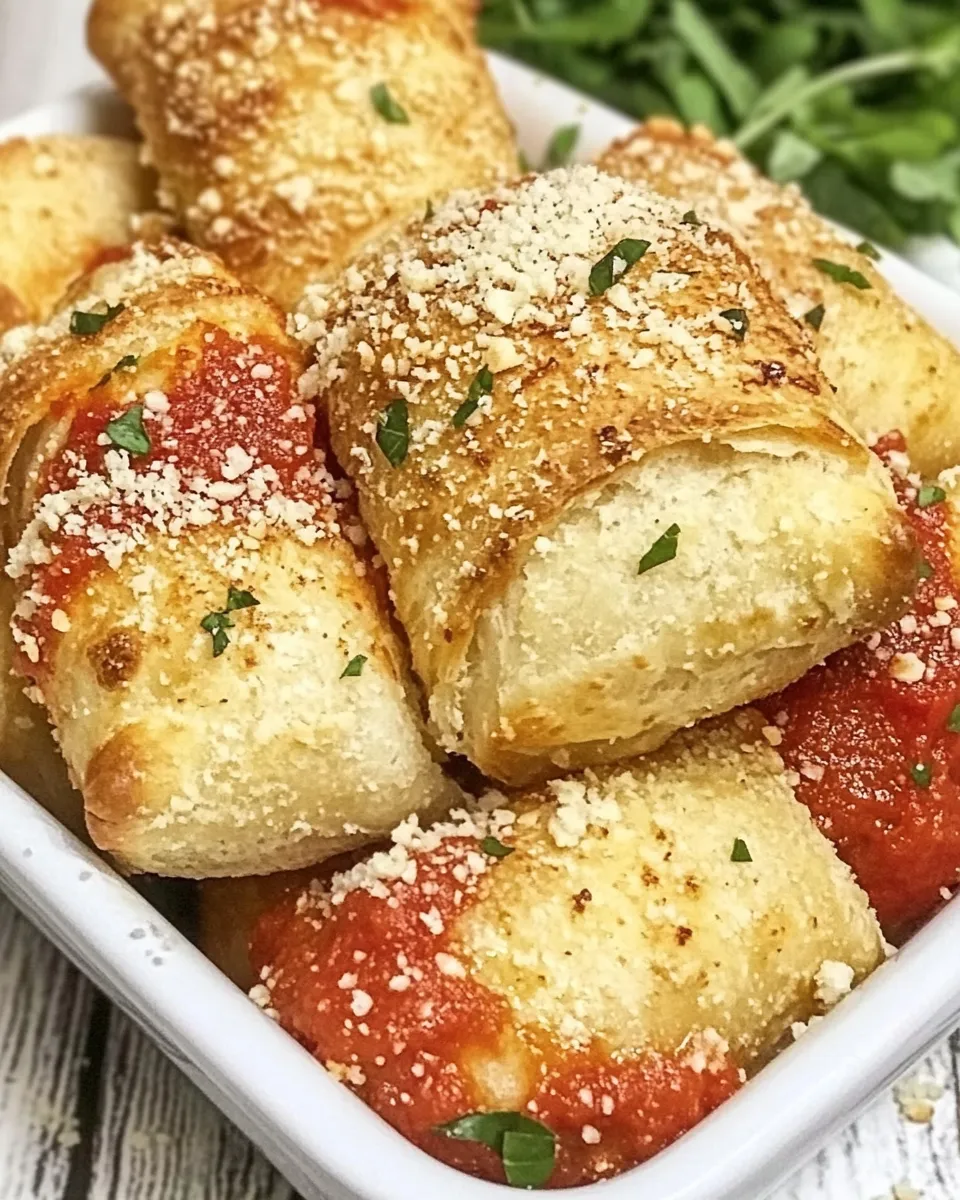
- Remove the rolls from the oven and brush the tops with the 2 Tbsp melted garlic butter.
- Sprinkle the rolls with ¼ tsp Italian seasoning and grated parmesan cheese.
- Let the rolls cool a few minutes, then serve warm.
Why It Works Every Time
This recipe relies on two predictable variables: canned dough and short, high-heat baking. Canned pizza dough is formulated to bake evenly without the uncertainty of homemade dough proofing. That means you get uniform rolls and a consistent crumb every time.
Baking at 425°F for 15 minutes gives a golden exterior while ensuring the interior cheese melts through. The seam-side-down placement keeps the rolls sealed, preventing the filling from leaking and ensuring a smooth, even top for the butter and parmesan finish.
The layering order — whole mozzarella, pepperoni, then a mozzarella half — creates an internal pocket of cheese around the pepperoni so each bite has both melty cheese and crisped edges from the pepperoni. Brushing with garlic butter after baking preserves that sheen and delivers fresh garlic flavor without burning it in the oven.
If You’re Out Of…
If you’re missing one of the items, here are focused, realistic adjustments that keep the result close to the original without inventing extra ingredients.
- If you don’t have enough mozzarella slices: use the available slices as-is and reduce the number placed in each roll; the rolls will still be satisfying and the pepperoni will provide flavor.
- If you’re low on pepperoni slices: distribute what you have evenly so each roll gets some pepperoni. Fewer slices will make the rolls slightly less pepperoni-forward but still tasty.
- If you don’t have melted garlic butter: melt plain butter and stir in a small amount of garlic if you have it; brushing plain melted butter still gives a pleasant finish.
- If you don’t have Italian seasoning: omit it. The garlic butter and parmesan provide enough flavor; the seasoning is a nice extra, not a requirement.
What You’ll Need (Gear)
- Baking sheet — to bake the rolls in a single layer.
- Parchment paper — prevents sticking and speeds cleanup.
- Sharp knife or bench scraper — for cutting the dough into six equal pieces.
- Small bowl and brush — for the melted garlic butter and brushing after baking.
- Oven mitts and cooling rack — for safe handling and cooling.
Pitfalls & How to Prevent Them
- Leaking filling: If the seam isn’t sealed, cheese can ooze out. Press the seam firmly and place rolls seam-side down so they stay closed while baking.
- Undercooked center: If your oven runs cool, a slightly longer bake time may be needed. Check visually — the rolls should be evenly golden brown and the cheese inside should be melted.
- Burned garlic butter: Don’t brush with garlic butter before baking; garlic burns easily. Brush while the rolls are hot out of the oven for the best flavor and color.
- Soggy bottom: Make sure the oven is fully preheated and use parchment paper on a flat sheet. Avoid crowding the rolls; space them for hot air circulation.
Year-Round Variations
This recipe is intentionally focused so it performs well across seasons. Here are a few inline adjustments you can make without changing the basic shopping list.
- Make them more melty: add the extra mozzarella half at the very center of each roll for a gooier center when you have the full nine slices.
- Herbal finish: if you want more herb flavor and have leftover Italian seasoning, lightly sprinkle an extra pinch after brushing the garlic butter.
- Party-size timing: bake multiple sheets back-to-back and keep finished rolls warm on a rack in a low oven while you finish the rest.
What I Learned Testing
I tested these over a few sessions to dial the timing and the assembly. The biggest wins were small: press the seam well and place seam-side down, and don’t skip the step of halving some mozzarella slices. That half slice on top of the pepperoni helps lock the meat in place and creates a cheese cap that holds during rolling and baking.
I also found that brushing with melted garlic butter right after the rolls come out of the oven gives you the brightest garlic flavor. If you brush before baking, the garlic browns and becomes bitter. The 15-minute bake time worked reliably in my home oven; if your oven runs hot or cold, check for golden color first rather than relying strictly on time.
Leftovers & Meal Prep
These Pepperoni Rolls keep well and reheat nicely. Store cooled rolls in an airtight container in the refrigerator for up to 3 days. To reheat, place them on a baking sheet in a 350°F oven for 8–10 minutes until warmed through and the outside crisps back up. Microwaving works in a pinch, but you’ll lose crispness.
For longer storage, freeze cooled rolls individually on a baking sheet until firm, then transfer to a zip-top freezer bag for up to 2 months. Reheat from frozen at 350°F for 15–20 minutes, or until warmed through. If you want to prep ahead for hosting, assemble and freeze unbaked rolls on the baking sheet, then transfer to a bag; when ready to bake, add a few extra minutes to the bake time and then finish with garlic butter, Italian seasoning, and parmesan.
Your Questions, Answered
- Can I bake these from frozen? — Yes. Bake from frozen at a slightly lower temperature or add a few minutes to the 15-minute bake time. Check for even browning and melted cheese.
- Should I brush before or after baking? — After baking. Brushing before can burn the garlic; after keeps the flavor bright and the tops glossy.
- How do I prevent the rolls from falling apart? — Seal the seam by pressing firmly and position seam-side down on the baking sheet so the roll stays closed while it bakes.
- How long will they last in the fridge? — Up to 3 days in an airtight container.
Ready to Cook?
If you have the ingredients on hand, this is a quick project that rewards you with warm, handheld comfort in under 30 minutes from start to finish. Follow the Pepperoni Rolls Cooking Guide, and keep the simple finishing steps intact — the garlic butter, Italian seasoning, and parmesan are small touches that make a big difference.
Gather your gear, preheat the oven, and assemble in a calm rhythm: cheese, pepperoni, cheese half, roll, seal, bake, finish. Then sit down with a stack of warm rolls and enjoy the payoff. If you try them, tell me which little adjustment you made — I love hearing which tiny tweak becomes someone’s new favorite.
Pepperoni Rolls
Equipment
- Rolling Pin
- Pizza Cutter
- Rimmed Baking Sheet
- Parchment Paper
Ingredients
Ingredients
- 1 8-ozcan pizza dough, (I use Pillsbury thin crust)
- 36 pepperoni slices
- 9 mozzarella cheese slices
- 2 Tbspmelted garlic butter
- 1/4 tspItaliain seasoning
- grated parmesan cheese
Instructions
Instructions
- Preheat oven to 425°F. Line a baking sheet with parchment paper and set aside.
- Open the can of pizza dough and unroll it into a rectangle.
- Cut the rectangle into six equal pieces.
- Cut three of the mozzarella slices in half. For each dough piece, place 1 whole mozzarella slice on the dough, arrange six pepperoni slices on top, then place one mozzarella half on the pepperoni.
- Roll each piece of dough up and place seam-side down on the prepared baking sheet, leaving space between rolls.
- Bake for 15 minutes, or until the rolls are golden brown.
- Remove the rolls from the oven and brush the tops with the 2 Tbsp melted garlic butter.
- Sprinkle the rolls with ¼ tsp Italian seasoning and grated parmesan cheese.
- Let the rolls cool a few minutes, then serve warm.
Notes
Store leftovers in an airtight container in the refrigerator.