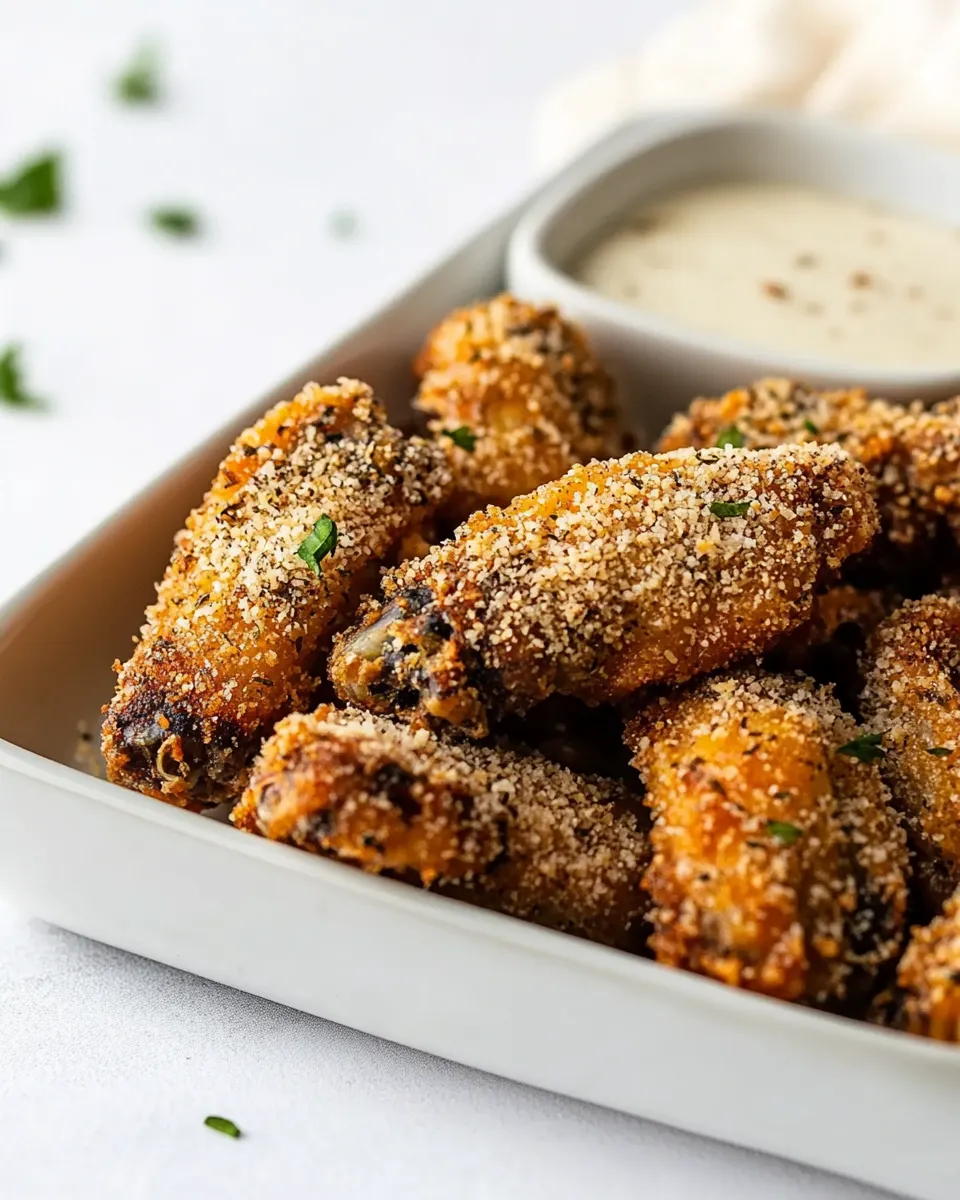
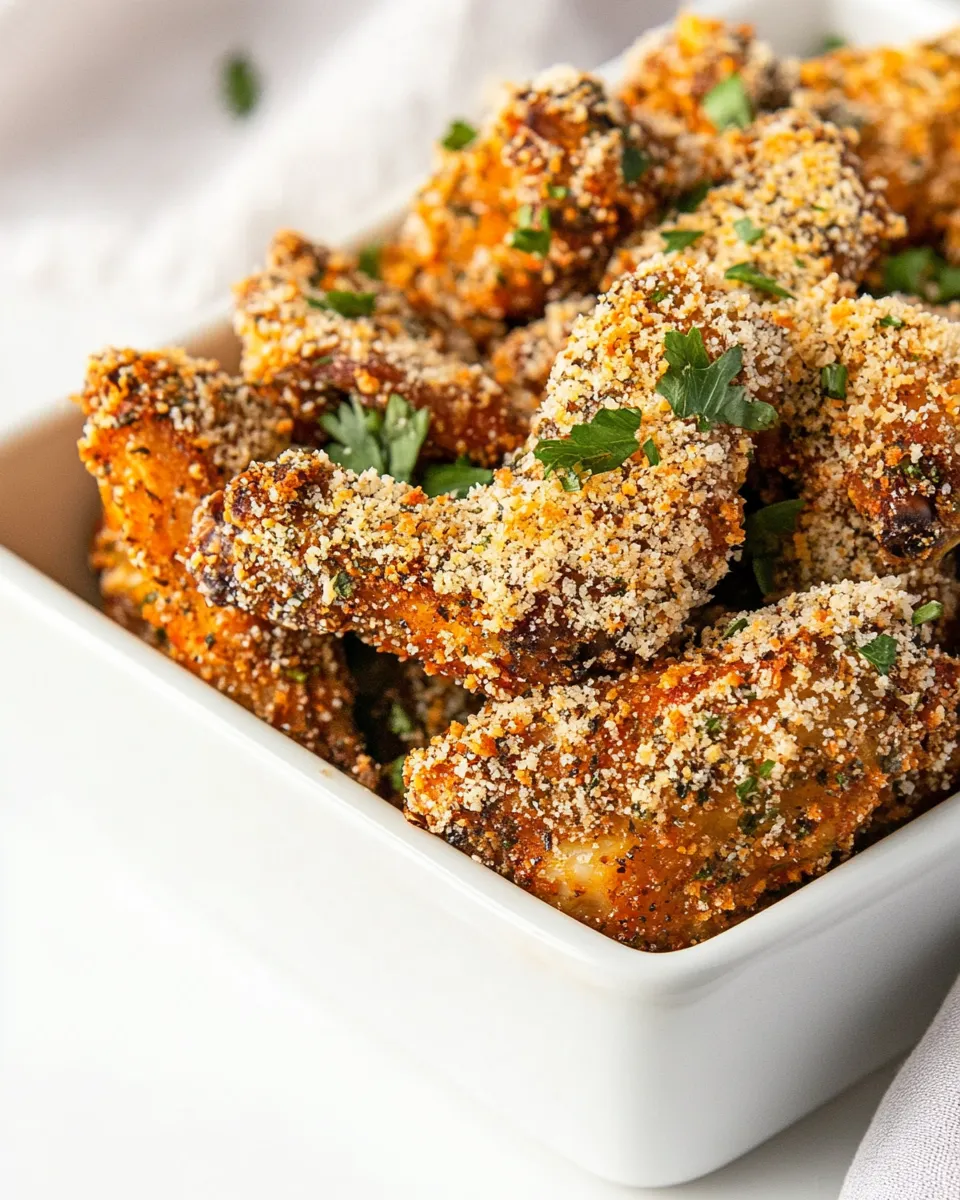
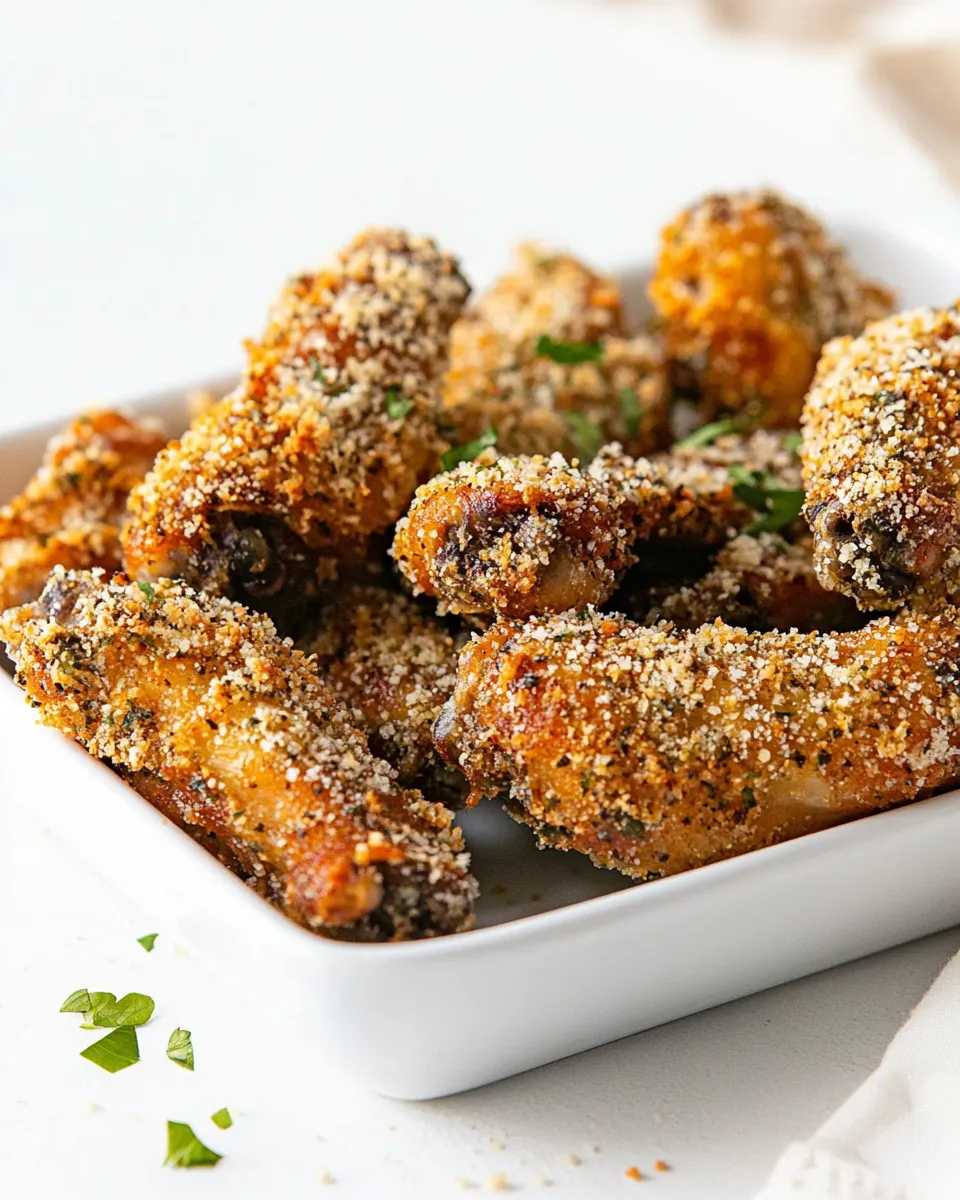
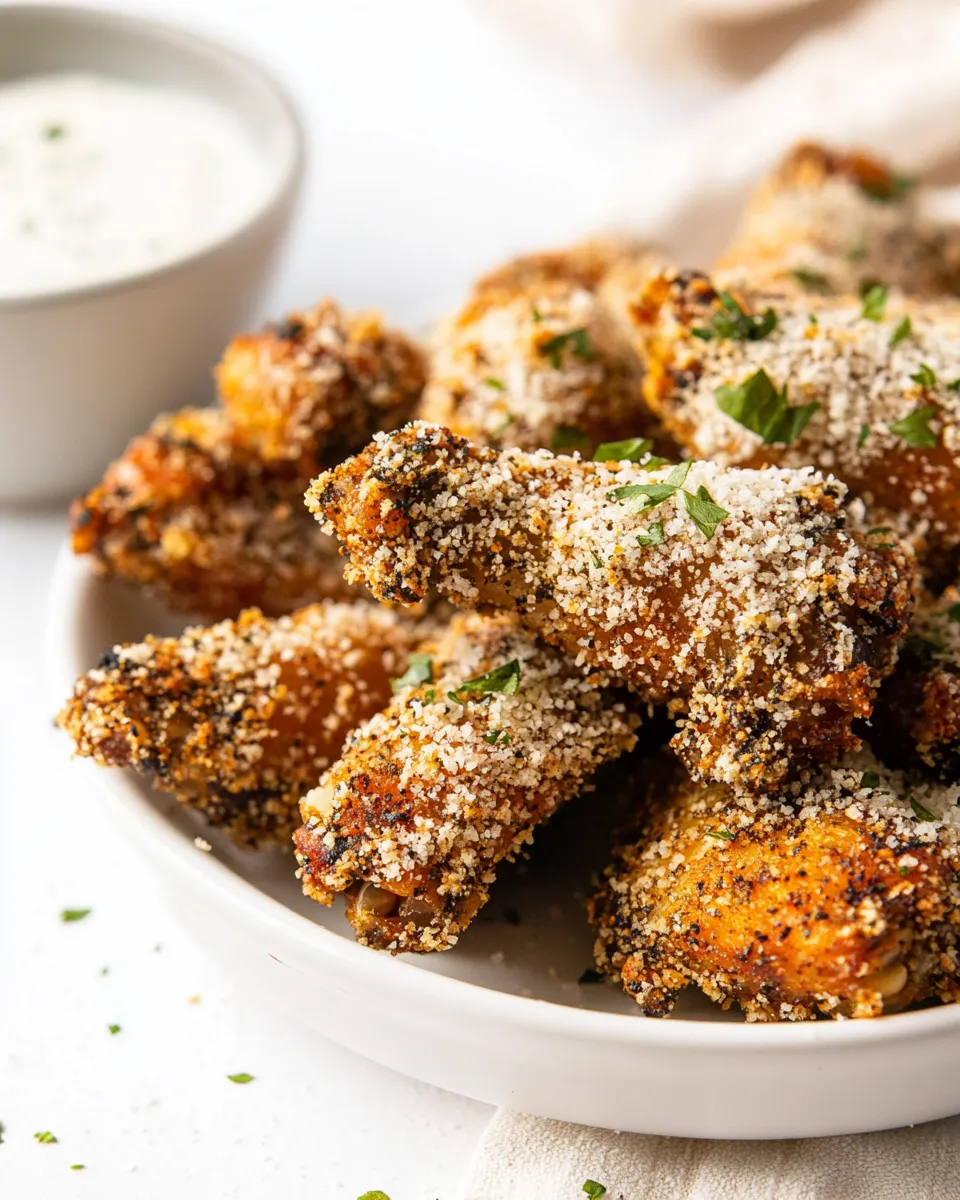
These wings are the kind of recipe I return to when I want something reliably crunchy, garlicky, and a little indulgent without deep-frying. The combination of cornstarch and baking powder gives the skin courtroom-crisp texture while a buttery Parmesan coating locks in savory, nutty flavor. They’re straightforward to make and scale well for a weeknight snack or game-day spread.
I like that this method uses everyday pantry ingredients and a single baking sheet. There’s no flipping in oil or complicated marinades — just a couple of tosses and some patience while the oven does the work. The final bake after coating sets the crust so it stays crisp just long enough to serve warm and perfect.
Below I’ll walk you through exactly what goes into the dish, the step-by-step cooking guide straight from the tested method, and practical tips for troubleshooting, storing, and swapping ingredients if you need to. Let’s get the oven ready.
What Goes Into Crispy Garlic Parmesan Wings
At their core these wings rely on a few technical tricks and bold flavor: cornstarch and baking powder for crisping, a light but butter-forward coating to help the Parmesan adhere, garlic powder and Italian seasoning for aromatics, and crushed red pepper for a whisper of heat. Salt brings everything into balance, and using grated Parmesan ensures the coating melts into a golden, savory crust.
Ingredients
- 2 – 2 ½ pounds chicken wings, trimmed (sometimes called party wings) — the main ingredient; trim to remove tips or separate flats and drumettes if needed.
- 1 tablespoon cornstarch — adds extra crunch by drying the skin and creating a light crust.
- 2 teaspoon baking powder — an alkalizing agent that raises pH and promotes browning and crispness.
- 1 ½ teaspoons salt — seasons the meat and helps draw moisture from the skin for better crisping.
- 1 ½ teaspoon garlic powder, divided — concentrated garlic flavor; part goes into the wing rub and part into the Parmesan mix.
- 4 tablespoons melted butter — used to coat the wings so the Parmesan mixture sticks and to add richness.
- 1 cup grated Parmesan cheese, divided (not shredded) — forms the savory, slightly salty crust; grated cheese packs and melts better than shredded.
- 1 tablespoon Italian seasoning — dried herb blend for depth and Mediterranean notes.
- ¼ – ½ teaspoon crushed red pepper — provides heat; adjust the amount to taste.
Crispy Garlic Parmesan Wings Cooking Guide
- Preheat the oven to 450°F. Line a large baking sheet with parchment paper or foil.
- In a large mixing bowl add the trimmed chicken wings and then add 1 tablespoon cornstarch, 2 teaspoons baking powder, 1 ½ teaspoons salt, and ½ teaspoon garlic powder. Toss well so the wings are evenly coated.
- Arrange the wings in a single layer on the prepared baking sheet, making sure the wings do not touch.
- Bake the wings in the preheated oven for 20 minutes.
- Flip each wing and bake for an additional 20 minutes (40 minutes total).
- While the wings bake, melt 4 tablespoons butter in a shallow microwave-safe bowl. In a clean bowl combine 3/4 cup grated Parmesan cheese, the remaining 1 teaspoon garlic powder, 1 tablespoon Italian seasoning, and 1/4–1/2 teaspoon crushed red pepper; mix well.
- Remove the wings from the oven. One at a time, dip each wing into the melted butter, let excess butter drip off, then roll the wing in the Parmesan mixture to coat. Place coated wings back on the baking sheet.
- Return the coated wings to the oven and bake 5 to 10 minutes more, until the coating is golden and set.
- Remove the wings and immediately sprinkle with the remaining 1/4 cup grated Parmesan cheese. Serve warm.
Why This Crispy Garlic Parmesan Wings Stands Out
It’s the technique, not fancy ingredients, that makes these wings sing. Baking powder raises the pH of the skin slightly, promoting Maillard reaction and turning the skin blistered and crisp without frying. Cornstarch helps absorb moisture and creates a delicate, crackly texture that holds up through the final Parmesan bake.
The two-stage bake is smart: the first long roast renders fat and crisps the skin; the dip-and-coat step builds the flavorful crust and the short finish bakes the cheese to golden perfection without burning it. Lastly, using grated Parmesan rather than a pre-shredded blend avoids anti-caking agents and yields a smoother, more cohesive coating.
Quick Replacement Ideas
- Instead of butter: use an equal amount of neutral oil (vegetable or canola) or melted olive oil for a dairy-lean option; the coating will adhere differently but still work.
- If you don’t have Parmesan: try Pecorino Romano for a sharper finish or a hard-grated Asiago if you prefer milder saltiness.
- Swap Italian seasoning with a mix of dried oregano and basil if that’s what you have on hand.
- For a milder heat profile: reduce crushed red pepper to a pinch or omit it and add a squeeze of lemon after baking for brightness.
What You’ll Need (Gear)
- Large baking sheet — use a rimmed sheet so wings roast evenly and fat doesn’t pool on your oven floor.
- Parchment paper or foil — keeps cleanup quick and prevents sticking.
- Large mixing bowl — for tossing wings with dry ingredients.
- Shallow microwave-safe bowl — to melt butter and dip wings.
- Clean bowl for Parmesan mix — wide enough to roll wings easily.
- Tongs — for safe flipping and dipping.
- Measuring spoons and cups — accurate seasoning matters for the crisping chemistry.
Problems & Prevention
Here are common issues you might see and how to avoid them.
- Soggy skin: Make sure wings are patted dry before tossing with cornstarch and baking powder. Don’t overcrowd the pan — air circulation is essential.
- Uneven browning: Arrange wings in a single layer and rotate the pan halfway through if your oven has hot spots.
- Burnt Parmesan: If the cheese browns too quickly during the final 5–10 minutes, reduce the oven temperature by 25°F or pull the wings earlier; residual heat will finish the set.
- Coating falls off: Let excess butter drip off before rolling in the Parmesan mix. A light, even coating sticks better than a dripping one.
Allergy-Friendly Swaps
If you need to adapt this recipe for allergies or dietary needs, keep the cooking method and crisping agents but swap problem ingredients as follows.
- Dairy-free: Use a plant-based butter or neutral oil in place of butter. Replace Parmesan with a hard vegan cheese or a blend of nutritional yeast and ground almonds (test for nut allergies separately).
- Gluten-free: This recipe is naturally gluten-free as written (cornstarch is gluten-free); verify that your baking powder and grated cheese are certified gluten-free if cross-contamination is a concern.
- Low-sodium: Reduce the added salt to 1 teaspoon and rely on Parmesan’s saltiness for flavor; taste and adjust after baking.
Cook’s Commentary
I prefer wings trimmed and left whole for the best balance of meat and skin. If you separate flats and drumettes, they’ll cook a touch faster — keep an eye on them. The divided garlic powder adds a base garlic flavor to the wings themselves and a fresher hit in the Parmesan mix. If you want a stronger garlic presence, swap one teaspoon of the garlic powder for a clove of very finely minced garlic mixed into the melted butter, but remember fresh garlic can scorch if exposed too long in the oven.
Timing matters: the 40-minute total bake before coating renders fat and crisps. The final 5–10 minutes after coating is short but crucial — it melts the cheese into the crust rather than burning it. I usually aim for 7 minutes for a nice golden finish, but ovens vary.
Store, Freeze & Reheat
Store leftover wings in an airtight container in the refrigerator for up to 3 days. To preserve crispness, line the container with paper towels and place wings in a single layer if possible. For freezing, cool completely, arrange on a tray to freeze individually for 1–2 hours, then transfer to a freezer bag for up to 2 months.
To reheat and recover crispness, do not microwave. Reheat in a 375°F oven on a wire rack over a baking sheet for 10–12 minutes from refrigerated, or 18–22 minutes from frozen, until fully heated through and the crust is crisp. A quick broil for 30–60 seconds can help re-crisp the surface; watch closely to avoid burning.
Your Questions, Answered
- Can I use frozen wings? Yes. Thaw completely and pat dry before proceeding, or add 10–15 minutes to the initial bake time if you cook from frozen and expect less even crisping.
- Are the wings fully cooked after 40 minutes? In most ovens, 40 minutes at 450°F will bring wings to a safe internal temperature, but always check with an instant-read thermometer; internal temp should be 165°F for poultry.
- Can I make these ahead? You can prepare and par-bake the wings up to the first 40-minute bake, then cool and refrigerate. Finish the butter-and-Parmesan bake just before serving.
- How do I make more or fewer wings? The method scales well. Keep ratios of cornstarch, baking powder, and salt proportional; avoid crowding the pan.
Final Thoughts
These Crispy Garlic Parmesan Wings strike a great balance between convenience and restaurant-quality results. The technique is forgiving and the flavors are familiar but elevated — buttery, garlicky, and deeply savory with a hint of heat. They’re perfect for a casual night in, parties, or when you want crispy wings without the mess of frying. Try them once as written, then tweak the heat and herbs to make them yours.
Crispy Garlic Parmesan Wings
Equipment
- Large Mixing Bowl
- Baking Sheet
- parchment paper or foil
- Microwave-safe Bowl
Ingredients
Ingredients
- 2 – 2 1/2 poundschicken wingstrimmed sometimes called party wings
- 1 tablespooncornstarch
- 2 teaspoonbaking powder
- 1 1/2 teaspoonsalt
- 1 1/2 teaspoongarlic powderdivided
- 4 tablespoonsmelted butter
- 1 cupgrated parmesan cheesedivided not shredded
- 1 tablespoonItalian seasoning
- 1/4 – 1/2 teaspooncrushed red pepper
Instructions
Instructions
- Preheat the oven to 450°F. Line a large baking sheet with parchment paper or foil.
- In a large mixing bowl add the trimmed chicken wings and then add 1 tablespoon cornstarch, 2 teaspoons baking powder, 1 ½ teaspoons salt, and ½ teaspoon garlic powder. Toss well so the wings are evenly coated.
- Arrange the wings in a single layer on the prepared baking sheet, making sure the wings do not touch.
- Bake the wings in the preheated oven for 20 minutes.
- Flip each wing and bake for an additional 20 minutes (40 minutes total).
- While the wings bake, melt 4 tablespoons butter in a shallow microwave-safe bowl. In a clean bowl combine 3/4 cup grated Parmesan cheese, the remaining 1 teaspoon garlic powder, 1 tablespoon Italian seasoning, and 1/4–1/2 teaspoon crushed red pepper; mix well.
- Remove the wings from the oven. One at a time, dip each wing into the melted butter, let excess butter drip off, then roll the wing in the Parmesan mixture to coat. Place coated wings back on the baking sheet.
- Return the coated wings to the oven and bake 5 to 10 minutes more, until the coating is golden and set.
- Remove the wings and immediately sprinkle with the remaining 1/4 cup grated Parmesan cheese. Serve warm.
Notes
“Trimmed wings” are wings that have any excess skin flaps trimmed off, so they look more appealing. You can buy them trimmed or do it yourself.
Leftovers from this baked chicken wings recipe will keep well for
up to 3 days
in the refrigerator. Cool them completely before transferring them to an airtight container and placing in the fridge.
Reheat the wings in the oven at 350 degrees F for 10-15 minutes until crispy and hot. Or, if you can, I highly recommend
reheating them in the air fryer.