Pizzelle Cannoli perfectly blends two classic Italian treats into a delightful dessert that is sure to impress. With the crisp, delicate pizzelle cookies enveloping a creamy, luscious ricotta filling, every bite promises a burst of flavor. This recipe not only looks stunning, but it also provides a delightful contrast of textures—from the crunchy pizzelle to the smooth, sweetened ricotta filling. Whether you’re hosting a special occasion or simply indulging your sweet tooth, Pizzelle Cannoli is the perfect treat for any gathering.
What Sets This Recipe Apart

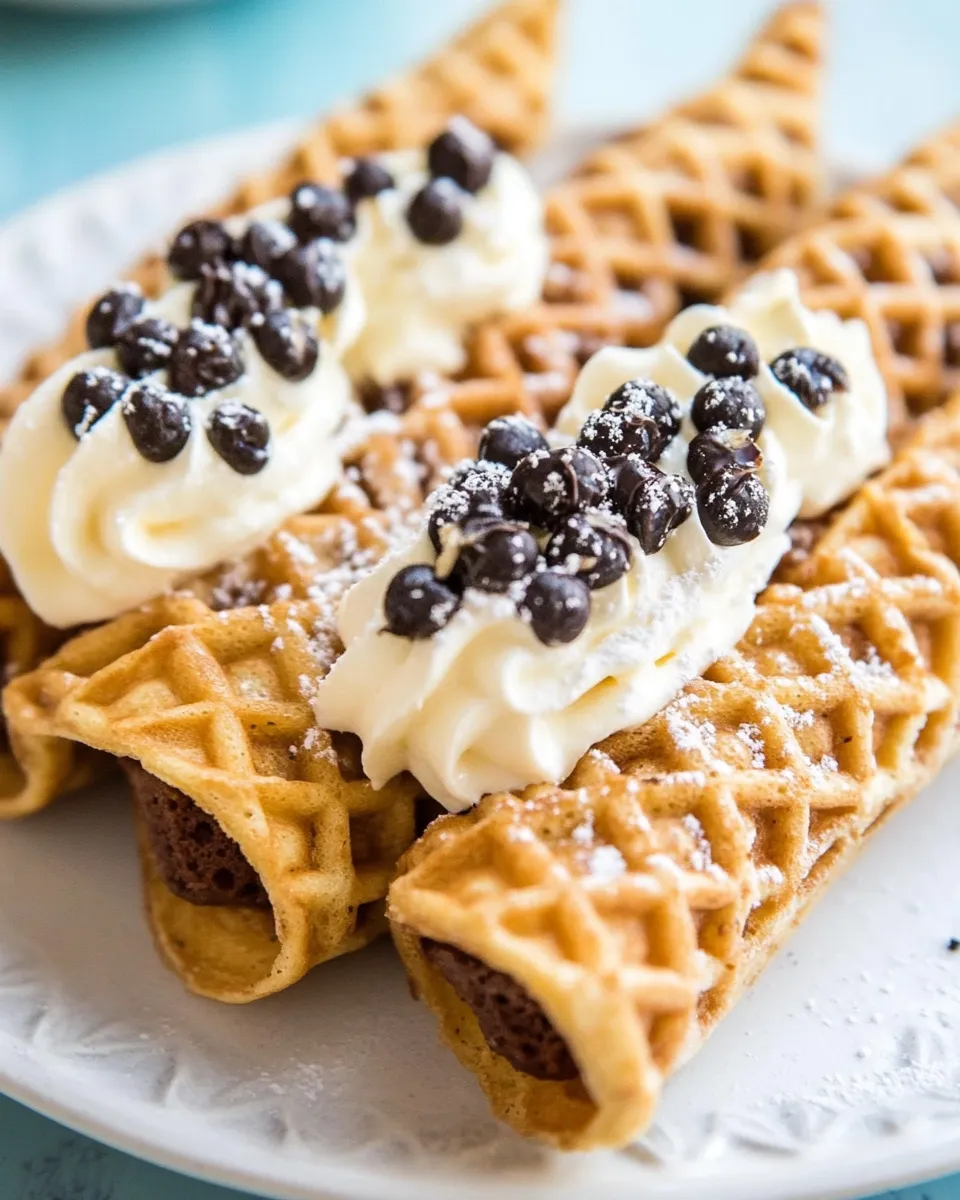
This Pizzelle Cannoli recipe stands out because it combines the traditional Italian pizzelle—a thin, crispy waffle cookie—with a rich cannoli-style filling made from ricotta cheese. The pizzelle adds a unique texture and flavor that elevates the typical cannoli experience. Plus, the addition of semi-sweet mini chocolate chips in the filling provides a delightful surprise in every bite, making it a crowd-pleaser. And the best part? It’s simpler to make than you might think!
Ingredient Checklist
To create this heavenly Pizzelle Cannoli, you will need the following ingredients:
- 1 cup heavy whipping cream
- 4 cups whole milk ricotta cheese
- 1 cup powdered sugar, plus more for garnish
- 2 teaspoons vanilla extract
- 2 cups all-purpose flour
- 1 cup granulated sugar
- ½ cup butter, melted and cooled
- 4 eggs
- 1 tablespoon vanilla extract (see note 2)
- 2 teaspoons baking powder
- 2/3 cup semi-sweet mini chocolate chips, plus more for garnish
Essential Tools for Success
Before diving into the recipe, gather these essential tools to ensure your Pizzelle Cannoli turn out perfectly:
- Pizzelle maker – The key to achieving those crispy, intricate pizzelle cookies.
- Mixing bowls – For combining your ingredients efficiently.
- Electric mixer – To whip the cream and mix the filling until light and fluffy.
- Spatula – For folding in the chocolate chips and serving.
- Cooling rack – To cool the pizzelle after cooking.
Pizzelle Cannoli Made Stepwise
Creating Pizzelle Cannoli involves a few simple steps. Follow this guide for a scrumptious result:
Step 1: Prepare the Pizzelle Batter
In a large mixing bowl, whisk together the granulated sugar, eggs, and vanilla extract until well combined and slightly frothy. Gradually add in the melted butter, mixing until fully incorporated. In another bowl, sift together the flour and baking powder. Gradually add the dry ingredients to the wet mixture, stirring until you achieve a smooth batter.
Step 2: Cook the Pizzelle
Preheat your pizzelle maker according to the manufacturer’s instructions. Once heated, lightly grease the plates and drop a tablespoon of batter onto each side of the pizzelle maker. Close the lid and cook for about 30 seconds or until golden brown. Carefully remove the pizzelle and place them on a cooling rack. Repeat until all the batter is used.
Step 3: Make the Cannoli Filling
In a separate bowl, combine the ricotta cheese, powdered sugar, and 2 teaspoons of vanilla extract. Using an electric mixer, whip until the mixture is smooth and creamy. In a separate bowl, whip the heavy whipping cream until stiff peaks form. Gently fold the whipped cream into the ricotta mixture until fully combined. Finally, fold in the mini chocolate chips.
Step 4: Assemble the Cannoli
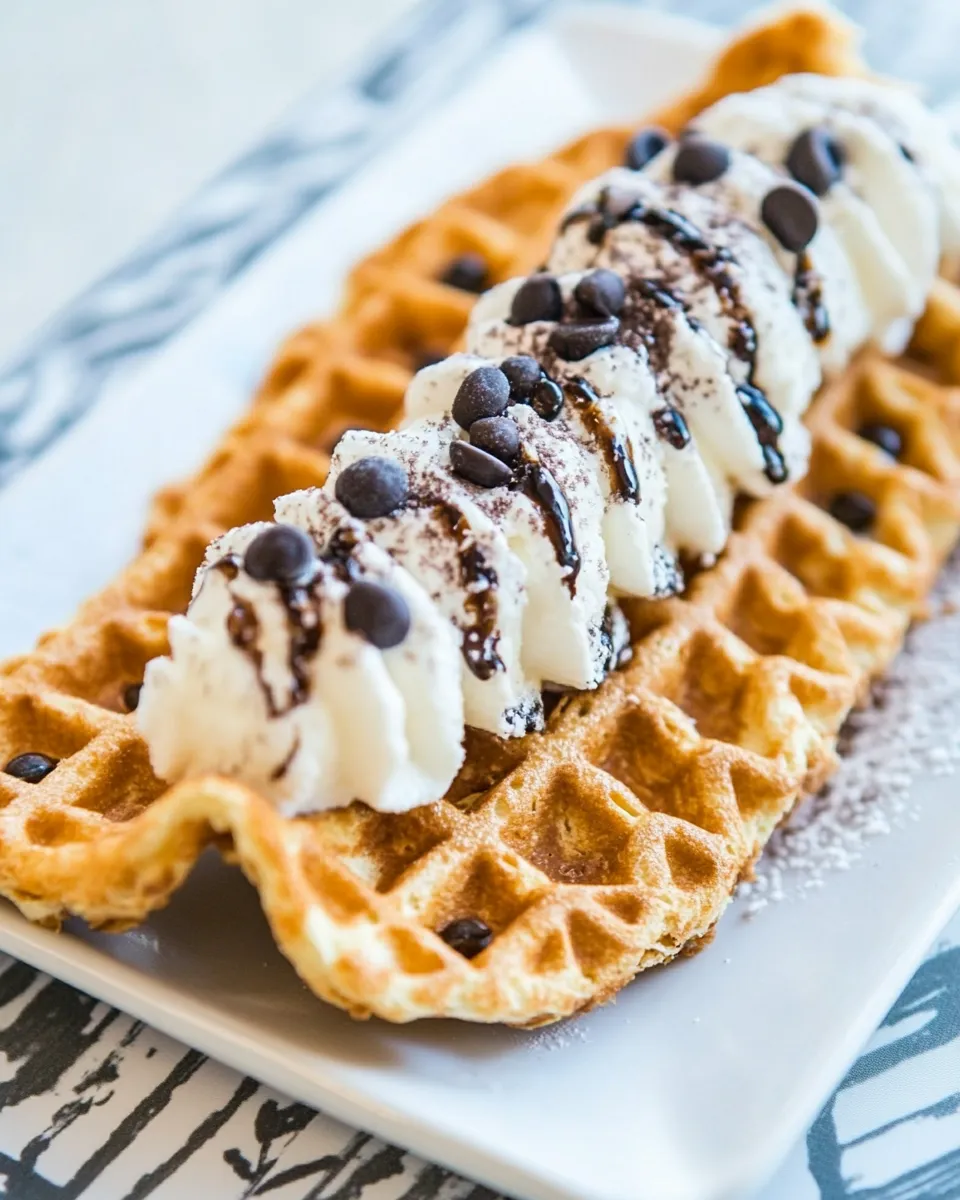
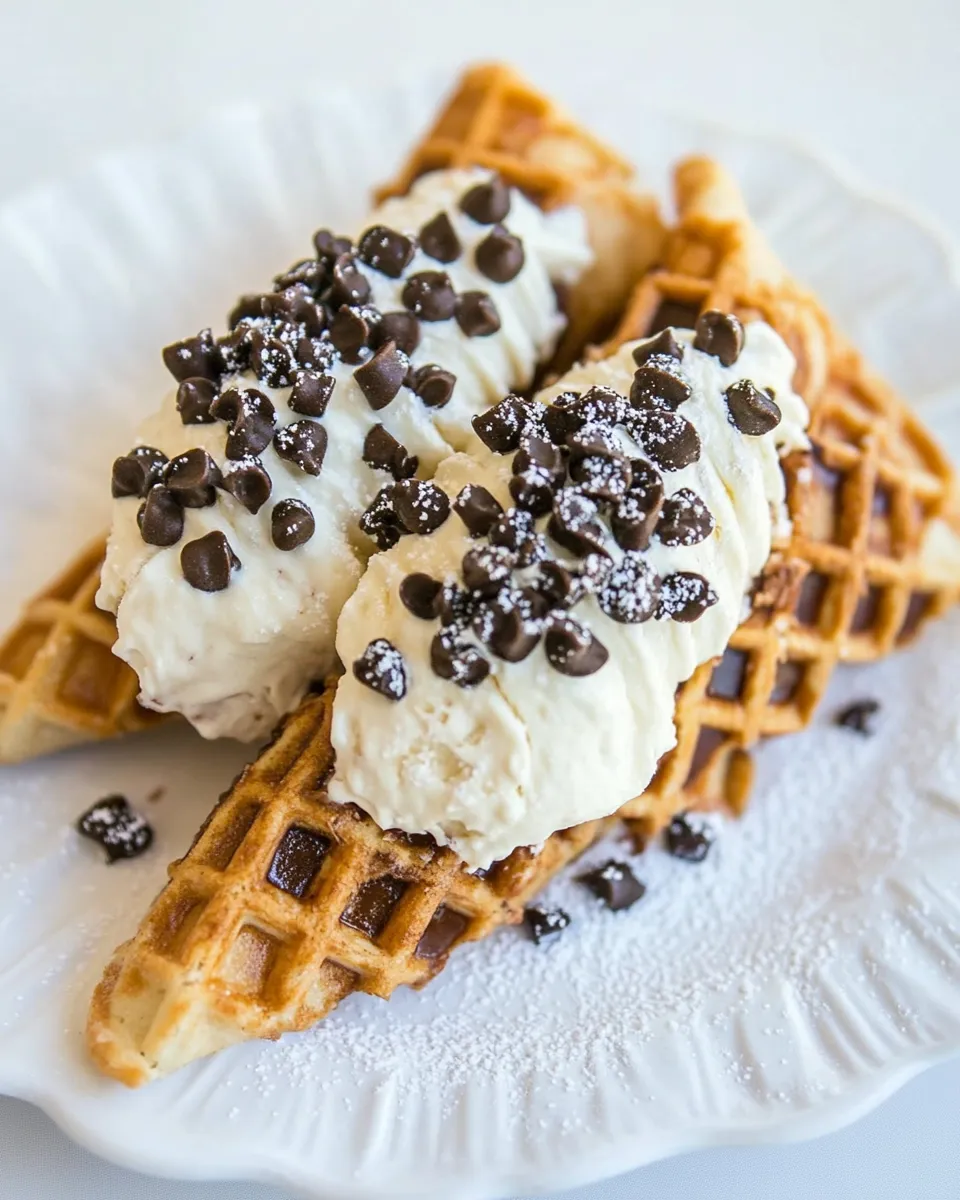
Once the pizzelle have completely cooled, take one pizzelle and spoon a generous amount of the ricotta filling onto one end. Roll it into a tube shape and gently press the ends together. Repeat with the remaining pizzelle and filling.
Step 5: Garnish and Serve
Dust the filled pizzelle cannoli with extra powdered sugar and sprinkle additional mini chocolate chips for a beautiful presentation. Serve immediately or chill for a short while before enjoying.
Substitutions by Category
If you’re missing an ingredient or want to make adjustments, here are some substitutions you can consider:
- Dairy: Substitute whole milk ricotta with part-skim ricotta or mascarpone for a richer filling.
- Gluten-Free: Use a gluten-free all-purpose flour blend to make the pizzelle gluten-free.
- Sweeteners: For a healthier option, replace granulated sugar with coconut sugar or a natural sweetener of your choice.
- Flavorings: Enhance the flavor by adding a pinch of cinnamon or almond extract to the batter or filling.
Errors to Dodge
Creating the perfect Pizzelle Cannoli can be a breeze if you avoid these common pitfalls:
- Overmixing the batter: This can lead to tough pizzelle. Mix just until combined.
- Not cooling the pizzelle: Attempting to fill the pizzelle while they’re warm can make the filling melt and leak out.
- Filling too early: If you fill the pizzelle too soon, they may become soggy. Wait until just before serving to assemble.
- Skipping the dusting: Powdered sugar not only adds sweetness but makes the presentation pop!
Keep-It-Fresh Plan
To ensure your Pizzelle Cannoli remain delicious and fresh, follow these tips:
Assembled Pizzelle Cannoli are best enjoyed the same day they are made. If you need to prepare them in advance, store the pizzelle and filling separately. The pizzelle can be kept in an airtight container at room temperature for up to 3 days, while the filling can be refrigerated for up to 5 days. Assemble just before serving to maintain their wonderful texture.
Frequently Asked Questions
Can I make the pizzelle batter ahead of time?
Yes, you can prepare the pizzelle batter ahead of time and store it in the refrigerator for up to 24 hours. Just give it a good stir before using.
What can I use instead of ricotta cheese?
If you’re not a fan of ricotta, you can substitute mascarpone cheese for a richer, creamier filling. Cream cheese is also a viable option, though it will change the flavor slightly.
Can I freeze the Pizzelle Cannoli?
It is not recommended to freeze the assembled Pizzelle Cannoli, as the texture of the pizzelle will suffer. However, you can freeze the unfilled pizzelle and the ricotta filling separately. Thaw and assemble before serving.
How can I make the cannoli filling more flavorful?
For an extra flavor boost, consider adding citrus zest (like lemon or orange) or a splash of liqueur, such as amaretto or rum, to the filling.
If you’re looking for more delicious recipes, consider trying these healthy-ish favorites:
Serve & Enjoy
Now that you’ve crafted your gorgeous Pizzelle Cannoli, it’s time to serve and enjoy! Present them on a beautiful platter, dusted with powdered sugar and garnished with chocolate chips, and watch your guests’ eyes light up with delight. The combination of the crispy pizzelle and the sweet, creamy filling is a match made in dessert heaven. Whether you celebrate a special occasion or simply want to treat yourself, this recipe is a delightful indulgence that you’ll want to make again and again.
With each bite of Pizzelle Cannoli, you’ll experience a delicious harmony of flavors and textures that truly captures the essence of Italian desserts. So gather your friends and family, and enjoy the fruits of your labor together. Happy baking!
Pizzelle Cannoli
Equipment
- Pizzelle maker
- Mixing Bowls
- Electric Mixer
- Spatula
- Cooling rack
Ingredients
For the Pizzelle Batter:
- 2 eggs
- 1 cup granulated sugar
- 1 tablespoon vanilla extract (see note 2)
- ½ cup butter melted and cooled
- 2 cups all-purpose flour
- 2 teaspoons baking powder
For the Cannoli Filling:
- 4 cups whole milk ricotta cheese
- 1 cup powdered sugar plus more for garnish
- 2 teaspoons vanilla extract
- 1 cup heavy whipping cream
- 2/3 cup semi-sweet mini chocolate chips plus more for garnish
Instructions
Step 1: Prepare the Pizzelle Batter
- In a large mixing bowl, whisk together the granulated sugar, eggs, and vanilla extract until well combined and slightly frothy. Gradually add in the melted butter, mixing until fully incorporated. In another bowl, sift together the flour and baking powder. Gradually add the dry ingredients to the wet mixture, stirring until you achieve a smooth batter.
Step 2: Cook the Pizzelle
- Preheat your pizzelle maker according to the manufacturer’s instructions. Once heated, lightly grease the plates and drop a tablespoon of batter onto each side of the pizzelle maker. Close the lid and cook for about 30 seconds or until golden brown. Carefully remove the pizzelle and place them on a cooling rack. Repeat until all the batter is used.
Step 3: Make the Cannoli Filling
- In a separate bowl, combine the ricotta cheese, powdered sugar, and 2 teaspoons of vanilla extract. Using an electric mixer, whip until the mixture is smooth and creamy. In a separate bowl, whip the heavy whipping cream until stiff peaks form. Gently fold the whipped cream into the ricotta mixture until fully combined. Finally, fold in the mini chocolate chips.
Step 4: Assemble the Cannoli
- Once the pizzelle have completely cooled, take one pizzelle and spoon a generous amount of the ricotta filling onto one end. Roll it into a tube shape and gently press the ends together. Repeat with the remaining pizzelle and filling.
Step 5: Garnish and Serve
- Dust the filled pizzelle cannoli with extra powdered sugar and sprinkle additional mini chocolate chips for a beautiful presentation. Serve immediately or chill for a short while before enjoying.
Notes
- Store pizzelle and filling separately to maintain crispness; assemble just before serving.
- Substitute mascarpone or cream cheese for ricotta to vary the filling flavor.
- Use gluten-free flour to make this recipe gluten-free.
- Enhance filling flavor with citrus zest or a splash of liqueur like amaretto or rum.
- Do not overmix pizzelle batter to avoid tough cookies.