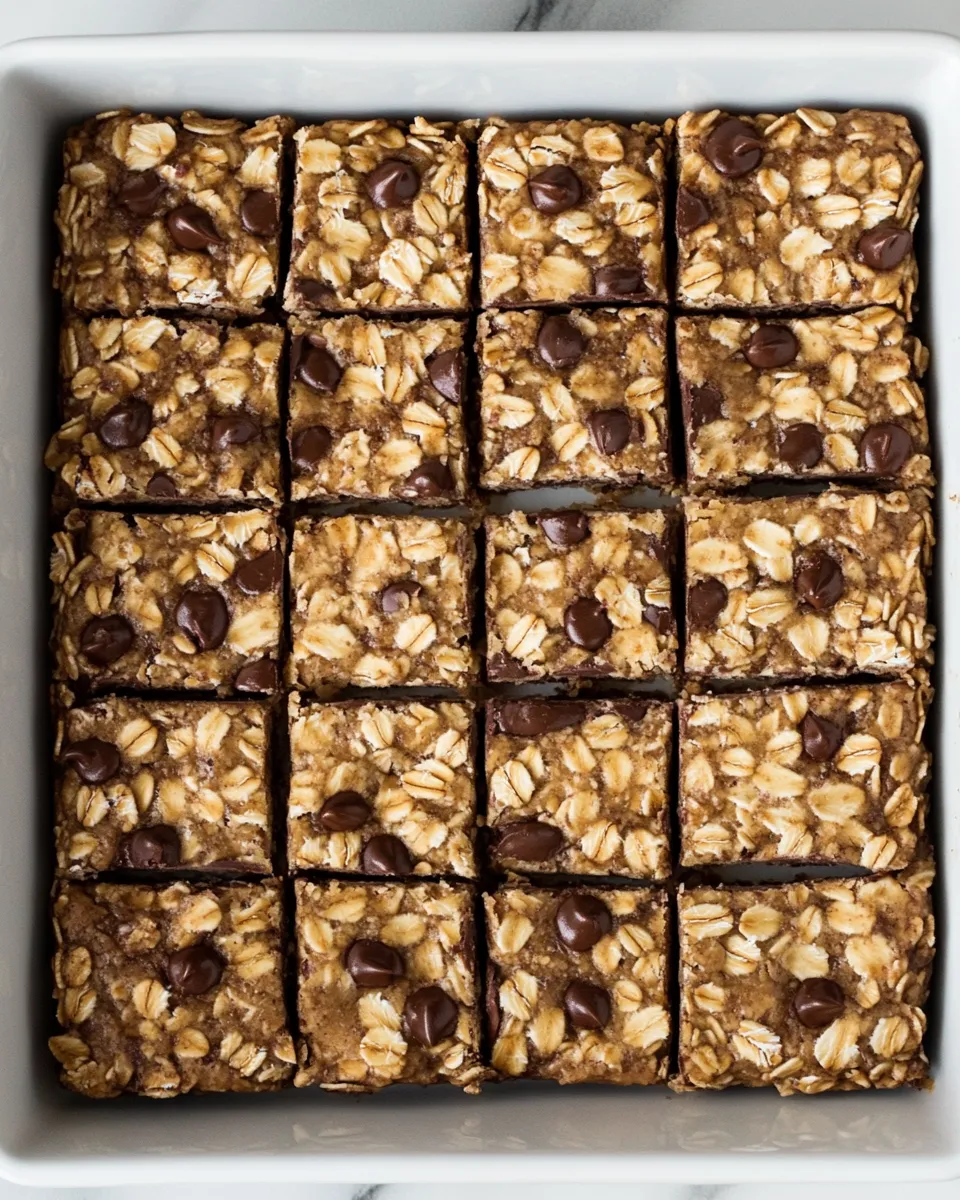
These Baked Oatmeal Bars are my go-to when the week looks busy and I still want breakfast that travels well. They land somewhere between chewy granola and a breakfast cookie: simple, forgiving, and reliably satisfying. I make a double batch when I know mornings will be chaotic—one pan for now, one pan for the freezer.
There are no complicated steps here: mash, mix, press, bake, rest, and slice. The banana does a lot of the work as a natural sweetener and binder, while the oats give structure and texture. You can keep the bars plain and honest, or fold in a handful of chocolate chips or chopped nuts. Either way, cleanup is minimal.
Below I walk you through what to buy, the exact ingredient list, the step-by-step method (unchanged from a trusted simple formula), and practical tips so your bars come out consistent every time. If you like make-ahead breakfasts that actually taste homemade, these will quickly become a staple.
Your Shopping Guide
Before you start, gather the few pantry staples and a couple of optional extras. This recipe is intentionally compact in ingredients: rolled oats, banana, a touch of sweetener, a fat (oil or nut butter), vanilla, salt, and water. The optional add-ins—chocolate chips, nuts—stay optional so you can adapt based on what’s on hand.
Notes for the shop: choose very ripe bananas for sweetness and moisture; buy old-fashioned rolled oats (they give the best texture here); select a neutral oil you like or a nut butter you trust; and if you don’t already own them, pick up an 8-inch square pan and a sheet of parchment paper. Those two small purchases make the bars easy to remove and slice.
Ingredients
- 2 cups rolled oats — the base and body of the bars; old-fashioned oats give the best chew.
- 1 1/3 cup mashed banana (for banana-free, try these Baked Oats) — provides sweetness and binding; very ripe bananas work best.
- 6 tbsp water — helps hydrate the oats and loosen the batter so it presses evenly.
- 1/2 tsp salt — balances sweetness and rounds the flavors.
- 3 tbsp pure maple syrup, agave, or honey OR stevia equivalent — pick one sweetener option from the list; they’re interchangeable here.
- 3 tbsp oil, nut butter, or additional water — adds mouthfeel and tenderness; choose oil for a neutral result or nut butter for richness.
- 1 tsp pure vanilla extract — subtle aroma that lifts the whole bar.
- optional handful chocolate chips, chopped nuts, etc. — fold in or sprinkle on top for texture and flavor contrast.
How to Prepare Baked Oatmeal Bars
- Preheat the oven to 350°F. Line an 8-inch square pan with parchment paper or grease it well.
- In a large bowl, combine the mashed banana (1 1/3 cup), 6 tbsp water, 3 tbsp sweetener (choose pure maple syrup, agave, or honey, or use the stevia equivalent), 3 tbsp oil or nut butter (or use the additional water option), and 1 tsp vanilla. Stir until the wet ingredients are uniform.
- Add 2 cups rolled oats and 1/2 tsp salt to the wet mixture. Stir until evenly combined. If using mix-ins (chocolate chips, chopped nuts, etc.), either fold a handful into the batter now or reserve them for the top.
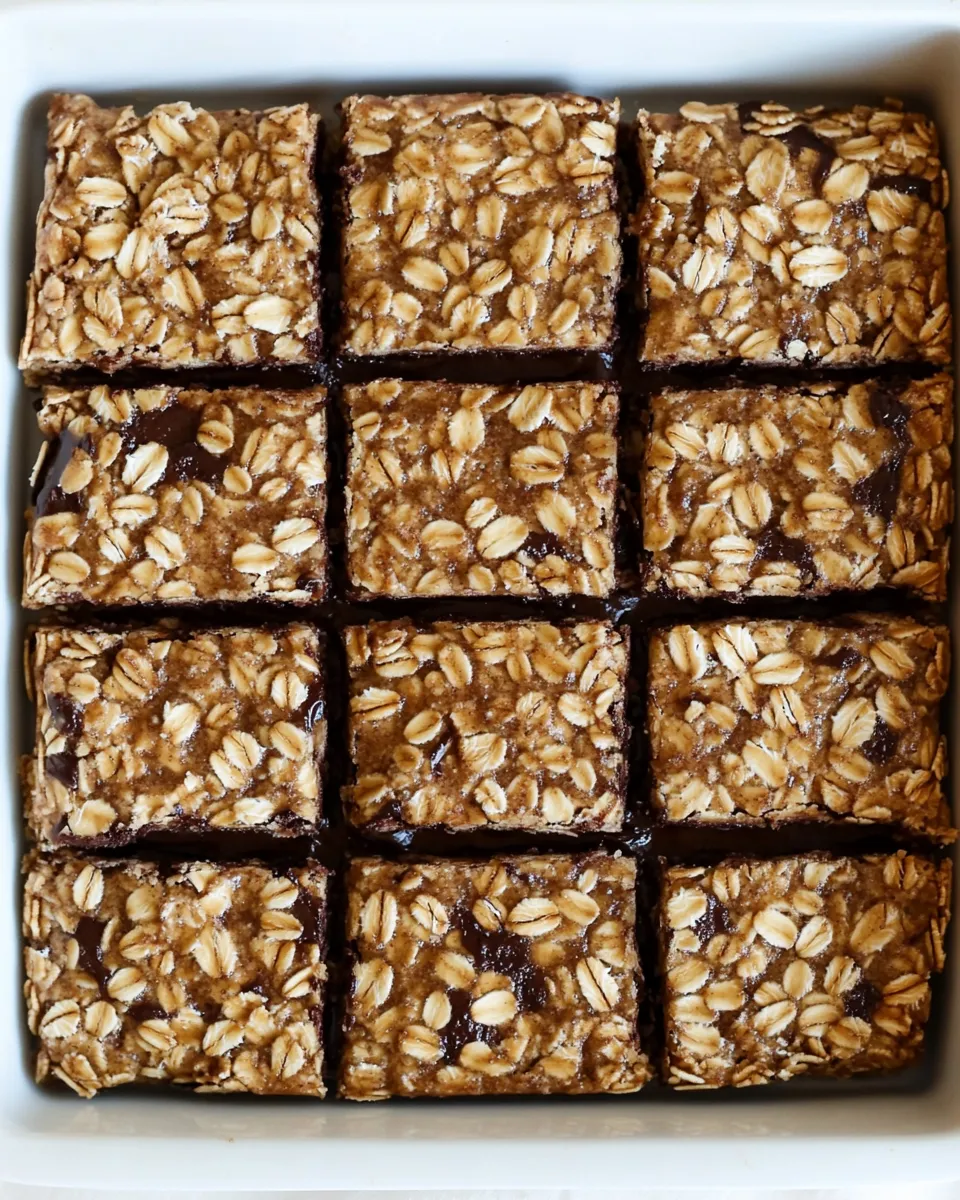
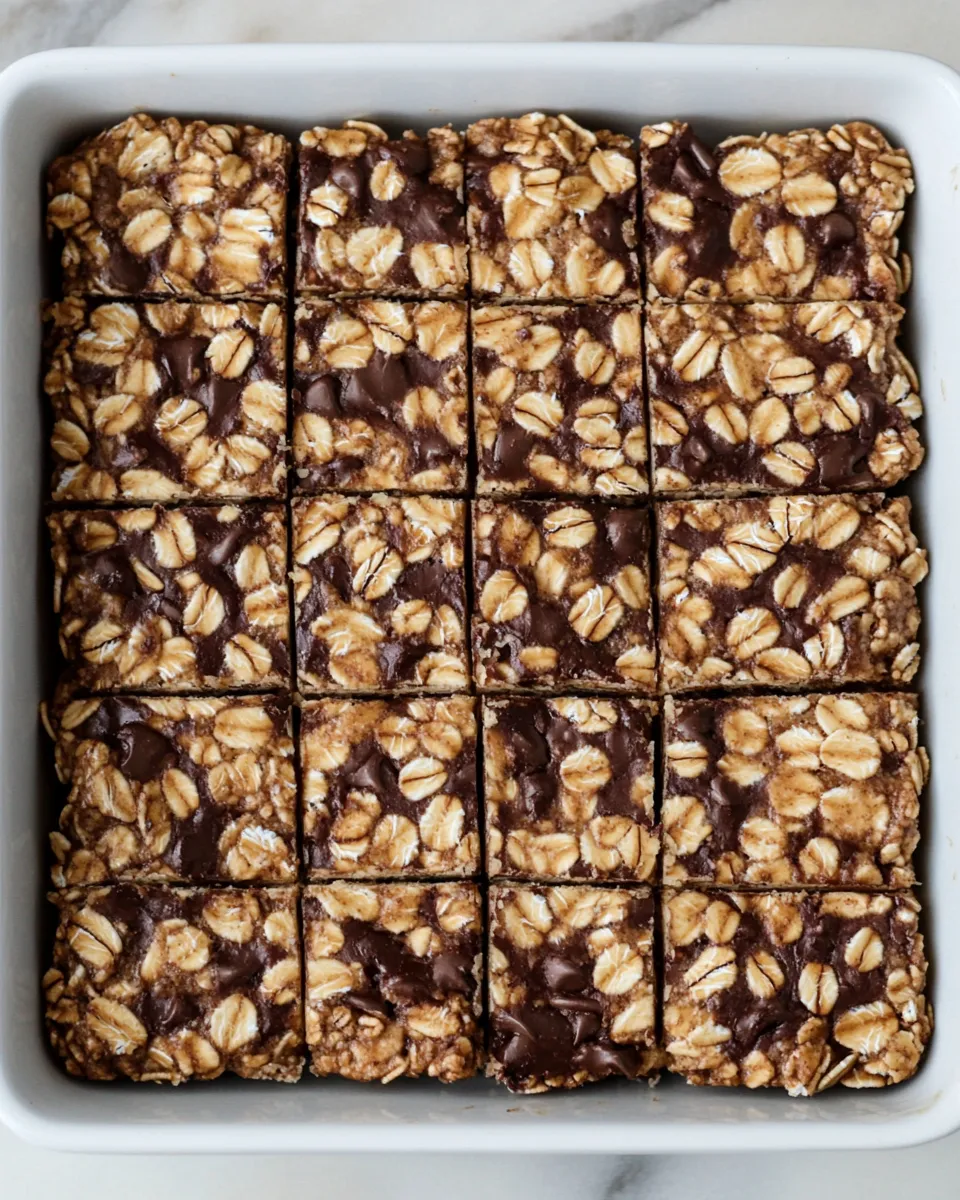
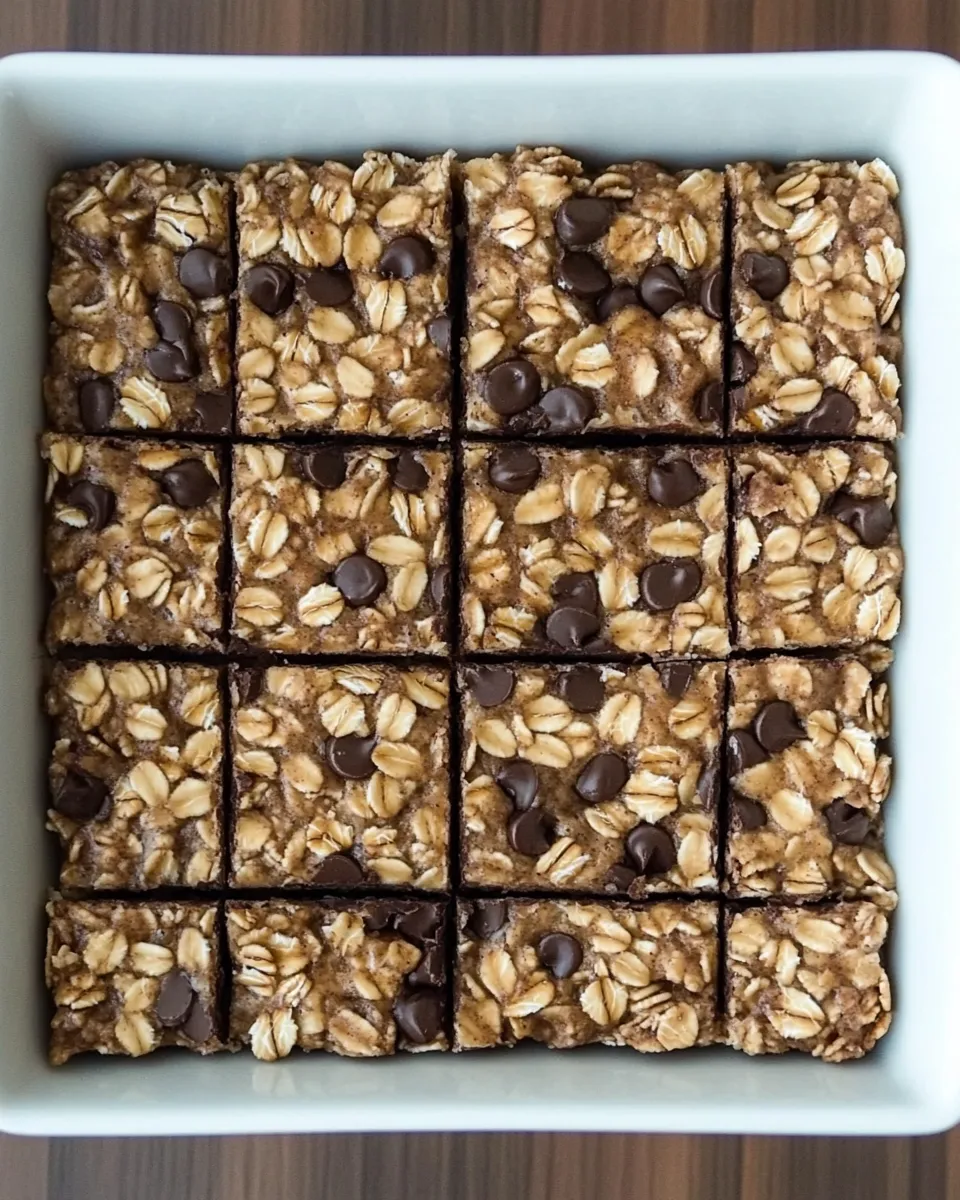
- Transfer the mixture to the prepared 8-inch pan. Use a spatula to spread and press it into an even layer.
- Sprinkle any reserved chocolate chips or toppings evenly over the top, if desired.
- Bake on the middle oven rack at 350°F for 20 minutes.
- After 20 minutes, turn off the oven but do not open the oven door. Let the pan sit inside the closed oven for an additional 5 minutes.
- Remove the pan from the oven and cool on a rack for at least 10 minutes, then lift the bars out using the parchment (or invert the pan) and let cool further until firm enough to slice.
- Slice into bars. Store leftovers refrigerated for 3–4 days or frozen for a few months.
Why You’ll Love This Recipe
These bars are designed to be low-drama and high-utility. They require minimal measuring, no mixer, and just one bowl. The mashed banana carries sweetness and moisture so you can keep the added sweetener modest. Oats give the bars chew and substance, making them filling enough to count as breakfast or a solid snack.
The baking-plus-resting step creates a texture that’s set without being hard. Turning off the oven and letting the pan sit helps the bars finish gently so the center doesn’t dry out while the edges firm up. The result is consistent: sliceable bars with a tender crumb and satisfying chew.
Quick Replacement Ideas
- Sweetener swaps — use maple syrup, agave, or honey (or the stevia equivalent listed) interchangeably; pick the one you prefer and keep the same measure.
- Fat options — the recipe allows 3 tbsp oil, nut butter, or additional water. Use oil for a neutral, tender bar; choose nut butter for extra flavor and richness; use extra water if you prefer to avoid added fat.
- Mix-ins — the recipe already lists optional chocolate chips and chopped nuts; fold them into the batter or sprinkle them on top to vary texture without changing the base formula.
- Banana-free — the ingredients note a banana-free option by referencing Baked Oats; if avoiding banana, follow that alternate base while keeping the oat proportion the same.
What’s in the Gear List
- 8-inch square pan — the recipe is scaled for this size; it yields a thickness that bakes evenly.
- Parchment paper or nonstick spray — parchment makes lifting and slicing easy; spray is fine if you don’t have parchment.
- Mixing bowl and spatula — a single large bowl keeps things simple; a spatula helps press the batter evenly.
- Measuring spoons and cups — the recipe uses tablespoons, teaspoons, and cup measures.
- Cooling rack — lets the pan cool evenly so the bars set properly before slicing.
Problems & Prevention
- Soggy center — make sure you press the batter firmly and evenly into the pan so it bakes uniform. If your bananas are extremely moist, reduce the added water slightly or opt for nut butter instead of oil.
- Bars stick to the pan — use parchment paper with an overhang or grease the pan well. Let the bars cool for the minimum 10 minutes, then lift with parchment to avoid breakage.
- Too dry or crumbly — press the batter more firmly before baking and avoid overbaking. If bars are under-moist, next time use slightly riper bananas or keep the 3 tbsp fat rather than swapping in extra water.
- Uneven baking — position the pan on the middle oven rack for the most consistent heat. If your oven runs hot or cold regularly, use an oven thermometer and adjust time accordingly.
Fresh Takes Through the Year
This recipe’s simplicity is what makes seasonal variety easy: switch up the optional toppings and mix-ins based on what’s in season or what you already have. A handful of chopped nuts provides crunch in colder months; a scattering of chocolate chips is an easy crowd-pleaser any time of year. Because the base is neutral and mildly sweet, the bars act like a canvas for small seasonal tweaks without needing recipe surgery.
For a lighter summer batch, fold in fewer mix-ins and enjoy slices with fresh fruit at the table. In slower months, add a rich nut butter and a generous handful of chopped nuts for a more decadent snack. Keep the core ingredient list intact and you won’t need to fuss with baking times or texture changes.
Method to the Madness
The method is intentionally short because each step has a clear job. Mash the banana so it blends evenly with the water and sweetener; this creates a uniform wet base. Stir in the oats and salt so they hydrate fully—oats absorb liquid and the 6 tbsp of water plus the banana ensures the batter holds together when pressed.
Bake at 350°F for 20 minutes so the edges begin to set. Turning off the oven and letting the pan sit inside for 5 minutes allows residual heat to finish the center without overcooking. Cooling on a rack then gives the bars time to firm up so they slice cleanly. Skipping or rushing any of these stages changes texture: the bars may be crumbly if rushed, or too dry if overbaked.
Keep It Fresh: Storage Guide
Follow the storage note in the method: refrigerate leftovers for 3–4 days. I like to slice bars and wrap individual pieces in parchment or plastic wrap before refrigerating so I can grab one and go. For longer storage, freeze slices in a single layer on a sheet tray until firm, then stack with parchment between layers in a freezer-safe container—these keep well for a few months.
To serve from frozen, thaw at room temperature for 30–60 minutes or microwave briefly (10–20 seconds) if you want a warm bar. If you refrigerate whole, let a chilled slice sit on the counter a few minutes before eating so flavors soften and the texture becomes more pleasant.
Common Qs About Baked Oatmeal Bars
- Can I use quick oats instead of rolled oats? Yes—you can, but quick oats will produce a softer, more cake-like bar. Rolled oats offer better chew and structure for slicing.
- How ripe should the banana be? Very ripe—spotty or mostly brown skins give the best sweetness and mash smoothly into the batter.
- Can I skip the sweetener? You can reduce the added sweetener if your banana is very sweet, but some added sweetener helps balance flavor. The recipe allows maple, agave, honey, or the stevia equivalent.
- Do I have to let the pan sit in the oven after turning it off? It’s recommended—the five-minute rest helps the bars set evenly without overbaking the edges.
- How should I cut the bars? Let them cool until firm, then use a sharp knife for neat slices. Lifting the whole slab out on the parchment makes cutting cleaner.
See You at the Table
These Baked Oatmeal Bars are a small-effort, big-return recipe: short hands-on time, pantry-friendly ingredients, and solid results even when you skip the bells and whistles. Make a pan on Sunday, slice a few for weekday breakfasts, and stash extras in the freezer for when life gets busy.
If you try them, leave a note about how you fold in your mix-ins—chocolate chips or chopped nuts, or both? I’m always swapping proportions depending on what I find in the pantry. Enjoy, and see you back here for the next simple, practical recipe.
Baked Oatmeal Bars
Equipment
- 8-inch square pan
- Oven
- Parchment Paper
- Mixing Bowl
- Spatula
Ingredients
Ingredients
- 2 cupsrolled oats
- 11/3 cupmashed banana for banana-free, try theseBaked Oats
- 6 tbspwater
- 1/2 tspsalt
- 3 tbsppure maple syrup agave, or honey OR stevia equivalent
- 3 tbspoil nut butter, or additional water
- 1 tsppure vanilla extract
- optional handful chocolate chips chopped nuts, etc.
Instructions
Instructions
- Preheat the oven to 350°F. Line an 8-inch square pan with parchment paper or grease it well.
- In a large bowl, combine the mashed banana (1 1/3 cup), 6 tbsp water, 3 tbsp sweetener (choose pure maple syrup, agave, or honey, or use the stevia equivalent), 3 tbsp oil or nut butter (or use the additional water option), and 1 tsp vanilla. Stir until the wet ingredients are uniform.
- Add 2 cups rolled oats and 1/2 tsp salt to the wet mixture. Stir until evenly combined. If using mix-ins (chocolate chips, chopped nuts, etc.), either fold a handful into the batter now or reserve them for the top.
- Transfer the mixture to the prepared 8-inch pan. Use a spatula to spread and press it into an even layer.
- Sprinkle any reserved chocolate chips or toppings evenly over the top, if desired.
- Bake on the middle oven rack at 350°F for 20 minutes.
- After 20 minutes, turn off the oven but do not open the oven door. Let the pan sit inside the closed oven for an additional 5 minutes.
- Remove the pan from the oven and cool on a rack for at least 10 minutes, then lift the bars out using the parchment (or invert the pan) and let cool further until firm enough to slice.
- Slice into bars. Store leftovers refrigerated for 3–4 days or frozen for a few months.
Notes
Also try these easy homemade
Protein Bars
.