I make this dough every week. It’s straightforward, forgiving, and built to become a reliable starting point for whatever pizza night looks like in your kitchen — thin and crisp, blistered and chewy, or hand-tossed with bubbly edges. The technique leans on cold ingredients and a slow chill for flavor and texture, so you get a dough that’s easy to handle and full of character.
No special flour or equipment required. Measure, mix, rest, and bake. Small decisions — the temperature of the water, how long you let the dough relax, or whether you preheat a stone — make the difference between good and great. I’ll walk you through each step and tell you what to watch for, so you can skip the guessing and focus on sauce and toppings.
Below you’ll find the exact ingredients and instructions I use, followed by reasons behind the method, helpful swaps, common mistakes, and storage tips. Bookmark this page — once you get the routine down, you’ll be making restaurant-quality pies at home without stress.
What You’ll Need
Ingredients
- 4½ cups unbleached bread flour or all-purpose flour (chilled) — provides structure; chilling helps keep the dough cool during mixing.
- 1¾ teaspoons salt — balances flavor and tightens the gluten for better chew.
- 1 teaspoon active dry yeast — the rising agent; check the date for best results.
- ¼ cup olive oil or vegetable oil — adds tenderness and helps the dough brown.
- 1¾ cups ice cold water (40°F) — cold water slows fermentation so you can refrigerate overnight and develop flavor.
- 1 tablespoon granulated white sugar — feeds the yeast for a predictable rise and a touch of browning.
- semolina / durum flour or cornmeal, for dusting — prevents sticking and gives a pleasant texture under the crust.
How to Prepare Basic Pizza Dough
- In a large bowl or the bowl of a stand mixer, combine 4½ cups chilled flour, 1¾ teaspoons salt, and 1 teaspoon active dry yeast.
- Add ¼ cup oil, 1 tablespoon granulated sugar, and 1¾ cups ice cold water (about 40°F). Stir with a large wooden spoon (or the paddle attachment on low) until the ingredients come together into a sticky dough.
- Knead the dough 5–7 minutes until smooth and elastic. If kneading by hand, turn the dough onto a lightly floured surface and knead. If using a mixer, switch to the dough hook and knead on medium speed. The finished dough should be springy and the ingredients evenly distributed. If the dough is too wet, sprinkle in a little flour until it is manageable; if too dry, add 1–2 teaspoons cold water.
- Flour your work surface or counter. Line a jelly-roll pan with parchment and lightly oil the parchment.
- Transfer the dough to the floured surface. Using a metal or plastic dough scraper, divide the dough into 6 equal pieces. (To prevent sticking, dip the scraper in water between cuts if needed.)
- Sprinkle flour over the dough pieces and on dry hands. Gently shape each piece into a tight ball; if the dough sticks, dust hands and dough with more flour.
- Place the dough balls on the prepared pan, leaving space between them. Lightly brush or mist the tops with oil. Cover the pan with plastic wrap or put it into a plastic bag and refrigerate overnight or for up to 3 days.
- (Optional freezing) To freeze, lightly coat each dough ball with oil, put each ball into its own zip-top freezer bag, and freeze for up to 3 months. Thaw in the refrigerator the day before use.
- On the day you will bake, remove the number of dough balls you need from the refrigerator exactly 2 hours before you plan to bake. Dust the counter or mat with flour and lightly oil the surface if desired.
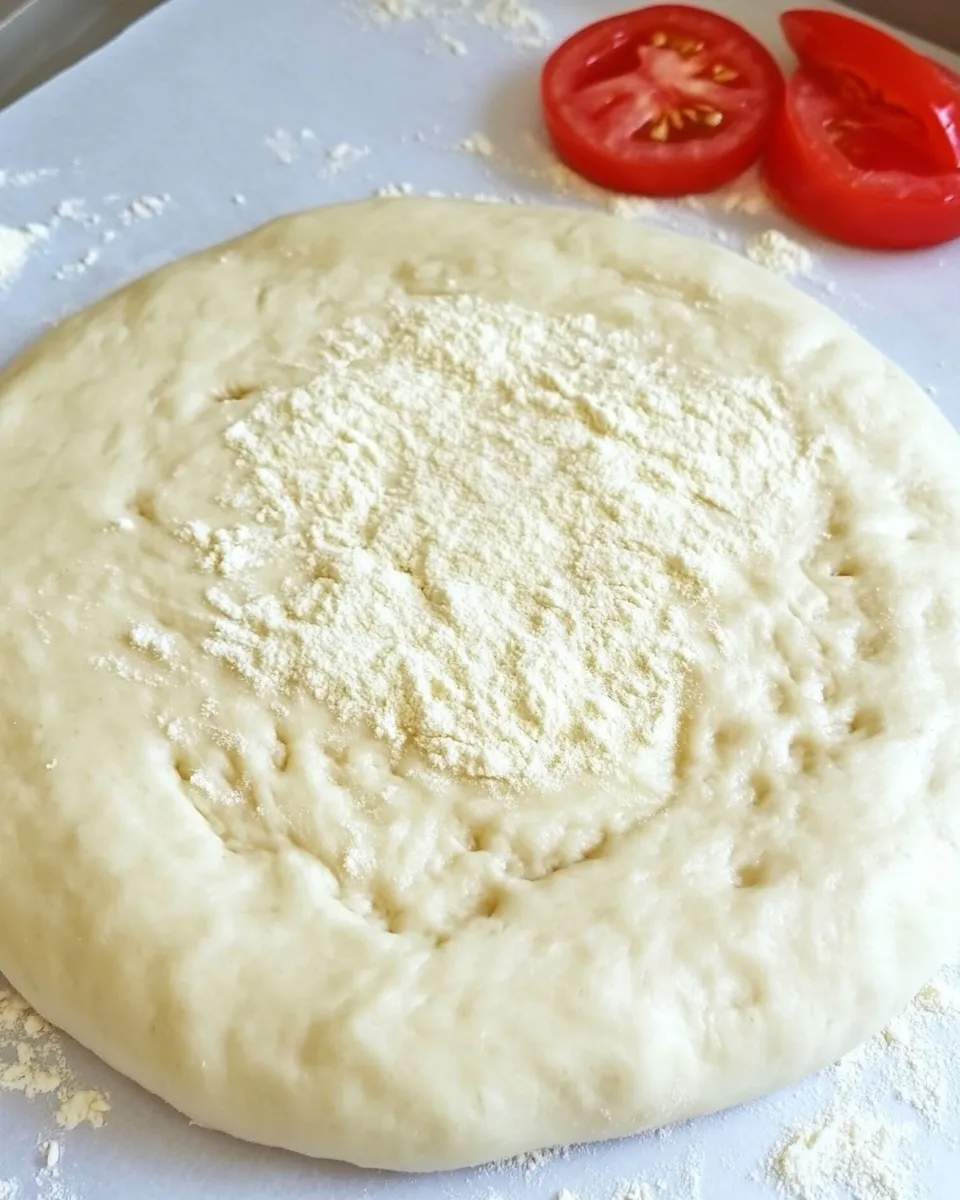
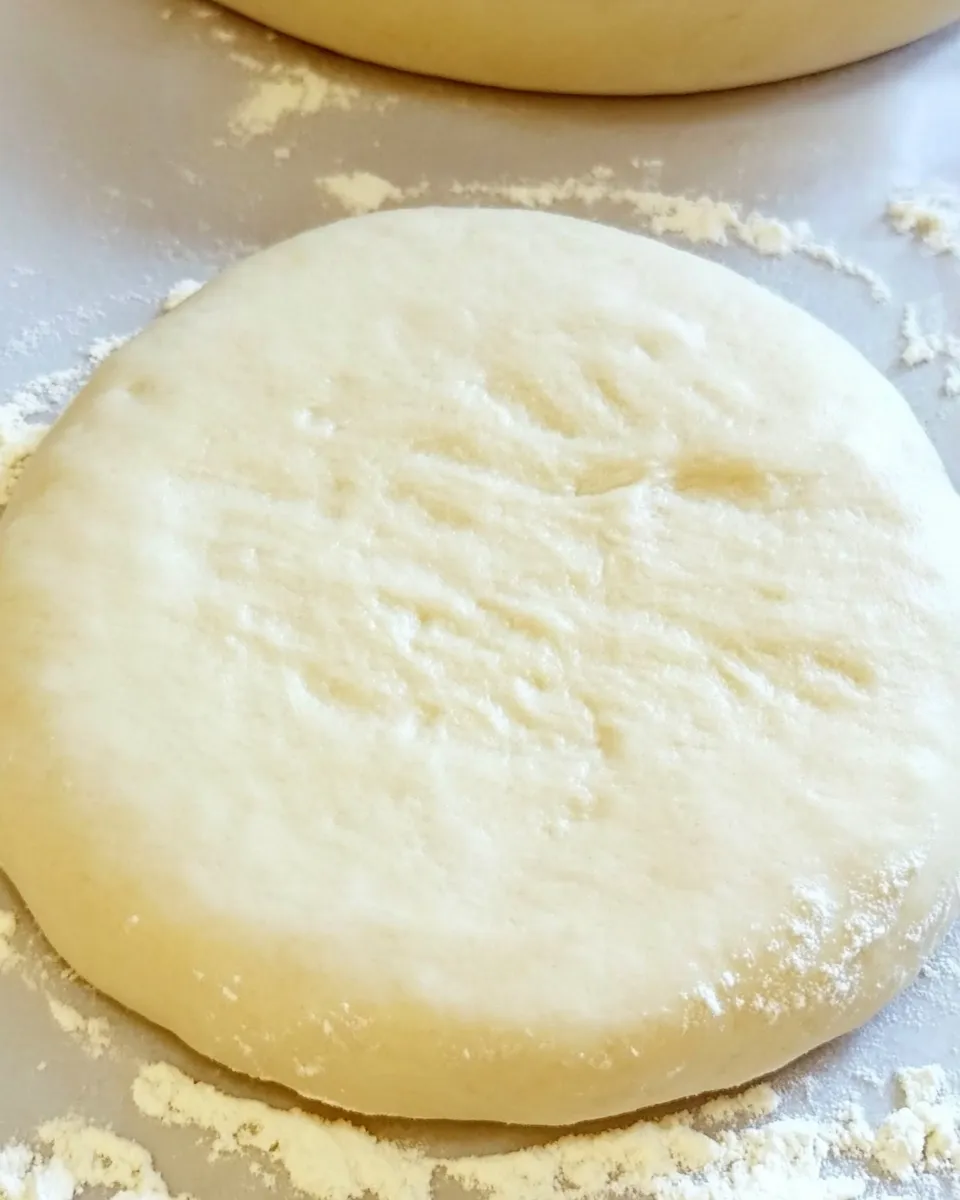
- With floured hands, press each dough ball into a disk about ½ inch thick and roughly 5 inches in diameter. Lightly flour and oil the tops, loosely cover with plastic wrap, and let rest at room temperature for 2 hours.
- At least 45 minutes before baking, place a baking stone on the lower third of the oven and preheat the oven as hot as it will go (about 500°F). If you do not have a baking stone, use the back of a jelly-roll pan, but do not preheat the pan.
- Generously sprinkle semolina/durum flour or cornmeal on a clean jelly-roll pan to prevent sticking. Shape each rested dough disk to its final size (about 9–12 inches) by stretching by hand or tossing. If the dough resists stretching, let it rest 5–20 minutes to relax the gluten, then try again. Transfer the stretched dough to the prepared pan so it can slide on the semolina/cornmeal.
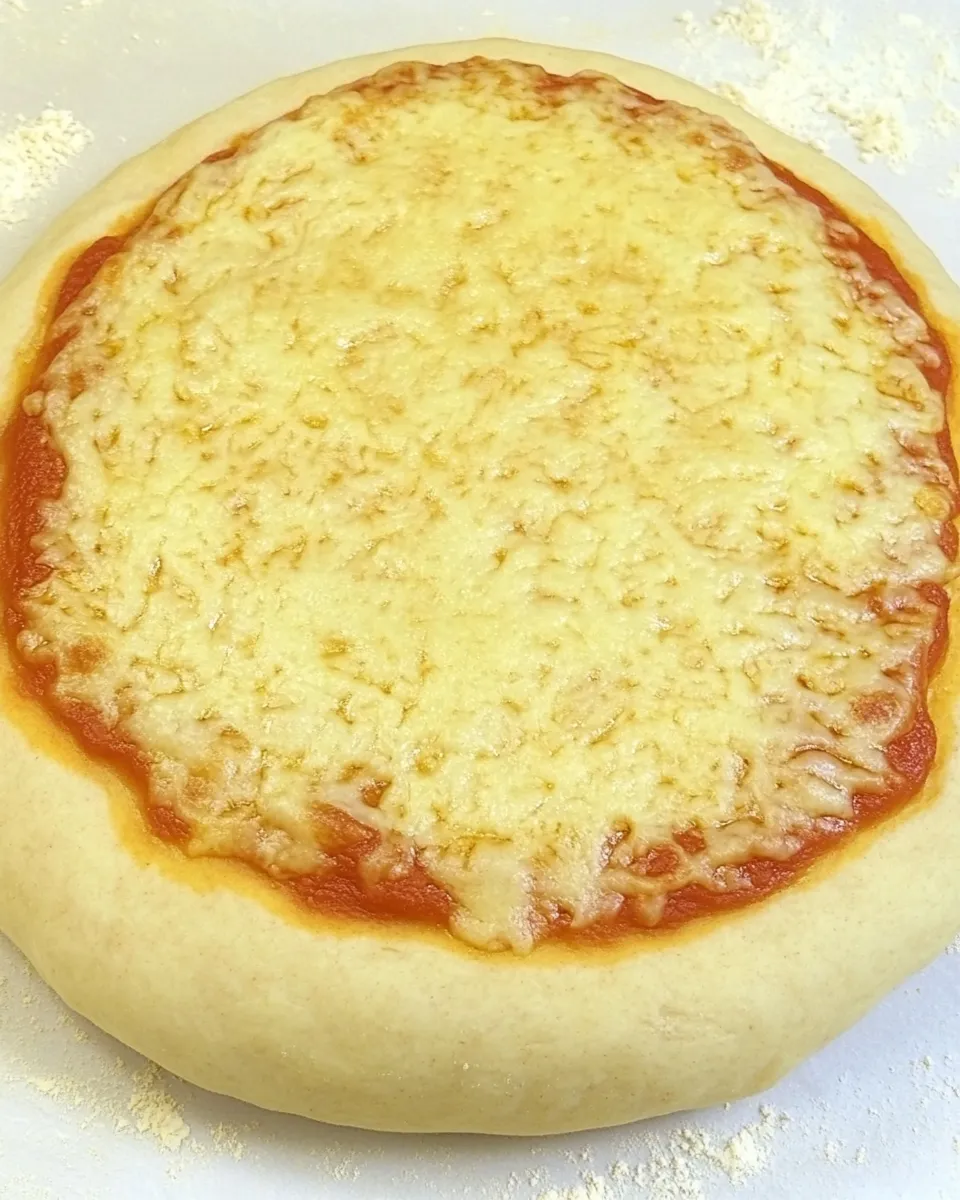
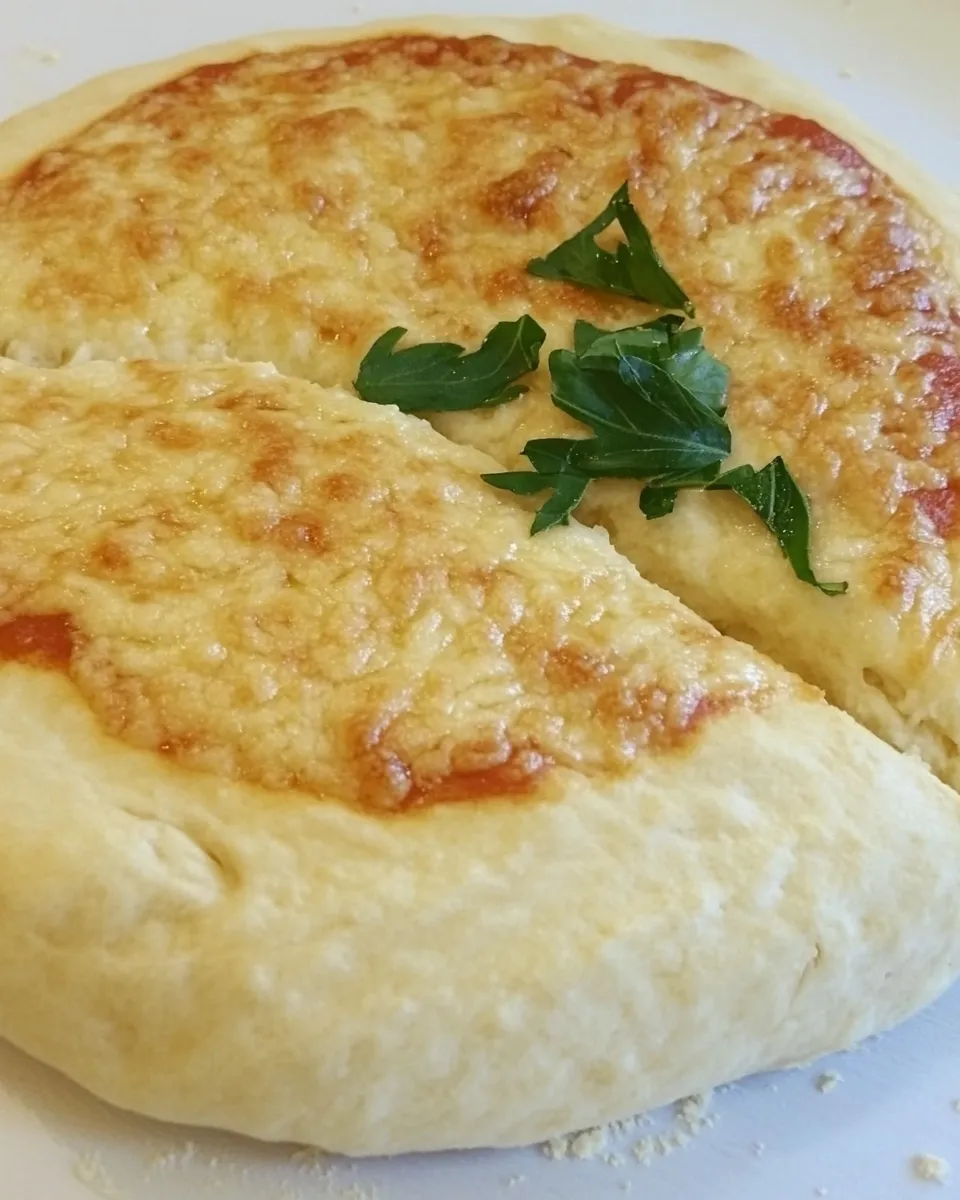
- Add your desired toppings. Slide the pizza onto the preheated stone or bake directly on the jelly-roll pan. Bake 5–8 minutes at 500°F; rotate the pizza 180° about 2 minutes into baking for even color. Bake until the crust is golden and toppings are cooked.
- Remove the pizza from the oven and transfer to a cutting board or plate. Let rest 3–5 minutes before slicing and serving.
Why This Recipe Works
There are three deliberate choices here: cold ingredients, brief kneading, and a slow, cool proof. Cold water (around 40°F) controls yeast activity during mixing, so the dough doesn’t overproof before you shape it. This gives you flexibility to refrigerate the balls for flavor development without the dough getting out of hand.
The hydration level and short knead time build enough gluten for structure without turning the dough tough. Oil softens the crumb and encourages browning. Dividing into individual balls and letting them rest in oil overnight creates a dough that’s relaxed and easy to stretch, with a crisp outside and a chewy interior after baking.
Preheating a baking stone concentrates heat at the base of the pizza for a lifted, blistered crust. If you don’t have a stone, the back of a heavy pan works; just avoid preheating that pan, since it’s better to transfer the pizza to a room-temperature metal surface that heats evenly from the oven air.
Dairy-Free/Gluten-Free Swaps
Good news: the base recipe is dairy-free already. Use your regular sauce and toppings choices and you won’t need to adjust the dough. For a gluten-free version, you’ll want a purpose-made gluten-free pizza blend designed to mimic bread flour. Those blends often require different hydration and handling, so treat this recipe as a method rather than a precise formula for gluten-free dough.
If you need a dairy-free topping solution, choose plant-based cheeses or go with vegetables, cured meats, and a drizzle of olive oil after baking. The dough handles dairy-free toppings just like the traditional versions, since the crust recipe itself contains no dairy.
What You’ll Need (Gear)
- Large mixing bowl or stand mixer with paddle and dough hook
- Large wooden spoon (if mixing by hand)
- Metal or plastic dough scraper
- Jelly-roll pan and parchment paper
- Plastic wrap or large resealable plastic bags for covering
- Baking stone (optional) or the back of a heavy jelly-roll pan
- Kitchen scale (helpful for dividing pieces evenly) or a measuring cup
- Semolina or cornmeal for dusting
Learn from These Mistakes
- Using warm water: it speeds fermentation and can leave you with overproofed, slack dough. Stick to ice-cold water for predictable results.
- Skipping the cold rest: immediate shaping after mixing yields tighter, springy dough that fights you when stretching. Overnight chill relaxes the gluten and improves flavor.
- Too much flour while shaping: a dusting is fine, but over-flouring will dry the surface and inhibit good browning and oven rise.
- Not preheating the stone: without a hot surface, the crust won’t get that quick burst of heat that creates blistering and an airy rim.
- Baking on a cold pan: if you don’t preheat a stone, don’t preheat a thin baking sheet. The dough needs even oven heat, not a scorching top and undercooked bottom.
Allergy-Friendly Swaps
For gluten allergy or celiac disease, use a certified gluten-free flour blend and follow the manufacturer’s directions for hydration and rest — the handling will be different. If you’re avoiding eggs or dairy, this dough already complies. For nut allergies, ensure your toppings and work surfaces are free from cross-contact.
If sesame or other seed dustings are an issue, stick with plain semolina or fine cornmeal for the transfer dusting. Always check labels on packaged flours and cornmeal if you require allergen-free certification.
Author’s Commentary
I started making this dough because I needed something consistent for busy weeknights and ambitious weekends alike. The cold-water trick changed everything — it turned a single recipe into a flexible system. Make a double batch and freeze some balls. Bake one for a quick dinner, save another for a weekend party.
My favorite finish is simple: crushed San Marzano tomatoes, a scatter of fresh mozzarella, basil leaves after baking, and a drizzle of good olive oil. But don’t be precious — leftover roasted vegetables, a smear of pesto, or even a classic margherita will shine on this crust.
Keep-It-Fresh Plan
Refrigerated dough balls will keep for up to 3 days. Keep them lightly oiled and tightly covered so they don’t form a skin. For longer storage, freeze individual oiled balls in separate freezer bags for up to 3 months. Thaw in the refrigerator the day before you plan to bake, then bring to room temperature for the two-hour rest described above.
After baking, cooled pizza keeps well wrapped in the fridge for 2–3 days. Reheat on a preheated skillet or in a hot oven (about 425°F) for a few minutes to revive the crust rather than microwaving, which will make it soggy.
Reader Q&A
Q: Can I make smaller or larger dough balls?
A: Yes. The recipe divides into six pieces for medium pies. For smaller personal pizzas make more, smaller balls; for larger pies make fewer, larger balls. Adjust rise and rest times slightly — bigger balls need a bit more time to relax.
Q: My dough is sticky and tears when I stretch it. Help?
A: If it tears, it’s usually under-rested. Let the disks relax 5–20 minutes and try again. If it’s very sticky, dust lightly with flour, but don’t overdo it. A little flour on your hands and the work surface is all you need.
Q: Can I use instant yeast instead of active dry?
A: Yes, you can generally substitute instant yeast at a slightly smaller amount. If you do, mix it directly with the dry ingredients. Because this recipe relies on cold water and a slow chill, the timing won’t change drastically, but expect small differences in rise speed.
Save & Share
If this recipe saved your pizza night, save the page and share a photo. Tag a friend who needs a reliable dough base or pass along the link. When people ask for a straightforward, dependable pizza dough, this is the one I send them to first.
If you try any variations — whole wheat, flavored oils, or different cold-fermentation times — leave a note in the comments. I read them, test a few, and often fold successful tweaks into future posts.
Basic Pizza Dough
Equipment
- Large Bowl
- stand mixer (optional)
- Wooden Spoon
- paddle attachment (optional)
- Dough hook (optional)
- metal or plastic dough scraper
- jelly-roll pan
- Parchment Paper
- Plastic Wrap
- zip-top freezer bags
- baking stone (optional)
Ingredients
Ingredients
- 4 1/2 cupsunbleached bread flour or all-purpose flour chilled
- 1 3/4 teaspoonssalt
- 1 teaspoonactive dry yeast
- 1/4 cupolive oil or vegetable oil
- 1 3/4 cupsice cold water 40°F
- 1 tablespoongranulated white sugar
- semolina / durum flour or cornmeal for dusting
Instructions
Instructions
- In a large bowl or the bowl of a stand mixer, combine 4½ cups chilled flour, 1¾ teaspoons salt, and 1 teaspoon active dry yeast.
- Add ¼ cup oil, 1 tablespoon granulated sugar, and 1¾ cups ice cold water (about 40°F). Stir with a large wooden spoon (or the paddle attachment on low) until the ingredients come together into a sticky dough.
- Knead the dough 5–7 minutes until smooth and elastic. If kneading by hand, turn the dough onto a lightly floured surface and knead. If using a mixer, switch to the dough hook and knead on medium speed. The finished dough should be springy and the ingredients evenly distributed. If the dough is too wet, sprinkle in a little flour until it is manageable; if too dry, add 1–2 teaspoons cold water.
- Flour your work surface or counter. Line a jelly-roll pan with parchment and lightly oil the parchment.
- Transfer the dough to the floured surface. Using a metal or plastic dough scraper, divide the dough into 6 equal pieces. (To prevent sticking, dip the scraper in water between cuts if needed.)
- Sprinkle flour over the dough pieces and on dry hands. Gently shape each piece into a tight ball; if the dough sticks, dust hands and dough with more flour.
- Place the dough balls on the prepared pan, leaving space between them. Lightly brush or mist the tops with oil. Cover the pan with plastic wrap or put it into a plastic bag and refrigerate overnight or for up to 3 days.
- (Optional freezing) To freeze, lightly coat each dough ball with oil, put each ball into its own zip-top freezer bag, and freeze for up to 3 months. Thaw in the refrigerator the day before use.
- On the day you will bake, remove the number of dough balls you need from the refrigerator exactly 2 hours before you plan to bake. Dust the counter or mat with flour and lightly oil the surface if desired.
- With floured hands, press each dough ball into a disk about ½ inch thick and roughly 5 inches in diameter. Lightly flour and oil the tops, loosely cover with plastic wrap, and let rest at room temperature for 2 hours.
- At least 45 minutes before baking, place a baking stone on the lower third of the oven and preheat the oven as hot as it will go (about 500°F). If you do not have a baking stone, use the back of a jelly-roll pan, but do not preheat the pan.
- Generously sprinkle semolina/durum flour or cornmeal on a clean jelly-roll pan to prevent sticking. Shape each rested dough disk to its final size (about 9–12 inches) by stretching by hand or tossing. If the dough resists stretching, let it rest 5–20 minutes to relax the gluten, then try again. Transfer the stretched dough to the prepared pan so it can slide on the semolina/cornmeal.
- Add your desired toppings. Slide the pizza onto the preheated stone or bake directly on the jelly-roll pan. Bake 5–8 minutes at 500°F; rotate the pizza 180° about 2 minutes into baking for even color. Bake until the crust is golden and toppings are cooked.
- Remove the pizza from the oven and transfer to a cutting board or plate. Let rest 3–5 minutes before slicing and serving.