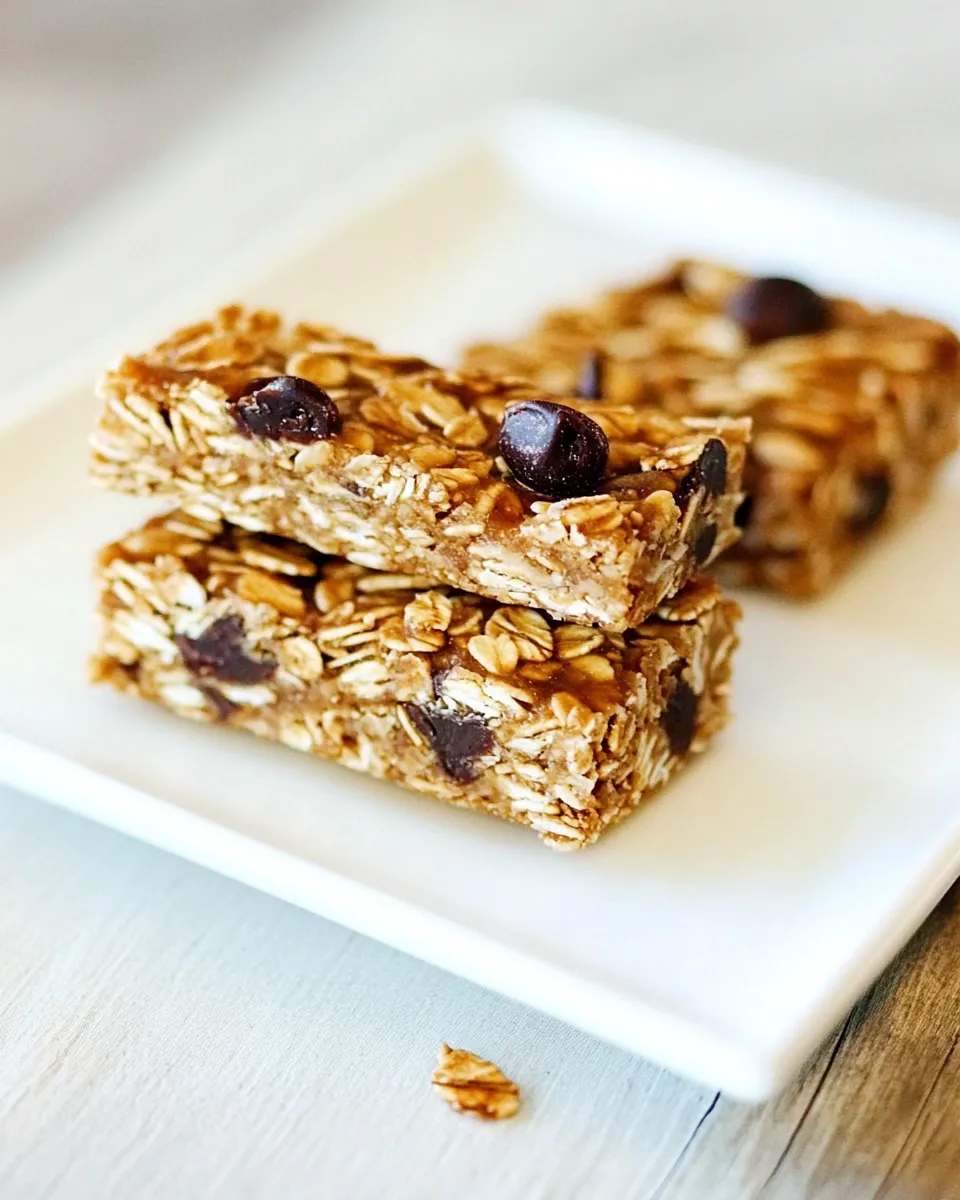
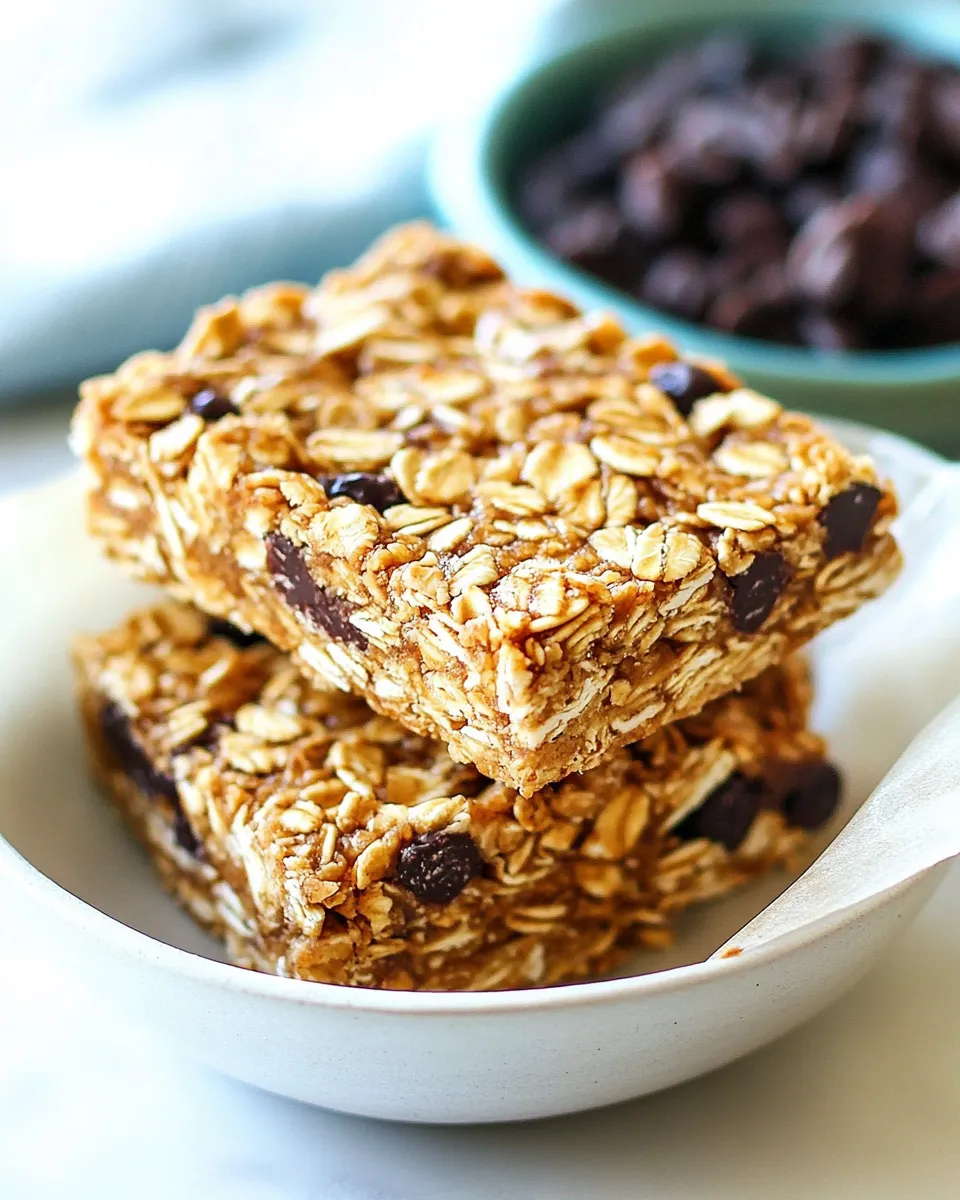
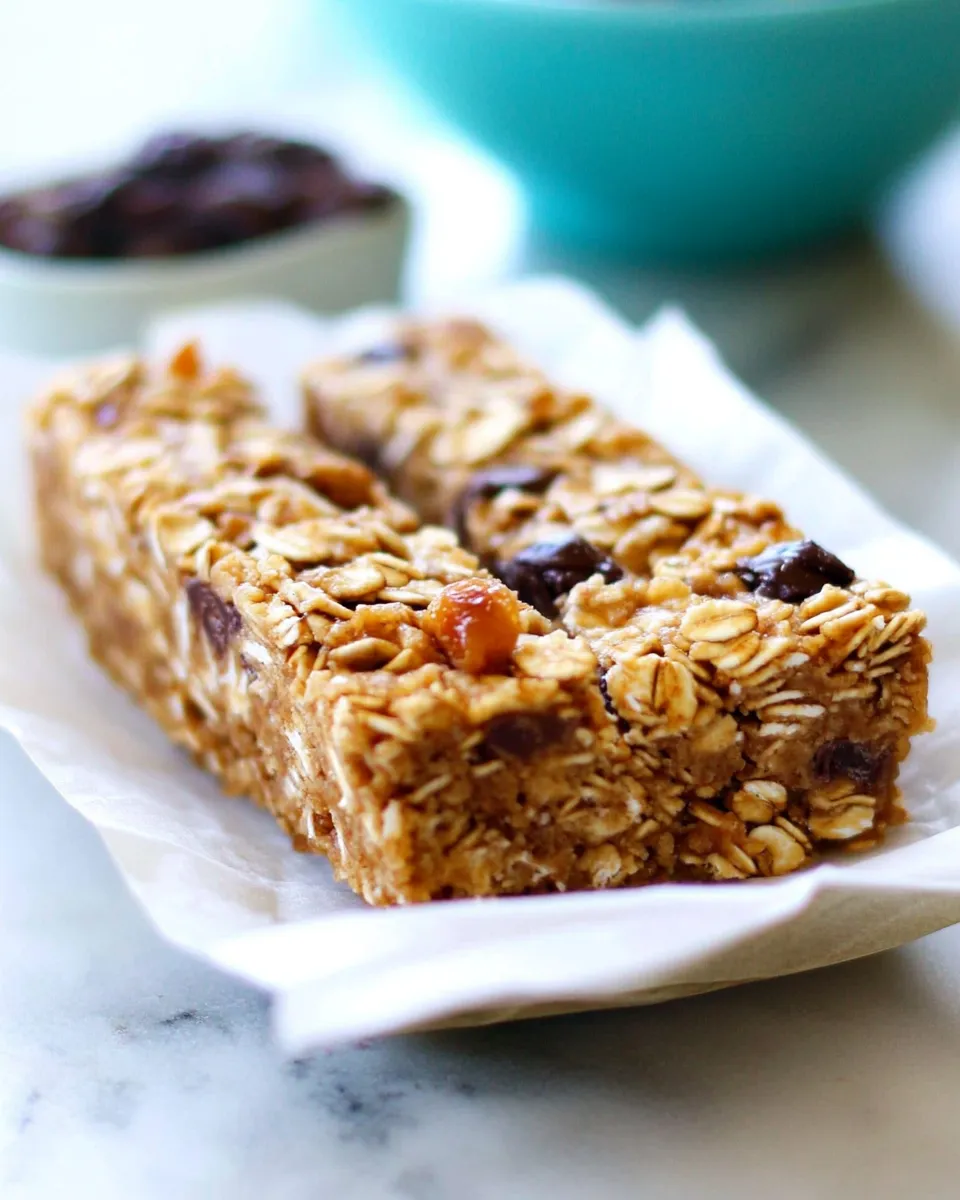
These granola bars are the kind I make on a Sunday afternoon when I want snacks ready for the week without firing up the oven. They come together in one bowl, press into a pan, and set at room temperature. No baking, no fuss—just a reliable chewy bar with pockets of chocolate and the chew of raisins.
I developed this version to be sturdy enough for backpacks and lunchboxes, but soft enough to bite into without crumbling. The combination of honey, brown sugar, and butter gives the bars chew and structure while the crispy rice keeps them light. Semi-sweet chocolate on top melts slightly and sets into an indulgent layer.
Below you’ll find the exact ingredients and step-by-step method I use every time, plus practical troubleshooting, substitution ideas, and storage notes. If you want a straightforward, repeatable snack recipe, this one delivers.
Ingredient Breakdown
Ingredients
- ½ cup unsalted butter — fat that binds and adds richness; unsalted lets you control salt level.
- ½ cup honey — natural sweetener and sticky binder that helps the bars hold together.
- ⅔ cup light brown sugar — adds sweetness and a bit of molasses flavor for chew.
- 3 and ½ cups old-fashioned oats — bulk and chew; old-fashioned (rolled) oats give the best texture here.
- 2 cups crispy rice cereal — provides lightness and crunch so the bars aren’t dense.
- 1 teaspoon vanilla extract — flavor enhancer; a small amount lifts the whole mix.
- ½ cup semi-sweet chocolate small chunks or mini chips — added on top for a chocolate layer and contrast; use small pieces so they melt and set quickly.
- ¾ cup raisins — chew and concentrated sweetness; evenly distributed for bursts of flavor.
Mastering Chewy No-Bake Granola Bars: How-To
- Line a 9″ x 13″ baking pan with aluminum foil or parchment paper, leaving an overhang for easy removal; set aside.
- In a large bowl, stir together 3 and ½ cups old-fashioned oats, 2 cups crispy rice cereal, and ¾ cup raisins.
- In a medium saucepan combine ½ cup unsalted butter, ½ cup honey, and ⅔ cup light brown sugar.
- Place the saucepan over medium heat and bring the mixture to a boil, stirring occasionally.
- Reduce the heat to low and simmer for 3 to 4 minutes, stirring often, until the sugar dissolves.
- Remove the pan from the heat and stir in 1 teaspoon vanilla extract.
- Pour the hot butter-honey-sugar mixture over the oat mixture and stir with a wooden spoon or spatula until the cereal and raisins are evenly coated.
- Scrape the coated cereal mixture into the prepared pan and spread into an even layer.
- Immediately sprinkle ½ cup semi-sweet chocolate (small chunks or mini chips) evenly over the top.
- Press the chocolate and cereal mixture firmly and evenly into the pan with a metal spatula to compact the bars.
- Let the bars set at room temperature for at least 2 hours, until firm.
- Use the foil or parchment overhang to lift the set slab from the pan and cut into 12 to 14 bars. Wrap bars in parchment paper and store in an airtight container for up to 2 weeks.
Why This Recipe is a Keeper
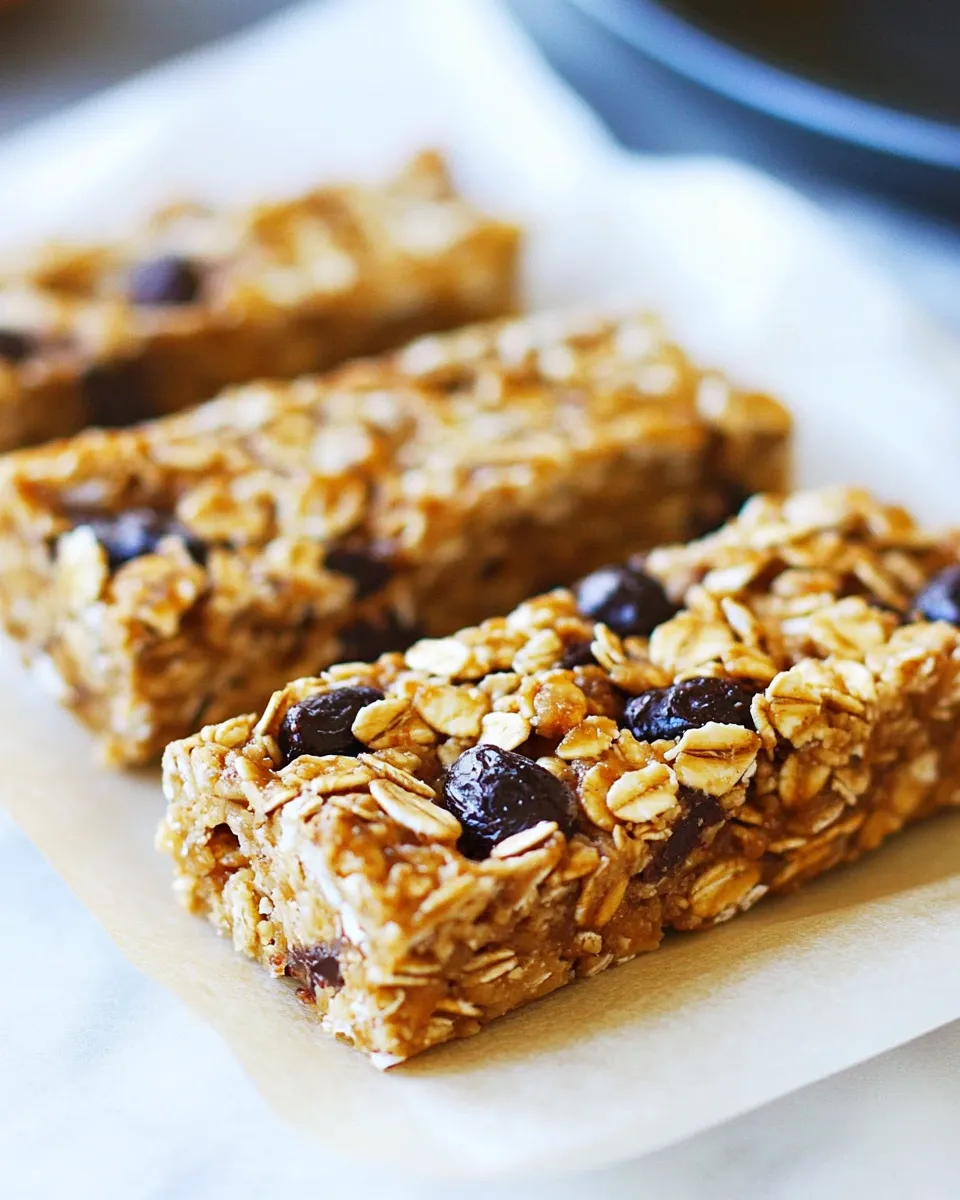
This recipe is dependable. The cook step is short and precise—bring to a boil, simmer until sugar dissolves, then mix. That combination of heat and timing gives you a binder that’s sticky enough to hold the bars, but not so hot that the chocolate melts fully into the mixture. The texture balance is intentional: oats for chew, crispy rice for lift, raisins for chew and bits of sweetness, and a chocolate top for contrast.
It’s also flexible. Once you understand the ratio—oats and crispy rice to binder—you can scale or adjust mix-ins and still get reliable results. Finally, being no-bake means these bars are quick, energy-efficient, and perfect when you don’t want to heat the kitchen.
If You’re Out Of…
- Unsalted butter — use salted butter but reduce or skip any added salt elsewhere; the flavor will be slightly saltier.
- Honey — maple syrup will work in a pinch, though bars may be a touch less sticky and have a different flavor note.
- Light brown sugar — dark brown will add a deeper molasses taste; granulated sugar will work but lose that depth.
- Old-fashioned oats — quick oats can be used but the texture will be softer and the bars may pack more densely.
- Crispy rice cereal — puffed rice or even crushed cornflakes can be a substitute; expect a slightly different crunch.
- Semi-sweet chocolate — milk chocolate or dark chocolate will both work; adjust to taste.
- Raisins — dried cranberries, chopped dates, or chopped dried apricots are good alternatives for chew and sweetness.
Tools of the Trade
- 9″ x 13″ baking pan — for shaping the slab.
- Aluminum foil or parchment paper — leaving an overhang makes removal easy.
- Medium saucepan — to heat butter, honey, and sugar.
- Large mixing bowl — to combine the dry ingredients before adding the hot syrup.
- Wooden spoon or spatula — for thorough, even mixing.
- Metal spatula — for pressing the mixture firmly and evenly into the pan.
- Bench scraper or sharp knife — for cutting neat bars after they set (optional).
Things That Go Wrong
- Bars fall apart — most often the binder wasn’t hot enough or you didn’t press the mixture firmly. Reheat a little extra honey/butter mix and drizzle over loose pieces, then press and let set.
- Bars too hard — overcooking the syrup or pressing too hard can compact the bars too much. Reduce simmer time by 30–60 seconds next time and press firmly but not excessively.
- Chocolate fully melts into the slab — if the cereal mix is too hot when you add the chocolate, it will melt through. Let the slab cool for a minute after pressing, or sprinkle chocolate slightly after removing from heat so it cools marginally.
- Uneven top layer — sprinkle chocolate in an even, light layer and press gently; if you dot large chunks they won’t spread. Mini chips or small chunks give the most even coverage.
- Sticky mess — if your hands and tools stick, lightly oil or dampen your spatula and hands to press or smooth without sticking.
Health-Conscious Tweaks
If you want to trim sugar or calories, here are straightforward adjustments that keep structure intact:
- Reduce brown sugar by a tablespoon or two and slightly increase honey; the binder will still hold, but flavor will shift.
- Swap half the crispy rice cereal for extra oats to reduce processed cereal volume; the bars will be denser but still chewy.
- Use dark chocolate with a higher cacao percentage to lower added sugar in the topping.
- Increase the proportion of raisins or add chopped nuts to add fiber and protein, which helps satiety. (Nuts will change calorie density.)
Recipe Notes & Chef’s Commentary
Few practical points I use every time: line the pan with a single sheet of parchment or foil and leave at least a 1″ overhang on two opposite sides. That overhang is worth its weight in convenience when it’s time to lift the slab out for cutting.
Work quickly once the hot syrup hits the dry mix. It sets up as it cools, and you want everything evenly coated while still pliable. I press with a metal spatula using consistent downward force, moving across the surface to compact the bars: start in the center and sweep outward to the edges.
For the chocolate top, small chips melt faster and give a thin layer that crisps slightly; chunks give noticeable pockets of chocolate. Both are valid—choose based on how chocolate-forward you want the bars to be.
How to Store & Reheat
Follow the original guidance for best results: wrap bars individually in parchment or place layers separated by parchment in an airtight container. Store at room temperature for up to 2 weeks. If you live in a very warm climate, refrigeration will keep the bars firmer but can make them slightly firmer to bite—let them sit at room temperature a few minutes before serving.
Freezing works well: wrap tightly and freeze up to 3 months. Thaw in the fridge or at room temperature. Reheating is usually unnecessary; if you prefer a warmed bar, microwave an unwrapped bar for 8–12 seconds—watch closely so the chocolate doesn’t melt out.
Reader Q&A
Q: Can I omit the raisins?
A: Yes. You can omit them entirely or replace with an equal volume of another dried fruit or nuts. If you omit dried fruit without replacing the volume, the bars will be less chewy but still hold together.
Q: My bars are sticky after 2 hours — is that normal?
A: A slightly tacky surface can be normal in humid environments. Ensure they’ve had at least 2 hours at room temperature; in humid conditions give them extra time or refrigerate briefly to firm up.
Q: Can I use a different pan size?
A: You can, but the thickness of the bars will change. A smaller pan makes thicker bars; a larger pan makes thinner, crisper bars. Adjust expectations—cutting yield will vary.
Q: How long does it take to make these from start to finish?
A: Active time is about 20–30 minutes. Add at least 2 hours of resting time at room temperature. Plan accordingly if you need bars the same day.
Ready to Cook?
If you’ve read this far, you’re ready. Gather the ingredients and tools: 9″ x 13″ pan, parchment or foil, saucepan, large bowl, and spatulas. The recipe yields 12 to 14 bars depending on how you cut them. Follow the method in the exact order, press firmly, and give the slab time to set.
These Chewy No-Bake Granola Bars have become my default snack: approachable to make, forgiving to tweak, and reliable in a lunchbox. Make a batch, wrap them individually, and you’ll have a week’s worth of portable snacks ready to go.
Chewy No-Bake Granola Bars
Equipment
- 9 x 13-inch baking pan
- Aluminum foil or parchment paper
- Medium Saucepan
- Large Bowl
- Wooden Spoon or Spatula
- metal spatula
Ingredients
Ingredients
- 1/2 cupunsalted butter
- 1/2 cuphoney
- 2/3 cuplight brown sugar
- 3 and 1/2 cupold-fashioned oats
- 2 cupcrispy rice cereal
- 1 teaspoonvanilla extract
- 1/2 cupsemi-sweet chocolate small chunks or mini chips
- 3/4 cupraisins
Instructions
Instructions
- Line a 9" x 13" baking pan with aluminum foil or parchment paper, leaving an overhang for easy removal; set aside.
- In a large bowl, stir together 3 and ½ cups old-fashioned oats, 2 cups crispy rice cereal, and ¾ cup raisins.
- In a medium saucepan combine ½ cup unsalted butter, ½ cup honey, and ⅔ cup light brown sugar.
- Place the saucepan over medium heat and bring the mixture to a boil, stirring occasionally.
- Reduce the heat to low and simmer for 3 to 4 minutes, stirring often, until the sugar dissolves.
- Remove the pan from the heat and stir in 1 teaspoon vanilla extract.
- Pour the hot butter-honey-sugar mixture over the oat mixture and stir with a wooden spoon or spatula until the cereal and raisins are evenly coated.
- Scrape the coated cereal mixture into the prepared pan and spread into an even layer.
- Immediately sprinkle ½ cup semi-sweet chocolate (small chunks or mini chips) evenly over the top.
- Press the chocolate and cereal mixture firmly and evenly into the pan with a metal spatula to compact the bars.
- Let the bars set at room temperature for at least 2 hours, until firm.
- Use the foil or parchment overhang to lift the set slab from the pan and cut into 12 to 14 bars. Wrap bars in parchment paper and store in an airtight container for up to 2 weeks.