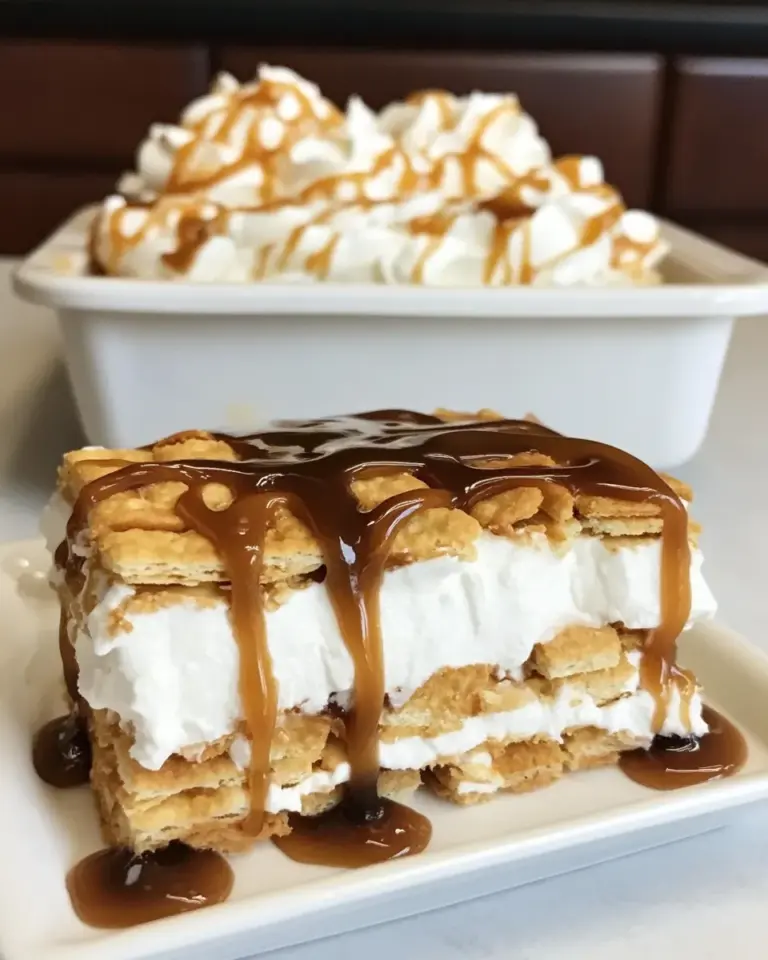
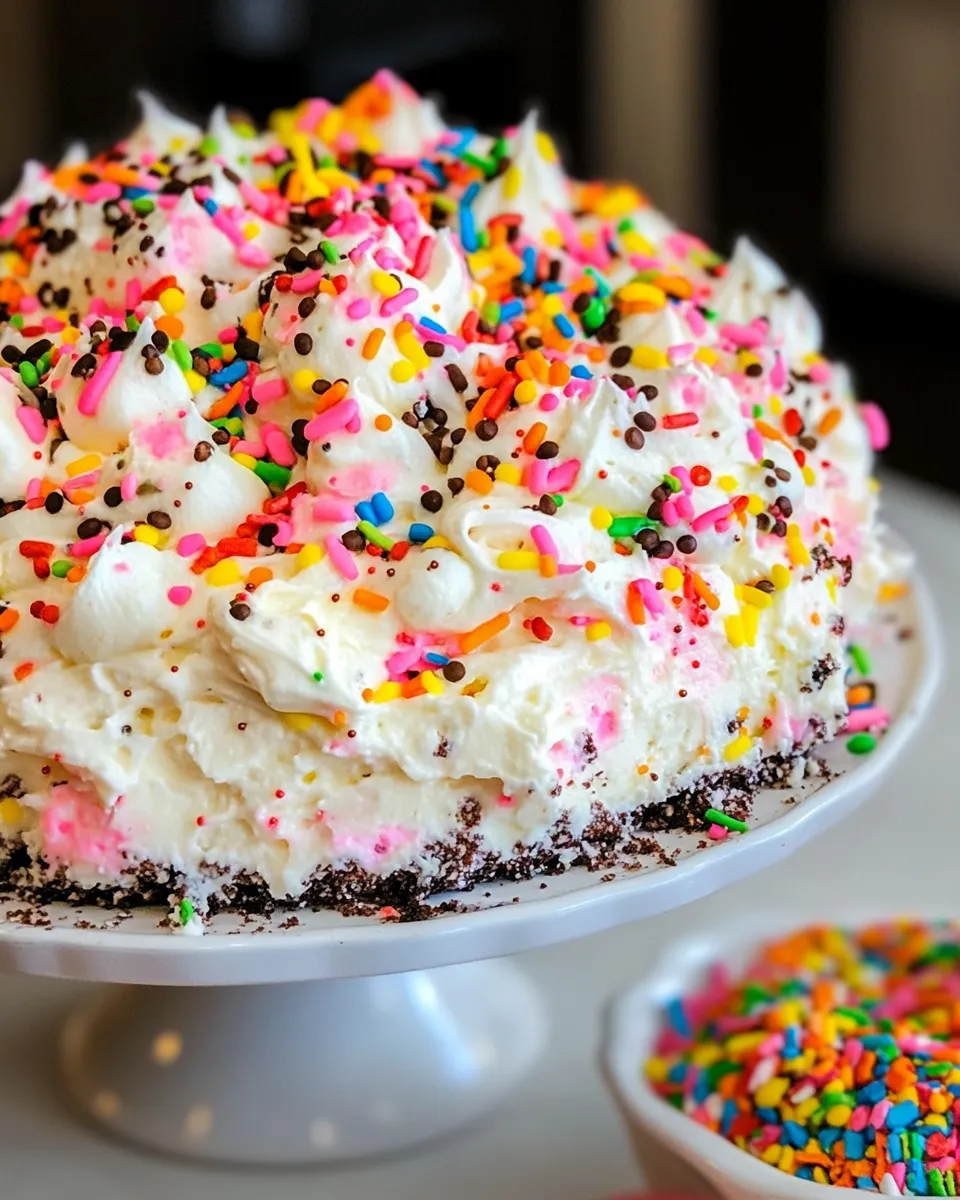
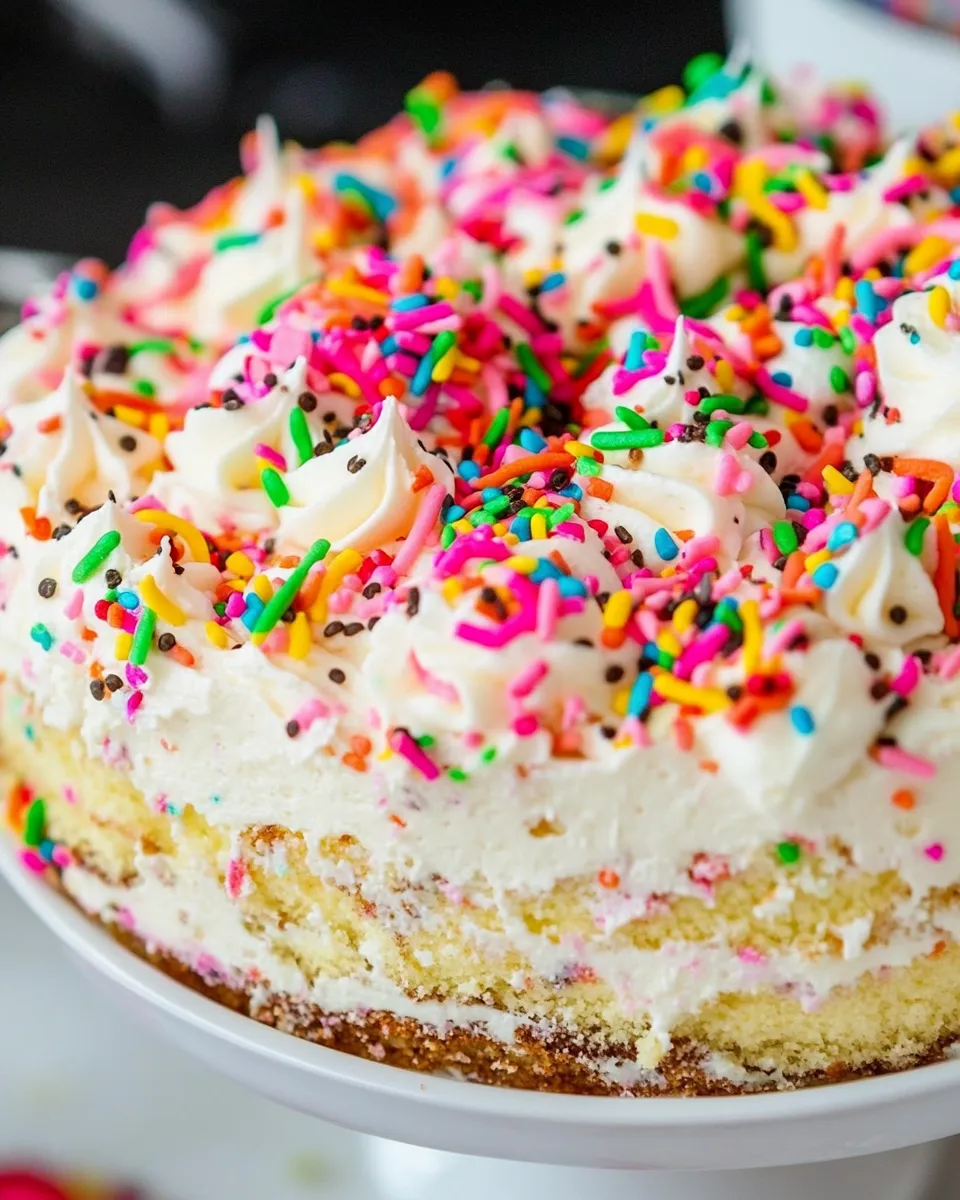
There’s a reason this dessert shows up at parties, potlucks, and any time you want to celebrate something small or big. Birthday Cake Lush combines crunchy cookie crust, fluffy instant-pudding filling, and that unmistakable Funfetti sparkle. It’s one of those recipes that looks festive without requiring a decorating degree.
I like to make this when I need a fast centerpiece that still feels special. It comes together mostly in minutes and then chills while I get other things ready. If you love nostalgic boxed flavors and an easy, no-bake finish, this will be a new go-to.
Below is everything you need: the exact ingredients, step-by-step instructions (kept in the original order so you can follow along), troubleshooting tips, and simple swaps to fit dietary needs. Read through once, then make it — it’s forgiving and crowd-pleasing.
Ingredients at a Glance
- 22 birthday cake-flavored Oreo cookies — the base: crushed to form a sweet, colorful crust.
- 4 tablespoons butter, melted — binds the cookie crumbs so the crust holds together.
- 1 (3.4-ounce) box vanilla instant pudding mix — builds the creamy filling and gives structure as it sets.
- 1/3 cup dry Funfetti cake mix — adds extra cake flavor and speckled color; helps thicken slightly.
- 1 cup milk — hydrates the instant pudding; whole milk gives the creamiest result.
- 1 (16-ounce) Cool Whip, divided — lightens the pudding filling and provides the whipped topping; half goes into the filling and half on top.
- 1/3 cup sprinkles, plus extra for sprinkling on top — fold into the filling for bursts of color and use more to make the top festive.
How to Prepare (Birthday Cake Lush)
- Place the 22 birthday cake Oreo cookies in a food processor and process until they form fine crumbs.
- In a medium bowl, combine the cookie crumbs with the 4 tablespoons melted butter and stir until evenly moistened. Press the mixture firmly and evenly into the bottom of an 11×7-inch pan or a 9-inch square pan. Set aside.
- In a large bowl, whisk together the 1 (3.4-ounce) box vanilla instant pudding mix and the 1/3 cup dry Funfetti cake mix. Whisk in the 1 cup milk for about 1 minute, or until the mixture begins to thicken.
- Fold half of the 1 (16-ounce) Cool Whip (reserve the remaining half for the topping) and the 1/3 cup sprinkles into the pudding mixture until evenly combined.
- Pour or spread the pudding mixture over the prepared crust in the pan, smoothing the top. Cover the pan with plastic wrap and refrigerate for at least 4 to 6 hours or overnight, until set.
- Just before serving, spread the remaining Cool Whip over the chilled dessert and sprinkle with additional sprinkles as desired. Slice and serve.
What You’ll Love About This Recipe
- Speed: Most of the active work is under 20 minutes. Then it chills while you handle other things.
- No-bake, low-effort finish: No oven time makes this perfect for hot days or busy kitchens.
- Kid-friendly nostalgia: The Funfetti flavor and colorful sprinkles make this an instant party favorite.
- Texture contrast: Crisp cookie crust against a pillowy pudding layer and a billowy whipped topping keeps every bite interesting.
What to Use Instead

If you don’t have one of the ingredients on hand, here are straightforward swaps that keep the spirit of the dish without changing the process.
- If you don’t have birthday cake Oreos: use another flavored sandwich cookie or classic Oreos; the crust will still hold and taste sweet.
- If you’re out of Funfetti cake mix: a plain dry vanilla cake mix will work for flavor and color tone, or omit it (the pudding still sets fine).
- If you don’t have Cool Whip: any refrigerated whipped topping works. For a homemade option, use stabilized whipped cream (note it can be softer than Cool Whip).
- If you only have instant pudding in a different flavor: vanilla complements the sprinkles best, but a mild flavor like white chocolate could work if you want to experiment.
Cook’s Kit
- Food processor or heavy-duty plastic bag and rolling pin (to crush cookies).
- 11×7-inch pan or 9-inch square pan.
- Medium and large mixing bowls.
- Whisk and flexible spatula for folding.
- Measuring cups and spoons.
- Plastic wrap for covering while chilling.
Things That Go Wrong
Here are predictable hiccups and how to fix or avoid them:
- Crust too crumbly: you didn’t pack it firmly enough or used too little butter. Press the crumbs down with the back of a measuring cup and ensure the melted butter evenly coats the crumbs.
- Pudding too thin or runny: make sure you whisked in the full cup of milk and let it sit briefly to thicken. If it’s still loose after mixing, folding in an extra 1/4 cup of Cool Whip can help set it.
- Filling doesn’t set in time: chilling for at least 4 to 6 hours is necessary; overnight is ideal. Don’t rush it or attempt to freeze it quickly — that can affect texture.
- Topping slides or sinks: don’t slice the dessert until the filling is fully chilled. If the top looks watery, blot excess moisture gently before adding the final Cool Whip layer.
Dietary Customizations
Want to adapt this for allergies or preferences? Keep the method but swap smartly.
- Gluten-free: use gluten-free sandwich cookies for the crust and a certified gluten-free Funfetti cake mix. Confirm your pudding mix and Cool Whip alternatives are labeled gluten-free.
- Dairy-free: swap the milk for a neutral-tasting plant milk (oat or soy work well) and use a dairy-free whipped topping in place of Cool Whip. Use dairy-free sandwich cookies if needed.
- Lower-sugar: there’s limited room to reduce sugar without changing the product type; choose reduced-sugar cookie options or sugar-free pudding mixes labeled for use in no-bake desserts, but expect flavor differences.
- Nut-free: the recipe itself doesn’t call for nuts, but always check labels on cookies, cake mix, and sprinkles for cross-contamination warnings if you’re serving someone with a nut allergy.
Author’s Commentary
I first made this when I needed a last-minute dessert for a friend’s birthday. The boxed components felt indulgent and nostalgic, and everyone loved that it looked festive without a lot of fuss. I discovered that pressing the crust firmly and using full-fat milk gives the best mouthfeel.
This is the kind of recipe I keep in my head for emergencies: birthday plans that appear last-minute, summertime potlucks, or when you want to bring a dessert that will disappear fast. I usually make it the night before — it slices cleaner and serves much prettier after an overnight chill.
Storage & Reheat Guide
Storage
- Refrigerator: Keep covered with plastic wrap or an airtight lid. It will stay fresh for 3 to 4 days, though sprinkles might soften over time.
- Freezer: You can freeze for up to 1 month. Wrap the pan tightly in plastic and then foil. Thaw in the refrigerator overnight before serving; the texture will be slightly softer after freezing.
Reheat
This is a chilled dessert and isn’t intended to be reheated. If you prefer it less cold, remove it from the fridge 10–15 minutes before serving so it softens slightly for easier slicing.
Your Questions, Answered
Q: Can I make this in a glass pie dish instead of a pan?
A: Yes. A glass pie or shallow baking dish will work. The filling depth will vary, but the method and chilling time remain the same.
Q: Can I use homemade whipped cream instead of Cool Whip?
A: You can, but homemade whipped cream is lighter and less stable than Cool Whip. To keep slices neat, stabilize whipped cream with a small amount of powdered sugar or a whipped cream stabilizer, and refrigerate thoroughly before slicing.
Q: Are the sprinkles necessary?
A: They’re there for color and to reinforce the “birthday cake” vibe. If you prefer fewer sprinkles, fold in less and still sprinkle a few on top for presentation.
Let’s Eat
When it’s time to serve, use a sharp knife dipped in hot water and wiped clean between cuts for tidy slices. Add a few fresh berries on the side if you want a simple contrast, or pass extra sprinkles for guests to personalize. This Birthday Cake Lush is meant to be fun, approachable, and reliable — the kind of dessert you can make quickly and feel proud to serve.
Make it for birthdays, make it for brightening a Tuesday — either way, enjoy the smiles it brings.

Birthday Cake Lush
Equipment
- Food Processor
- Medium Bowl
- Large Bowl
- 11x7-inch pan or 9-inch square pan
- Spatula
- Plastic Wrap
Ingredients
Ingredients
- 22 birthday cake-flavored Oreo cookies
- 4 tablespoonsbutter ,melted
- 1 3.4-ounce boxvanilla instant pudding mix
- 1/3 cupdry Funfetti cake mix
- 1 cupmilk
- 1 16-ounceCool Whip, ,divided
- 1/3 cupsprinkles ,plus extra for sprinkling on top
Instructions
Instructions
- Place the 22 birthday cake Oreo cookies in a food processor and process until they form fine crumbs.
- In a medium bowl, combine the cookie crumbs with the 4 tablespoons melted butter and stir until evenly moistened. Press the mixture firmly and evenly into the bottom of an 11×7-inch pan or a 9-inch square pan. Set aside.
- In a large bowl, whisk together the 1 (3.4-ounce) box vanilla instant pudding mix and the 1/3 cup dry Funfetti cake mix. Whisk in the 1 cup milk for about 1 minute, or until the mixture begins to thicken.
- Fold half of the 1 (16-ounce) Cool Whip (reserve the remaining half for the topping) and the 1/3 cup sprinkles into the pudding mixture until evenly combined.
- Pour or spread the pudding mixture over the prepared crust in the pan, smoothing the top. Cover the pan with plastic wrap and refrigerate for at least 4 to 6 hours or overnight, until set.
- Just before serving, spread the remaining Cool Whip over the chilled dessert and sprinkle with additional sprinkles as desired. Slice and serve.