These Chicken and Rice Enchiladas are the kind of recipe that earns a permanent slot in my weeknight rotation. They’re unfussy, forgiving, and built from pantry-friendly canned goods plus cooked chicken and rice — everything comes together quickly and reliably, and the results feed a crowd. I love that they travel well to potlucks, freeze beautifully, and still feel like comfort food on a busy Tuesday.
What I share here is the exact method I used every time I tested this version: the same oven temperature, the same layer of sauce in the pan, the same freeze point so you can make a second pan for later. I’ll walk you through the ingredients (and what each one does), step-by-step baking directions straight from the tested method, and practical troubleshooting so your enchiladas come out right every time.
No fluff — just clear guidance, tips for swaps if you need them, and make-ahead ideas. If you want to build a freezer stash or dial the heat up or down, I’ll show you how. Let’s get started.
Shopping List
Before you start, collect the items listed below so prep goes smoothly. This recipe is built on a few canned staples plus cooked chicken and rice; having everything within reach makes assembly fast. I recommend grabbing two 9×13 pans if you plan to bake one and freeze one as the recipe allows.
Ingredients
- 3 cups cooked chicken, shredded (about 3 breasts or 4 thighs) — the main protein; use roasted, poached, or leftover chicken.
- 2 1/2 cups cooked rice* (425 g) — provides bulk and texture; day-old rice works best to avoid excess moisture.
- 15 oz can corn, drained — adds sweetness and little pops of texture.
- 15 oz can black beans, rinsed and drained — fiber and heft; rinse to remove canning liquid and excess salt.
- 1/2 green bell pepper, chopped — mild crunch and color.
- 1/4 onion, chopped — savory background flavor; white or yellow will do.
- 1 clove garlic, minced — offers aroma and depth; fresh is best.
- 4 oz can jalapeño peppers or diced green chiles — controls the heat; choose based on how spicy you like it.
- 10.5 oz can cream of chicken soup*, or one batch homemade — binds the filling and keeps it creamy; use the canned version for speed.
- 4 oz cream cheese, softened — enriches the filling and helps it set.
- 3 cups shredded cheese, mozzarella cheddar, or Mexican blend — part goes inside each tortilla, the rest tops the pans for melty browned cheese.
- 16 large flour tortillas (not burrito size) — these roll nicely and fit 7–8 enchiladas per 9×13 pan as directed.
- 1 batch red enchilada sauce (or 4 cups store bought*) — coats the bottom of the pan and drenches the rolled enchiladas so they bake moist and saucy.
Chicken and Rice Enchiladas: How It’s Done
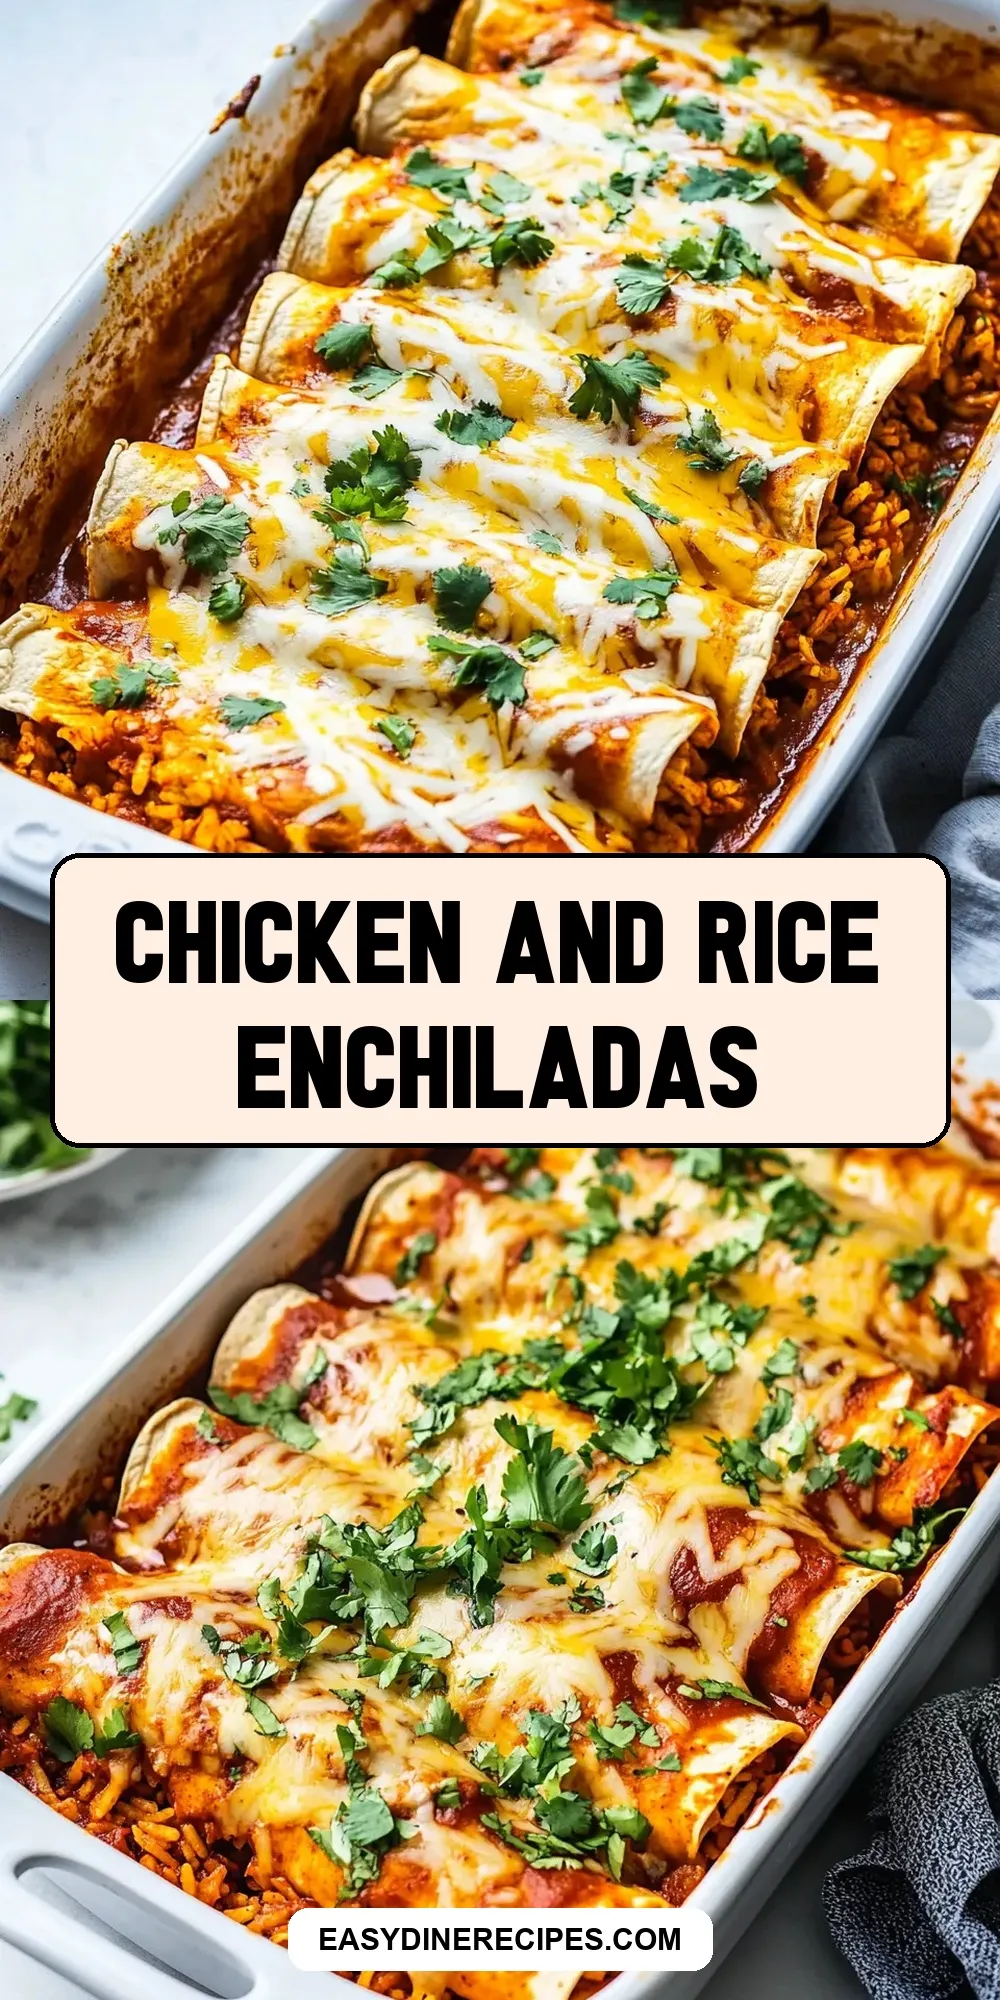
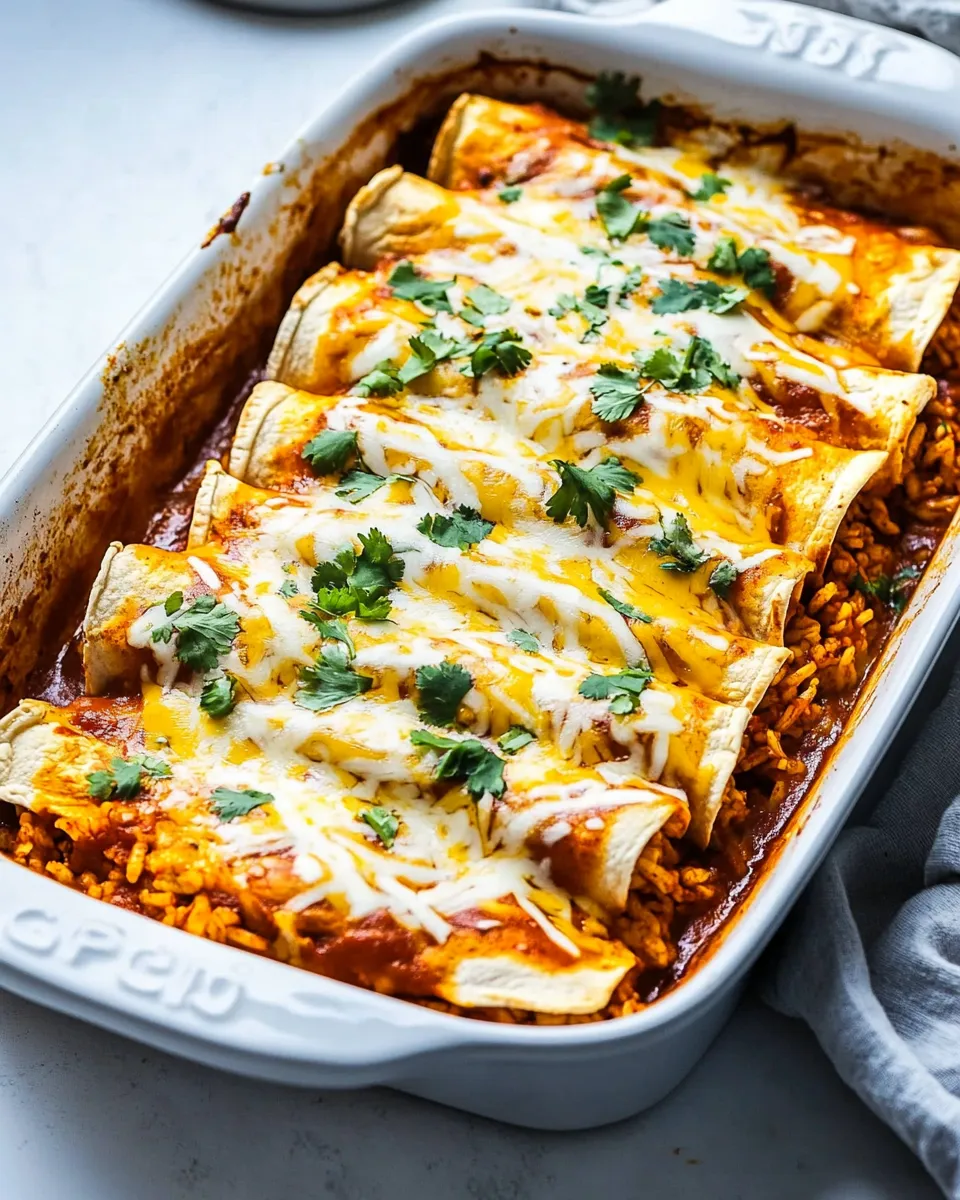
- Preheat oven to 400°F (200°C). Spoon a few spoonfuls of red enchilada sauce into the bottom of two 9×13-inch baking pans and spread to lightly coat the bottoms.
- In a very large bowl combine: 3 cups cooked shredded chicken, 2 1/2 cups cooked rice (425 g), drained 15 oz can corn, rinsed and drained 15 oz can black beans, 1/2 chopped green bell pepper, 1/4 chopped onion, 1 minced garlic clove, 4 oz can jalapeño peppers or diced green chiles, 10.5 oz can cream of chicken soup (or one batch homemade), and 4 oz softened cream cheese. Stir until evenly combined.
- Prepare the cheese for filling and topping: set the 3 cups shredded cheese nearby and reserve some to add inside each tortilla and the remainder to top the pans.
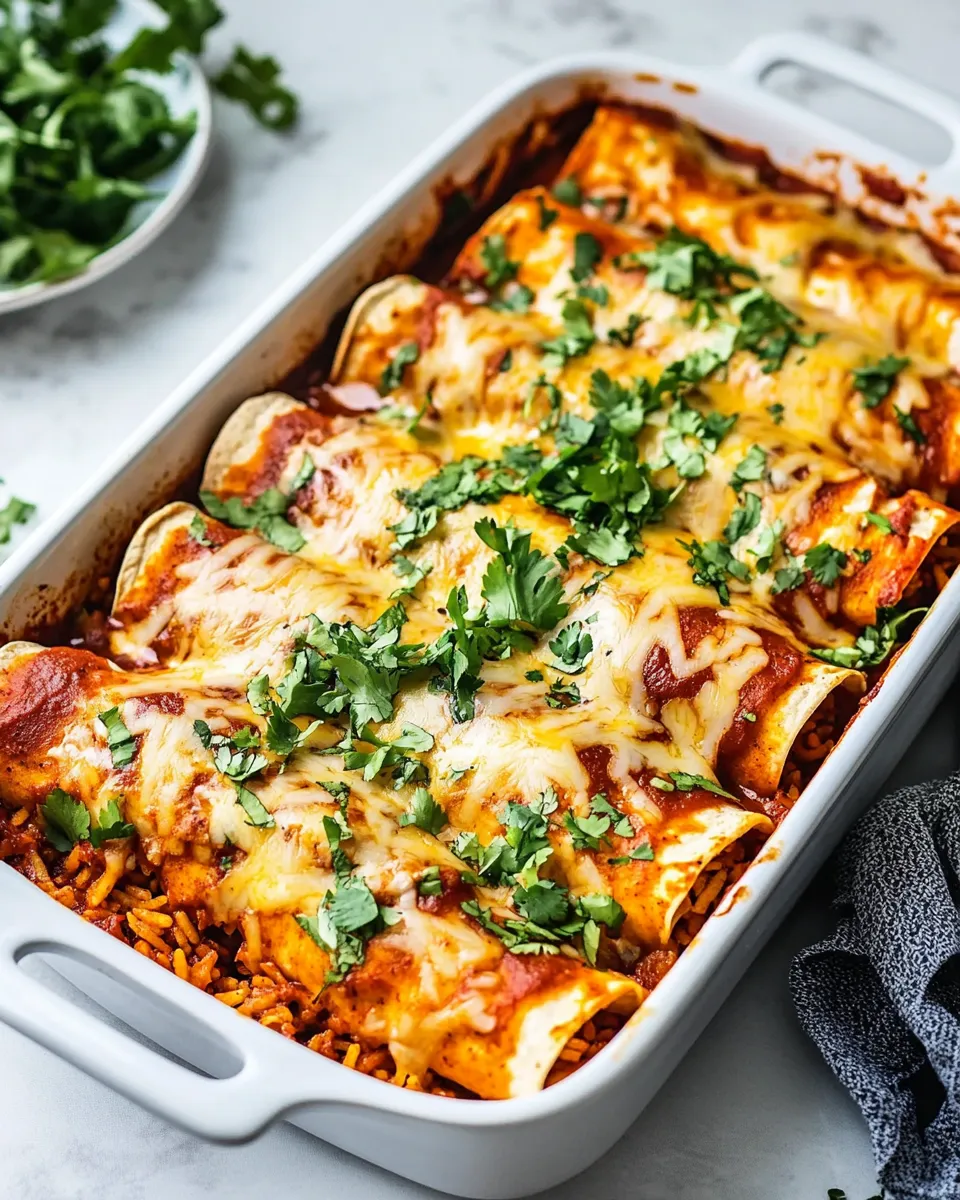
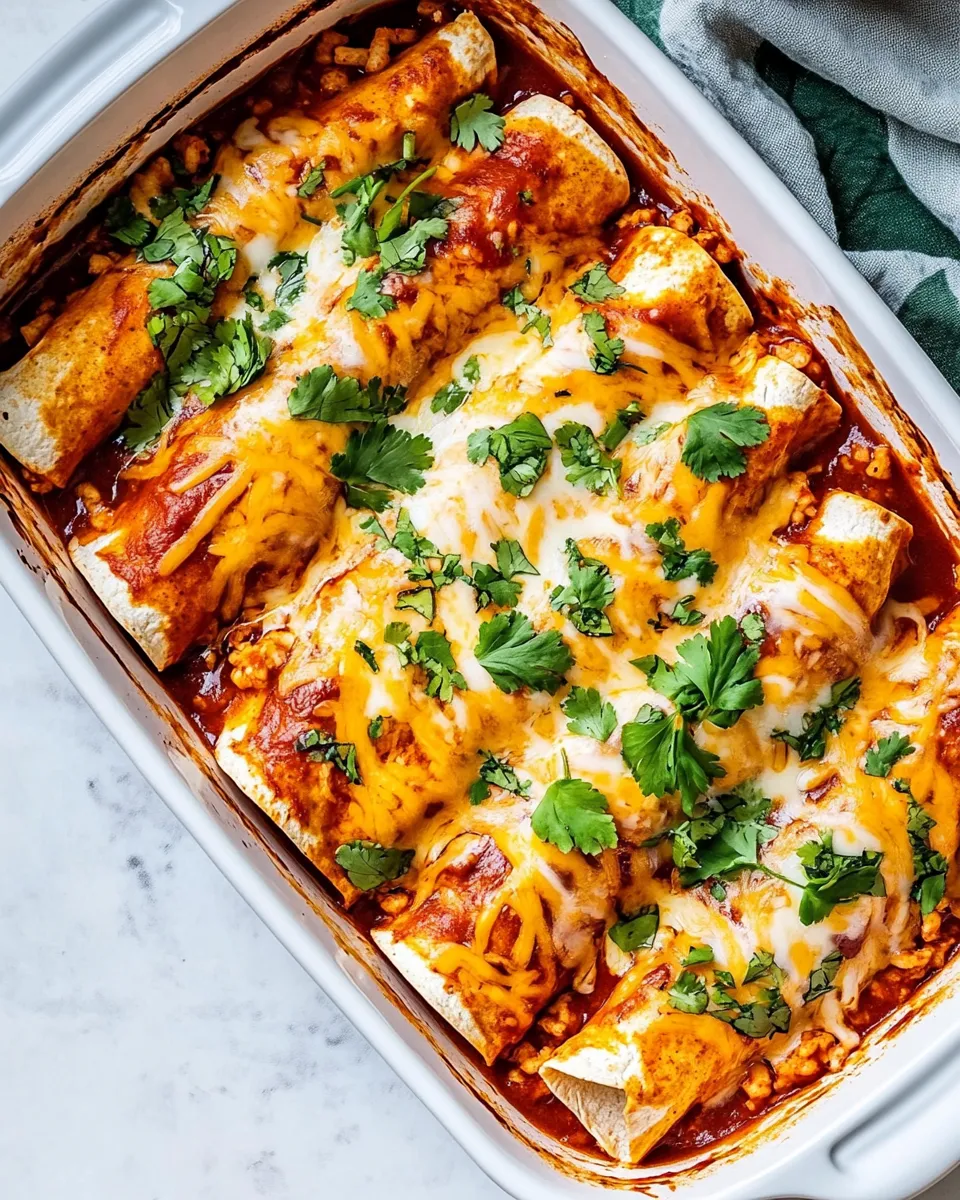
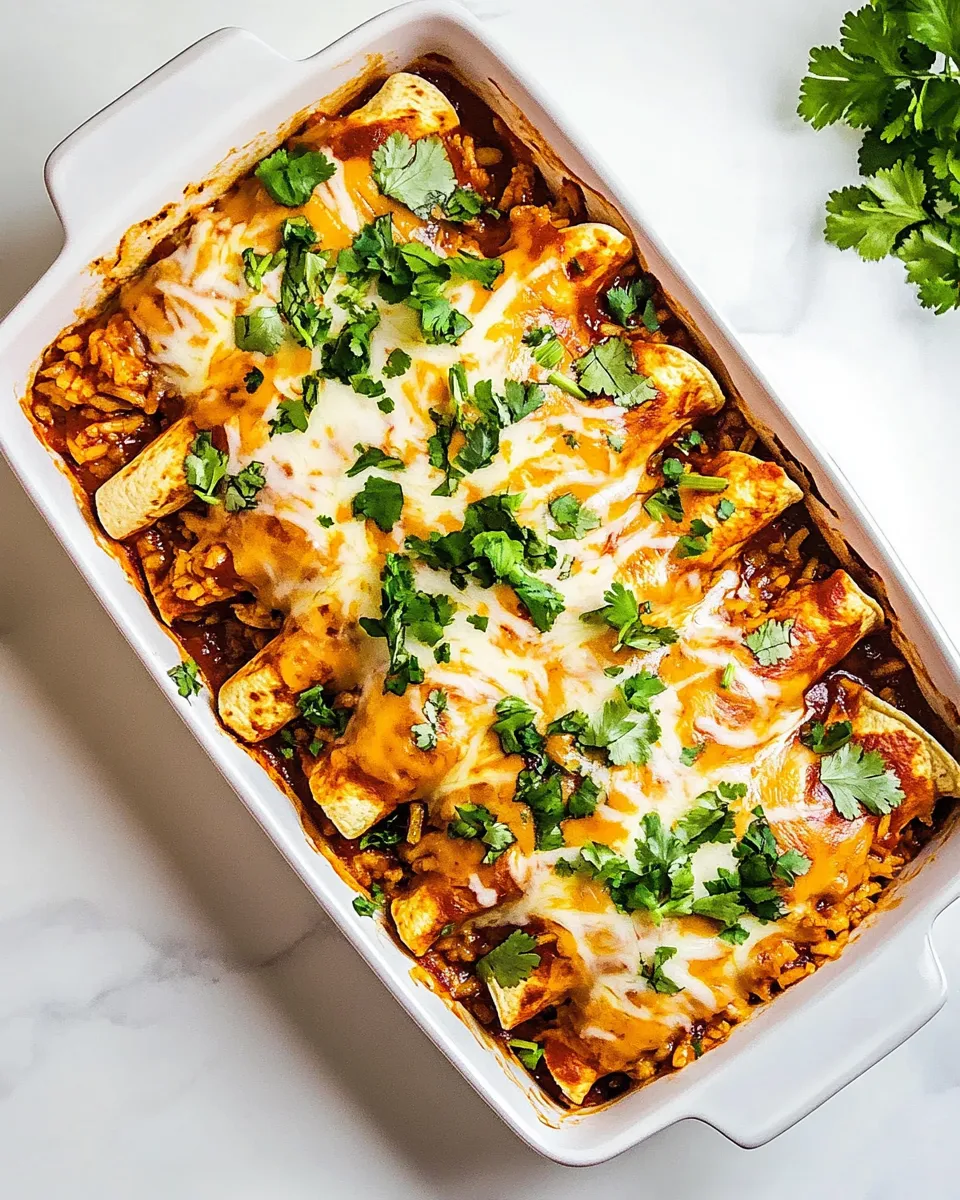
- Assemble the enchiladas: lay out one large flour tortilla. Spoon about 1/2 cup of the filling in a line along one edge of the tortilla. Sprinkle a small handful of shredded cheese (from the reserved 3 cups) over the filling. Tightly roll the tortilla and place seam-side-down in a prepared pan. Repeat with the remaining tortillas and filling, dividing them between the two pans (each pan should hold 7–8 enchiladas).
- If desired, cover and freeze the second pan at this point for later use (freeze before adding sauce and topping).
- Pour the remaining enchilada sauce evenly over the rolled enchiladas in both pans. Sprinkle the remaining shredded cheese evenly over the top.
- Bake at 400°F (200°C) for 15–20 minutes, or until the cheese is melted, bubbly, and the filling is heated through.
- Let the pans sit 5 minutes after baking, then serve. Serve with 5-minute homemade salsa or pico de gallo if desired.
Why This Recipe Is Reliable
This version is reliable because it balances moist filling with sturdy tortillas and a short, high-heat bake. The initial sauce smear in the pan prevents sticking and guarantees saucy bottoms, while the cream soup + cream cheese combo keeps the filling cohesive without making it runny. Using cooked rice — not raw — avoids excess liquid during baking, which is the most common cause of soggy enchiladas.
The recipe’s timing and temperature were tested repeatedly: 400°F (200°C) for 15–20 minutes consistently melts and browns the cheese without drying the interior. The assembly method (rolling tightly and placing seam-side-down) prevents unrolling during baking. And the option to freeze an un-sauced pan makes this a reliable make-ahead meal.
Dairy-Free/Gluten-Free Swaps
If you need dairy-free options: swap the cream cheese and canned cream-of-chicken for dairy-free cream alternatives or a blended silken tofu + nutritional yeast slurry for richness; use a dairy-free shredded cheese for the topping. If you need gluten-free: use gluten-free flour tortillas and confirm the cream-of-chicken soup and enchilada sauce are gluten-free (or make a small homemade substitute). For a fully dairy-free and gluten-free approach, use compliant canned/dairy-free products or homemade replacements that match the same roles: binder, fat, and melty topping.
Must-Have Equipment
- Two 9×13-inch baking pans — the recipe is written for two pans so you can bake one and freeze one.
- Large mixing bowl — for combining the filling evenly.
- Spoon or rubber spatula — for folding together the filling without overworking it.
- Measuring cups — to portion about 1/2 cup of filling per tortilla for consistent rolls.
- Oven preheated to 400°F (200°C) — accurate oven temperature is important for timing.
Things That Go Wrong
Here are the most common missteps and how to avoid them:
- Soggy enchiladas: Usually caused by too-wet filling or raw rice. Use cooked rice that is a bit dry (leftover rice works great), drain canned items well, and don’t overdo the sauce in the pan bottom.
- Tortillas fall apart: Roll them tightly and place seam-side-down. Warm tortillas for 15–20 seconds in the microwave wrapped in a damp paper towel if they’re brittle.
- Dry filling: Overbaking will dry out the filling. Stick to 15–20 minutes at 400°F and remove as soon as the cheese is bubbly.
- Filling won’t hold together when sliced: Let the pans rest for 5 minutes after baking; this brief rest lets the filling set and makes serving cleaner.
Customize for Your Needs
Want more heat? Add a finely chopped jalapeño to the filling or choose enchilada sauce with more kick. Want more veg? Fold in some sauteed zucchini or spinach — squeeze out excess moisture before adding. Prefer a different protein? Shredded turkey or a can of drained, flaked tuna could work in a pinch, though textures will differ.
If you like a crispier top, broil for the last 1–2 minutes, watching closely so the cheese doesn’t burn. For a lighter version, use lower-fat cream cheese and a reduced-fat shredded blend, but note the texture and flavor will be slightly different.
What I Learned Testing
I tested this recipe multiple times to lock down the oven time and the freeze-ahead step. Two things stood out: first, the bottom sauce smear is non-negotiable if you want easy serving and non-stick slices. Second, freezing before adding sauce and cheese preserves texture best; once you thaw, add sauce and cheese, then bake as directed. I also found that dividing filling evenly means every enchilada bakes the same — use ~1/2 cup per tortilla for consistent results.
On cheese choices: the Mexican blend gives a little more flavor; mozzarella keeps things milder and gooey. I preferred a mix of the two in testing — some inside for stretch and some on top for browning.
Refrigerate, Freeze, Reheat
Refrigerate leftovers in an airtight container for 3–4 days. To reheat from refrigerated: cover with foil and bake at 350°F until warmed through, about 15–20 minutes depending on portion size. A microwave works for single servings — cover and heat in 30-second bursts until hot.
For freezing: follow the recipe and assemble two pans. After rolling, cover and freeze the second pan at the point indicated in the method (freeze before adding sauce and topping). When ready to use, thaw in the refrigerator overnight, add sauce and cheese, then bake at 400°F for 15–20 minutes. You can also bake from frozen: add sauce and cheese, tent with foil, and bake at 375°F until heated through (time will vary; expect significantly longer than 15–20 minutes). Always check the center is hot.
Chicken and Rice Enchiladas Q&A
Can I use corn tortillas? You can, but corn tortillas are more fragile and may need to be warmed and lightly fried or dipped in sauce to prevent tearing. This recipe was tested with large flour tortillas for sturdiness.
How spicy are these? Mild-to-medium depending on your jalapeño/green chile choice and enchilada sauce. Use mild green chiles or omit the canned jalapeños for a gentler flavor.
Do I have to use cream of chicken soup? The canned soup adds body and creaminess quickly. You can substitute a homemade white sauce with chicken stock and cream if you prefer, but the canned version is part of the tested, reliable method.
Can I assemble the night before? Yes. Assemble, cover, and refrigerate overnight. Add sauce and cheese and bake as directed right before serving. If freezing, follow the freeze-before-sauce instruction in the method.
Wrap-Up
Chicken and Rice Enchiladas are a practical, delicious dish that’s easy to scale, simple to freeze, and forgiving in the kitchen. Follow the method and the small tips here — smear sauce in the pan, use cooked rice, roll tightly, and don’t skip the 5-minute rest — and you’ll get a consistent, crowd-pleasing result. Make one for tonight and freeze one for a day when you need dinner without thinking. Enjoy — and if you try a swap that works especially well, I’d love to hear about it.
Chicken and Rice Enchiladas
Equipment
- 9x13 inch Pan
Ingredients
Ingredients
- 3 cupscooked chicken shredded (about 3 breasts or 4 thighs)
- 2 1/2 cupscooked rice* 425 g
- 15 oz cancorn drained
- 15 oz canblack beans rinsed and drained
- 1/2 green bell pepper chopped
- 1/4 onion chopped
- 1 clovegarlic minced
- 4 oz canjalapeño peppers or diced green chiles
- 10.5 oz cancream of chicken soup* or one batch homemade
- 4 ozcream cheese softened
- 3 cupsshredded cheese mozzarella cheddar, or Mexican blend
- 16 largeflour tortillas not burrito size
- 1 batchred enchilada sauce or 4 cups store bought*
Instructions
Instructions
- Preheat oven to 400°F (200°C). Spoon a few spoonfuls of red enchilada sauce into the bottom of two 9×13-inch baking pans and spread to lightly coat the bottoms.
- In a very large bowl combine: 3 cups cooked shredded chicken, 2 1/2 cups cooked rice (425 g), drained 15 oz can corn, rinsed and drained 15 oz can black beans, 1/2 chopped green bell pepper, 1/4 chopped onion, 1 minced garlic clove, 4 oz can jalapeño peppers or diced green chiles, 10.5 oz can cream of chicken soup (or one batch homemade), and 4 oz softened cream cheese. Stir until evenly combined.
- Prepare the cheese for filling and topping: set the 3 cups shredded cheese nearby and reserve some to add inside each tortilla and the remainder to top the pans.
- Assemble the enchiladas: lay out one large flour tortilla. Spoon about 1/2 cup of the filling in a line along one edge of the tortilla. Sprinkle a small handful of shredded cheese (from the reserved 3 cups) over the filling. Tightly roll the tortilla and place seam-side-down in a prepared pan. Repeat with the remaining tortillas and filling, dividing them between the two pans (each pan should hold 7–8 enchiladas).
- If desired, cover and freeze the second pan at this point for later use (freeze before adding sauce and topping).
- Pour the remaining enchilada sauce evenly over the rolled enchiladas in both pans. Sprinkle the remaining shredded cheese evenly over the top.
- Bake at 400°F (200°C) for 15–20 minutes, or until the cheese is melted, bubbly, and the filling is heated through.
- Let the pans sit 5 minutes after baking, then serve. Serve with 5-minute homemade salsa or pico de gallo if desired.
Notes
Yield:
16 enchiladas.
Serving Size:
1 enchilada.
Rice:
If I'm in a hurry I will cook a package of boxed rice mix, like
cilantro-lime rice
, Mexican, or rice pilaf flavors best in these enchiladas. Or, use our homemade
Mexican rice
or
rice pilaf
.
Canned Cream of soup:
I use one batch of my
homemade cream of chicken soup
.
Enchilada Sauce:
sub any brand store-bought red or green enchilada sauce. You will need about 4 cups of sauce.
Make Ahead Instructions:
Follow the instructions to assemble the enchiladas, but don't pour the enchilada sauce on top. Cover and refrigerate for up to 2 days. Pour enchilada sauce and cheese on top right before baking. This recipe makes TWO 9×13 pans. I love to serve one for dinner that night, and freezing the other one for another day.
Freezing Instructions:
Follow the instructions to assemble the enchiladas, but don't pour the enchilada sauce on top. Cover tightly with two layers of aluminum foil and keep in the freezer for up to 3 months. Freeze enchilada sauce seperatly, if desired, and thaw overnight in fridge. Pour enchilada sauce over frozen enchiladas and bake from frozen at 350°F (180
°
C) for about 1 hour, covered in foil. Remove foil and bake for 30 minutes, or until hot and bubbly