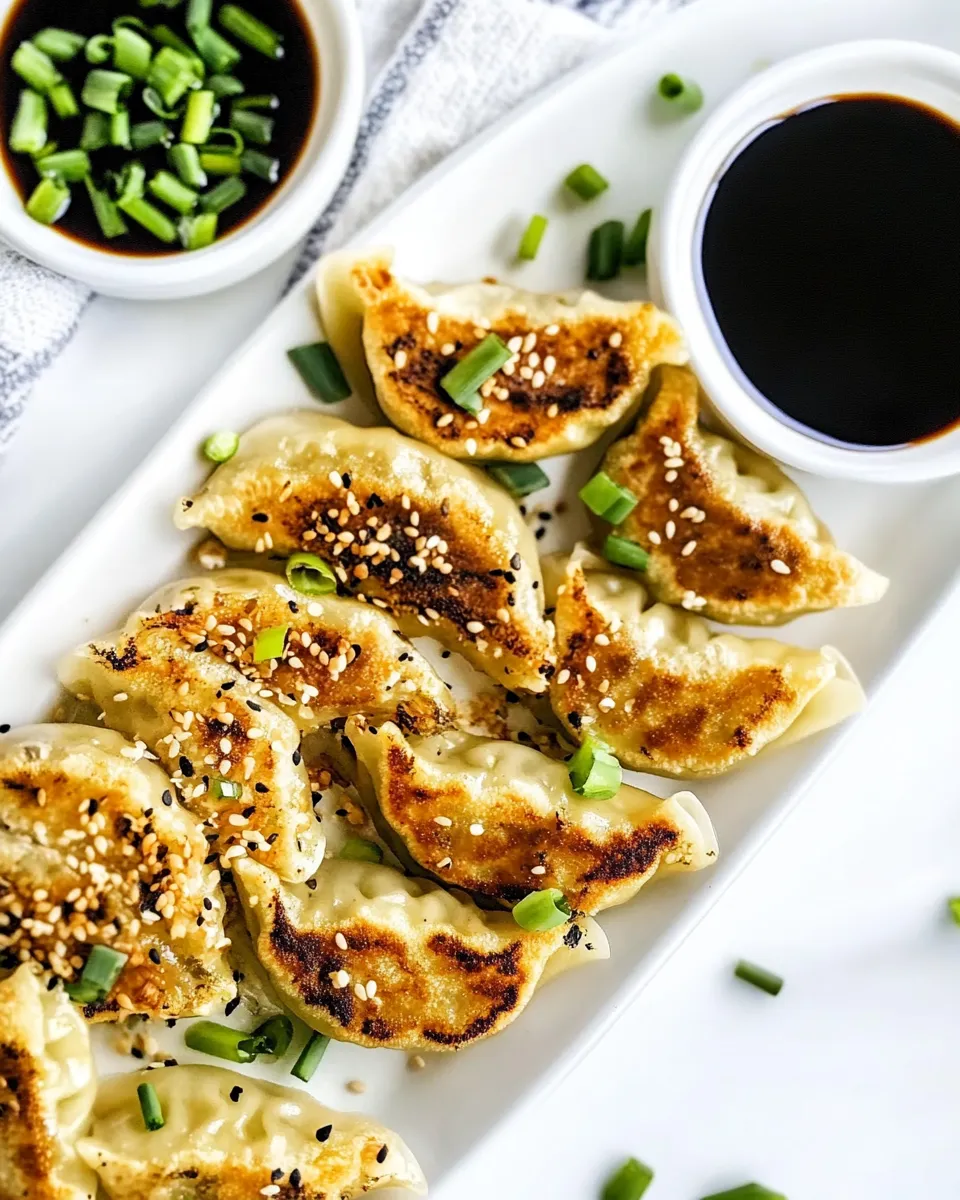
Potstickers are one of those meals I make when I want something comforting, hands-on, and a little bit fun to eat. They’re humble: simple fillings wrapped in a thin dough, crisped on the bottom, and served with a quick dip. What makes them special is texture — that contrast between the golden, crunchy base and the tender, savory interior — and the way a small, well-made dumpling can feel like a feast.
This recipe keeps things straightforward and practical. The filling is seasoned just enough to let the natural chicken and vegetables shine, and the steps are deliberately repeatable so you can turn out a batch without stress. I’ll walk you through what each ingredient does, how to assemble efficiently, and a few troubleshooting tips so nothing goes wrong at the pan.
If you’ve not wrapped dumplings before, don’t worry. The first few will be imperfect, and that’s okay — they’ll still taste great. Read through the steps first, gather your tools, and set a damp towel over the wrappers so they stay pliable. You’ll be surprised how quickly you get into a rhythm.
Ingredient Breakdown
Ingredients
- 1 pound ground chicken — the main protein; lean chicken keeps the filling tender without excess fat.
- 1/2 cup carrots shredded — adds sweetness, color, and a bit of crunch; grate fine so they cook through.
- 1 cup green cabbage shredded — provides moisture and body; shred thin to avoid big crunchy pieces.
- 3 garlic cloves — finely minced for aroma and flavor; don’t skip or substitute with powder.
- 1/4 cup green onions chopped — bright, oniony notes that balance the richness of the chicken.
- 1 tablespoon hoisin sauce — gives sweet-savory depth and a touch of umami to the filling.
- 1 tablespoon sesame oil — a little goes a long way; it rounds the filling with toasted, nutty flavor.
- 1 egg — you’ll beat the egg and reserve about 1 teaspoon for sealing; the rest binds the filling.
- 1/4 cup vegetable oil for frying — used to crisp the bottoms; neutral oil with a high smoke point is best.
- 40 dumpling wrappers — the canvas for your filling; keep them covered with a damp towel so they don’t dry out.
- Soy sauce for dipping — a simple, salty dip that complements the potstickers; serve on the side.
Chicken Potstickers: Step-by-Step Guide
- Finely mince the 3 garlic cloves. In a medium bowl combine 1 pound ground chicken, 1/2 cup shredded carrots, 1 cup shredded green cabbage, the minced garlic, 1/4 cup chopped green onion, 1 tablespoon hoisin sauce, 1 tablespoon sesame oil, and the 1 egg (beat the egg first; reserve about 1 teaspoon of the beaten egg for sealing, then add the rest to the filling). Mix until evenly incorporated.
- Set out the 40 dumpling wrappers on a clean surface. Keep the wrappers covered with a damp towel while you work so they do not dry out.
- Place about a heaping teaspoon of the chicken mixture in the center of a wrapper.
- Lightly brush the outer edge of the wrapper with the reserved beaten egg. Fold the wrapper over the filling to form a half-moon and press the edges together to seal. Pinch or pleat the sealed edge to ensure there are no gaps and to remove excess air.
- Repeat step 3–4 until all filling or all 40 wrappers are used.
- Pour 1/4 cup vegetable oil into a large skillet or large saucepan and heat over medium heat until the oil shimmers.
- Arrange potstickers in a single layer in the hot oil, leaving space between them (cook in batches if needed). Cook for 2–3 minutes without moving them, until the bottoms are golden brown.
- Carefully flip each potsticker and cook the other side for 2–3 minutes, until golden brown and cooked through. Adjust heat as needed to avoid burning; cook additional batches as necessary.
- Transfer cooked potstickers to a paper-towel-lined plate to drain any excess oil.
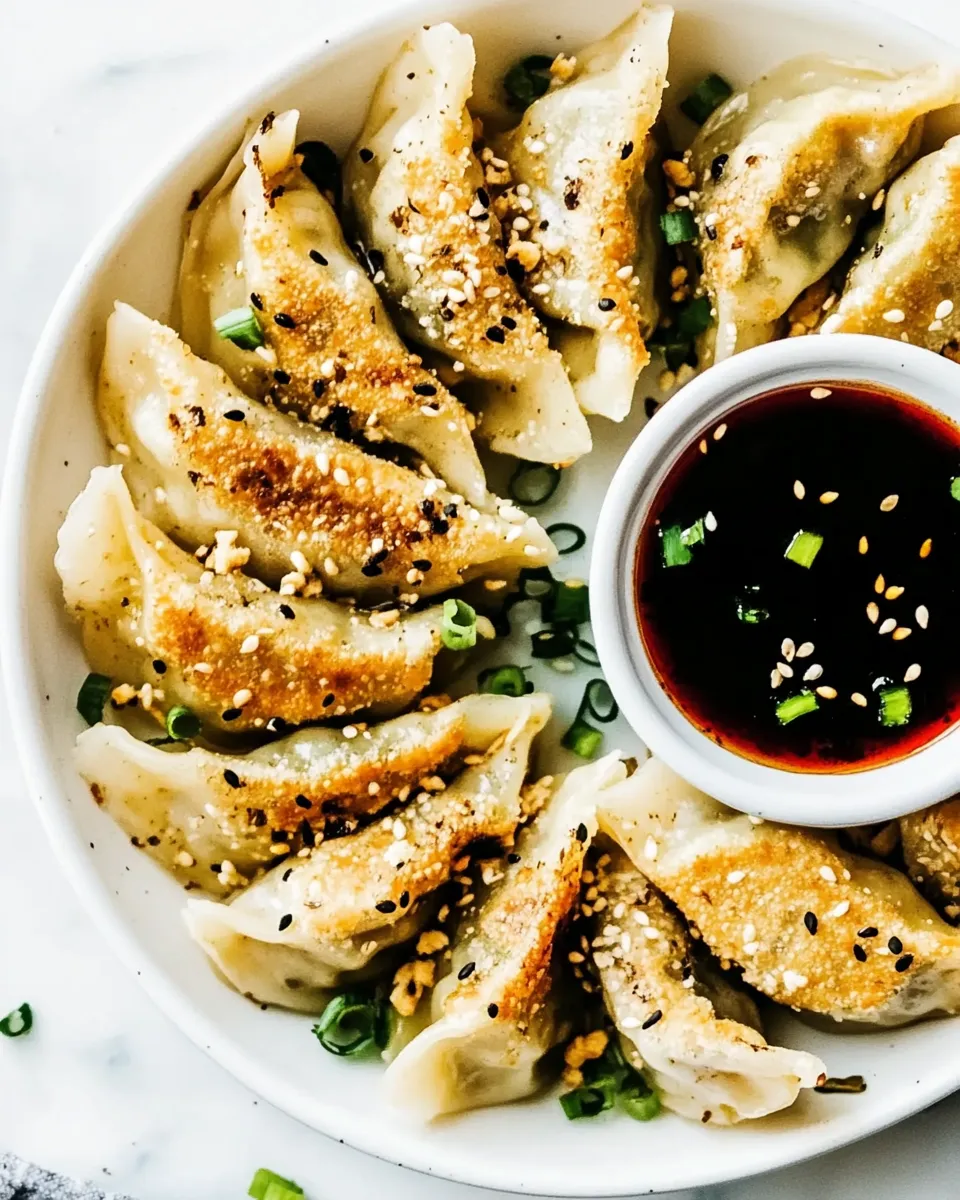
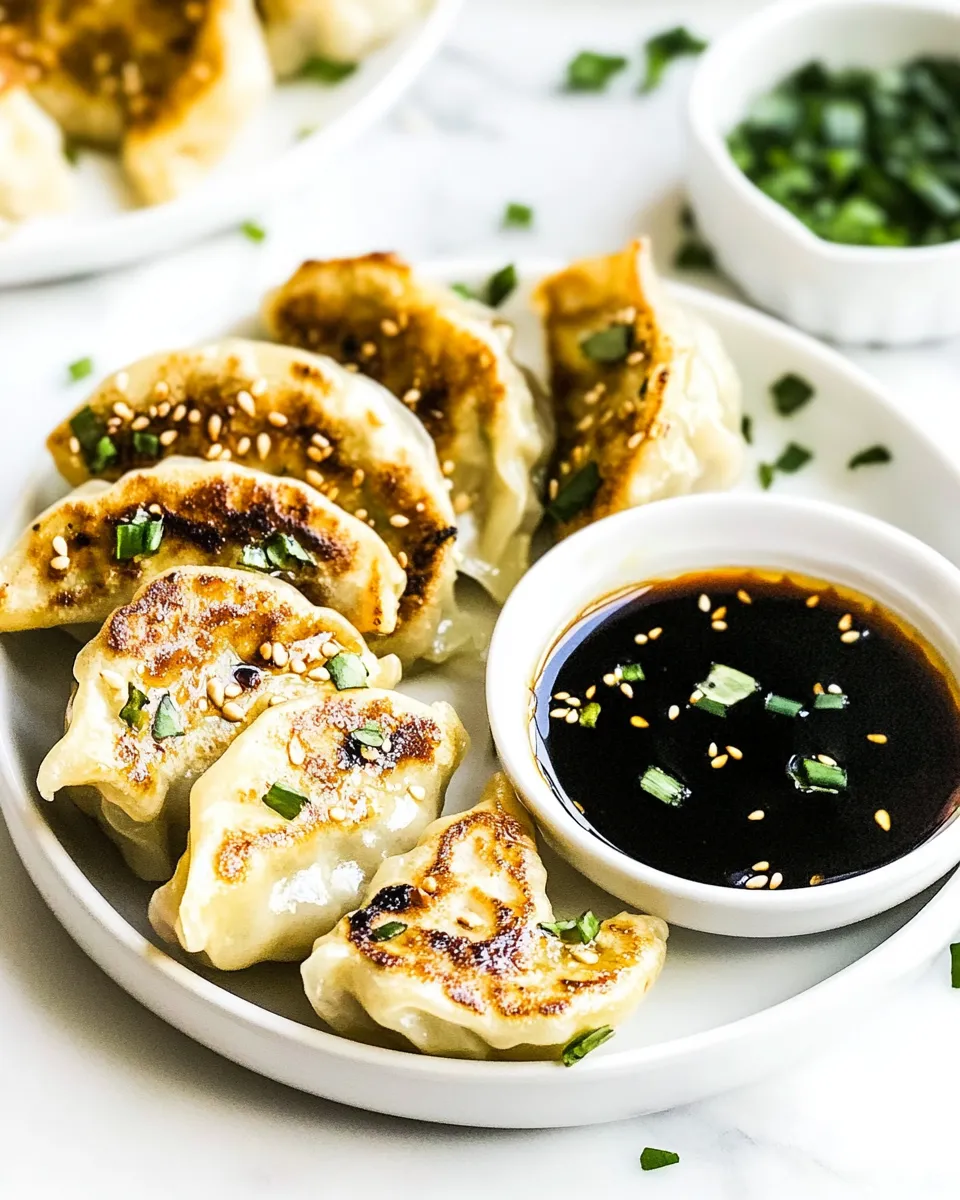
- Serve the potstickers warm with soy sauce for dipping.
Why Chicken Potstickers is Worth Your Time
Making potstickers from scratch feels like a small ceremony: a few simple movements repeated until you have a tray of little parcels. The payoff is immediate — hot, crisp bottoms, savory filling, and the satisfaction of having made something by hand. They’re a social meal too: set up an assembly line with friends or family and the work turns into conversation.
Unlike takeout, these let you control salt, oil, and filling proportion. The vegetables help keep each bite fresh and balanced, and the hoisin plus sesame oil rounds everything without overpowering. In 30–45 minutes you can go from raw ingredients to a plate of potstickers that are both weekday-friendly and party-ready.
Low-Carb/Keto Alternatives
If you’re watching carbs, there are a couple of ways to enjoy similar flavors with fewer carbs:
- Use large blanched napa cabbage leaves as wrappers and fold them around the filling, then sear gently in a skillet to brown the base. They won’t be crispy like a wrapper, but they pick up browning and make a light, low-carb parcel.
- Pan-fry small spoonfuls of the filling as mini chicken patties instead of wrapping them — you’ll get the same seasoning and a great sear without any wrapper.
Recommended Tools
- Large nonstick or heavy-bottomed skillet — for even browning and predictable heat.
- Mixing bowl — medium size to combine filling ingredients without overworking.
- Grater or box grater — for shredding the carrots and the cabbage finely.
- Spoon or small cookie scoop — to portion consistent amounts of filling (about a heaping teaspoon).
- Damp kitchen towel — essential for keeping wrappers pliable while you work.
- Paper towels and a plate — to drain potstickers after frying.
Don’t Do This
- Don’t overfill the wrappers — too much filling makes sealing hard and increases the chance of tearing or uneven cooking.
- Don’t let the wrappers dry out — once they start to dry they become brittle and won’t seal properly. Keep a damp towel over the stack.
- Don’t crowd the pan — leaving space between potstickers ensures proper browning. Cook in batches if needed.
- Don’t cook on too high heat — oil that’s too hot will burn the bottoms before the filling is cooked through. Medium heat is best.
Better Choices & Swaps
- Ground chicken can be swapped with ground turkey if you prefer a different flavor profile; both work well with the same seasonings.
- If you don’t have hoisin, a teaspoon of oyster sauce plus a small pinch of sugar can mimic the sweet-savory tone, but hoisin is the simpler choice.
- Use toasted sesame oil for flavor but avoid using it as the frying oil — it burns easily. The recipe already specifies neutral vegetable oil for frying.
- Feel free to add a small handful of finely chopped shiitake mushrooms or water chestnuts for extra texture, but grate them fine so they don’t disrupt the wrapper.
If You’re Curious
Quick notes for the curious cook: pleating is decorative but practical — it removes air and strengthens the seal. A wet finger or the reserved egg wash on the edge makes the wrapper stick. If a potsticker opens while frying, it usually seals back up; just press gently with a spatula.
Serving ideas: a simple dip of soy sauce is perfect, but try mixing soy with a little rice vinegar, a pinch of sugar, and chili flakes for a tangy-spicy option. Garnish with extra chopped green onion or toasted sesame seeds for a finishing touch.
Refrigerate, Freeze, Reheat
Short-term storage
Store cooked potstickers in an airtight container in the refrigerator for up to 3 days. Line the container with paper towels to absorb excess oil if you like.
Freezing
To freeze, place uncooked assembled potstickers on a tray in a single layer and freeze until solid (about 1–2 hours). Once frozen, transfer them to a freezer-safe bag or container. They can be cooked from frozen in a skillet; add a bit more cooking time and watch the heat so they brown without burning.
Reheating
Reheat refrigerated potstickers in a skillet over medium heat with a small amount of oil to refresh the crisp bottom; cover briefly if you need to warm through the center. Avoid microwaving if you want to retain crunch — it makes the wrapper soggy.
Reader Questions
- Can I bake these instead of frying? You can bake potstickers on a parchment-lined pan at 400°F (200°C) for about 12–15 minutes, flipping halfway, but you’ll miss the signature crispy bottom from pan-frying.
- How do I know the filling is fully cooked? Ground chicken should reach an internal temperature of 165°F (74°C). If you don’t use a thermometer, make sure the meat is no longer pink and the juices run clear after cutting one open.
- Can I make the filling ahead? Yes. Keep the mixed filling refrigerated for up to 24 hours before wrapping. The texture can relax, making filling easier to work with.
Ready, Set, Cook
Gather your ingredients, set up a small assembly station with a damp towel, and give yourself 30–45 minutes to make, fry, and plate up a batch. Start by mixing the filling and keeping the wrappers covered. Work methodically: fill, seal, arrange in the pan, brown, flip, and drain. Serve hot with soy sauce and watch them disappear.
These Chicken Potstickers are both approachable and rewarding. Once you’ve made a batch, variations and flavor experiments are a natural next step. But the first goal is simple: make crisp-bottomed, tender dumplings that taste like effort well spent. Happy cooking — you’ve got this.
Chicken Potstickers
Equipment
- Medium Bowl
- Large Skillet
- Large saucepan
- clean surface
- damp towel
- Paper Towels
Ingredients
Ingredients
- 1 poundground chicken
- 1/2 cupcarrotsshredded
- 1 cupgreen cabbageshredded
- 3 garlic cloves
- 1/4 cupgreen onionschopped
- 1 tablespoonhoisen sauce
- 1 tablespoonsesame oil
- 1 egg
- 1/4 cupvegetable oilfor frying
- 40 dumpling wrappers
- Soy saucefor dipping
Instructions
Instructions
- Finely mince the 3 garlic cloves. In a medium bowl combine 1 pound ground chicken, 1/2 cup shredded carrots, 1 cup shredded green cabbage, the minced garlic, 1/4 cup chopped green onion, 1 tablespoon hoisin sauce, 1 tablespoon sesame oil, and the 1 egg (beat the egg first; reserve about 1 teaspoon of the beaten egg for sealing, then add the rest to the filling). Mix until evenly incorporated.
- Set out the 40 dumpling wrappers on a clean surface. Keep the wrappers covered with a damp towel while you work so they do not dry out.
- Place about a heaping teaspoon of the chicken mixture in the center of a wrapper.
- Lightly brush the outer edge of the wrapper with the reserved beaten egg. Fold the wrapper over the filling to form a half-moon and press the edges together to seal. Pinch or pleat the sealed edge to ensure there are no gaps and to remove excess air.
- Repeat step 3–4 until all filling or all 40 wrappers are used.
- Pour 1/4 cup vegetable oil into a large skillet or large saucepan and heat over medium heat until the oil shimmers.
- Arrange potstickers in a single layer in the hot oil, leaving space between them (cook in batches if needed). Cook for 2–3 minutes without moving them, until the bottoms are golden brown.
- Carefully flip each potsticker and cook the other side for 2–3 minutes, until golden brown and cooked through. Adjust heat as needed to avoid burning; cook additional batches as necessary.
- Transfer cooked potstickers to a paper-towel-lined plate to drain any excess oil.
- Serve the potstickers warm with soy sauce for dipping.
Notes
Originally Posted Feb 18, 2020
Updated Dec 27, 2022