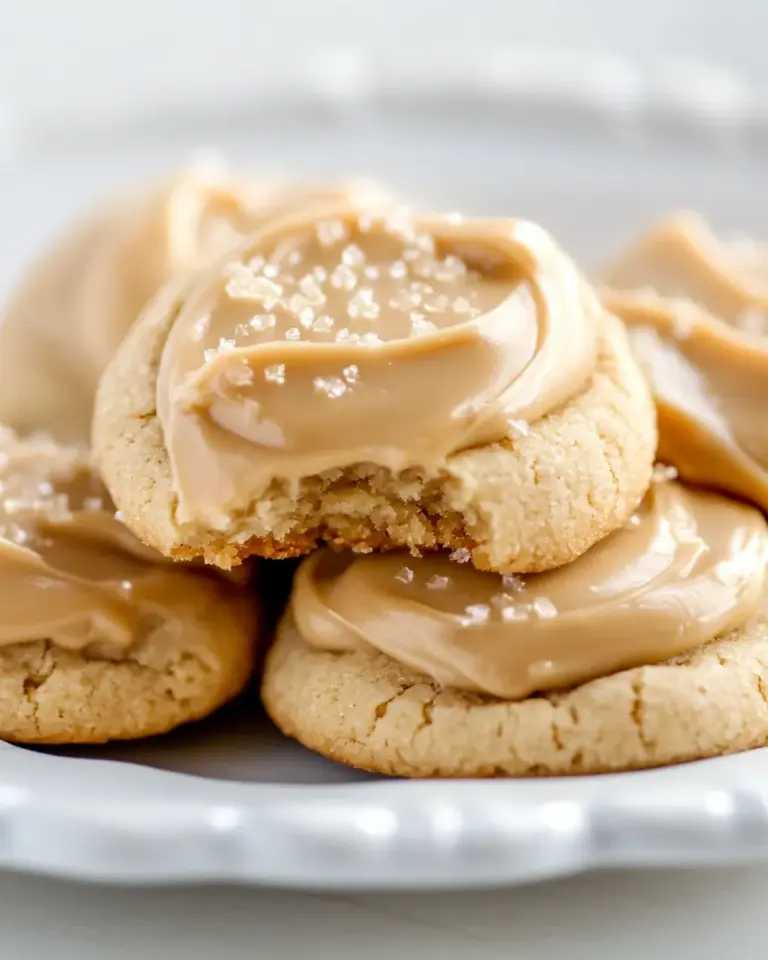
These Chocolate Peppermint Cookies are exactly what I reach for when I want something festive, chocolatey, and just a little bit grown-up. They have a sturdy, cocoa-rich base, semi-sweet chips tucked into the dough, and a glossy white chocolate dip dotted with crunchy candy cane. The contrast between dark chocolate and bright peppermint makes every bite interesting.
I developed this version to be dependable — no fiddly tempering, no last-minute ingredient hunts. The dough comes together in a stand mixer or with a strong arm and a bowl. Baking is forgiving: the cookies puff, crack slightly on top, and finish with a tender center when you stop at the right moment. Decoration is optional, but the dipped-and-sprinkled finish makes them holiday-ready.
Below you’ll find precise ingredients, the exact method to follow, troubleshooting and storage tips, and simple ways to make the cookies your own. Read the ingredient notes before you start so you understand the role each item plays. Then measure, mix, scoop, and enjoy.
Ingredient Notes

Ingredients
- 2½ cups (300 g) all-purpose flour — Provides structure; measure by spooning into the cup and leveling for accuracy.
- 1 cup unsweetened cocoa powder — Brings chocolate intensity; use natural or Dutch-process depending on what you have (see notes).
- 1 teaspoon baking soda — Leavens and helps spread; don’t omit.
- ½ teaspoon salt — Balances sweetness and enhances chocolate flavor.
- 1 cup (230 g) unsalted butter at room temperature, 2 sticks — Fat for tenderness and flavor; room temperature is important for proper creaming.
- 1 cup granulated sugar — Adds sweetness and contributes to crisp edges.
- 1 cup light brown sugar — Adds moisture and a hint of caramel flavor; it helps with chewiness.
- 2 large eggs at room temperature — Bind the dough and add lift; room temperature eggs incorporate more easily.
- 1 teaspoon pure vanilla extract — Rounds out flavor and amplifies the chocolate.
- ½ teaspoon peppermint extract (optional) — Adds mint brightness; optional so you can control the mint intensity.
- 1 cup semi-sweet chocolate chips — Melty pockets of chocolate throughout the cookie.
- 1½ cups white chocolate or vanilla melting wafers — Used for dipping; melting wafers set up quickly and give a smooth finish.
- ¼ cup crushed candy cane — Provides crunchy peppermint topping and festive color.
The Method for Chocolate Peppermint Cookies
- Preheat the oven to 350°F (180°C). Line 3 large baking sheets with parchment paper or silicone baking mats.
- In a large bowl, whisk together the dry ingredients: 2½ cups (300 g) all-purpose flour, 1 cup unsweetened cocoa powder, 1 teaspoon baking soda, and ½ teaspoon salt. Set aside.
- In the bowl of a stand mixer, beat 1 cup (230 g) unsalted butter (room temperature), 1 cup granulated sugar, and 1 cup light brown sugar on medium-high speed for about 3 minutes, until light and fluffy. Scrape down the sides of the bowl with a spatula.
- Add the 2 large eggs (room temperature), 1 teaspoon pure vanilla extract, and ½ teaspoon peppermint extract (optional). Mix until combined.
- Add the dry ingredient mixture to the wet ingredients and mix on low speed until just combined. Do not overmix.
- Fold 1 cup semi-sweet chocolate chips into the dough by hand with a spatula until evenly distributed.
- Using a medium cookie scoop (about 1½ tablespoons / ~30 g per cookie), portion the dough into balls. Roll lightly if needed and place them on the prepared baking sheets, leaving space between cookies for spreading.
- Bake for 11–13 minutes, until the cookies have puffed and have slightly cracked tops. Avoid overbaking.
- Remove the baking sheets from the oven and let the cookies cool on the sheets for 5 minutes, then transfer the cookies to a wire rack to cool completely.
- Place 1½ cups white chocolate or vanilla melting wafers in a small microwave-safe bowl (or use a double boiler). Melt until smooth: microwave in 20–30 second intervals, stirring between intervals, or melt gently over simmering water.
- Dip half of each cooled cookie into the melted white chocolate, gently shake off excess, and return to a wire rack or a parchment-lined baking sheet. Immediately sprinkle each dipped cookie with ¼ cup crushed candy cane. Allow the coating to set completely before serving or storing.
Why It Deserves a Spot

These cookies hit the sweet spot — literally. The cocoa-forward dough keeps the base rich, while the chocolate chips give bursts of melty texture. The white chocolate dip brightens the experience and the crushed candy cane adds a satisfying crunch and that unmistakable peppermint note. They’re visually appealing and have a balanced bite: slightly crisp at the edges, tender inside.
They’re versatile too. Make them as an everyday treat, a cookie exchange contender, or a gift tucked in a tin. The production is straightforward enough to double, and the finished cookies travel well when stored properly.
If You’re Out Of…

If you’re missing one thing, don’t panic. Here are practical swaps with no new measurements required — just adjust to taste.
- If you don’t have peppermint extract: leave it out. The cookies will still be classic chocolate cookies. Or add a few drops of mint liqueur if you have it, but start small and taste.
- If you don’t have white melting wafers: white chocolate chips melted with a little coconut oil or vegetable shortening will help them smooth and set more quickly.
- If you’re out of semi-sweet chips: chop a chocolate bar into chunks and fold them in. The pieces will be chunkier but work beautifully.
- If you lack light brown sugar: use dark brown sugar for deeper molasses notes or make a quick substitute by mixing molasses with granulated sugar to approximate light brown.
Gear Up: What to Grab
Must-Have Tools
- Stand mixer (or hand mixer and a sturdy bowl) — makes creaming the butter and sugars effortless.
- Large mixing bowls — one for dry, one for wet.
- Medium cookie scoop (~1½ tablespoons / ~30 g) — ensures even-sized cookies that bake uniformly.
- Baking sheets and parchment or silicone mats — for even browning and easy cleanup.
- Wire rack — for cooling and letting the chocolate set properly.
Nice-to-Have
- Small microwave-safe bowl or double boiler — for melting the white chocolate.
- Offset spatula or dipping tongs — makes the dipping step cleaner.
Avoid These Mistakes
- Overcreaming the butter and sugars. Cream until light and slightly fluffy, about three minutes as the method says. Overcreaming can introduce too much air and cause collapsing.
- Overmixing once the flour goes in. Mix on low until just combined. Overworked dough yields tougher cookies.
- Skipping the rest on the baking sheet. Letting the cookies sit for 5 minutes before transferring prevents breakage and lets them set.
- Overbaking. Remove at 11–13 minutes when tops are puffed and just beginning to crack. They finish cooking on the sheet.
- Dipping warm cookies. Always cool completely before dipping in melted white chocolate or the coating won’t set properly and may melt into the cookie surface.
Make It Your Way
Want to riff? Small tweaks make big differences without derailing the recipe.
- For extra chew: replace 2–3 tablespoons of the all-purpose flour with an equal amount of bread flour.
- To intensify chocolate: use a mix of semi-sweet and bittersweet chips, or add 2–3 tablespoons instant espresso powder to the dry mix (no extra liquid needed).
- To reduce sweetness: use dark chocolate chips and skip or reduce the white chocolate dip.
- To make them more festive: press a whole candy cane piece or a small seasonal sprig onto the wet white chocolate for presentation.
Cook’s Notes

Room temperature ingredients matter. Butter and eggs at room temperature incorporate smoothly and yield a more even dough. If your kitchen is cold, let the butter sit a bit longer or give it 10-second bursts in the microwave until pliable, not melted.
Measure flour properly. Spoon it into the cup and level with a knife rather than scooping straight from the bag, which packs too much flour in and dries the cookies out.
For peppermint flavor, start light. Peppermint extract is powerful; ½ teaspoon is optional and can easily overpower the chocolate. You can always add more to the melted white chocolate for a minty glaze, but taste as you go.
Make-Ahead & Storage
These cookies are forgiving when it comes to make-ahead steps.
- Unbaked dough can be scooped onto a tray, frozen solid, then transferred to a freezer bag for up to 3 months. Bake from frozen, adding a minute or two to the bake time.
- Baked cookies (without the white chocolate dip) keep in an airtight container at room temperature for up to 5 days.
- Once dipped and sprinkled, store in a single layer or with parchment between layers to prevent sticking. Keep at room temperature for up to 3 days; longer storage is best refrigerated in a tightly sealed container for up to a week, but chilling may soften the coating slightly.
- For longer storage, freeze baked cookies (fully cooled, undipped) in a single layer, then transfer to an airtight container for up to 3 months. Thaw at room temperature before dipping.
Troubleshooting Q&A
Q: My cookies spread too much. What happened?
A: Likely causes are warm dough, overcreamed butter, or an oven hotter than indicated. Chill the dough 15–30 minutes before scooping if your kitchen is warm. Double-check oven temperature with an oven thermometer.
Q: The cookies are dry and crumbly.
A: You probably added too much flour or overbaked. Measure flour correctly (spoon and level) and pull the cookies from the oven when centers still look slightly soft; they’ll finish on the baking sheet.
Q: The white chocolate seized or turned grainy when melting.
A: White chocolate is sensitive to overheating and moisture. Melt gently in short intervals and stir frequently. If it seizes, stirring in a small amount of neutral oil (a teaspoon at a time) can often smooth it — use sparingly.
Q: The peppermint topping is soggy after storage.
A: Moisture causes the crushed candy to soften. Store in a cool, dry place, and layer with parchment if stacking. If humidity is high, refrigerate in an airtight container.
The Takeaway
These Chocolate Peppermint Cookies are a dependable, crowd-pleasing recipe that marry rich cocoa with crisp peppermint. The method is straightforward: cream, mix, fold in chips, scoop, bake, and decorate. Follow the ingredient notes and the method exactly for consistent results, and use the tips here to adapt or troubleshoot. Whether you’re making a batch for a party or a cozy night in, these cookies deliver comfort and cheer with every bite.

Chocolate Peppermint Cookies
Equipment
- 3 Cookie Sheets
- 3 Parchment paper or silicone baking mat
- Mixing Bowl
- Electric Hand mixer or Stand mixer
- Medium cookie scoop
Ingredients
Ingredients
- ?2 1/2 cups 300 gall purpose flour
- ?1 cupunsweetend cocoa powder
- ?1 teaspoonbaking soda
- ?1/2 teaspoonsalt
- ?1 cup 230 gunsalted butterat room temperature, 2 sticks
- ?1 cupgranulated sugar
- ?1 cuplight brown sugar
- ?2 largeeggsat room temperature
- ?1 teaspoonpure vanilla extract
- ?1/2 teaspoonpeppermint extractoptional
- ?1 cupsemi-sweet chocolate chips
- ?1 1/2 cupswhite chocolateor vanilla melting wafers
- ?1/4 cupcrushed candy cane
Instructions
Instructions
- Preheat the oven to 350°F (180°C). Line 3 large baking sheets with parchment paper or silicone baking mats.
- In a large bowl, whisk together the dry ingredients: 2½ cups (300 g) all-purpose flour, 1 cup unsweetened cocoa powder, 1 teaspoon baking soda, and ½ teaspoon salt. Set aside.
- In the bowl of a stand mixer, beat 1 cup (230 g) unsalted butter (room temperature), 1 cup granulated sugar, and 1 cup light brown sugar on medium-high speed for about 3 minutes, until light and fluffy. Scrape down the sides of the bowl with a spatula.
- Add the 2 large eggs (room temperature), 1 teaspoon pure vanilla extract, and ½ teaspoon peppermint extract (optional). Mix until combined.
- Add the dry ingredient mixture to the wet ingredients and mix on low speed until just combined. Do not overmix.
- Fold 1 cup semi-sweet chocolate chips into the dough by hand with a spatula until evenly distributed.
- Using a medium cookie scoop (about 1½ tablespoons / ~30 g per cookie), portion the dough into balls. Roll lightly if needed and place them on the prepared baking sheets, leaving space between cookies for spreading.
- Bake for 11–13 minutes, until the cookies have puffed and have slightly cracked tops. Avoid overbaking.
- Remove the baking sheets from the oven and let the cookies cool on the sheets for 5 minutes, then transfer the cookies to a wire rack to cool completely.
- Place 1½ cups white chocolate or vanilla melting wafers in a small microwave-safe bowl (or use a double boiler). Melt until smooth: microwave in 20–30 second intervals, stirring between intervals, or melt gently over simmering water.
- Dip half of each cooled cookie into the melted white chocolate, gently shake off excess, and return to a wire rack or a parchment-lined baking sheet. Immediately sprinkle each dipped cookie with ¼ cup crushed candy cane. Allow the coating to set completely before serving or storing.
Notes
Freeze cookies for up to 3 months.
Nutrition values are rough estimates per cookie without white chocolate or candy cane.