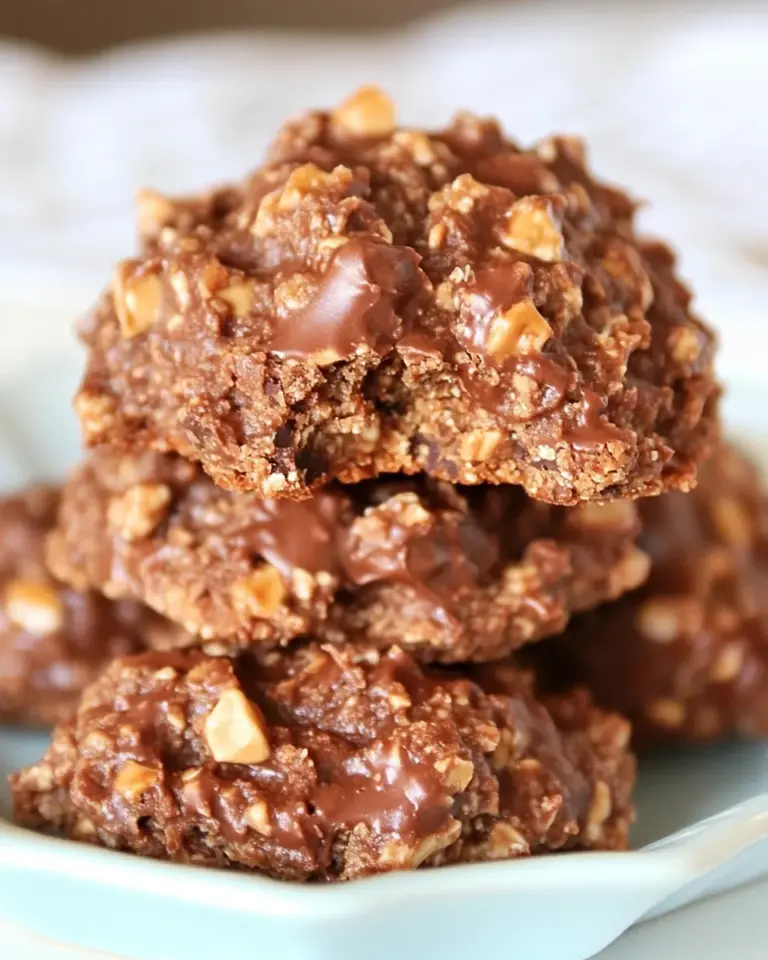
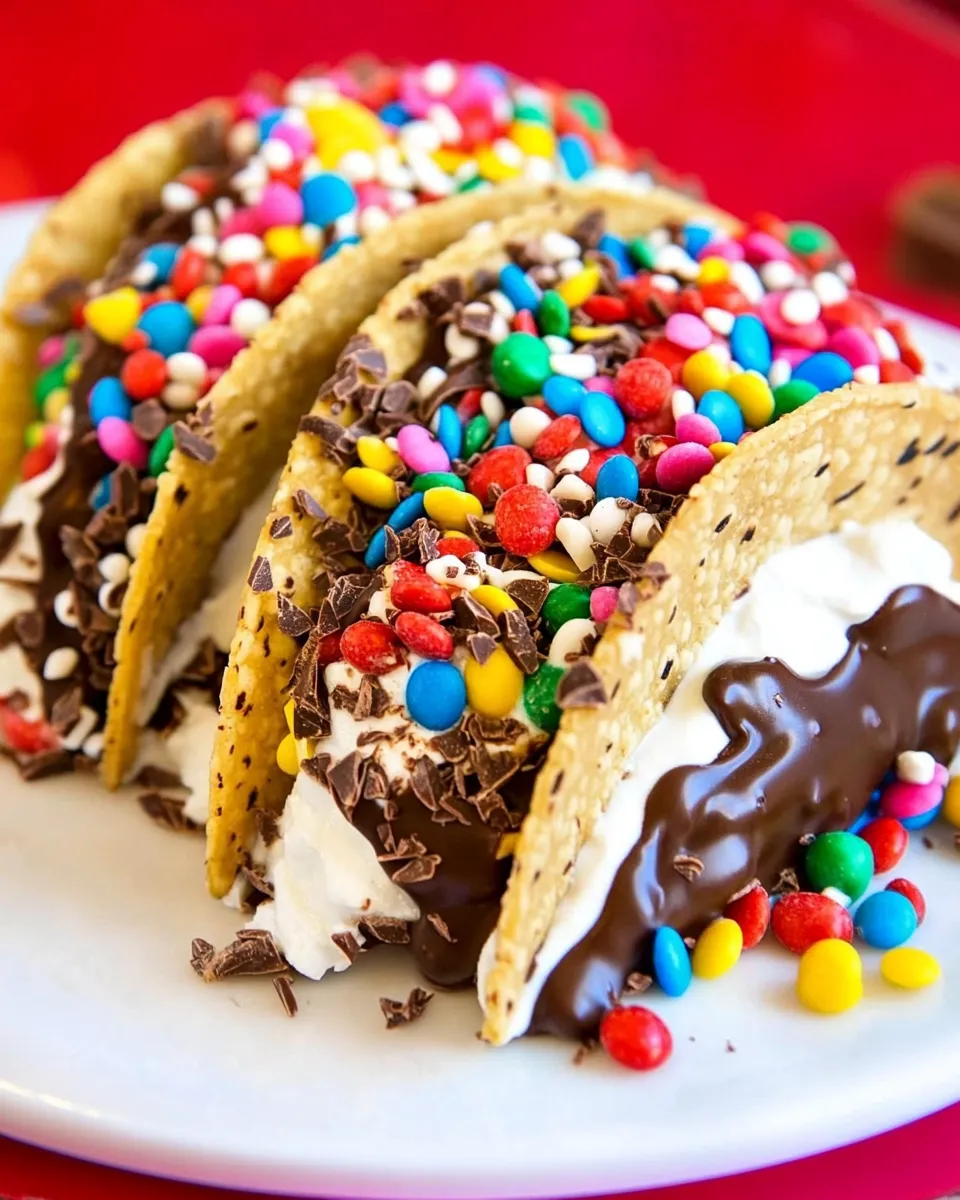
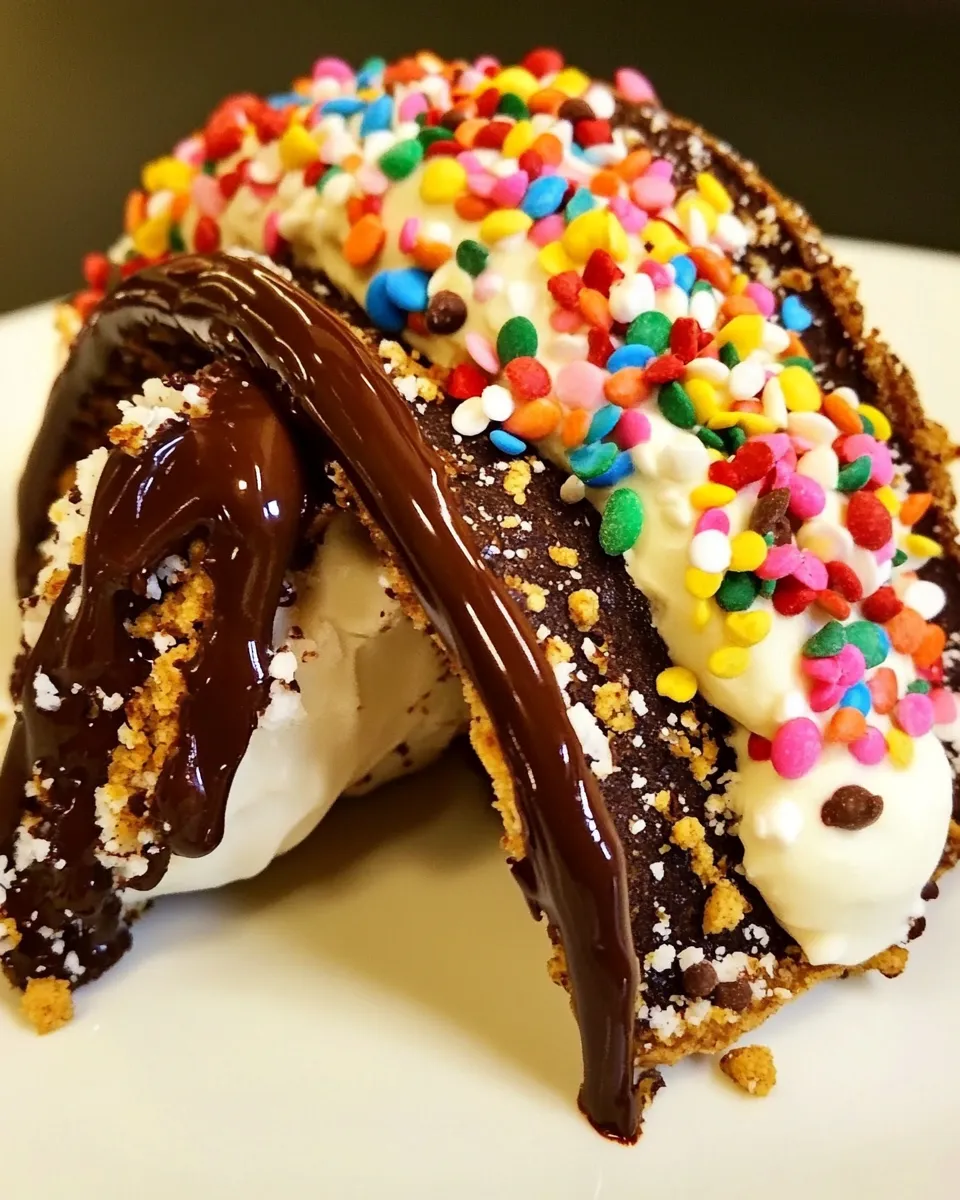
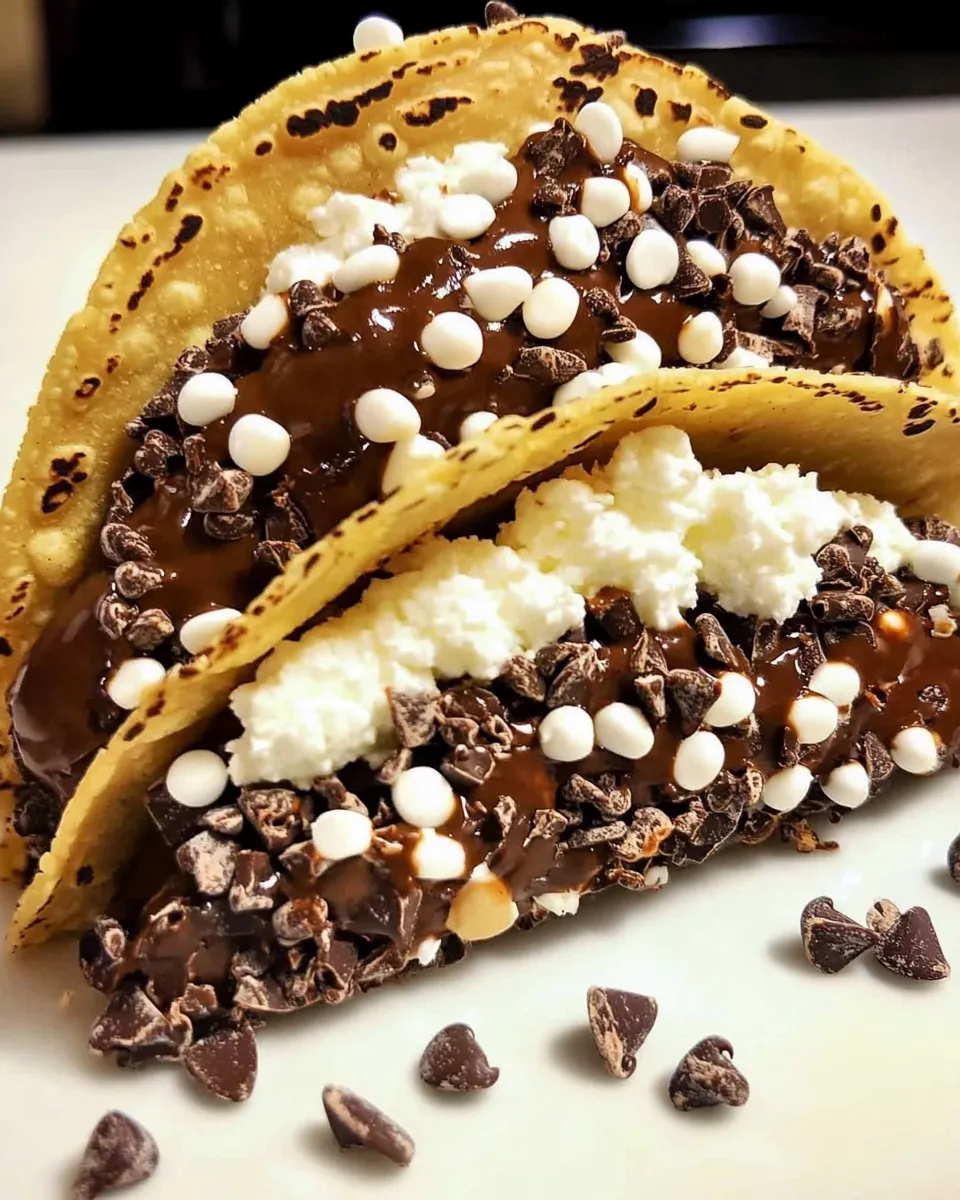
Chocolate tacos are a playful, elegant dessert that feels special without a lot of fuss. Think crisp, delicate chocolate shells cradling creamy vanilla ice cream, finished with melted chocolate and crunchy peanuts. They’re a crowd-pleaser for kids and grown-ups alike, and they come together mostly from pantry staples.
I test and tweak recipes in a small kitchen, looking for reliable steps you can follow on a weeknight or for company. This version focuses on clear technique: a thin cookie-like batter baked into discs, quickly shaped while warm, then filled and frozen. The steps are precise because the shells are delicate; follow them and you’ll be rewarded.
Below you’ll find a compact ingredient rundown, a step-by-step instruction set taken directly from a trusted source, helpful swaps, troubleshooting, storage notes, and answers to common questions. Read once, gather your ingredients, and work steadily—timing matters most when shaping the shells.
Ingredient Rundown
All ingredients below come from the recipe source. Each line includes a short note on role or handling so you know why it matters.
- 1/2 cup powdered sugar — sweetens and helps give the shell a tender, cookie-like texture.
- 1.1 ounces all-purpose flour (about 1/4 cup) — provides structure; measure carefully for thin, flexible shells.
- 3 tablespoons unsweetened cocoa — gives the shells their chocolate flavor and color.
- 1 teaspoon cornstarch — lightens the texture and helps the shells set without becoming tough.
- 1/4 teaspoon salt — balances sweetness and amplifies chocolate flavor.
- 3 tablespoons egg whites — bind the dry ingredients and create a smooth, spreadable batter; use pasteurized whites if preferred.
- 1 teaspoon 2% reduced-fat milk — thins the batter to a spreadable consistency.
- 1/4 teaspoon vanilla extract — adds background vanilla warmth to the shells.
- Cooking spray — helps release delicate shells from parchment if needed.
- 1/2 cup semisweet chocolate chips — melted and used to adhere peanuts and add extra chocolate on the shell exterior and drizzled over ice cream.
- 1 teaspoon canola oil — thins and glosses the melted chocolate for easier spreading and drizzling.
- 1/2 cup finely chopped unsalted dry-roasted peanuts, divided — provides crunchy contrast; recipe divides them for coating and garnish.
- 2 2/3 cups vanilla low-fat ice cream — the filling; use a slightly softened scoopable texture for easier portioning.
From Start to Finish: Chocolate Tacos
- Preheat oven to 400°F.
- In a medium bowl, whisk together 1/2 cup powdered sugar, 1.1 ounces all-purpose flour (about 1/4 cup), 3 tablespoons unsweetened cocoa, 1 teaspoon cornstarch, and 1/4 teaspoon salt until evenly combined.
- Add 3 tablespoons egg whites, 1 teaspoon 2% reduced‑fat milk, and 1/4 teaspoon vanilla extract to the dry mixture; whisk until smooth and slightly runny.
- Line a baking sheet with parchment paper or lightly coat it with cooking spray. On the underside of the parchment, trace four 5‑inch circles to use as placement guides (you can use a 5‑inch round cookie cutter or a cup).
- Drop 1 tablespoon of batter onto each traced circle and spread the batter thinly and evenly to the edges of the circle with the back of a spoon.
- Bake at 400°F for 6 minutes, or until the edges begin to brown. Remove the baking sheet from the oven.
- Loosen each disc from the parchment with a spatula. Working quickly while the discs are pliable, drape each disc over two parallel wooden spoons (or another rounded support) to form a taco shape. Cool the shaped shells completely on a wire rack. Handle gently—the shells are delicate.
- Repeat steps 5–7 with the remaining batter so you have a total of 8 shells.
- Place 1/2 cup semisweet chocolate chips and 1 teaspoon canola oil in a microwave‑safe bowl. Microwave on HIGH for 1 minute, stirring after 30 seconds; then stir until the chocolate is fully melted and smooth.
- Divide the 1/2 cup finely chopped unsalted dry‑roasted peanuts into two equal portions.
- Using a small spoon, spread some of the melted chocolate on the top third of the outside of both sides of each cooled shell. Immediately press some of the first portion of chopped peanuts onto the chocolate so they adhere. (Work carefully to avoid breaking the shells.)
- Spoon 1/3 cup vanilla low‑fat ice cream into each shell.
- Drizzle the remaining melted chocolate over the ice cream and sprinkle with the remaining chopped peanuts.
- Place the assembled chocolate tacos in the freezer for at least 30 minutes before serving to firm the shells and ice cream.
What You’ll Love About This Recipe
These tacos are textural contrast in miniature: a thin, crackly shell; cold, creamy ice cream; warm chocolate and crunchy peanuts. The method keeps things straightforward—batter, bake, shape, fill, freeze. No deep frying, no tempering chocolate, no long resting times.
The shells are delicate but forgiving if you work steadily. Because you bake only a few discs per sheet, you can control browning and shape them while they’re warm. If you like a slightly chewier shell, watch the edges and bake a touch less; for crispier, let the edges brown a hair more.
Budget & Availability Swaps
There’s room to swap while staying faithful to the recipe’s spirit:
- Chocolate chips: If semisweet chips are unavailable, use any baking chocolate or chocolate chips on hand—dark or milk—but keep the 1/2 cup measure to maintain the coating quantity.
- Peanuts: The recipe calls for unsalted dry‑roasted peanuts. If you only have salted nuts, use them sparingly or blot any excess salt before pressing them into the chocolate. You can also use chopped almonds or hazelnuts for a different crunch, keeping the 1/2 cup amount.
- Milk: The tiny 1 teaspoon of 2% reduced‑fat milk thins the batter. Use any milk you have in the same teaspoon amount—whole, skim, or a mild plant milk will work.
- Ice cream: If vanilla low‑fat isn’t available, use regular vanilla ice cream or any vanilla frozen dessert. Keep the 1/3 cup per shell to avoid overfilling.
Equipment Breakdown
You don’t need fancy tools, but a few simple items make the process smoother:
- Baking sheet and parchment paper — for even baking and easy release.
- 5‑inch cookie cutter or cup — to trace circles so shells are uniform in size.
- Offset spatula or thin spatula — for loosening delicate discs from the parchment.
- Two parallel wooden spoons or rounded supports — to shape the discs into taco shells while warm.
- Microwave‑safe bowl — for melting chocolate quickly and safely.
- Wire rack — to cool shaped shells without trapping steam.
Troubleshooting Tips
Shaping and handling the shells
The shells are fragile. If a disc tears when you lift it, let it cool and use it as a generous cookie with ice cream scooped on top rather than a taco. To reduce tearing: loosen fully from the parchment with a thin spatula, work quickly while warm, and support the center with the spatula as you drape it over the spoons.
Shells too soft or too crispy
If shells stay floppy after cooling, they were likely underbaked—next time bake until edges just begin to brown. If they’re snapping and crumbling, they’re overbaked; reduce baking time by 30 seconds to 1 minute and test again. Oven temperatures vary; use visual cues.
Melted chocolate seizes or is too thick
If chocolate becomes grainy, it may be overheated. Stir frequently and stop microwaving as soon as most of the chips are soft; residual heat will finish melting them. The recipe adds 1 teaspoon canola oil—this thins and glosses the chocolate. Add a tiny drop more oil only if needed.
Make It Fit Your Plan
Timing and make-ahead options:
- Make shells ahead: You can shape and cool shells, then store them in an airtight container at room temperature for a day. Do not fill until ready to serve to avoid soggy shells from condensation.
- Assemble ahead: If you assemble tacos, freeze them as directed for at least 30 minutes and store in the freezer up to 2 days for best texture. Longer storage may cause textural changes in the peanuts and shell.
- Scaling the recipe: The method scales, but make sure you only bake a few discs per sheet at a time so you can shape them while warm.
If You’re Curious
Why such small batter portions? Thin, evenly spread batter bakes quickly and becomes flexible when warm, which is critical for shaping. Thicker batter yields cookies, not shells. Also, the powdered sugar and cornstarch combo creates a more delicate, crisp finish than granulated sugar alone.
Why freeze before serving? Freezing firms both the ice cream and shells so the tacos hold their shape and aren’t messy on first bite. It also gives the melted chocolate a chance to set firmly against the cold ice cream.
Storage & Reheat Guide
Store assembled tacos in an airtight container in the freezer. Lay them flat and, if stacking is necessary, separate layers with parchment paper to prevent sticking. For best texture, consume within 2 days.
These are meant to be eaten straight from the freezer; no reheating. If shells soften at room temperature, they will lose their crispness and may become sticky. If you’ve stored unfilled shells at room temperature, keep them in an airtight container and use within a day for best texture.
Quick Q&A
- Can I make shells without wooden spoons? — Yes. Use any rounded supports like rolling pins laid parallel or a small bottle, as long as the curve is gentle and you can drape the warm disc without tearing it.
- What if I only have whole eggs? — The recipe calls for 3 tablespoons egg whites specifically. Substituting whole egg will change texture and runniness. If you must, separate an egg and use just the whites, measuring 3 tablespoons.
- Can I skip the peanuts? — Yes. Omit them and still have delicious tacos, though you’ll lose the crunchy contrast. The chocolate coating alone will help hold any other garnish you choose.
- Is there a non‑dairy option? — You can use a plant milk in the same teaspoon quantity and a non‑dairy ice cream. Be mindful that flavor and texture may shift slightly.
Hungry for More?
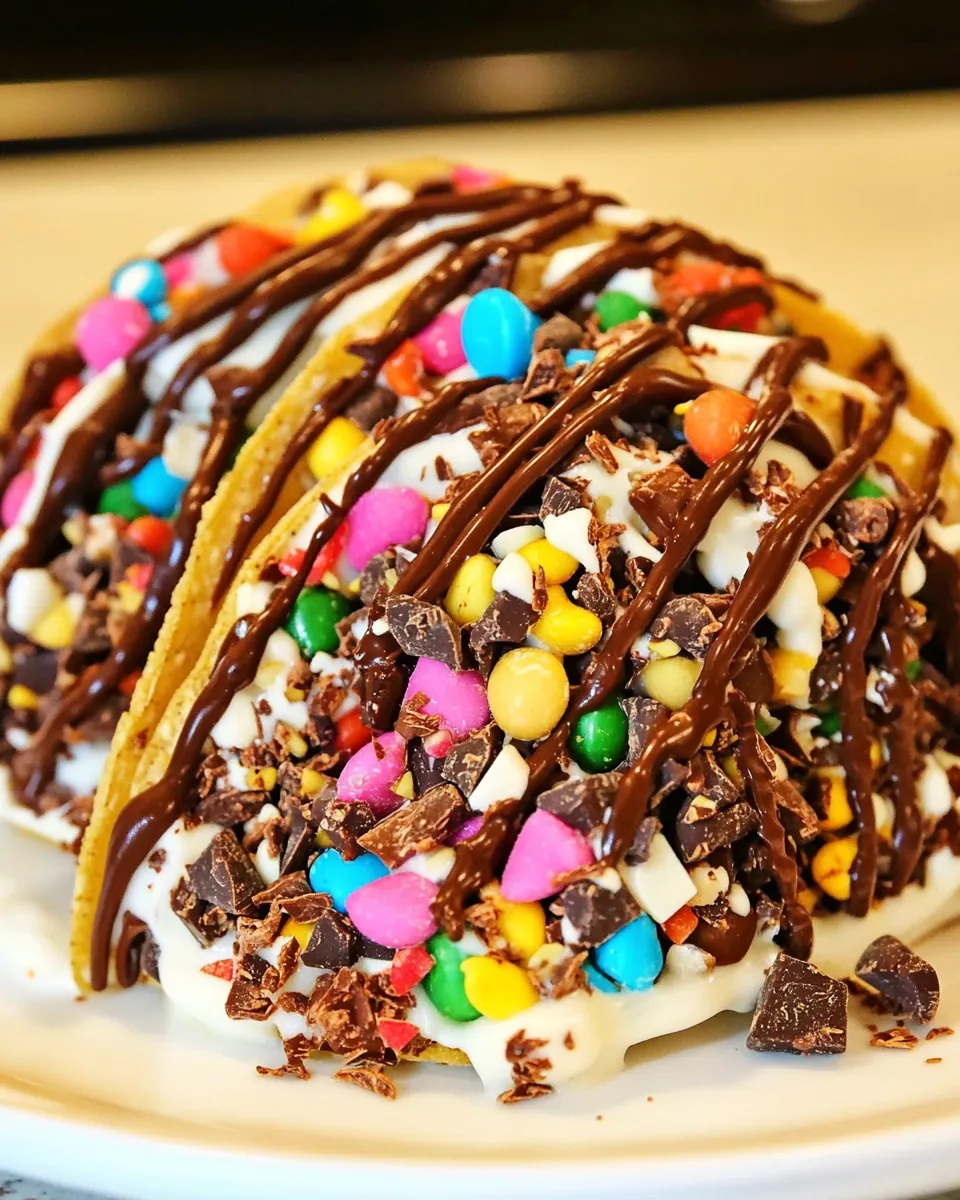
If you liked these, try swapping the ice cream flavor (a coffee or salted caramel would be lovely) or adding a light sprinkle of flaky sea salt over the final chocolate drizzle for an extra flavor lift. The technique also works for other thin batter cookies—once you’ve mastered shaping, get playful.
Ready to bake? Gather your ingredients and work in small batches for shaping. Take a breath between trays, and remember: gentle hands and timing are what turn these into beautiful, crunchy little tacos. Enjoy.
Chocolate Tacos
Equipment
- Oven
- Mixing Bowl
- Whisk
- Baking Sheet
- Parchment Paper
- Spoon
- Spatula
- wooden spoons
- Wire Rack
- Microwave-safe Bowl
Ingredients
Ingredients
- 1/2 cuppowdered sugar
- 1.1 ouncesall-purpose flourabout 1/4 cup
- 3 tablespoonsunsweetened cocoa
- 1 teaspooncornstarch
- 1/4 teaspoonsalt
- 3 tablespoonsegg whites
- 1 teaspoon2% reduced-fat milk
- 1/4 teaspoonvanilla extract
- Cooking spray
- 1/2 cupsemisweet chocolate chips
- 1 teaspooncanola oil
- 1/2 cupfinely chopped unsalteddry-roasted peanuts divided
- 2 2/3 cupsvanilla low-fat ice cream
Instructions
Instructions
- Preheat oven to 400°F.
- In a medium bowl, whisk together 1/2 cup powdered sugar, 1.1 ounces all-purpose flour (about 1/4 cup), 3 tablespoons unsweetened cocoa, 1 teaspoon cornstarch, and 1/4 teaspoon salt until evenly combined.
- Add 3 tablespoons egg whites, 1 teaspoon 2% reduced‑fat milk, and 1/4 teaspoon vanilla extract to the dry mixture; whisk until smooth and slightly runny.
- Line a baking sheet with parchment paper or lightly coat it with cooking spray. On the underside of the parchment, trace four 5‑inch circles to use as placement guides (you can use a 5‑inch round cookie cutter or a cup).
- Drop 1 tablespoon of batter onto each traced circle and spread the batter thinly and evenly to the edges of the circle with the back of a spoon.
- Bake at 400°F for 6 minutes, or until the edges begin to brown. Remove the baking sheet from the oven.
- Loosen each disc from the parchment with a spatula. Working quickly while the discs are pliable, drape each disc over two parallel wooden spoons (or another rounded support) to form a taco shape. Cool the shaped shells completely on a wire rack. Handle gently—the shells are delicate.
- Repeat steps 5–7 with the remaining batter so you have a total of 8 shells.
- Place 1/2 cup semisweet chocolate chips and 1 teaspoon canola oil in a microwave‑safe bowl. Microwave on HIGH for 1 minute, stirring after 30 seconds; then stir until the chocolate is fully melted and smooth.
- Divide the 1/2 cup finely chopped unsalted dry‑roasted peanuts into two equal portions.
- Using a small spoon, spread some of the melted chocolate on the top third of the outside of both sides of each cooled shell. Immediately press some of the first portion of chopped peanuts onto the chocolate so they adhere. (Work carefully to avoid breaking the shells.)
- Spoon 1/3 cup vanilla low‑fat ice cream into each shell.
- Drizzle the remaining melted chocolate over the ice cream and sprinkle with the remaining chopped peanuts.
- Place the assembled chocolate tacos in the freezer for at least 30 minutes before serving to firm the shells and ice cream.