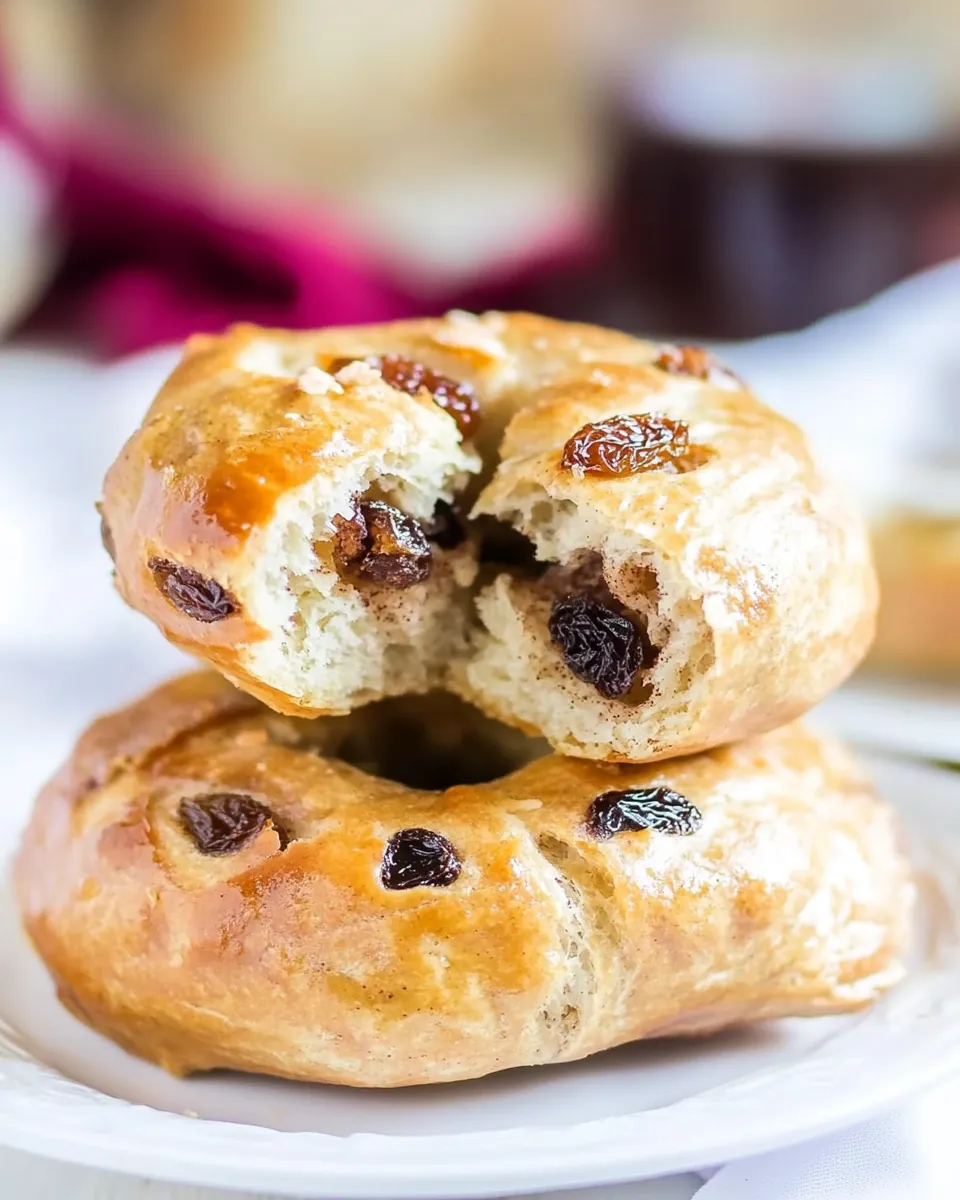
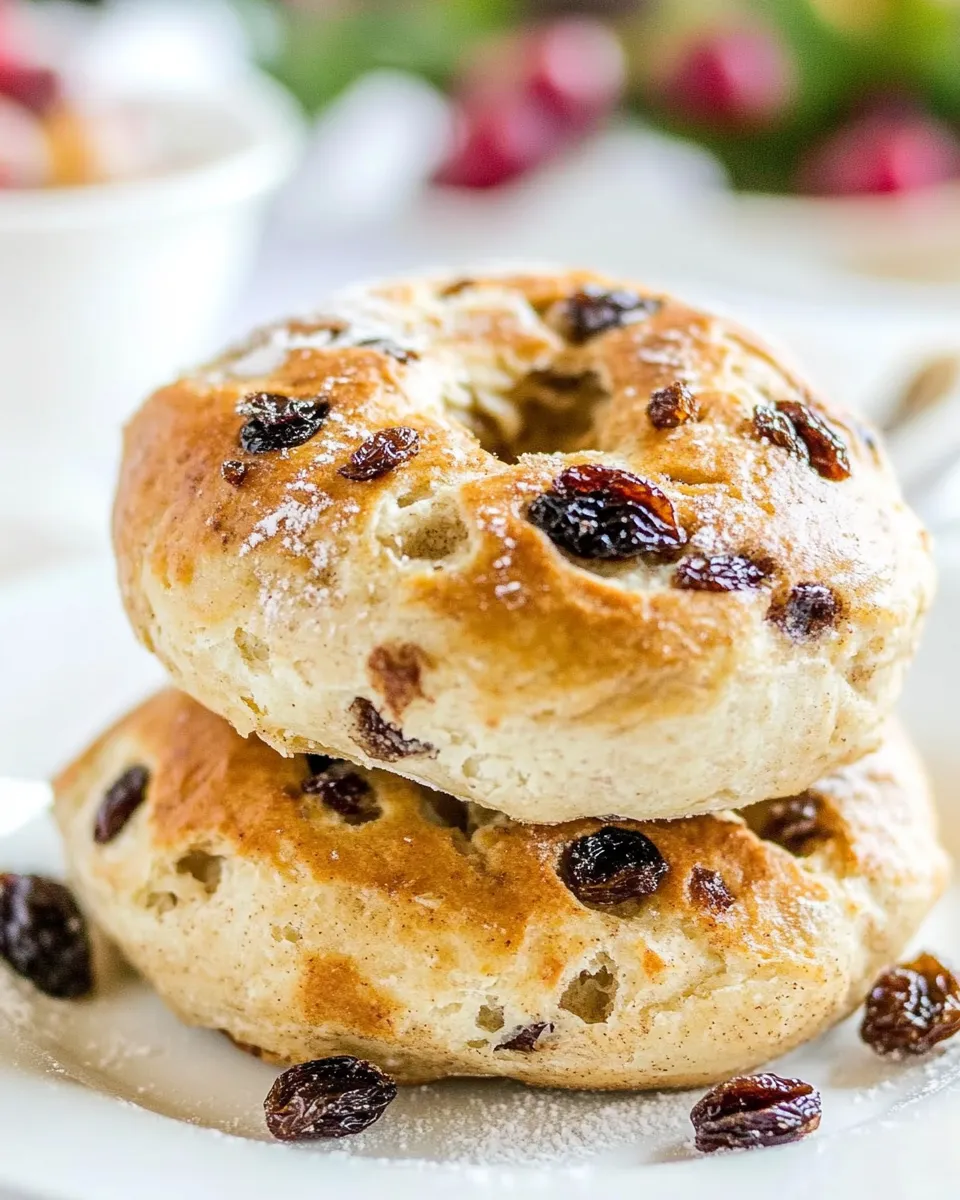
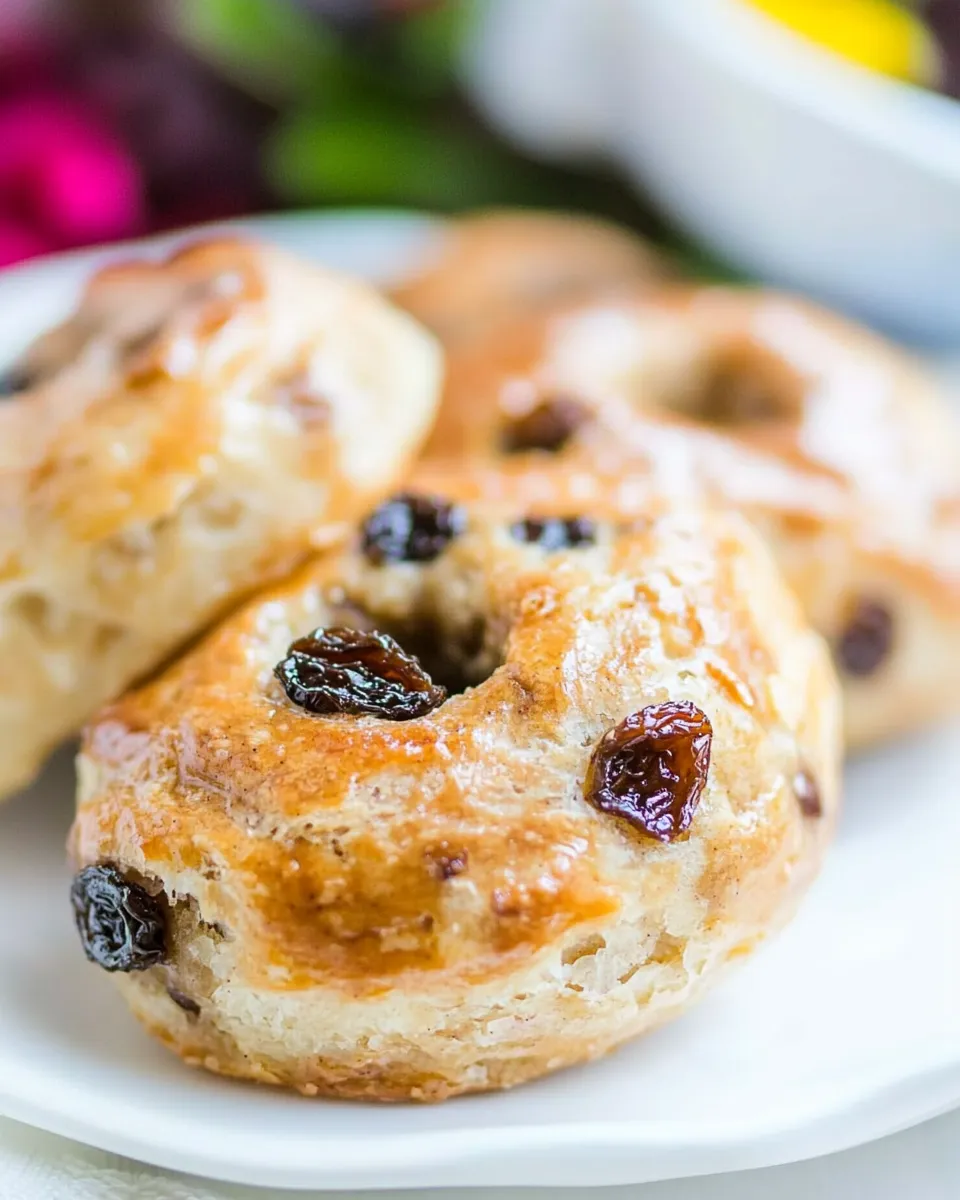
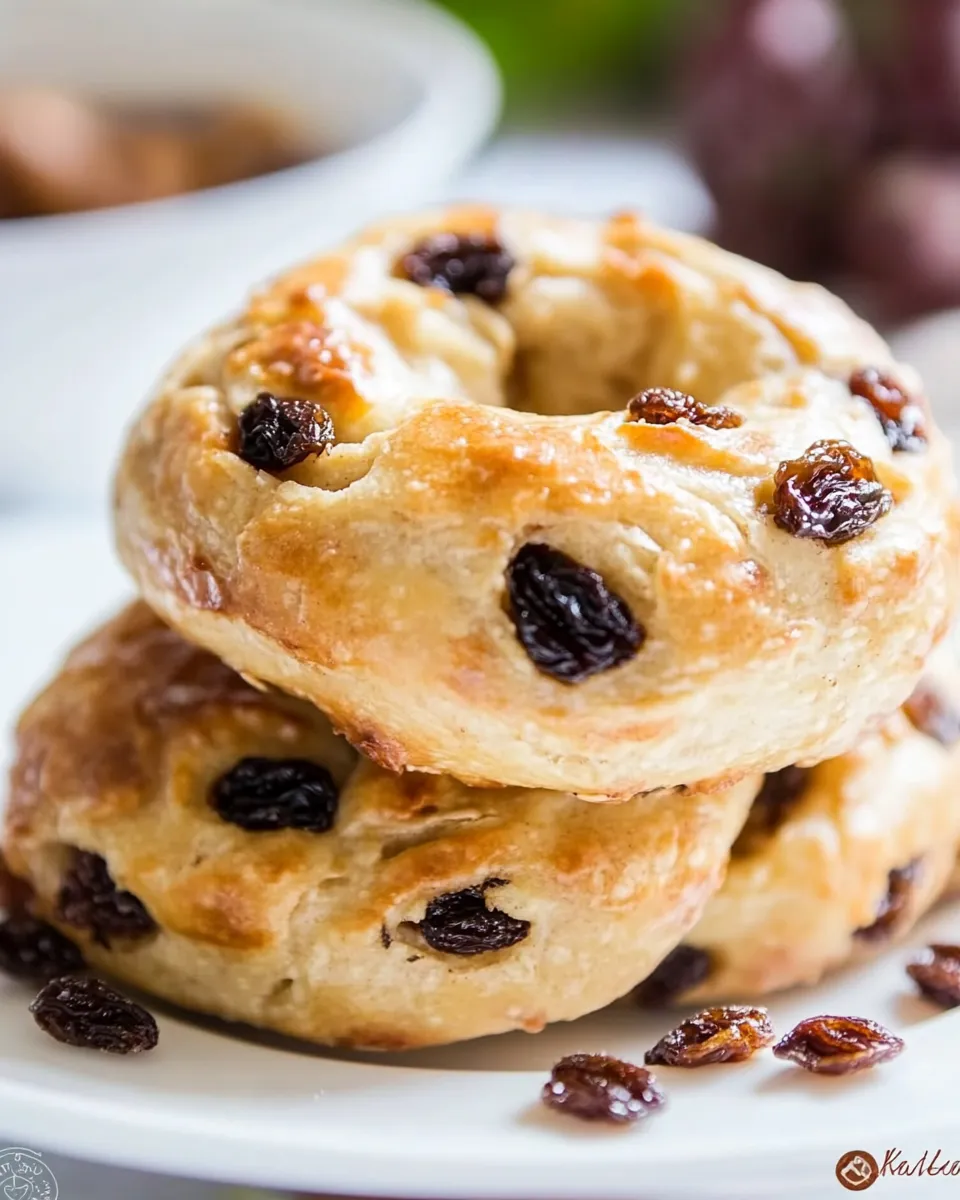
These cinnamon raisin bagels are one of my favorite weekend projects: a little hands-on, forgiving, and absolutely worth the time. They come out with a warm cinnamon aroma and pockets of sweet raisins, chewy in the middle and golden on the outside. I make them when I want breakfast to feel special without fussing over complicated steps.
I’ll walk you through the exact recipe I use—measurements and sequence are the same every time—and add practical notes so you don’t get stalled. Expect tips on dough feel, shaping, and two different crust methods (boil or quick submerge) so you can pick the texture you like.
No fluff here: clear stages, troubleshooting pointers, and storage guidance so leftovers behave like a dream. If you like lightly sweet, chewy bagels that still crisp at the edges, this is a dependable recipe you’ll return to.
Ingredient Checklist
- 1 cup water, warmed to packaging directions (about 125°F) — warms the yeast; should feel warm to the touch but not hot.
- 1 ½ tablespoons granulated sugar — feeds the yeast and contributes mild sweetness.
- 2 ¼ teaspoons instant or active dry yeast (one 1/4-ounce packet, I use Red Star Platinum) — the leavening agent; sprinkle evenly for even activation.
- 2 ½ cups bread flour, plus more if needed and for flouring work surface — provides structure and chew; add a tablespoon at a time if dough is sticky.
- pinch salt, optional and to taste — balances sweetness and strengthens gluten; add to preference.
- 1 tablespoon cinnamon, or to taste — warms the dough; distribute in step so it’s even.
- ¾ cup raisins — the sweet pockets in the bagel; push loose ones into the dough while kneading.
- water for submerging or boiling — used for the crust step; temperature and time change the final chew.
- 2 tablespoons yellow cornmeal for sprinkling on baking trays, optional but recommended — prevents sticking and gives a subtle texture to the bottom crust.
Homemade Cinnamon Raisin Bagels: From Prep to Plate
- Warm 1 cup water to the yeast packaging directions (about 125°F). If you don’t have a thermometer, make it warm to the touch but not hot.
- In the bowl of a stand mixer fitted with a dough hook or in a large mixing bowl, combine the warm water and 1 1/2 tablespoons granulated sugar. Sprinkle 2 1/4 teaspoons yeast evenly over the surface. Wait 5–10 minutes until the surface is foamy.
- Add 2 1/2 cups bread flour and an optional pinch of salt to the bowl. Knead (with the mixer on low/medium or by hand) for 5–7 minutes until the dough comes together into a smooth, round ball that is firm but not sticky. If the dough is sticky, add additional bread flour 1 tablespoon at a time until it is manageable.
- Flatten the dough slightly and sprinkle 1 tablespoon cinnamon and 3/4 cup raisins over it. Knead for 2–3 minutes more (or by hand on a floured surface) until the cinnamon and raisins are evenly distributed. Push any loose raisins into the dough as needed.
- Lightly grease a large bowl, place the dough inside, cover with plastic wrap or a clean towel, and let rise in a warm, draft-free place until doubled in size, about 2 hours.
- Punch the dough down and turn it out onto a lightly floured work surface. Divide the dough into 6 to 8 equal portions. Roll each portion into a smooth ball.
- Make a hole through the center of each ball with your finger and gently stretch to form a bagel shape, keeping the hole open enough to allow for expansion during baking. Place shaped bagels onto baking trays that have been sprinkled with the 2 tablespoons yellow cornmeal (spread a thin, even layer of the cornmeal on the trays to prevent sticking).
- Cover the trays loosely and let the bagels rise in a warm, draft-free place for about 30 minutes, until noticeably larger (they will not double). Begin preheating the oven to 400°F during the last 10 minutes of this rise.
- Choose one of the following for the crust:
- Boil for a chewier crust: Bring a large pot of water to a rolling boil. Working in batches, lower each bagel into the boiling water and boil 1–2 minutes total, flipping once halfway through (1 minute per side for 2 minutes total or 30–60 seconds per side for a lighter chew). Remove with a slotted spoon and let drain briefly.
- Quick submerge for a milder chew: Submerge each bagel in a bowl of warm tap water for about 1 minute, then lift and drain briefly.
- After boiling or submerging, return the bagels to the cornmeal-lined trays with space between them.
- Bake in the preheated 400°F oven for about 18–20 minutes, until the bagels are golden, domed, and cooked through. Boiled bagels or larger bagels (if you made only 6) may need a few extra minutes—watch color and doneness rather than time alone.
- Remove the trays from the oven and let the bagels cool on the trays briefly before transferring to a cooling rack or serving.
Why This Homemade Cinnamon Raisin Bagels Stands Out
These bagels strike a balance between an old-school chew and an approachable home bake. The dough uses bread flour for that classic, satisfying chew, and the cinnamon-plus-raisin combination gives each bite warmth and little sweet surprises. The method keeps things straightforward: a single rise, a shaping step, and an optional boil for texture control.
I like that you can tune the crust: a 2-minute boil gives the full-on chewy, glossy exterior that defines traditional bagels; a quick submerge yields a softer, slightly less dense bite. Either way, the inside remains tender and studded with raisins.
Low-Carb/Keto Alternatives
Traditional bagels rely on high-gluten bread flour for structure and chew, so there’s no direct one-to-one substitution that will produce the same result without introducing new techniques or specialty ingredients. If you want to reduce carbs conceptually, consider these approaches rather than strict swaps:
- Reduce the raisins or omit them to lower sugar and carbs; the dough will be less sweet and more neutral.
- Expect texture changes if you reduce wheat-based flour—bagels will be denser and less chewy. Look for purpose-formulated low-carb bread recipes instead of simple substitutions.
- When attempting alternative flours, follow recipes specifically developed for those flours; this recipe’s rising and baking times assume bread flour and active yeast behavior.
Kitchen Gear Checklist
Essentials
- A large mixing bowl or stand mixer with a dough hook — for kneading and initial mixing.
- Kitchen thermometer (helpful but optional) — to check water temperature for yeast activation.
- Large pot and slotted spoon or spider strainer — required if you choose to boil for a chewier crust.
- Baking trays and a cooling rack — for baking and finishing.
Helpful but Not Required
- Bench scraper — makes dividing and shaping dough easier.
- Clean towel or plastic wrap — for covering dough during rises.
- Measuring cups and spoons — for accurate ingredient amounts.
What Not to Do
Don’t rush the first rise. The dough needs time to relax and double; shortchanging this step makes shaping difficult and yields tight, poorly risen bagels. Don’t skip the cornmeal on the tray if you want easy release—bagels can stick as they bake.
Avoid over-flouring the surface. A light dusting is enough; too much flour will make the dough dry and reduce chew. When adding raisins and cinnamon, don’t dump them into a sticky mess—flatten first, sprinkle, then knead briefly so the inclusions distribute without tearing the gluten network.
When boiling, don’t overcrowd the pot. Bagels need room to float and flip. Lower them gently to avoid deforming the shapes.
Adaptations for Special Diets
Special diets require careful changes. For gluten-free diets, this recipe will not convert cleanly—gluten-free doughs need binders and adjusted hydration and are best made from tested gluten-free bagel recipes. For vegan adaptations, this recipe is already close to vegan since it doesn’t include eggs or dairy in its base. If you need to avoid added sugars, reduce or omit the granulated sugar and use fewer raisins; expect a different flavor profile and slower yeast activity.
In short: this formula is optimized for bread flour and standard yeast. For medical or strict dietary needs, use purpose-built recipes or consult a reliable source tailored to the diet you follow.
Author’s Commentary
I make these when I want a weekend morning to smell like cinnamon. The technique is forgiving: if your kitchen is cool, give the dough the extra time it needs. If your dough turns sticky, add flour a tablespoon at a time; if it’s dry, let it rest—hydration evens out during kneading.
My go-to is the quick submerge when I want a softer bagel for toasting; when guests come over, I go full boil for that classic chew and shine. Raisins can migrate during baking; push any loose ones into the dough before shaping so they stay put. Lastly, let the bagels cool briefly before slicing. They slice cleaner once they’ve had a few minutes off the hot tray.
Storage & Reheat Guide
Store cooled bagels in an airtight container at room temperature for up to 2 days. For longer storage, split and freeze bagels in a freezer-safe bag for up to 3 months. To reheat from frozen, toast or bake at low heat until warmed through; from thawed, a quick toast brings back surface crispness and softens the crumb.
Avoid reheating in a microwave for regular use—microwaves soften crusts and can make texture gummy. For best texture, slice and toast, or refresh in a 350°F oven for 5–8 minutes.
Top Questions & Answers
- Can I make the dough ahead? — Yes. After shaping, you can retard the bagels in the refrigerator overnight before the final rise, then warm briefly to take off the chill before boiling/submerging and baking.
- Why did my dough not rise? — Check the yeast freshness and water temperature (should be warm but not hot). Old yeast or water that’s too hot can prevent proper activation.
- How do I know if the bagels are done? — They should be golden, domed, and sound slightly hollow when tapped. Internal color and feel are reliable—don’t rely on time alone.
- Can I add more cinnamon or raisins? — You can, but adding too many inclusions may interfere with gluten development and make shaping harder. Distribute extras cautiously and use slightly gentler kneading.
Bring It to the Table
Serve these warm, and they instantly feel like a treat. Offer a selection of spreads or toppings and let people customize—bagels are happiest dipped or slathered. They pair well with a hot beverage and a piece of fruit or a simple savory or sweet accompaniment, depending on your moment.
Make a batch, freeze extras, and you’ll have a bakery-quality breakfast that’s worth the little extra effort. If you try the boil or the quick submerge approach, you’ll quickly learn which texture you prefer—both are delicious.
Easy Homemade Cinnamon Raisin Bagels
Equipment
- Stand mixer with dough hook
- Large Mixing Bowl
- baking trays
- Large Pot
- Slotted Spoon
- Cooling rack
- Measuring cups and spoons
Ingredients
Ingredients
- 1 cupwater warmed to packaging directions (about 125 F for Red Star Platinum
- 1 1/2 tablespoonsgranulated sugar
- 2 1/4 teaspoonsinstant or active dry yeast (one 1/4-ounce packet I use Red Star Platinum
- 2 1/2 cupsbread flour plus more if needed and for flouring work surface
- pinchsalt optional and to taste
- 1 tablespooncinnamon or to taste
- 3/4 cupraisins
- water for submerging or boiling
- 2 tablespoonsyellow cornmeal for sprinkling on baking trays optional but recommended
Instructions
Instructions
- Warm 1 cup water to the yeast packaging directions (about 125°F). If you don’t have a thermometer, make it warm to the touch but not hot.
- In the bowl of a stand mixer fitted with a dough hook or in a large mixing bowl, combine the warm water and 1 1/2 tablespoons granulated sugar. Sprinkle 2 1/4 teaspoons yeast evenly over the surface. Wait 5–10 minutes until the surface is foamy.
- Add 2 1/2 cups bread flour and an optional pinch of salt to the bowl. Knead (with the mixer on low/medium or by hand) for 5–7 minutes until the dough comes together into a smooth, round ball that is firm but not sticky. If the dough is sticky, add additional bread flour 1 tablespoon at a time until it is manageable.
- Flatten the dough slightly and sprinkle 1 tablespoon cinnamon and 3/4 cup raisins over it. Knead for 2–3 minutes more (or by hand on a floured surface) until the cinnamon and raisins are evenly distributed. Push any loose raisins into the dough as needed.
- Lightly grease a large bowl, place the dough inside, cover with plastic wrap or a clean towel, and let rise in a warm, draft-free place until doubled in size, about 2 hours.
- Punch the dough down and turn it out onto a lightly floured work surface. Divide the dough into 6 to 8 equal portions. Roll each portion into a smooth ball.
- Make a hole through the center of each ball with your finger and gently stretch to form a bagel shape, keeping the hole open enough to allow for expansion during baking. Place shaped bagels onto baking trays that have been sprinkled with the 2 tablespoons yellow cornmeal (spread a thin, even layer of the cornmeal on the trays to prevent sticking).
- Cover the trays loosely and let the bagels rise in a warm, draft-free place for about 30 minutes, until noticeably larger (they will not double). Begin preheating the oven to 400°F during the last 10 minutes of this rise.
- Choose one of the following for the crust: - Boil for a chewier crust: Bring a large pot of water to a rolling boil. Working in batches, lower each bagel into the boiling water and boil 1–2 minutes total, flipping once halfway through (1 minute per side for 2 minutes total or 30–60 seconds per side for a lighter chew). Remove with a slotted spoon and let drain briefly. - Quick submerge for a milder chew: Submerge each bagel in a bowl of warm tap water for about 1 minute, then lift and drain briefly.
- After boiling or submerging, return the bagels to the cornmeal-lined trays with space between them.
- Bake in the preheated 400°F oven for about 18–20 minutes, until the bagels are golden, domed, and cooked through. Boiled bagels or larger bagels (if you made only 6) may need a few extra minutes—watch color and doneness rather than time alone.
- Remove the trays from the oven and let the bagels cool on the trays briefly before transferring to a cooling rack or serving.
Notes
Extra bagels will keep airtight at room temperature for up to 5 days, or can be frozen for up to 6 months. I have not tested freezing the dough after the first rise and after shaping, but before the second rise, and don’t know if this would be successful.