I make refried beans a lot — for tacos, for a lazy weeknight bowl, for guests who always ask for “just more of those beans.” This version covers both from-scratch and from-a-can methods so you can pick the path that fits your day. No fuss, real flavor, and a texture you control.
Both approaches use simple pantry staples and one or two small decisions (do you want smokier beans? add liquid smoke). Follow the steps and you’ll have a reliably creamy spread that can stand in for store-bought refried beans or shine on a plate all by itself.
This post walks through ingredients, precise steps, common mistakes, quick swaps, and storage so you can make these beans again and again with consistent results.
What Goes In
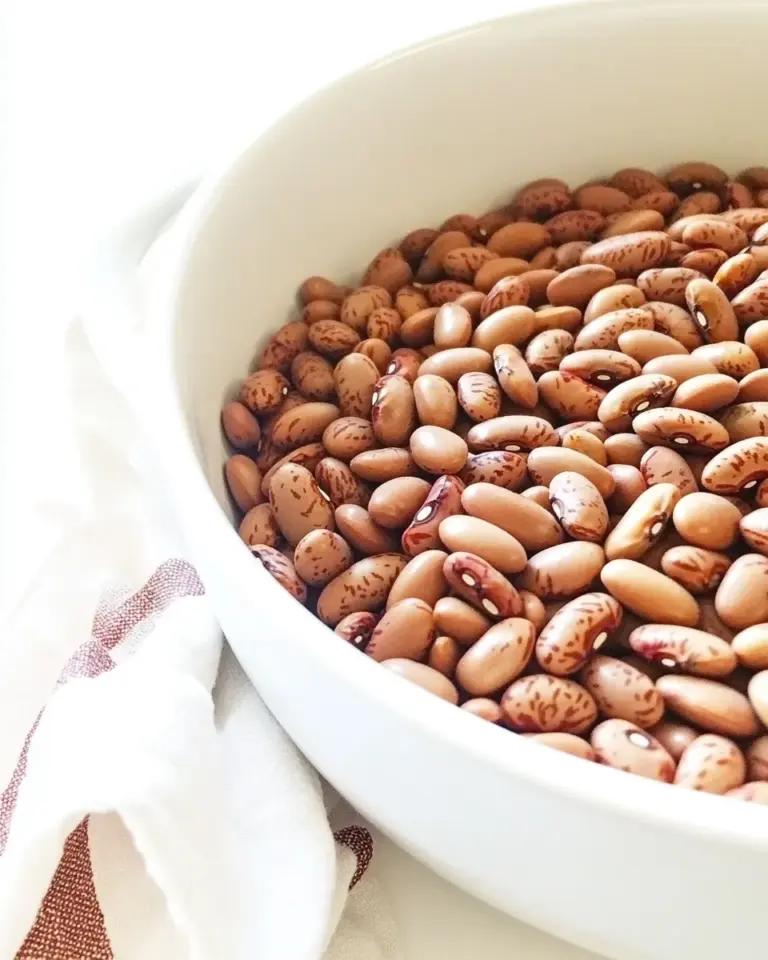
Pinto Beans from Scratch
- 2cupsdry pinto beans — the foundation; rinse and sort before cooking.
- 6cupsvegetable broth — cooks the beans and adds savory depth (use more to adjust consistency).
- 6garlic clovesminced — bright, aromatic backbone; adds savory bite.
- 1/2medium onionabout 1 cup, diced — sweetness and texture; dice small for even cooking.
- 1 7-ouncecan diced green chili — a gentle heat and tang; drains or keeps the juice per your spice preference.
- 3roma tomatoesdiced — freshness and acidity to balance the beans.
- 1tablespooncumin — warm, earthy spice that defines the flavor profile.
- 1-2teaspoonssalt — start with the lower amount while cooking; adjust at the end.
- 1teaspoonoregano — herbal lift; blends with cumin for classic taste.
- 1//4teaspooncayenne — concentrated heat; adjust or omit if you prefer mild beans.
- 1/2teaspoonliquid smokeoptional — optional smoky note; add only if you like a campfire tang.
- Cilantro for garnish — bright, finishing herb; optional but recommended.
- Cojita cheese — salty, crumbly garnish; omit to keep the beans vegan.
Pinto Beans from a Can
- 215 ounce cans pinto beans — quick base; drain before warming.
- 1tablespoonoilneutral flavor – vegetable, canola, avocado — for sautéing the aromatics.
- ½cuponionfinely chopped — sautéed until translucent to build flavor quickly.
- 1garlic clovefinely chopped — a quick hit of garlic to lift canned beans.
- ½teaspoonsalt — starting seasoning for the canned route; taste and adjust.
- ¼teaspoonpepper — simple seasoning to round the flavor.
- ¼cupwater or brothplus more as needed — helps loosen and finish the texture while mashing.
- Cilantro for garnish — fresh finishing herb.
- Cojita cheese — optional, salty topping.
Homemade Refried Beans, Made Easy
- Pinto Beans from Scratch — Rinse and sort the 2cupsdry pinto beans, removing any stones or debris.
- In a large pot, combine the rinsed dry beans with 6cupsvegetable broth, 6garlic cloves (minced), 1/2medium onion (about 1 cup, diced), 3roma tomatoes (diced), and 1 7-ouncecan diced green chili. Stir in 1tablespooncumin, 1teaspoonoregano, 1//4teaspooncayenne, and 1–2teaspoonssalt (start with 1 teaspoon). If using, add 1/2teaspoonliquid smoke.
- Bring the pot to a gentle boil over medium-high heat, then reduce heat to low, cover, and simmer until the beans are tender when mashed between a fork and spoon — about 1½ to 2 hours. Check every 20–30 minutes and add a splash of additional broth if the pot becomes dry.
- When the beans are tender, remove the pot from heat. Reserve about 1/4 cup of the cooking liquid in a small bowl, then scoop the beans (with remaining liquid as needed) into a large skillet or leave them in the pot for mashing.
- Heat the skillet over medium heat (no additional oil required). Add the beans and the reserved 1/4 cup cooking liquid. Use a potato masher to mash the beans to your preferred consistency, adding more cooking liquid a tablespoon at a time if the mixture seems too thick.
- Continue to cook the mashed beans over medium heat, stirring frequently, until they reach the desired thickness for refried beans. If they become too thin, simmer a few minutes uncovered to reduce excess liquid.
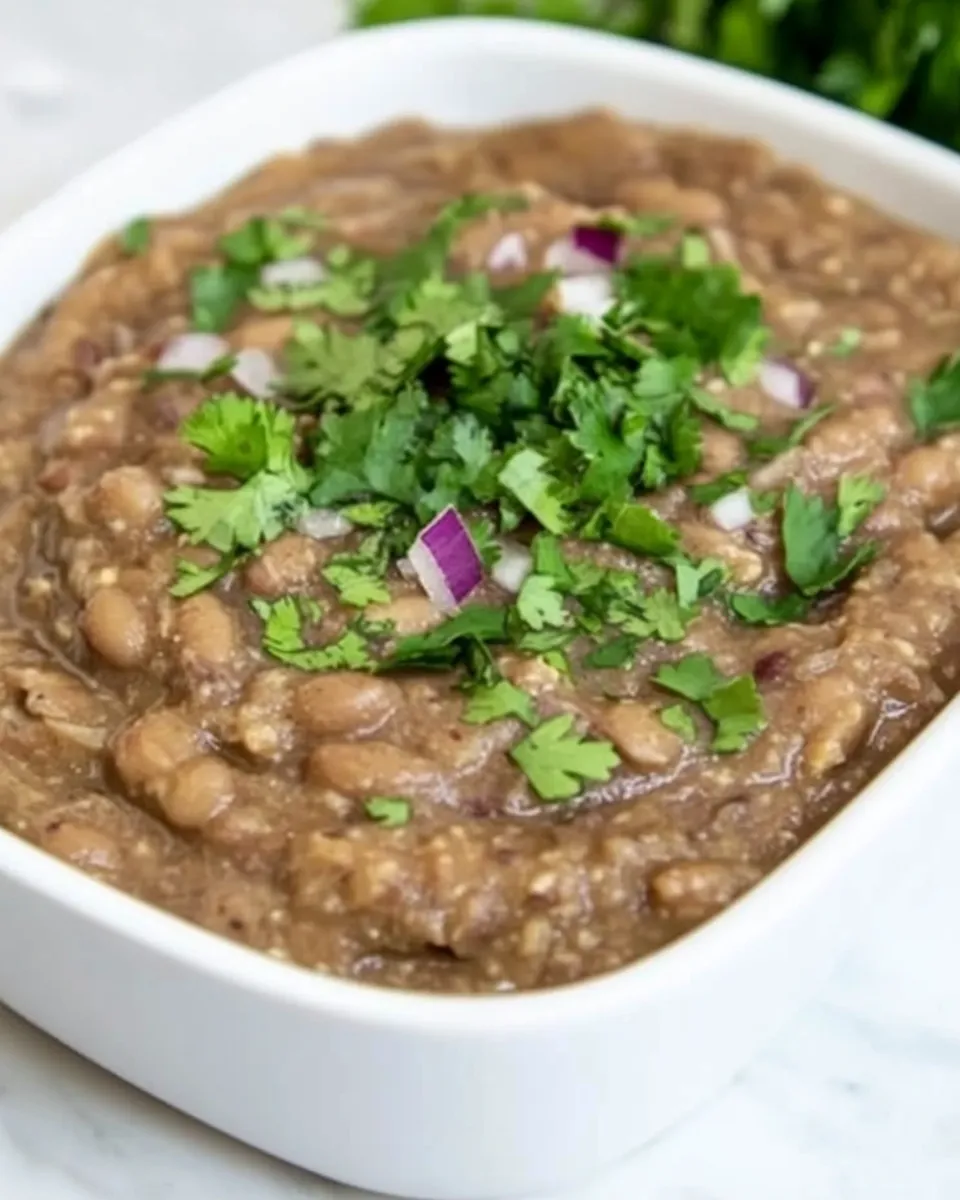
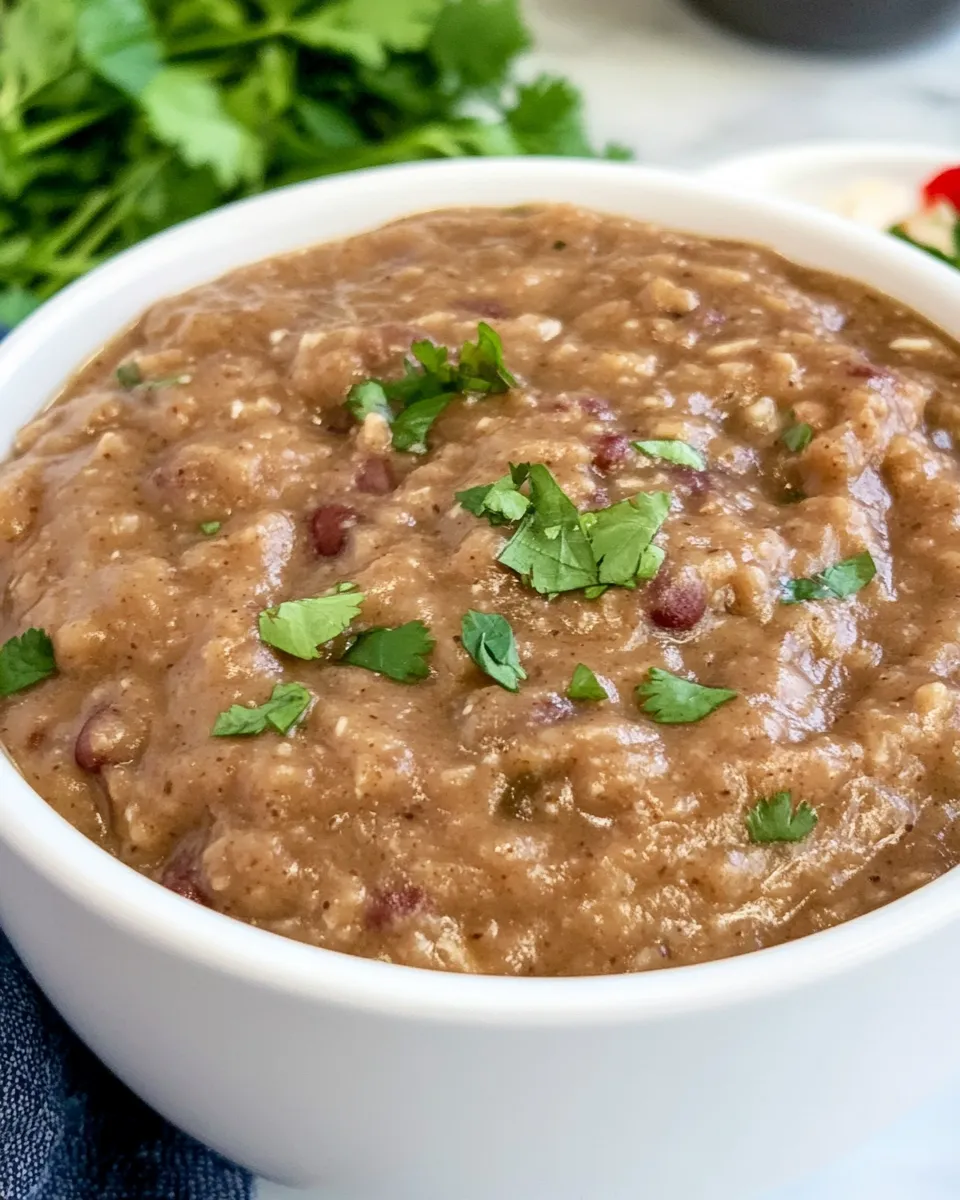
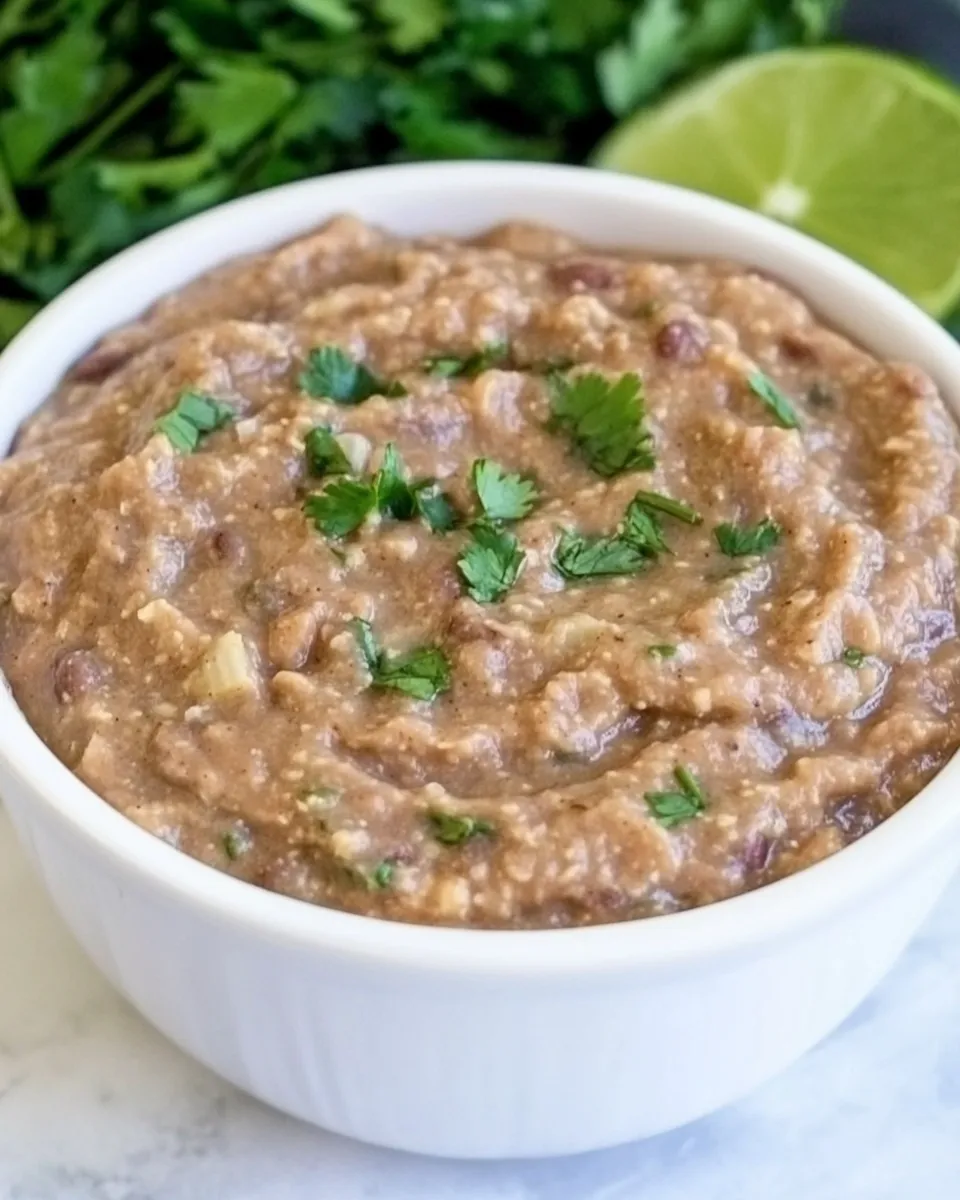
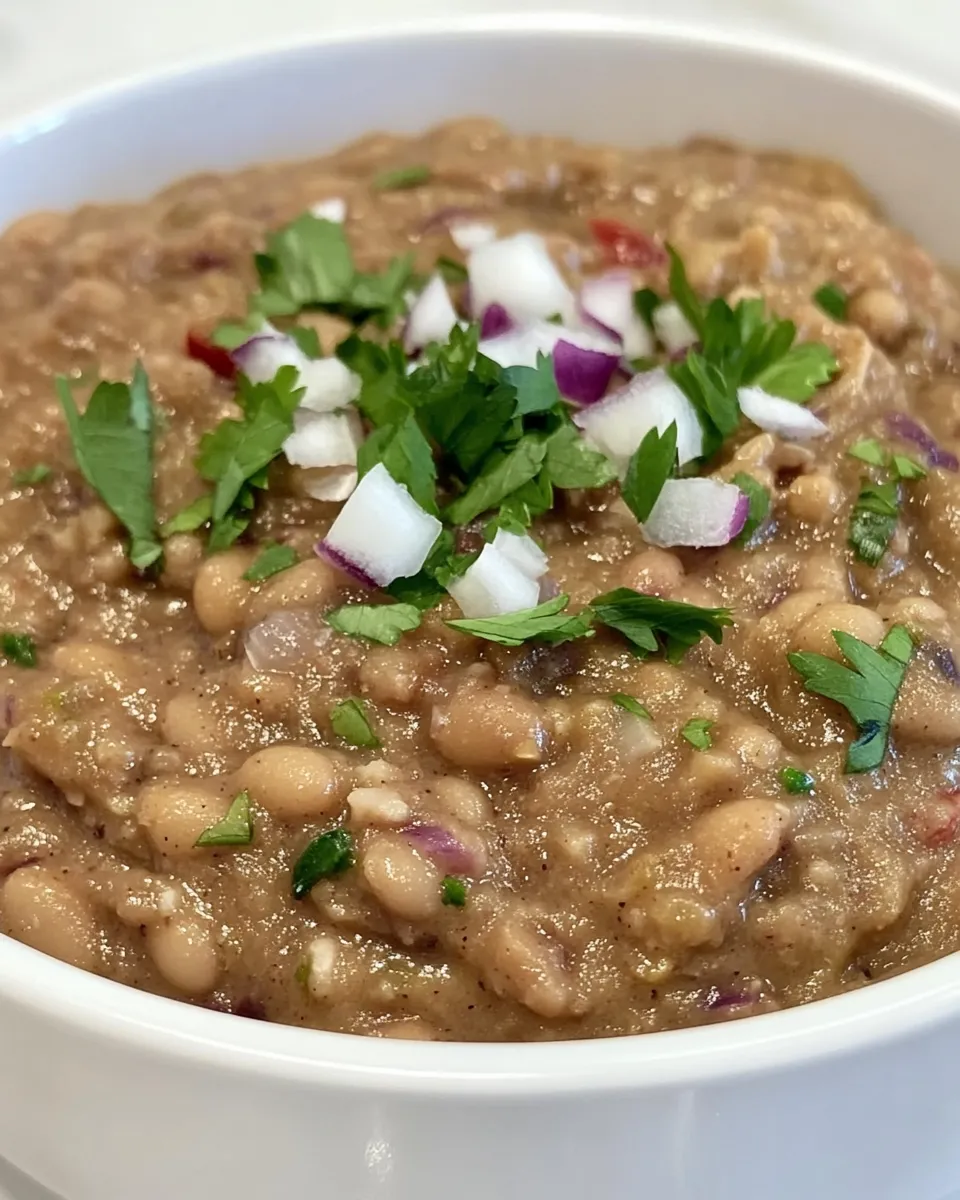
- Taste and adjust seasoning (add the remaining salt if desired). Keep warm until ready to serve. Garnish with Cilantro and Cojita cheese.
- Pinto Beans from a Can — Drain the canned pinto beans and set aside.
- Heat 1tablespoonoil (neutral oil) in a large skillet over medium heat. Add ½cuponion (finely chopped) and sauté until translucent, about 4–5 minutes. Add 1garlic clove (finely chopped) and cook about 30 seconds until fragrant.
- Add the drained canned beans to the skillet with ¼cupwater or broth. Season with ½teaspoon salt and ¼teaspoon pepper. Warm over medium heat for about 2 minutes.
- Use a potato masher to mash the beans in the skillet to your preferred consistency. Add more water or broth, a tablespoon at a time, if the beans are too thick.
- If the beans are too soupy, continue to simmer over medium-low heat, stirring frequently, until they thicken to your liking. Taste and adjust seasoning.
- Serve the canned-version refried beans warm, garnished with Cilantro and Cojita cheese.
Why This Recipe Is Reliable
This recipe works because it controls two variables: seasoning and liquid. Whether you start from dry beans or a can, you’re building flavor early (onion, garlic, tomatoes, cumin) and then letting the beans tell you when they’re done by texture. Cooking low and slow for dried beans breaks down skins and starches so the mashing gives you a creamy result without heavy fats.
The canned method is reliable because it adds aromatics and a touch of liquid so the beans heat evenly and mash smoothly. The directions include small adjustment points — reserve cooking liquid, add a tablespoon at a time — so you won’t overshoot the texture.
Vegan & Vegetarian Swaps
The base recipe is vegan if you skip the Cojita cheese. The from-scratch and canned versions both rely on vegetable broth, garlic, onion, tomatoes, and spices — all plant-based. If you want to keep the finished dish vegan, leave off the cheese and double the cilantro for brightness.
If you use the canned route and want a richer mouthfeel without dairy, increase the reserved cooking liquid or a neutral oil very slightly while mashing. The recipe intentionally keeps added fat optional, so you can control richness without changing ingredients on hand.
Equipment & Tools
- Large pot — for cooking dried beans; size depends on batch.
- Large skillet — for mashing and finishing the beans so they develop a slightly toasted edge.
- Potato masher — the simplest way to get creamy beans while keeping a bit of texture.
- Wooden spoon or heatproof spatula — for stirring while finishing in the skillet.
- Small bowl — to reserve cooking liquid if you want to control texture.
Steer Clear of These
Don’t over-salt at the start. The recipe calls for 1–2 teaspoons of salt for the dried-bean method; start low and finish after mashing. If you add the higher end early, the beans can taste flat or become too salty as they reduce.
Don’t rush dried beans. Turning up the heat to speed cooking risks splitting skins and producing a grainy texture. Gentle simmering keeps the beans intact until they’re soft enough to mash.
Avoid adding too much liquid at once when mashing. Add a tablespoon at a time; it’s much easier to thin a thick mash than to thicken a thin one without losing flavor clarity.
Warm & Cool Weather Spins
Warm weather: make the canned version and cool the beans slightly, then use them as a room-temperature dip with grilled tortillas, fresh veggies, or as part of a picnic board. Keep garnishes light — more cilantro, skip the cheese if you want a brighter presentation.
Cool weather: long-simmered from-scratch beans are perfect in bowls. Serve with warm tortillas, roasted vegetables, or a fried egg on top. The extra time spent on the stove builds comforting depth.
Cook’s Notes
Timing
Dry beans will take roughly 1½ to 2 hours depending on age and stovetop heat. Check them at intervals and add broth if they look dry. Canned beans move fast — plan for 10–15 minutes of sautéing and mashing.
Texture Tips
If you like ultra-smooth beans, mash more thoroughly and use more of the reserved cooking liquid. For chunkier beans, mash less and stop while there are still whole beans visible. Finishing them in a skillet gives a slightly caramelized note and helps reduce extra liquid.
Seasoning
Taste after mashing; the concentrated flavor of the beans shifts as water reduces. Add the second half of the salt only after you’ve mashed and finished to prevent over-salting.
Meal Prep & Storage Notes
Cool beans to room temperature within two hours and refrigerate in an airtight container for up to 4–5 days. Reheat gently in a skillet with a splash of broth or water to restore creaminess.
For longer storage, freeze in portioned, freezer-safe containers for up to 3 months. Thaw in the fridge overnight and rewarm in a skillet with a little liquid, stirring until even.
Questions People Ask
Can I use canned beans in the same recipe as dry beans?
Yes. The post includes both methods. Use the canned-bean steps (8–13) for a fast version; the aromatics and a little broth help the canned beans taste fresh and mash well.
How do I get a really creamy texture?
Reserve some of the cooking liquid (or use the ¼ cup called for) and add it a tablespoon at a time while mashing. Finish in a hot skillet and stir constantly so starches release and the mixture thickens to a creamy finish.
Are these gluten-free?
The ingredients listed are naturally gluten-free, but check labels on broth and canned goods if you need strict gluten-free verification.
Can I make these ahead for a party?
Yes. Make them a day ahead and reheat slowly, adding a splash of broth before serving. Finish with cilantro and Cojita just before guests arrive.
Wrap-Up
This is a practical, forgiving refried beans recipe that gives you two reliable routes: from-scratch for depth, and canned for speed. Keep the core steps in mind — build flavor with aromatics, control moisture with reserved liquid, and finish by mashing to your preferred texture — and you’ll have tasty, consistent beans every time.
Serve warm, top with cilantro and Cojita if you like, and enjoy a simple, flavorful component that elevates tacos, bowls, or a quick snack. Come back to this method and tweak salt and heat to make it your go-to bean recipe.
Easy Homemade Refried Beans Recipe
Equipment
- Large Pot
- Large Skillet
- Potato Masher
- Measuring Cups
- Small Bowl
Ingredients
Ingredients
- PINTO BEANS FROM SCRATCH
- 2 cupsdry pinto beans
- 6 cupsvegetable broth
- 6 garlic clovesminced
- 1/2 medium onionabout 1 cup diced
- 1 7- ouncecan diced green chili
- 3 roma tomatoesdiced
- 1 tablespooncumin
- 1-2 teaspoonssalt
- 1 teaspoonoregano
- 1//4 teaspooncayenne
- 1/2 teaspoonliquid smokeoptional
- Cilantro for garnish
- Cojita cheese
- PINTO BEANS FROM A CAN
- 215 ounce cans pinto beans
- 1 tablespoonoilneutral flavor – vegetable canola, avocado
- 1/2 cuponionfinely chopped
- 1 garlic clovefinely chopped
- 1/2 teaspoonsalt
- 1/4 teaspoonpepper
- 1/4 cupwater or brothplus more as needed
Instructions
Instructions
- Pinto Beans from Scratch — Rinse and sort the 2cupsdry pinto beans, removing any stones or debris.
- In a large pot, combine the rinsed dry beans with 6cupsvegetable broth, 6garlic cloves (minced), 1/2medium onion (about 1 cup, diced), 3roma tomatoes (diced), and 1 7-ouncecan diced green chili. Stir in 1tablespooncumin, 1teaspoonoregano, 1//4teaspooncayenne, and 1–2teaspoonssalt (start with 1 teaspoon). If using, add 1/2teaspoonliquid smoke.
- Bring the pot to a gentle boil over medium-high heat, then reduce heat to low, cover, and simmer until the beans are tender when mashed between a fork and spoon — about 1½ to 2 hours. Check every 20–30 minutes and add a splash of additional broth if the pot becomes dry.
- When the beans are tender, remove the pot from heat. Reserve about 1/4 cup of the cooking liquid in a small bowl, then scoop the beans (with remaining liquid as needed) into a large skillet or leave them in the pot for mashing.
- Heat the skillet over medium heat (no additional oil required). Add the beans and the reserved 1/4 cup cooking liquid. Use a potato masher to mash the beans to your preferred consistency, adding more cooking liquid a tablespoon at a time if the mixture seems too thick.
- Continue to cook the mashed beans over medium heat, stirring frequently, until they reach the desired thickness for refried beans. If they become too thin, simmer a few minutes uncovered to reduce excess liquid.
- Taste and adjust seasoning (add the remaining salt if desired). Keep warm until ready to serve. Garnish with Cilantro and Cojita cheese.
- Pinto Beans from a Can — Drain the canned pinto beans and set aside.
- Heat 1tablespoonoil (neutral oil) in a large skillet over medium heat. Add ½cuponion (finely chopped) and sauté until translucent, about 4–5 minutes. Add 1garlic clove (finely chopped) and cook about 30 seconds until fragrant.
- Add the drained canned beans to the skillet with ¼cupwater or broth. Season with ½teaspoon salt and ¼teaspoon pepper. Warm over medium heat for about 2 minutes.
- Use a potato masher to mash the beans in the skillet to your preferred consistency. Add more water or broth, a tablespoon at a time, if the beans are too thick.
- If the beans are too soupy, continue to simmer over medium-low heat, stirring frequently, until they thicken to your liking. Taste and adjust seasoning.
- Serve the canned-version refried beans warm, garnished with Cilantro and Cojita cheese.
Notes
Place beans in a large bowl, add 6-8 cups of water and soak over night in the refrigerator. Rinse water 2 times and place beans in the crockpot.
Add broth, garlic, onion, diced green chili, cumin, salt, oregano, cayenne, and liquid smoke.
Cover and cook on low for 7 hours. Stir in chopped tomatoes and cook for an additional hour. Serve with cilantro and add additional salt and pepper to taste.
Rinse and sort beans removing stones. Place beans in a large bowl, add 6-8 cups of water and soak overnight in the refrigerator. Rinse water 2 times
Drain beans and place in a large pot with 6 cups of hot broth, onion, diced green chili, cumin, salt, oregano, cayenne and liquid smoke (optional).
Bring to a simmer with lid slightly ajar for about 1-1/2 to 2 hours or until desired tenderness is reached.
Rinse and sort beans removing any stones.
Place beans in the Instant Pot inner cooking pot. Add 6 cups of broth, diced onion, diced chili, cumin, salt, oregano cayenne, and liquid smoke (optional). Stir ingredients together.
Cover with the lid and place the vent in the SEALED position. Press MANUAL mode and add 30 minutes to the timer. Allow the steam to release naturally for 20 minutes.