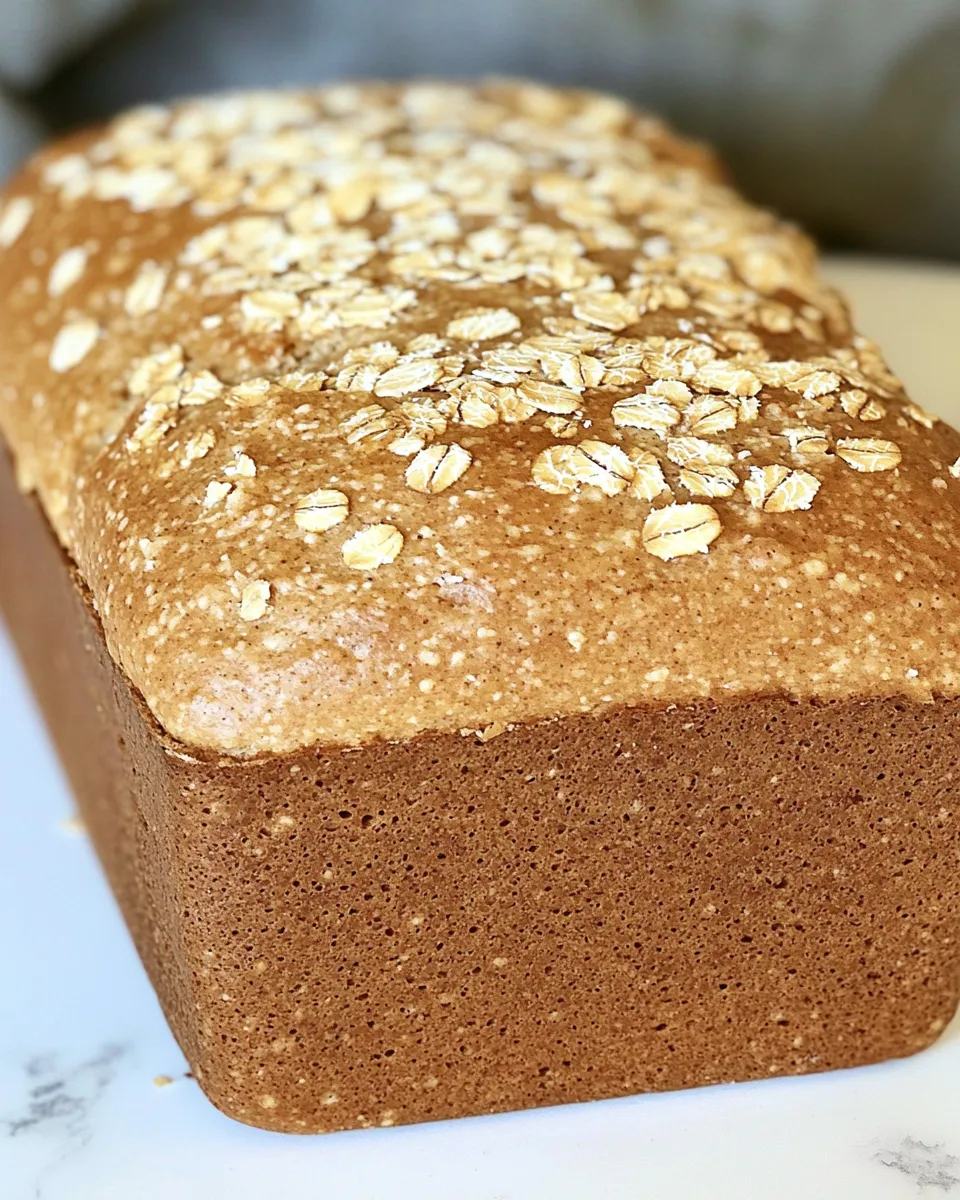
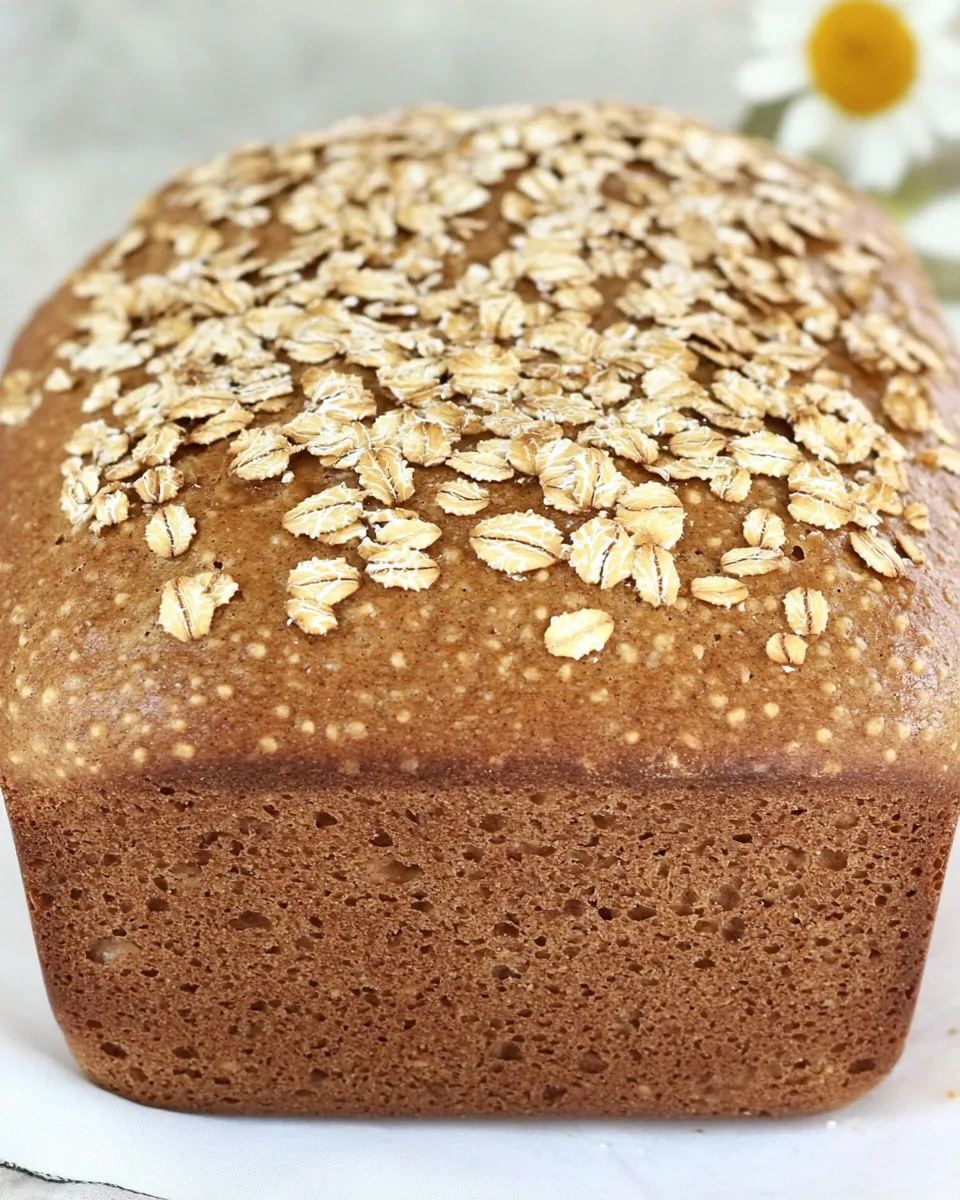
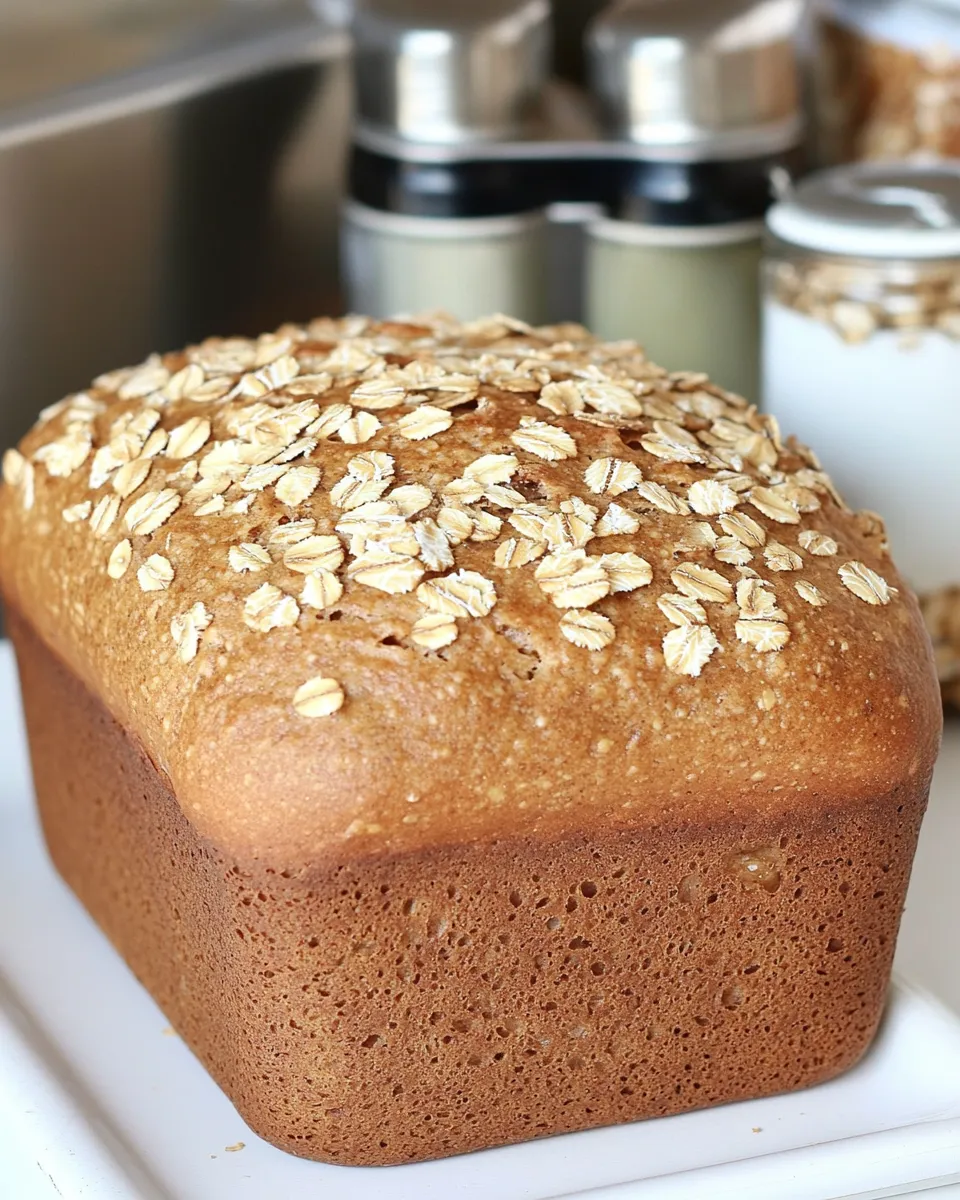
I bake a lot, and this Honey Oat Bread has become my weekday workhorse: modest ingredients, forgiving method, and a friendly crumb that holds up to butter, jam, and sandwiches. It’s the kind of loaf that makes your kitchen smell like home and gives you reliable results even when your morning is rushed. I like it warm from the oven with a pat of butter, but it’s also sturdy enough to toast and hold up to a hearty filling.
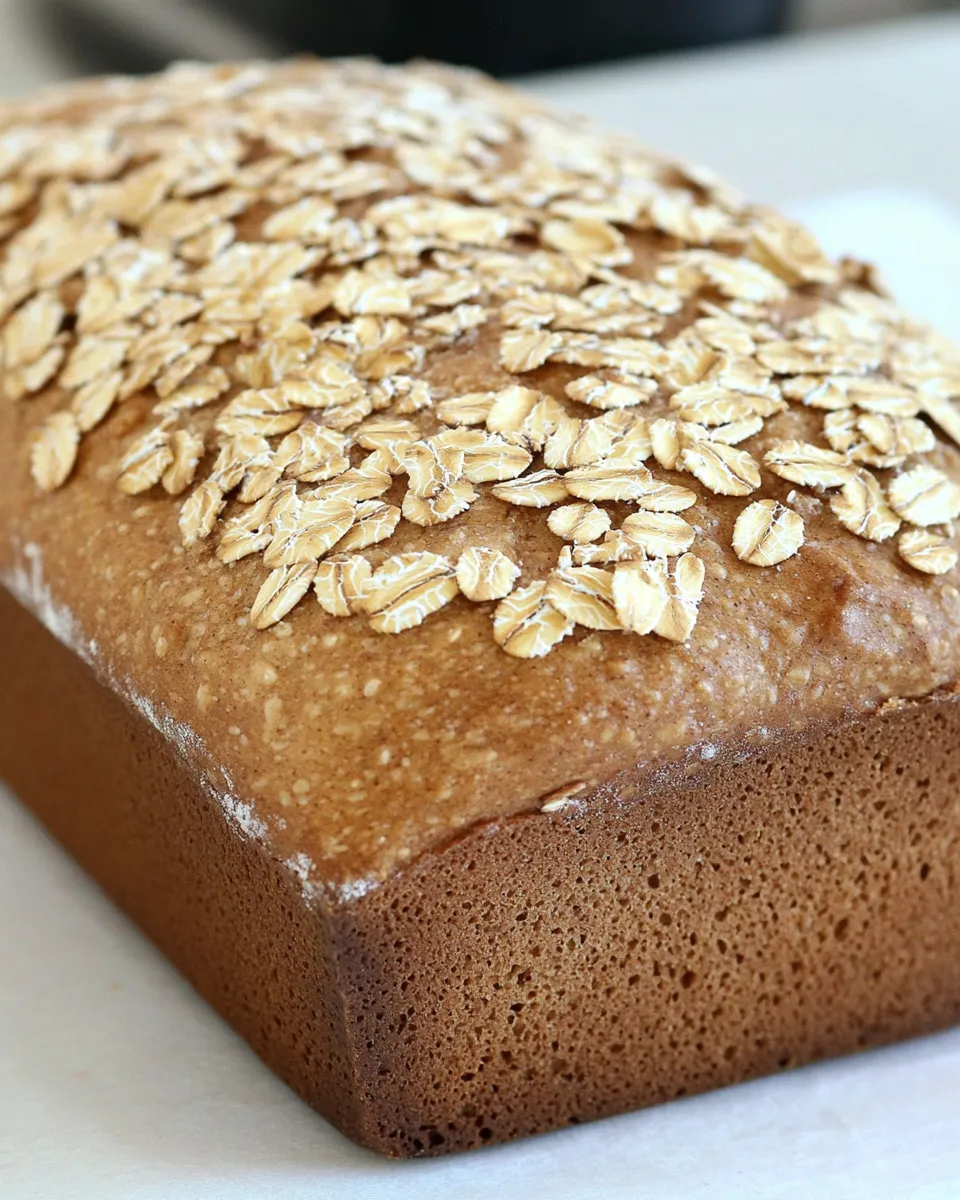
The formula is straightforward and designed for home bakers who want texture and flavor without fuss. Whole wheat gives the loaf depth while honey whispers sweetness and keeps the bread tender. Oats on top add a rustic look and a little chew. Once you get the timing down — proofing, shaping, and a single bake — you’ll find yourself making this loaf again and again.
I’ll walk you through the ingredient notes, the exact step-by-step directions, and practical tips I use in my kitchen to avoid common mistakes. Read through the equipment and troubleshooting sections first if you’re new to yeast baking. Then preheat the oven, and let’s make a dependable, comforting loaf.
The Ingredient Lineup
- 1 cup warm water — activates the yeast; should feel like warm bath water, not hot, to avoid killing the yeast.
- 1 envelope active dry yeast — the leavening agent; one envelope is the standard 2 1/4 teaspoons.
- 1/4 cup honey — sweetener and tenderizer; also feeds the yeast for a mild, rounded flavor.
- 3 tablespoons butter melted and cooled — enriches the dough and softens the crumb; cool the butter so it doesn’t kill the yeast during mixing.
- 1 teaspoon salt — balances sweetness and strengthens gluten; don’t skip it.
- 1 1/2 cups whole wheat flour — provides flavor, nutrition, and structure; measure by spooning into the cup and leveling for consistency.
- 2 1/4 cups bread flour — higher protein to build a strong gluten network; reserve a small portion to adjust dough consistency.
- 2 tablespoons milk — for brushing the loaf before topping; helps oats adhere and browns the crust.
- oats — for the topping; rolled oats give the best texture and appearance; sprinkle evenly.
Honey Oat Bread, Made Easy
- In a large bowl combine 1 cup warm water, 1 envelope active dry yeast, and 1/4 cup honey. Stir, then let sit 10 minutes or until the mixture is foamy.
- Stir in 3 tablespoons melted butter (cooled) and 1 teaspoon salt.
- Add 1 1/2 cups whole wheat flour and most of the 2 1/4 cups bread flour, keeping a small portion of the bread flour in reserve. Mix until incorporated. Add from the reserved bread flour as needed (up to the full 2 1/4 cups total) to form a soft but slightly stiff dough.
- Turn the dough onto a lightly floured surface and knead 5–7 minutes, until the dough is smooth and elastic.
- Lightly grease the ball of dough, place it in a clean dry bowl, cover with plastic wrap and a kitchen towel, and let rise about 1 hour or until doubled in size.
- Punch down the dough and let it rest 10 minutes.
- Grease a bread pan, shape the dough to fit the pan, place it in the pan, then cover with plastic wrap and a kitchen towel. Let the dough rise again until doubled, about 45 minutes.
- Preheat the oven to 375°F while the dough finishes its second rise.
- Brush the top of the loaf with 2 tablespoons milk and sprinkle oats evenly over the top.
- Bake at 375°F for 30–40 minutes, until the loaf is golden.
- Let the loaf cool in the pan for 20 minutes, then remove it from the pan and let it cool completely before slicing.
Why You’ll Love This Recipe
This loaf balances hearty whole-wheat flavor with a soft, sliceable crumb. Honey gives it a gentle sweetness that plays nicely with savory toppings, and the oats make the crust attractive and slightly chewy. The dough is forgiving: a short knead and two routine rises are all it takes. You don’t need specialty flours or a pro oven to get good results, which makes this recipe perfect for busy home cooks who still want a scratch-made loaf.
It’s also versatile. Use it for morning toast, lunch sandwiches, or a simple buttered slice with soup. It keeps well and toasts beautifully, so leftovers rarely go to waste. Finally, it teaches a few core bread techniques — proofing yeast, dough consistency, and shaping — without overwhelming steps.
If You’re Out Of…
- Whole wheat flour — use an equal amount of additional bread flour; expect a slightly lighter, less nutty loaf.
- Bread flour — plain all-purpose will work in a pinch; the texture will be a touch softer and less chewy, but the loaf will still be delicious.
- Milk for brushing — substitute an egg wash (one beaten egg with a teaspoon water) for a shinier crust, or use water for a more matte finish.
- Honey — light brown sugar can replace it measure-for-measure, though flavor will change slightly.
Equipment at a Glance
- Large mixing bowl — for proofing and mixing the dough.
- Wooden spoon or sturdy spatula — to combine ingredients before kneading.
- Lightly floured surface — countertop or pastry board for kneading and shaping.
- Bread pan — standard loaf pan (8½” x 4½” or similar) to shape and bake the loaf.
- Plastic wrap and kitchen towel — to cover dough during rises and maintain humidity.
- Basting brush — to brush milk on the dough before topping.
- Oven thermometer (optional) — helpful if your oven runs hot or cold; accuracy matters for baking time.
Avoid These Traps
- Water too hot or too cold. If the water is hot, it can kill the yeast. If it’s cold, the yeast won’t activate. Aim for lukewarm (about 100–110°F) — it should feel comfortably warm to the wrist.
- Skipping the yeast proof. If the initial mixture doesn’t foam within 10–15 minutes, your yeast might be dead. Start over with fresh yeast rather than continuing with inactive yeast.
- Adding too much flour. Dough should be soft but slightly stiff; resist the urge to keep adding flour. Use the reserved bread flour gradually and stop when the dough reaches the described consistency.
- Rushing proofs. Underproofed dough will be dense; overproofed dough can collapse in the oven. Look for the dough to double in size rather than strictly relying on the clock.
- Baking straight from the pan without brushing. Brushing with milk and adding oats not only improves appearance but helps give you a nicely browned crust and secures the oats on top.
Seasonal Serving Ideas
- Spring: Serve thin slices with ricotta, honey, and fresh strawberries for a bright brunch.
- Summer: Use thick slices for grilled panini with leftover roasted vegetables and soft cheese.
- Fall: Pair warm slices with squash soup or a sharp cheddar for a comforting meal.
- Winter: Make hearty breakfast toast topped with almond butter, sliced bananas, and a drizzle of honey.
Chef’s Notes
Timing and temperature
Proof times vary with room temperature. If your kitchen is cool, allow extra time; if warm, expect the dough to double sooner. Preheat the oven only once the second rise is nearly complete so the cycle lines up with the suggested bake time.
Mixing and kneading
The dough should feel slightly stiff but elastic after kneading. If it’s overly sticky, dust the surface with small amounts of the reserved bread flour. Knead until the dough is smooth — this develops gluten and helps the loaf rise evenly.
Shaping for the pan
When shaping, make a gentle log that fits your pan’s length. Tuck seams underneath to create a smooth top and encourage an even rise. Avoid overworking the dough during shaping; a gentle hand keeps the crumb tender.
Store, Freeze & Reheat
Store cooled slices in an airtight container at room temperature for 2–3 days. For longer storage, slice the loaf and freeze in a freezer-safe bag for up to 3 months. Toast slices straight from the freezer or thaw at room temperature for 30–60 minutes before reheating.
To refresh a slightly stale slice, wrap it in foil and warm in a 300°F oven for 8–10 minutes. For a quick reheat, toast slices until golden — it revives texture and flavor.
Top Questions & Answers
- Q: Can I make this bread in a stand mixer?
A: Yes. Use the dough hook on low to medium speed for about 5–7 minutes until the dough is smooth and elastic, then proceed with the rises.
- Q: My loaf bakes unevenly. What went wrong?
A: Check pan size and oven temperature. Make sure the dough fits the pan evenly and that your oven heats uniformly. Rotating the loaf halfway through baking can help in ovens with hot spots.
- Q: The top browned too fast but the middle was underdone.
A: Tent the loaf loosely with foil halfway through baking to prevent over-browning, and verify your oven temperature with an oven thermometer. You can also bake on a lower rack.
- Q: Can I add seeds or nuts?
A: Yes. Fold in a small handful (1/4–1/2 cup) of seeds or nuts into the dough during mixing, but note this changes texture and may slightly affect rise.
Ready, Set, Cook
Make time for the rises and be patient with the dough; the hands-off resting stages do the heavy lifting here. Use the exact ingredient amounts given, follow the steps in order, and remember that small adjustments — like the feel of the dough — are part of bread baking. This loaf rewards a little attention with dependable flavor and texture. Get your jar of honey out, preheat the oven, and enjoy the simple pleasure of a warm slice straight from your own oven.
Honey Oat Bread
Equipment
- Large Bowl
- lightly floured surface
- bread pan
- Oven
- Plastic Wrap
- Kitchen towel
Ingredients
Ingredients
- 1 cupwarm water
- 1 envelope active dry yeast
- 1/4 cuphoney
- 3 tablespoonsbuttermelted and cooled
- 1 teaspoonsalt
- 1 1/2 cupswhole wheat flour
- 2 1/4 cupsbread flour
- 2 tablespoonsmilk
- oats
Instructions
Instructions
- In a large bowl combine 1 cup warm water, 1 envelope active dry yeast, and 1/4 cup honey. Stir, then let sit 10 minutes or until the mixture is foamy.
- Stir in 3 tablespoons melted butter (cooled) and 1 teaspoon salt.
- Add 1 1/2 cups whole wheat flour and most of the 2 1/4 cups bread flour, keeping a small portion of the bread flour in reserve. Mix until incorporated. Add from the reserved bread flour as needed (up to the full 2 1/4 cups total) to form a soft but slightly stiff dough.
- Turn the dough onto a lightly floured surface and knead 5–7 minutes, until the dough is smooth and elastic.
- Lightly grease the ball of dough, place it in a clean dry bowl, cover with plastic wrap and a kitchen towel, and let rise about 1 hour or until doubled in size.
- Punch down the dough and let it rest 10 minutes.
- Grease a bread pan, shape the dough to fit the pan, place it in the pan, then cover with plastic wrap and a kitchen towel. Let the dough rise again until doubled, about 45 minutes.
- Preheat the oven to 375°F while the dough finishes its second rise.
- Brush the top of the loaf with 2 tablespoons milk and sprinkle oats evenly over the top.
- Bake at 375°F for 30–40 minutes, until the loaf is golden.
- Let the loaf cool in the pan for 20 minutes, then remove it from the pan and let it cool completely before slicing.