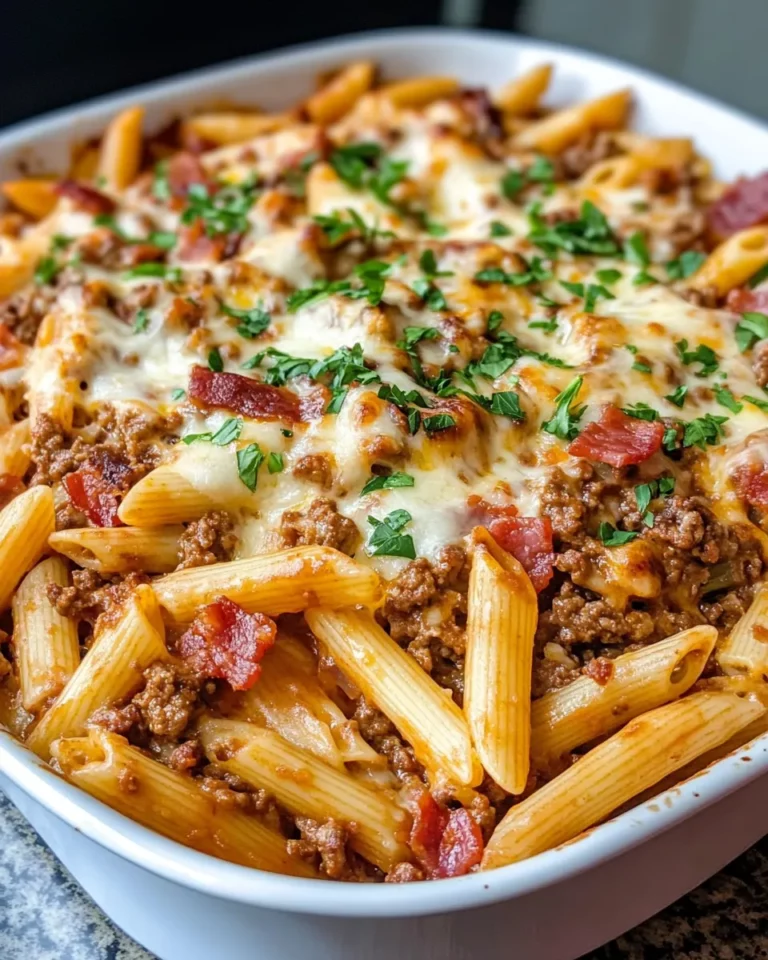
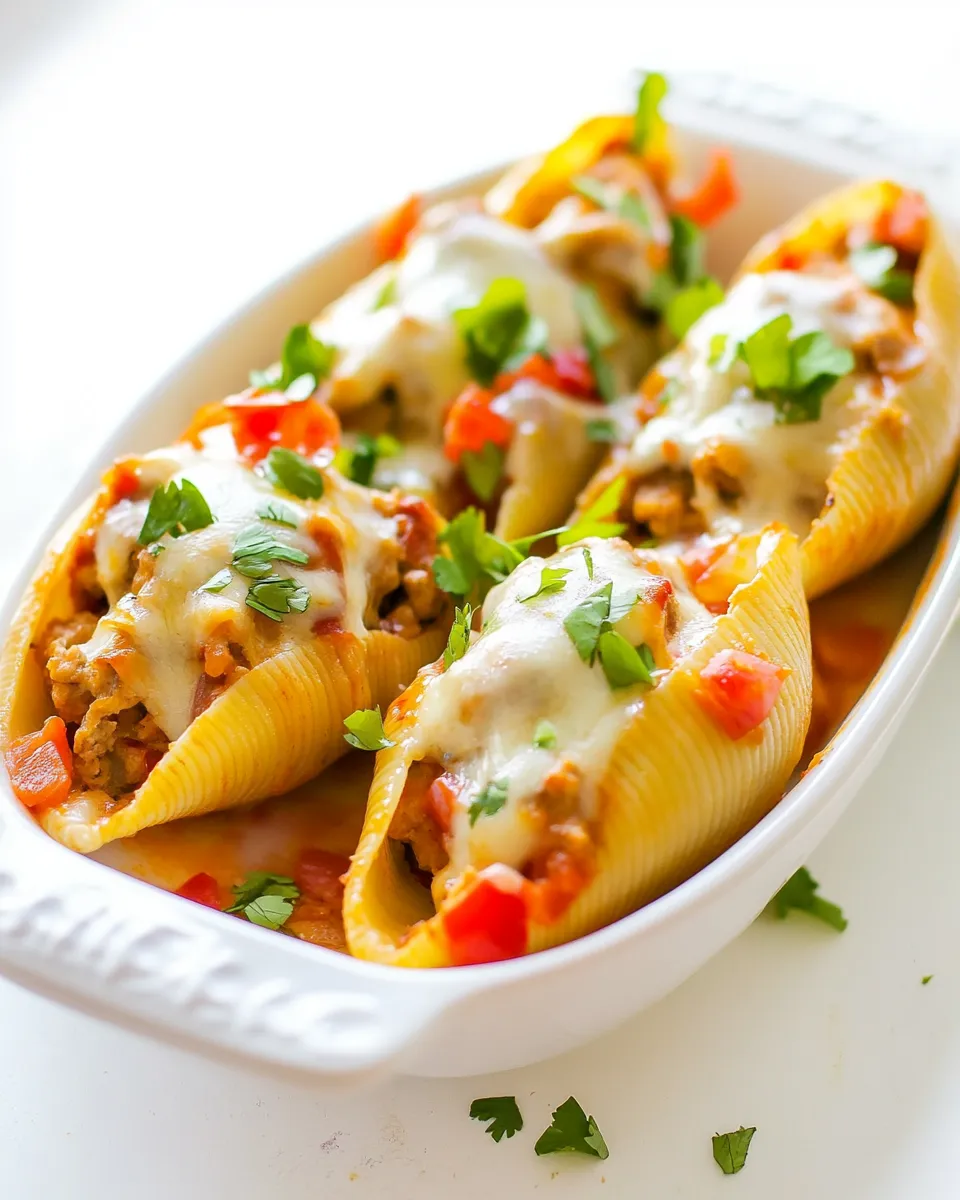
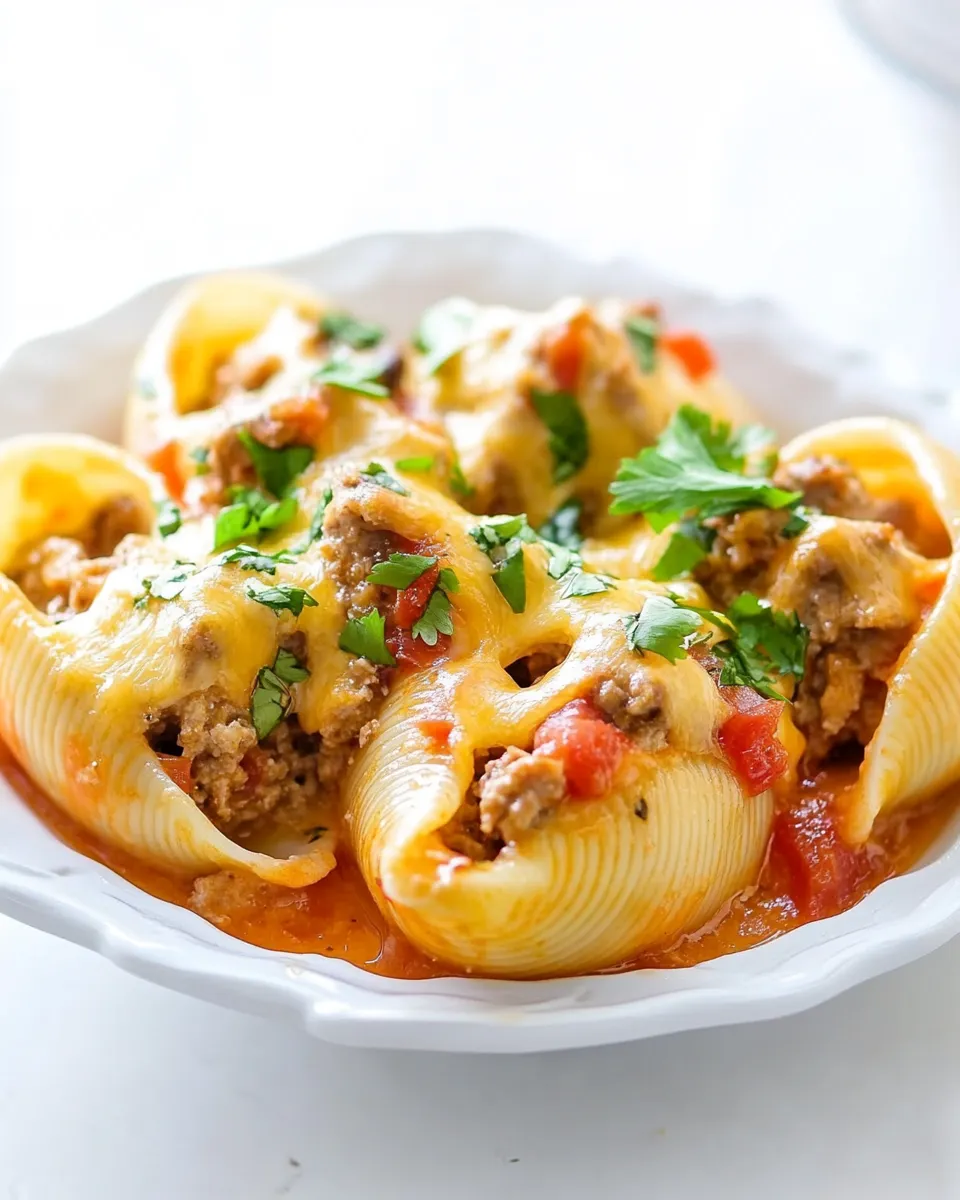
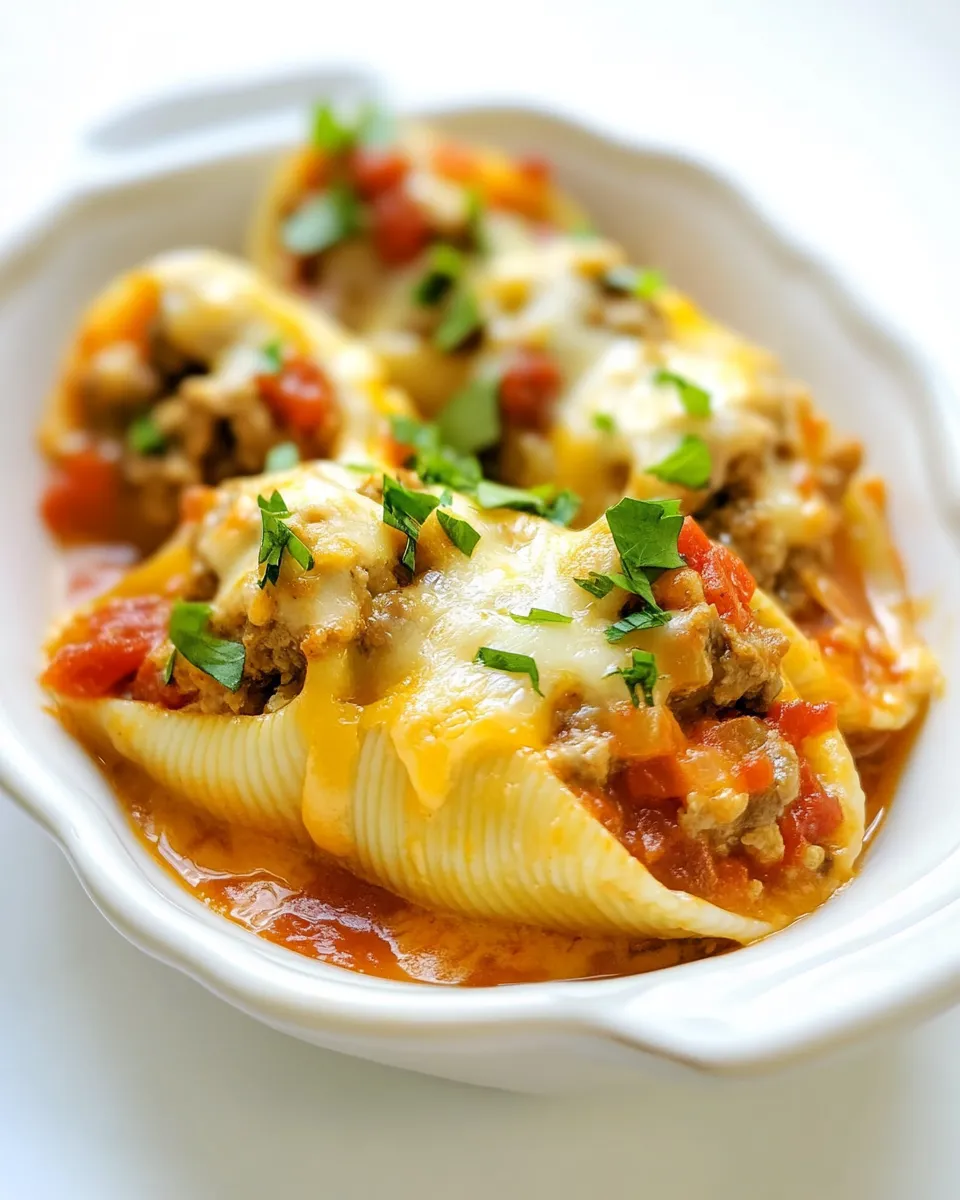
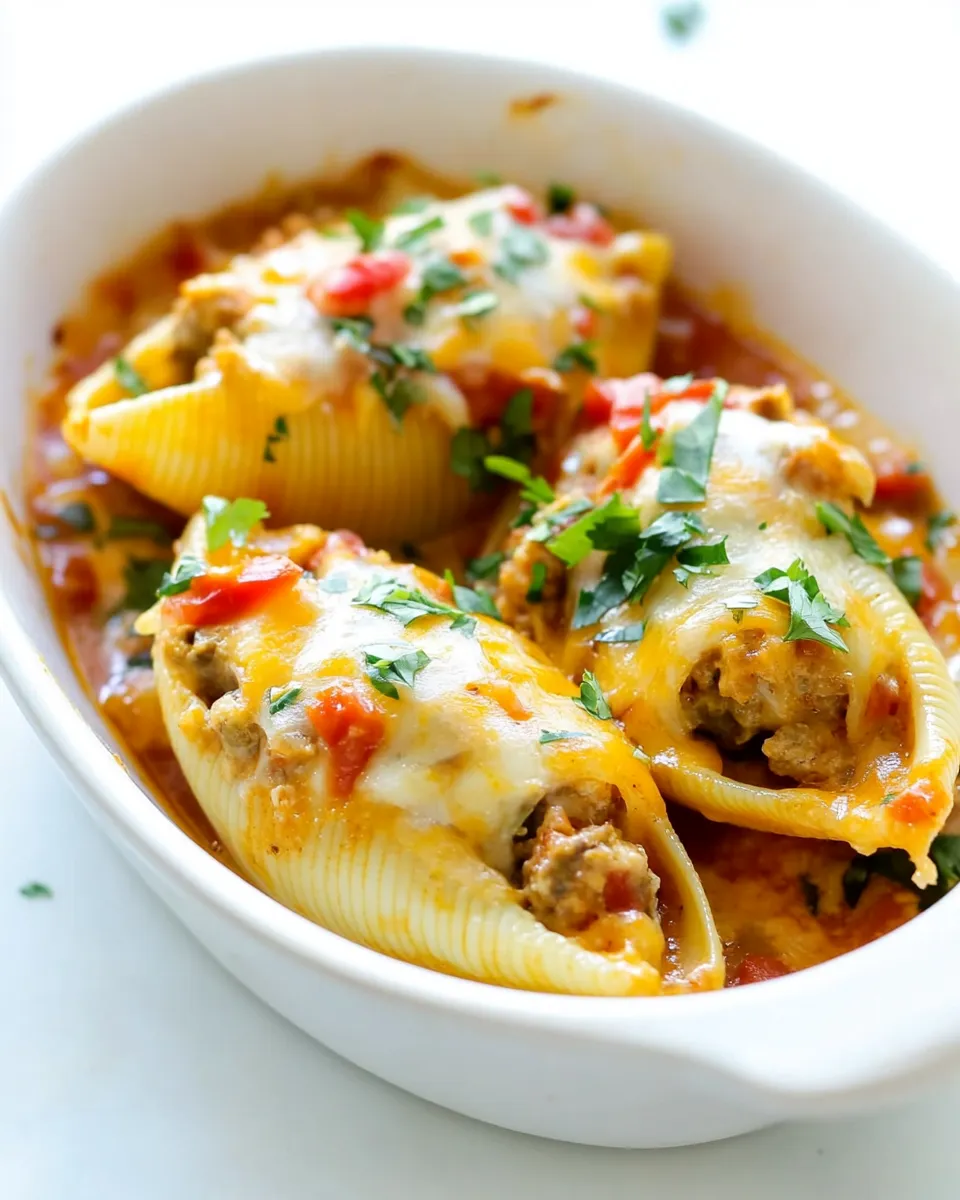
Comfort food and weeknight speed meet in this stuffed-shells spin inspired by taco night. Big jumbo pasta shells cradle a seasoned, cheesy meat filling; a slick of salsa and taco sauce keeps everything saucy and bold. It bakes fast and feeds a crowd without fuss.
I test recipes until they behave the same way every time. These shells are forgiving: you can make the filling a day ahead, cook the shells a touch firmer if you’re stuffing early, or swap ground turkey if you want lighter. The assembly is straightforward and the bake brings everything together quickly.
Expect melted cheese, a little tang from the salsa, and a familiar taco seasoning backbone. I’ll walk you through exactly what to do, what tools help, what to avoid, and how to store leftovers so they stay great. No complicated steps, just solid results.
What You’ll Need
Ingredients
- 1 pound ground beef (or ground turkey) — the main protein and base of the filling; turkey keeps it lighter.
- 1 package low-sodium taco seasoning — adds the taco-flavored backbone; low-sodium lets you control salt.
- 4 ounces cream cheese — melts into the meat to make the filling creamy and bind the mixture.
- 20 jumbo pasta shells (about 6 ounces) — the vessels for the filling; jumbo size is essential for an easy stuff.
- 1 1/2 cups salsa — a layer on the bottom to keep shells from sticking and to add acidity and spice.
- 1 cup taco sauce — poured over the shells to keep them moist and add concentrated taco flavor.
- 1 cup cheddar cheese (or just use all of one kind of cheese) — gives sharpness and melt; choose all cheddar if you prefer a single flavor.
- 1 cup Monterrey Jack cheese — mellower, creamier melting cheese that blends well with cheddar.
- 3 green onions — sliced/chopped on top at the end for a fresh, mild onion bite.
- Sour cream — for serving; cool, creamy contrast to the warm, spicy shells.
Cook Mexican Stuffed Shells Like This
- Preheat oven to 350°F.
- In a large skillet over medium heat, brown 1 pound ground beef (or ground turkey), breaking it into crumbles. Drain any excess fat.
- Add 1 package low-sodium taco seasoning to the meat and prepare according to the package directions. Stir to combine.
- Add 4 ounces cream cheese to the skillet, cover, and simmer until the cream cheese is fully melted and the mixture is smooth. Remove from heat and transfer the meat mixture to a bowl to cool to room temperature.
- While the meat mixture cools, cook 20 jumbo pasta shells (about 6 ounces) according to package directions until al dente. Drain and arrange the shells individually on a baking sheet or cutting board so they don’t stick together and cool enough to handle.
- Pour 1 1/2 cups salsa into the bottom of a 9×13-inch baking dish and spread evenly.
- Stuff each shell with 1 to 2 tablespoons of the cooled meat mixture and place the shells in the prepared 9×13 dish, open side up, in a single layer.
- Evenly spoon or pour 1 cup taco sauce over the stuffed shells so they are mostly covered.
- Cover the dish with foil and bake in the preheated oven for 15–20 minutes.
- Remove the foil, evenly sprinkle 1 cup cheddar cheese and 1 cup Monterrey Jack cheese over the shells (or use all of one cheese type if you prefer), and bake uncovered for an additional 5–10 minutes, until the cheese is melted.
- Remove from the oven, top with sliced/chopped 3 green onions, and serve with sour cream and/or extra salsa.
Reasons to Love Mexican Stuffed Shells
This recipe checks a lot of boxes. It’s family-friendly, transports well (covered casserole), and scales easily. You get built-in portion control with each shell, which makes serving simple. The flavor profile is familiar and widely liked: cheesy, savory, and slightly spicy. The technique is straightforward—brown, season, melt, stuff, and bake—so you can focus on timing rather than complicated steps.
It also hits the convenience sweet spot. The filling reheats beautifully, and the assembled dish tolerates being refrigerated before baking. If you need a dinner that feels special but doesn’t require hours, this one does the job.
No-Store Runs Needed
Most of the ingredients are pantry or fridge staples if you do a typical week of Mexican-style dinners. Ground meat or turkey, taco seasoning, cream cheese, pasta shells or another stuffed pasta, jarred salsa, and shredded cheese are all common. If you have ground meat and cream cheese, you can turn it into a meal with whatever jarred sauce and shredded cheese you have on hand—no last-minute grocery dash required.
Prep & Cook Tools
- Large skillet — for browning the meat and melting the cream cheese.
- 9×13-inch baking dish — the recommended size to fit 20 shells in a single layer.
- Large pot — for boiling the jumbo pasta shells.
- Baking sheet or cutting board — to spread shells after draining so they cool and stay separate.
- Foil — to cover the dish for the initial bake and trap steam.
- Spoon or small cookie scoop — helps portion 1–2 tablespoons of filling into each shell quickly and evenly.
What Not to Do
Don’t stuff hot filling into hot shells. The directions call for cooling the meat mixture to room temperature before stuffing—that prevents the shells from becoming mushy and makes assembly safer. Don’t skip draining excess fat after browning. Too much grease will pool under the shells and change the texture.
Do not overcook the pasta. Cook the shells to al dente per the package—so they hold their shape while you stuff and bake. Overcooked shells fall apart during stuffing. Also, don’t skip the salsa layer in the bottom of the dish; it keeps the pasta from sticking and adds vital moisture and flavor.
Season-by-Season Upgrades
Spring and summer: keep it light at the table by topping with a dollop of sour cream before serving and scattering sliced green onions right at the end, as directed. The bright bite from the onions is refreshing in warmer months.
Fall and winter: this dish plays nicely with heartier sides like roasted vegetables or steamed greens. Use the full-fat cheese mix for a richer finish that feels comforting when nights get cold. The oven time is short, so this still works when you want something warm and quick.
Across every season, small adjustments like choosing all cheddar for a sharper finish or all Monterrey Jack for a milder, creamier melt let you nudge the final profile without changing the method.
What I Learned Testing
On texture
Cooling the meat mixture is a small extra step that pays off. When the filling is too hot it relaxes the shell and releases more moisture, which can lead to a soft or slightly gummy shell after baking. Cooling lets the cream cheese set slightly so the filling behaves during stuffing and baking.
On assembly
Lay the cooked shells spaced on a sheet to cool; they’re harder to handle if they stick together. A metal baking sheet cools faster than a plastic cutting board and helps the shells stop steaming sooner.
On flavor balance
The taco seasoning and salsa provide most of the flavor. If you prefer bolder notes, choose a slightly spicier salsa or a taco seasoning blend you already like—this recipe responds well to bold, familiar mixes without needing anything fussy.
Prep Ahead & Store
Make the filling up to 24 hours ahead and refrigerate it in an airtight container. Cook the shells up to a day ahead as well; drain and spread them on a baking sheet, then loosely cover with plastic wrap in the fridge. For the day-of assembly, bring the filling to room temperature before stuffing the shells.
After baking, leftovers keep well. Cool completely and refrigerate in a covered container for up to 3–4 days. Reheat gently in a low oven until warmed through, or microwave single portions covered for short intervals to avoid drying out.
To freeze: assemble the full dish through step 8 (before the final bake and before adding the shredded cheese), cover tightly, and freeze. When you’re ready to eat, bake from frozen (remove any plastic wrap), covered with foil, at a moderate temperature until hot throughout, then add cheese and finish uncovered until melted. Exact times vary with your oven and whether the dish is fully frozen, so test for internal heat before serving.
Frequently Asked Questions
Can I make this vegetarian? The recipe as written relies on ground meat. I did not include vegetarian ingredients in the source, so if you want to experiment, swap the meat for a plant-based crumble that measures similarly—but note that adds an ingredient not listed in the original recipe.
What if I only have smaller pasta shells? Jumbo shells are called for so each holds a decent scoop. Smaller shells will require more filling scoops and can change the bake time. Use whatever you have but expect to arrange them in multiple layers or in more than one baking dish.
Do I have to use both cheeses? No. The recipe states you can use all of one cheese type if you prefer. Cheddar gives more sharpness; Monterrey Jack melts creamier. Use what you like.
Can I prepare everything ahead and bake later? Yes. The recipe notes cooling and storing the filling and shells. Assemble and bake when you’re ready. Keep the assembled dish refrigerated and bake within 24 hours for best texture.
Before You Go
This is a recipe you can rely on when you want comforting food that’s quick to assemble and crowd-pleasing. Follow the order of cook, cool, stuff, and bake; don’t skip the cooling step for best texture. Use the cheeses you like and serve with sour cream and extra salsa from the fridge.
If you try it, leave a note about which cheese combo you preferred or whether you used beef or turkey—those small choices change the character of the dish more than the technique. I hope this becomes one of your dependable weeknight favorites.
Mexican Stuffed Shells
Equipment
- Large Skillet
- 9x13 inch Baking Dish
- Baking Sheet
- Oven
Ingredients
Ingredients
- 1 poundground beef (or ground turkey)
- 1 package low-sodium taco seasoning
- 4 ouncescream cheese
- 20 jumbo pasta shells (about 6 ounces)
- 1 1/2 cupssalsa
- 1 cuptaco sauce
- 1 cupcheddar cheese (or just use all of one kind of cheese)
- 1 cupMonterrey jack cheese
- 3 green onions
- Sour cream
Instructions
Instructions
- Preheat oven to 350°F.
- In a large skillet over medium heat, brown 1 pound ground beef (or ground turkey), breaking it into crumbles. Drain any excess fat.
- Add 1 package low-sodium taco seasoning to the meat and prepare according to the package directions. Stir to combine.
- Add 4 ounces cream cheese to the skillet, cover, and simmer until the cream cheese is fully melted and the mixture is smooth. Remove from heat and transfer the meat mixture to a bowl to cool to room temperature.
- While the meat mixture cools, cook 20 jumbo pasta shells (about 6 ounces) according to package directions until al dente. Drain and arrange the shells individually on a baking sheet or cutting board so they don’t stick together and cool enough to handle.
- Pour 1 1/2 cups salsa into the bottom of a 9×13-inch baking dish and spread evenly.
- Stuff each shell with 1 to 2 tablespoons of the cooled meat mixture and place the shells in the prepared 9×13 dish, open side up, in a single layer.
- Evenly spoon or pour 1 cup taco sauce over the stuffed shells so they are mostly covered.
- Cover the dish with foil and bake in the preheated oven for 15–20 minutes.
- Remove the foil, evenly sprinkle 1 cup cheddar cheese and 1 cup Monterrey Jack cheese over the shells (or use all of one cheese type if you prefer), and bake uncovered for an additional 5–10 minutes, until the cheese is melted.
- Remove from the oven, top with sliced/chopped 3 green onions, and serve with sour cream and/or extra salsa.
Notes
Source:
The Way to His Heart