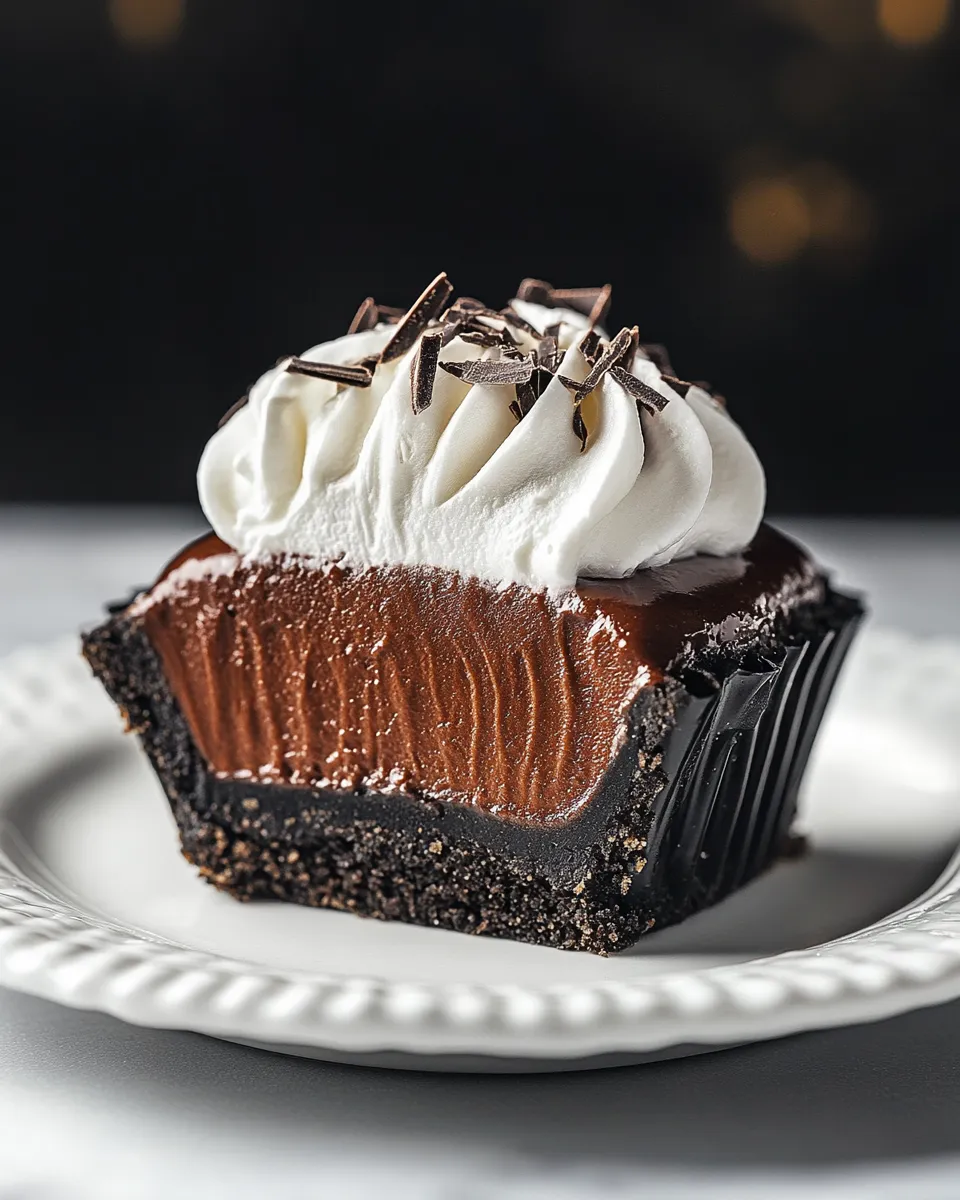
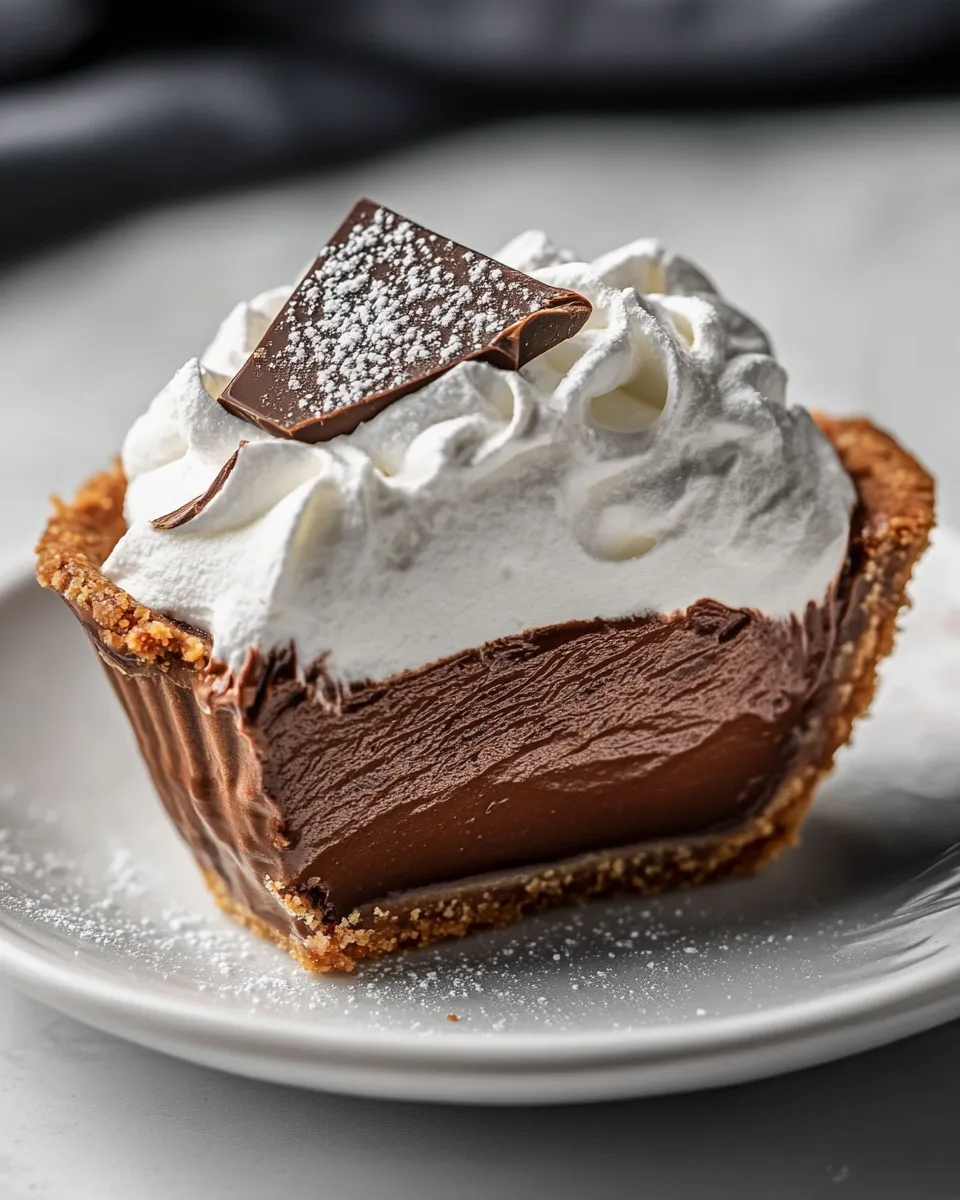
If you’re a chocolate lover, prepare to meet your new favorite dessert! This Mini Chocolate Cream Pie Recipe is an indulgent treat perfect for any occasion. With a rich chocolate filling nestled in a crispy Oreo crust, these mini pies are sure to impress your friends and family. They are decadent, creamy, and oh-so-chocolatey, making them a fantastic addition to your dessert repertoire. Let’s dive into why you’ll love this recipe and how simple it is to create your very own mini chocolate cream pies.
Reasons to Love Mini Chocolate Cream Pie Recipe
There are countless reasons to adore this Mini Chocolate Cream Pie Recipe. Here are just a few:
- Individual Servings: These mini pies are perfectly portioned, making them ideal for gatherings or a sweet treat just for you.
- Rich Flavor: The combination of semi-sweet chocolate and creamy filling creates a luxurious dessert that satisfies any chocolate craving.
- Easy to Make: With simple ingredients and straightforward steps, even novice bakers can whip up these delightful pies.
- Versatile Toppings: Customize each pie with your favorite toppings, from chocolate shavings to fresh berries, to suit your taste.
- Make Ahead: These pies can be prepared in advance, allowing you to enjoy your time with loved ones without the stress of last-minute baking.
Ingredients at a Glance
To create these mini chocolate cream pies, gather the following ingredients:
- 24 regular-sized Oreo cookies (cream NOT removed)
- 6 tablespoons (84g) salted butter, melted
- 8 ounces semi-sweet chocolate, finely chopped
- 1 and 1/2 cups (340ml) heavy whipping cream, divided
- 5 tablespoons (70g) salted butter, cut into cubes, room temperature
- 1/4 cup (54g) confectioners’ sugar, sifted
- Chocolate squares or chocolate shavings for garnish, optional
Recommended Tools
Before you start baking, make sure you have these essential tools on hand:
- Mini Pie Pans: Perfect for creating individual servings of your mini pies.
- Mixing Bowls: Use these for mixing your crust and filling ingredients.
- Whisk: Essential for whipping the cream and combining ingredients smoothly.
- Spatula: A handy tool for folding and transferring your chocolate filling.
- Microwave-safe Bowl: For melting your chocolate effortlessly.
Mini Chocolate Cream Pie Recipe: Step-by-Step Guide

Now that you have your ingredients and tools ready, let’s get started with the Mini Chocolate Cream Pie Recipe!
Step 1: Prepare the Crust
Begin by preheating your oven to 350°F (175°C). In a food processor, blend the 24 Oreo cookies until finely crushed. Add the melted butter and pulse until the mixture resembles wet sand.
Step 2: Form the Crust
Press the cookie mixture evenly into the bottom and up the sides of each mini pie pan. Bake in the preheated oven for 8-10 minutes until set. Remove from the oven and allow to cool completely.
Step 3: Melt the Chocolate
In a microwave-safe bowl, combine the finely chopped semi-sweet chocolate with 1/2 cup of the heavy whipping cream. Heat in the microwave in 30-second intervals, stirring in between, until smooth and melted. Allow the mixture to cool slightly.
Step 4: Prepare the Filling
In a large mixing bowl, beat the remaining heavy whipping cream until soft peaks form. Gradually add the confectioners’ sugar and continue to beat until stiff peaks form. Gently fold in the cooled chocolate mixture until well combined.
Step 5: Assemble the Pies
Spoon the chocolate filling evenly into the cooled Oreo crusts, smoothing out the tops with a spatula.
Step 6: Chill
Refrigerate the mini pies for at least 2 hours or until set. This step is crucial for achieving that perfect creamy texture.
Step 7: Serve and Garnish
Once set, remove the mini pies from the refrigerator. If desired, garnish with chocolate squares or shavings on top for an extra touch of elegance. Serve chilled and enjoy every bite of your delicious creation!
Allergy-Friendly Substitutes

If you have dietary restrictions or allergies, consider these substitutes for the Mini Chocolate Cream Pie Recipe:
- Gluten-Free: Use gluten-free Oreo cookies for the crust.
- Dairy-Free: Substitute coconut cream for heavy whipping cream and use dairy-free chocolate.
- Lower Sugar: Use a sugar substitute in place of confectioners’ sugar.
Avoid These Traps
When making your mini chocolate cream pies, keep these tips in mind to ensure success:
- Don’t overmix the whipped cream; this can lead to a grainy texture.
- Be sure to let the chocolate cool before folding it into the whipped cream to prevent melting.
- Allow the crust to cool completely before adding the filling; warm crusts can lead to a soupy filling.
- Don’t skip the chilling step; it’s essential for the filling to set properly.
Prep Ahead & Store
To make your life easier, you can prep these mini chocolate cream pies ahead of time. Here’s how:
- Assemble the crusts and fill them with the chocolate filling a day in advance. Just keep them covered in the refrigerator until you’re ready to serve.
- These mini pies can be stored in the fridge for up to 3 days. Just be sure to cover them with plastic wrap to keep them fresh.
Helpful Q&A
Can I use milk chocolate instead of semi-sweet chocolate?
Yes, you can use milk chocolate for a sweeter flavor, but it may alter the overall richness of the filling. Adjust the sweetness accordingly.
Can I freeze these mini pies?
Yes, you can freeze them! Just make sure they are tightly covered. They can be stored in the freezer for up to a month. Thaw in the refrigerator before serving.
What if I don’t have mini pie pans?
No problem! You can use muffin tins or even small ramekins as an alternative for your mini pies.
Can I add other flavors to the filling?
Absolutely! You can incorporate flavors like peppermint extract or espresso powder for a unique twist on the classic chocolate flavor.
If you enjoyed this , you might also want to try:
Let’s Eat
Now that you have this Mini Chocolate Cream Pie Recipe in your arsenal, it’s time to indulge in the creamy, chocolatey goodness. Whether for a special occasion or a simple weeknight treat, these mini pies are guaranteed to delight. Enjoy every bite, and don’t forget to share with your loved ones!
Mini Chocolate Cream Pie Recipe
Equipment
- Mini Pie Pans
- Mixing Bowls
- Whisk
- Spatula
- Microwave-safe Bowl
- Food Processor
Ingredients
- 24 Oreo cookies regular-sized, cream NOT removed
- 6 tablespoons salted butter melted
- 8 ounces semi-sweet chocolate finely chopped
- 1 1/2 cups heavy whipping cream divided
- 5 tablespoons salted butter cut into cubes, room temperature
- 1/4 cup confectioners' sugar sifted
- Chocolate squares or chocolate shavings for garnish, optional
Instructions
- Preheat your oven to 350°F (175°C). In a food processor, blend the 24 Oreo cookies until finely crushed. Add the melted butter and pulse until the mixture resembles wet sand.
- Press the cookie mixture evenly into the bottom and up the sides of each mini pie pan. Bake in the preheated oven for 8-10 minutes until set. Remove from the oven and allow to cool completely.
- In a microwave-safe bowl, combine the finely chopped semi-sweet chocolate with 1/2 cup of the heavy whipping cream. Heat in the microwave in 30-second intervals, stirring in between, until smooth and melted. Allow the mixture to cool slightly.
- In a large mixing bowl, beat the remaining heavy whipping cream until soft peaks form. Gradually add the confectioners' sugar and continue to beat until stiff peaks form. Gently fold in the cooled chocolate mixture until well combined.
- Spoon the chocolate filling evenly into the cooled Oreo crusts, smoothing out the tops with a spatula.
- Refrigerate the mini pies for at least 2 hours or until set.
- Once set, remove the mini pies from the refrigerator. If desired, garnish with chocolate squares or shavings on top. Serve chilled and enjoy.
Notes
- Use gluten-free Oreo cookies for a gluten-free version.
- Substitute coconut cream and dairy-free chocolate for a dairy-free alternative.
- Do not overmix the whipped cream to avoid a grainy texture.
- Allow the crust to cool completely before adding the filling to prevent a soupy filling.
- These mini pies can be stored in the refrigerator for up to 3 days, covered.