I first made this pie on a hot weekend when turning on the oven felt like a punishment. It’s one of those recipes that looks and tastes like effort, but requires surprisingly little hands-on time. The base is crunchy cookie crumbs, the filling is silky instant vanilla pudding studded with mini chocolate chips, and the whole thing sets up in the fridge — no baking required. That combination makes it an automatic reach for potlucks, last-minute guests, or any day when you want dessert without fuss.
What I appreciate most is how forgiving it is. You can use whatever chocolate chip cookies you have on hand, and the filling comes together in a single bowl. The chill time is the real work — patience rewards you with clean slices and a cool, creamy texture. I’ll walk you through shopping, the exact steps, smart swaps, and common problems so you can make this pie confidently.
Below you’ll find the ingredients listed exactly as the recipe calls for, a step-by-step method you can follow straight through, and practical tips for storage and serving. Read it once, gather your things, and this pie will come together smoother than you expect.
Your Shopping Guide
Keep the shopping list tight and purposeful. You really only need a few items: a dependable bag of chocolate chip cookies for the crust, unsalted butter, instant vanilla pudding mix, milk, mini chocolate chips, and something to top the pie. If you want convenience, buy a pre-made whipped topping; if you prefer fresh, add heavy cream to your list so you can whip your own.
When selecting cookies, go for sturdier store brands like Chips Ahoy or equivalent. They crush easily and bind well with butter. For the pudding, use the 3.4-ounce boxed instant vanilla pudding called for in the directions — that specific size is calibrated to the milk amount in the recipe. Mini chocolate chips melt into the filling more subtly than full-size chips, so follow that item unless you want larger melt spots.
- Cookies: choose a crunchy chocolate chip cookie you like eating plain.
- Unsalted butter: buy real butter, not spreads, since it helps set the crust.
- Instant vanilla pudding, 3.4-ounce box: this is the exact size needed.
- Mini chocolate chips: pack more if you love extra chocolate.
- Whipped cream or topping: ready-made or heavy cream to whip at home.
Ingredients
- 2 ¼cups (251 g) Chocolate Chip Cookie crumbs such as Chips Ahoy, about 20 cookies — these form the crust; sturdier cookies work best for structure.
- 4 tablespoons (57 g) unsalted butter melted — binds the crumbs and helps the crust set; use melted but cooled slightly for easier handling.
- 1 (3.4 ounce) box instant vanilla pudding — the instant pudding provides the filling’s structure and flavor; use the exact box size listed.
- 1 ½ cups (356 ml) milk — the liquid to reconstitute the instant pudding; whole milk gives the creamiest texture.
- 1/2 cup (170 g) mini chocolate chips — folded into the pudding for pockets of chocolate throughout.
- Additional Cookies, for garnish — break into pieces to garnish the top before serving.
- Whipped Cream or whipped topping, for garnish — optional, for a finished look and light contrast to the pudding.
Stepwise Method: No Bake Chocolate Chip Cookie Pudding Pie
- Place about 20 chocolate chip cookies in a large resealable plastic bag and crush with a rolling pin until you have 2 1/4 cups (251 g) of cookie crumbs. Reserve any additional cookies for garnish.
- Pour the crumbs into a bowl, add 4 tablespoons (57 g) melted unsalted butter, and stir until the crumbs are evenly moistened.
- Press the buttered crumbs firmly into the bottom and up the sides of a 9″ pie plate to form the crust. Chill the crust in the refrigerator for at least 30 minutes.
- In a medium bowl, whisk the 3.4-ounce box of instant vanilla pudding mix with 1 1/2 cups (356 ml) milk until smooth. Let the mixture sit for 5 minutes to thicken.
- Stir 1/2 cup (170 g) mini chocolate chips into the thickened pudding. If you want cookie pieces in the filling, crush some of the reserved additional cookies and fold them in.
- Pour the pudding mixture into the chilled crust, smooth the top, cover, and refrigerate for at least 4 hours or overnight to set.
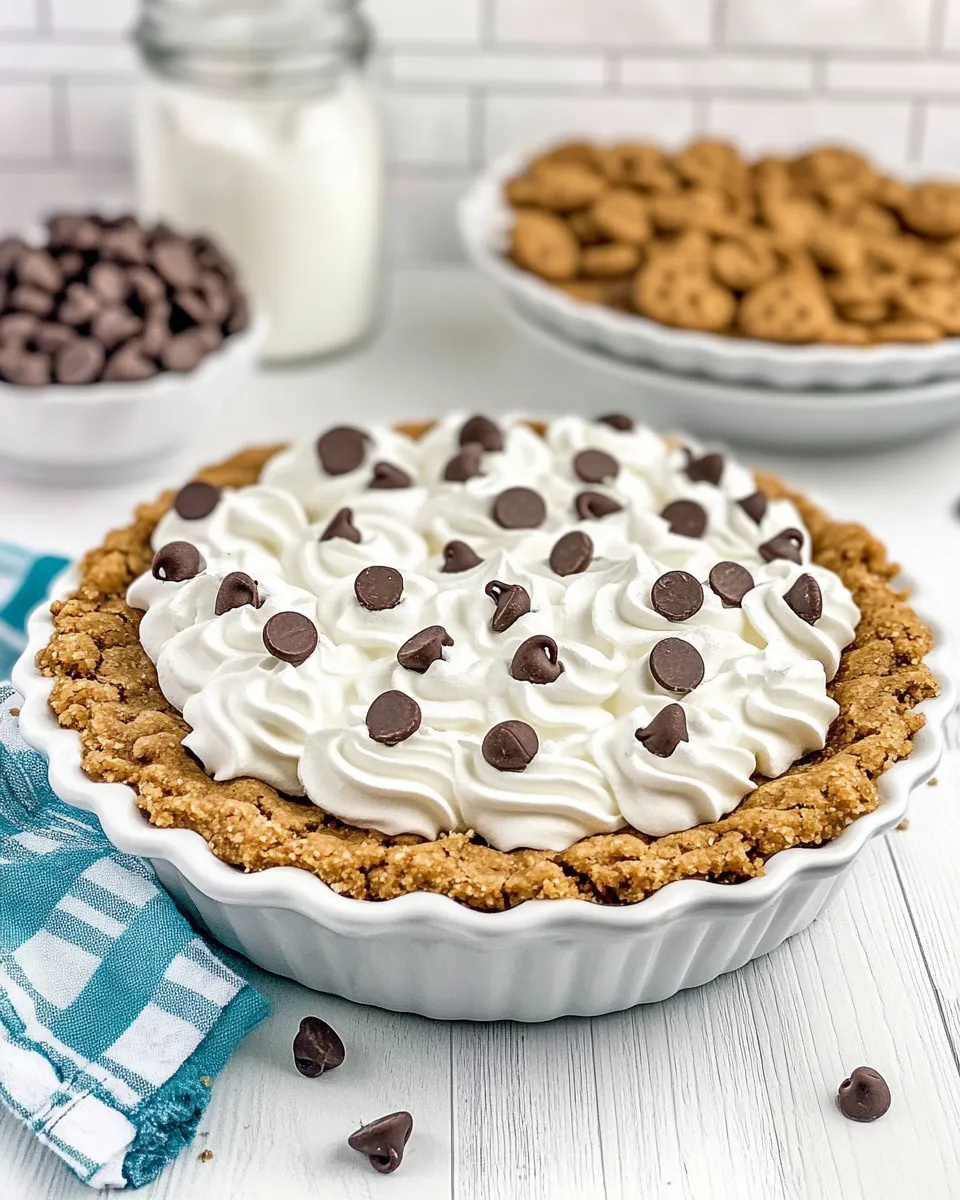
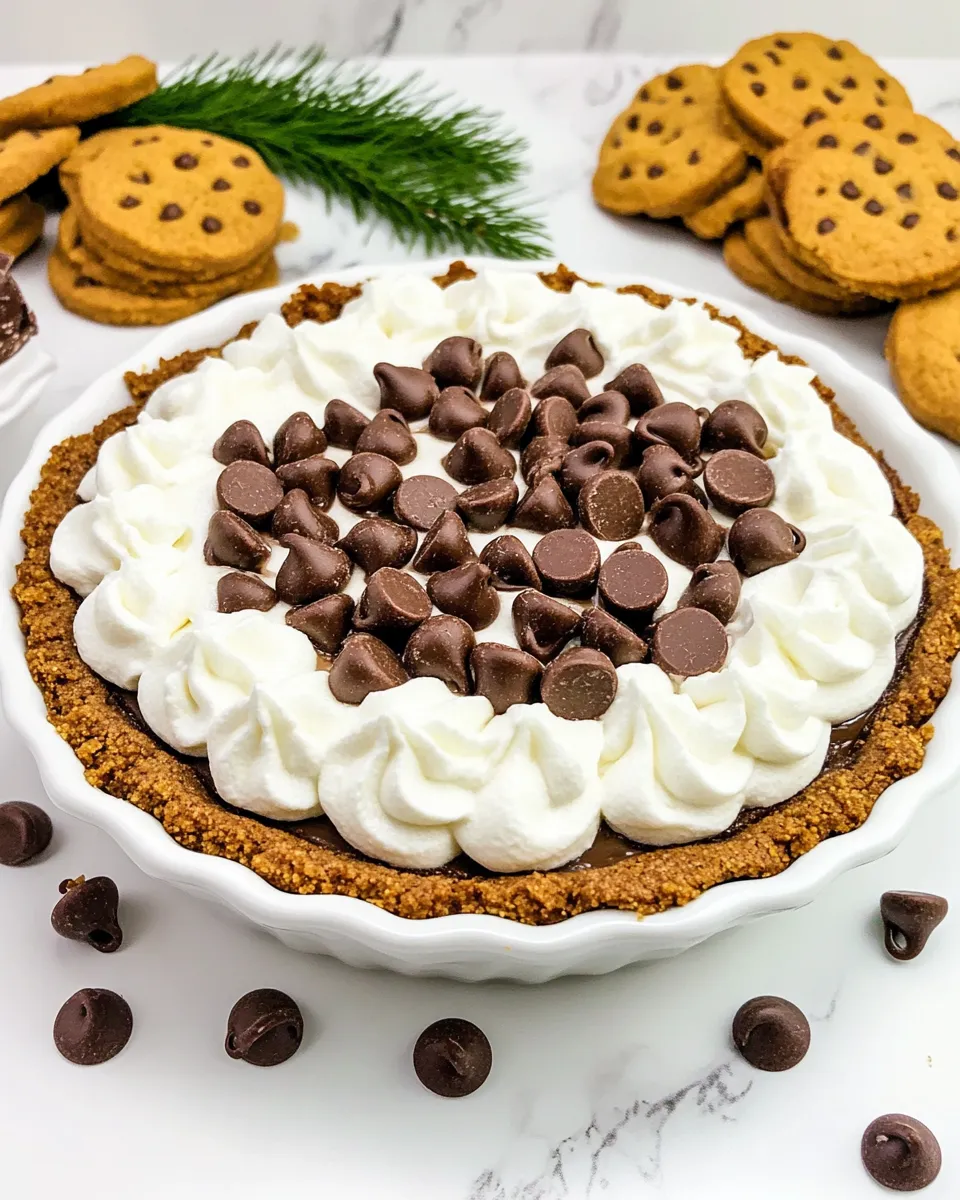
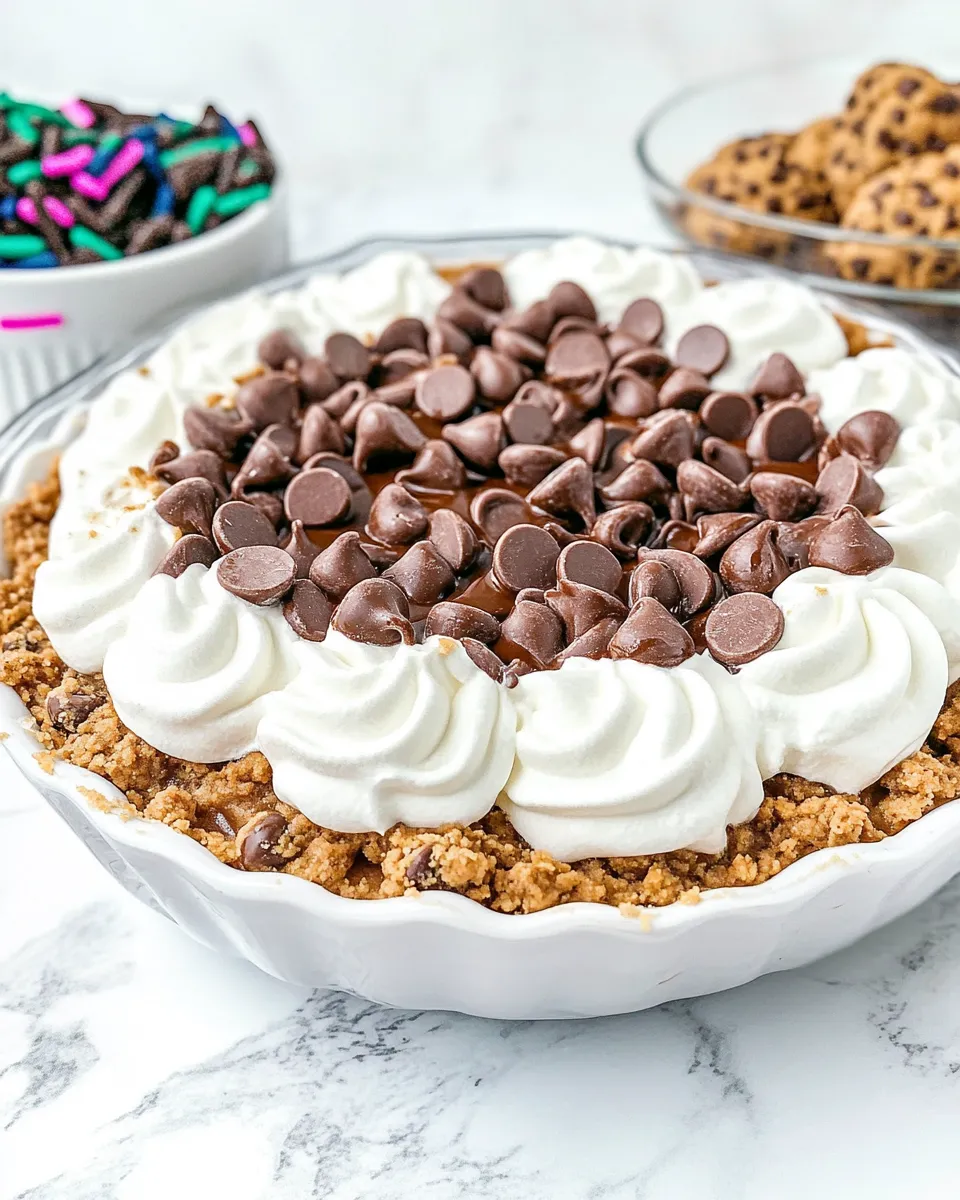
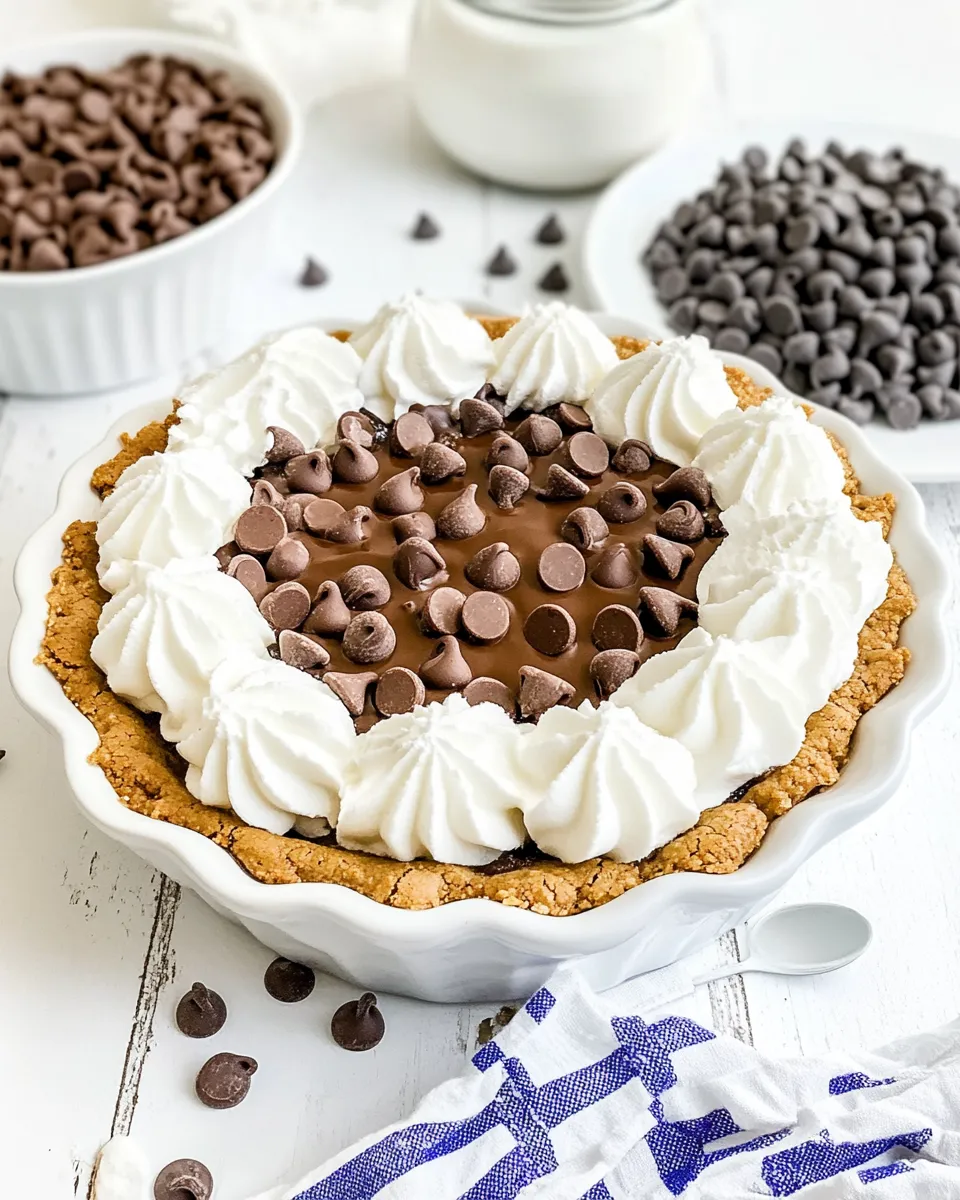
- Before serving, top the pie with whipped cream or whipped topping and garnish with the additional cookies (for example, break cookies in half and place them around the pie at equal slice intervals).
- Store the pie covered in the refrigerator up to 2 days without whipped cream. If the pie is topped with fresh whipped cream, serve within 24 hours.
Why You’ll Love This Recipe
It’s quick to assemble. Most of the time is hands-off chilling, which leaves you free to prepare other things or relax. The texture contrast is the winner here: a crunchy cookie crust against a creamy, slightly firm pudding center studded with mini chips. It looks like a layered dessert you’d pay for at a café, but it’s made with pantry staples.
It’s adaptable. You can scale it for a smaller dish, make it in a glass pie plate for prettier slices, or switch the garnish based on what you have. The ingredients are affordable and easy to source, and the pie travels well in a cooler for picnics or barbecues.
Quick Replacement Ideas
- Cookies: use any crunchy chocolate chip cookie you like. If you prefer a different flavor, swap with peanut butter cookies or shortbread (texture will change).
- Butter: salted butter will work; reduce added salt elsewhere if you’re pairing with salted components.
- Pudding: instant chocolate pudding instead of vanilla creates a double-chocolate version, but note flavor shifts.
- Milk: 2% or whole milk gives better texture; skim can be used but the filling will be thinner.
- Whipped topping: stabilized whipped cream keeps better if you need the pie to sit out briefly.
Prep & Cook Tools
- Large resealable plastic bag — for crushing the cookies cleanly and quickly.
- Rolling pin or heavy jar — crushes cookies evenly without a food processor.
- Mixing bowls — one for crumbs, one for pudding.
- Whisk and spoon — whisk for the pudding mix; spoon for stirring chips into the filling.
- 9″ pie plate — the recipe’s quantities are calibrated for this size.
- Measuring cups and spoons or kitchen scale — to match the recipe amounts accurately.
- Plastic wrap or pie dome — to cover the pie while it chills.
Problems & Prevention
Common issue: a soggy crust. That usually happens when the butter-to-crumb ratio is off or the crust isn’t pressed firmly. Measure the crumbs to about 2 1/4 cups and press firmly into the pie plate so the crust compacts. Chilling the crust for at least 30 minutes before adding the filling helps it set and resists sogginess.
Common issue: runny filling. Instant pudding will thicken in about five minutes, but make sure you use the full 1 1/2 cups (356 ml) milk called for and the correct 3.4-ounce pudding box. Under-measuring the pudding mix or over-diluting with more milk will thin it. If your filling seems too loose after whisking and waiting five minutes, give it a few extra minutes in the fridge to firm up before pouring into the crust.
Common issue: slices fall apart. For clean slices, chill the pie for at least 4 hours. Use a sharp, warm knife for serving — run the knife under hot water, dry it, and then slice. Wipe the knife between cuts for neat pieces.
Spring–Summer–Fall–Winter Ideas
Spring: Add fresh berries on top of the whipped cream to brighten the flavor and cut the richness slightly. Berries also make the pie look festive for gatherings.
Summer: Serve chilled with a dollop of lemon-infused whipped cream to introduce a citrusy contrast that keeps the pie feeling light on hot days.
Fall: Fold in a handful of crushed gingersnaps or a pinch of cinnamon into the crust crumbs to add autumnal warmth. Garnish with candied pecans for texture.
Winter: Swap the vanilla pudding for chocolate and add a sprinkle of sea salt on top of the whipped cream to make the pie feel more decadent for holiday dinners.
If You’re Curious
Why use mini chocolate chips? They distribute more evenly through the pudding and create a smoother bite. Larger chips can clump and create pockets of melted chocolate which is fine if you want contrast, but mini chips are more consistent.
Can you substitute homemade pudding? Yes, but the structure changes. The instant box is formulated to set firmly enough for pie filling when mixed with milk and chilled. A homemade custard tends to be softer and may require gelatin or additional thickening agents to set similarly.
Cooling, Storing & Rewarming
Cool: The pie needs refrigeration to set. After assembling, cover and refrigerate for at least 4 hours; overnight is ideal. Don’t attempt to speed this by putting the pie in the freezer — freezing can alter texture and make the crust brittle.
Store: The recipe guidance is clear — store the pie covered in the refrigerator up to 2 days without whipped cream. If you top the pie with freshly whipped cream, consume within 24 hours. If you need to prep in advance, keep the whipped topping separate and add it right before serving for best texture and appearance.
Rewarming: This is a chilled dessert; it doesn’t reheat. If slices are too firm from extended refrigeration, let them sit at room temperature 10–15 minutes before serving for a softer mouthfeel.
Frequently Asked Questions
Q: Can I use a food processor for the cookie crumbs?
A: Yes. Pulse cookies until fine crumbs form. Be careful not to over-process into a paste; you want dry crumbs. Measure out 2 1/4 cups (251 g) after processing.
Q: Can I make this gluten-free?
A: Use gluten-free chocolate chip cookies for the crust and ensure any pudding mix and toppings are certified gluten-free. The method remains the same.
Q: How do I make the lightly sweetened whipped cream that won’t weep?
A: Chill your bowl and whisk, use heavy cream (not half-and-half), and whip with a little powdered sugar. If you need extra stability, add a teaspoon of cornstarch or use a stabilizer like a bit of instant vanilla pudding mix (small amounts will not alter flavor much).
Q: Can I double the recipe for a larger gathering?
A: Yes. Make two pies and keep them chilled. If you combine into a larger pan, monitor set time — more volume can take longer to firm.
In Closing
This No Bake Chocolate Chip Cookie Pudding Pie is a small miracle: minimal active time, familiar ingredients, and a look-at-me finish. It’s perfect for when you want a dessert that feels special but doesn’t eat up your day. Follow the steps as written, respect the chill time, and you’ll have a reliable, crowd-pleasing pie. When you make it, take a quick photo and savor the first cool, chocolate-flecked bite — it always feels like a reward.
No Bake Chocolate Chip Cookie Pudding Pie
Equipment
- large resealable plastic bag
- Rolling Pin
- Mixing Bowl
- 9-inch pie plate
- Medium Bowl
- Whisk
- Spatula
- Refrigerator
Ingredients
Ingredients
- 2 1/4 cups 251 g Chocolate Chip Cookie crumbssuch as Chips Ahoy, about 20 cookies
- 4 tablespoons 57 g unsalted buttermelted
- 1 3.4 ouncebox instant vanilla pudding
- 1 1/2 cups 356 ml milk
- 1/2 cup 170 g mini chocolate chips
- Additional Cookies for garnish
- Whipped Cream or whipped topping for garnish
Instructions
Instructions
- Place about 20 chocolate chip cookies in a large resealable plastic bag and crush with a rolling pin until you have 2 1/4 cups (251 g) of cookie crumbs. Reserve any additional cookies for garnish.
- Pour the crumbs into a bowl, add 4 tablespoons (57 g) melted unsalted butter, and stir until the crumbs are evenly moistened.
- Press the buttered crumbs firmly into the bottom and up the sides of a 9" pie plate to form the crust. Chill the crust in the refrigerator for at least 30 minutes.
- In a medium bowl, whisk the 3.4-ounce box of instant vanilla pudding mix with 1 1/2 cups (356 ml) milk until smooth. Let the mixture sit for 5 minutes to thicken.
- Stir 1/2 cup (170 g) mini chocolate chips into the thickened pudding. If you want cookie pieces in the filling, crush some of the reserved additional cookies and fold them in.
- Pour the pudding mixture into the chilled crust, smooth the top, cover, and refrigerate for at least 4 hours or overnight to set.
- Before serving, top the pie with whipped cream or whipped topping and garnish with the additional cookies (for example, break cookies in half and place them around the pie at equal slice intervals).
- Store the pie covered in the refrigerator up to 2 days without whipped cream. If the pie is topped with fresh whipped cream, serve within 24 hours.
Notes
Refrigerate filled pie at least 4 hours or overnight to set.
Store uncovered whipped-cream-topped pie for up to 24 hours; without whipped cream, store up to 2 days.