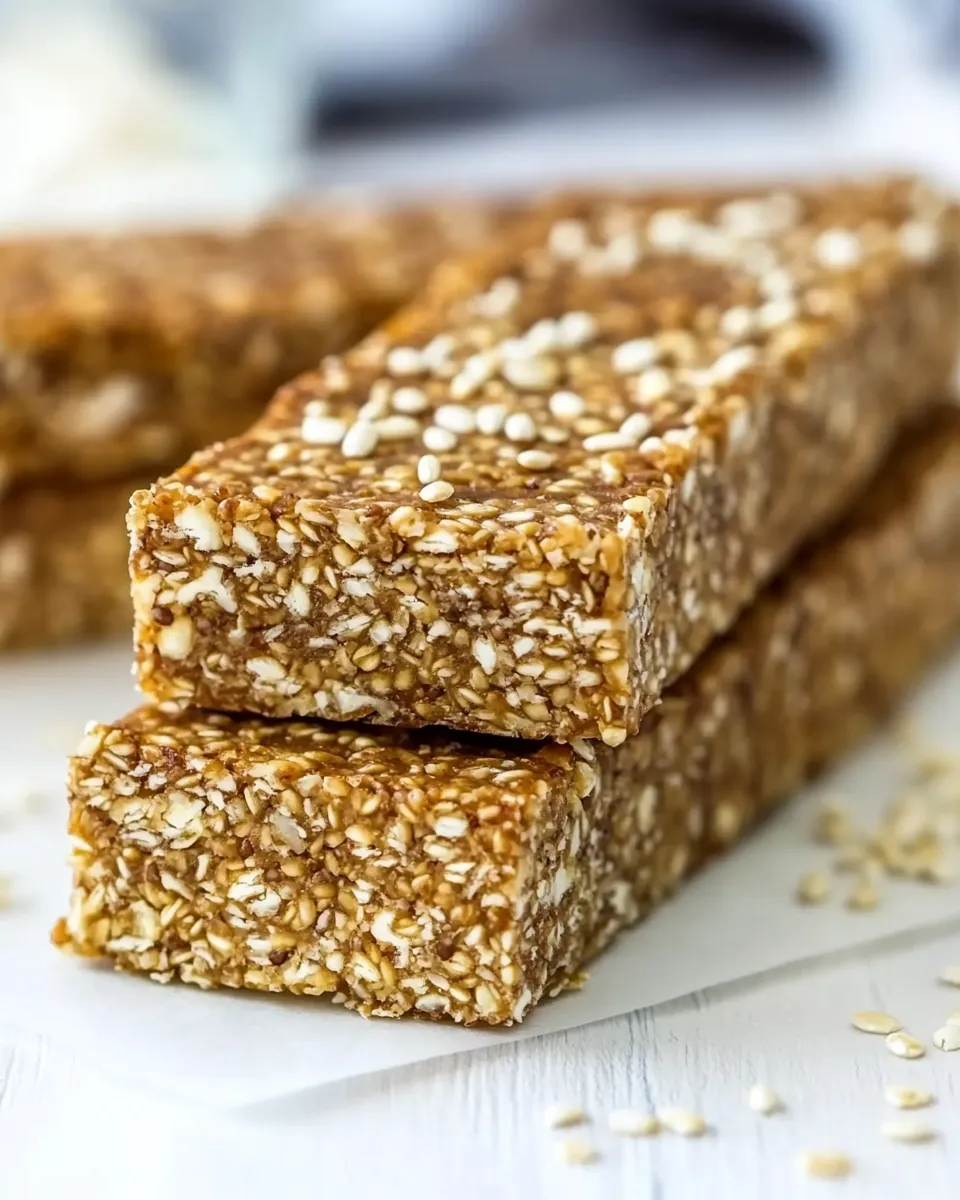
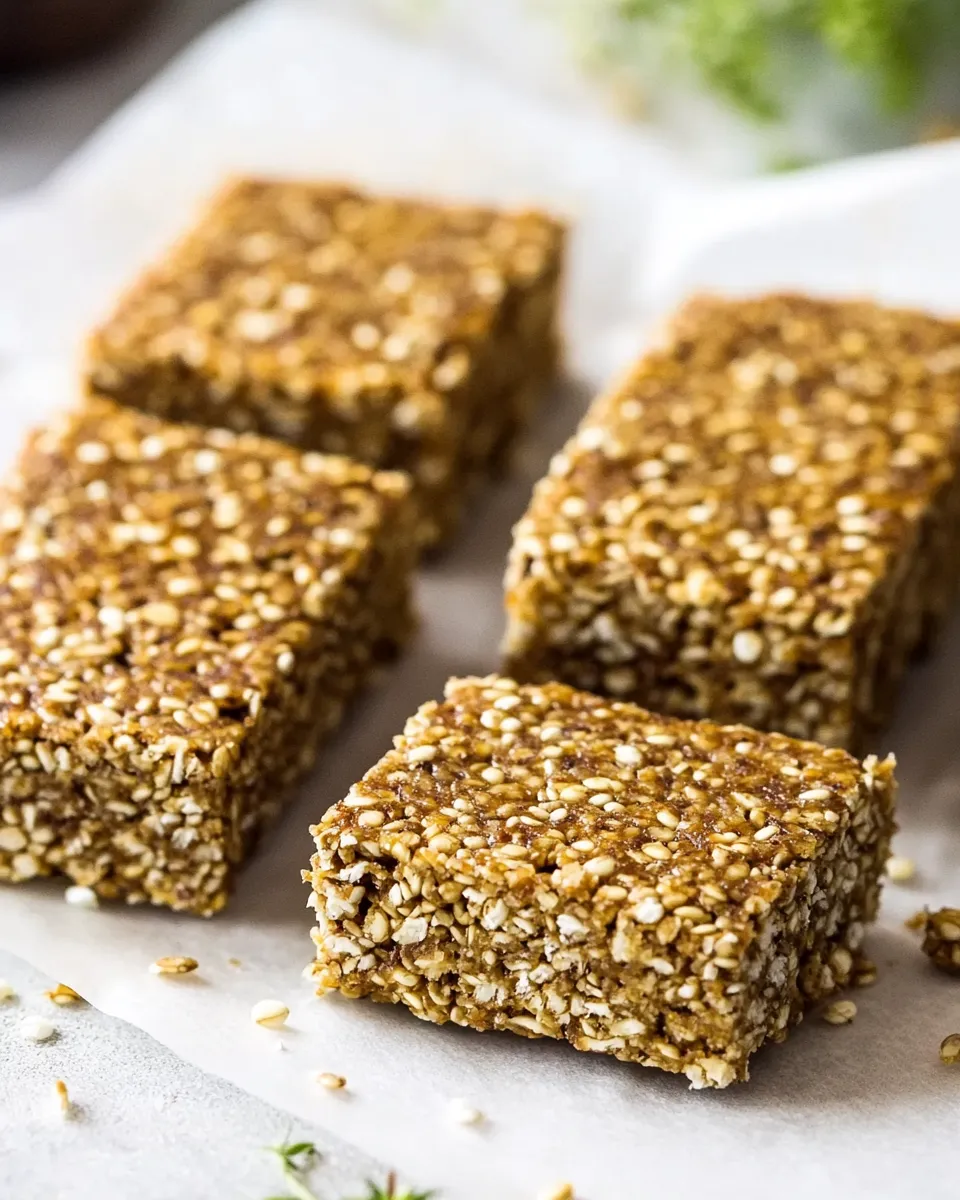
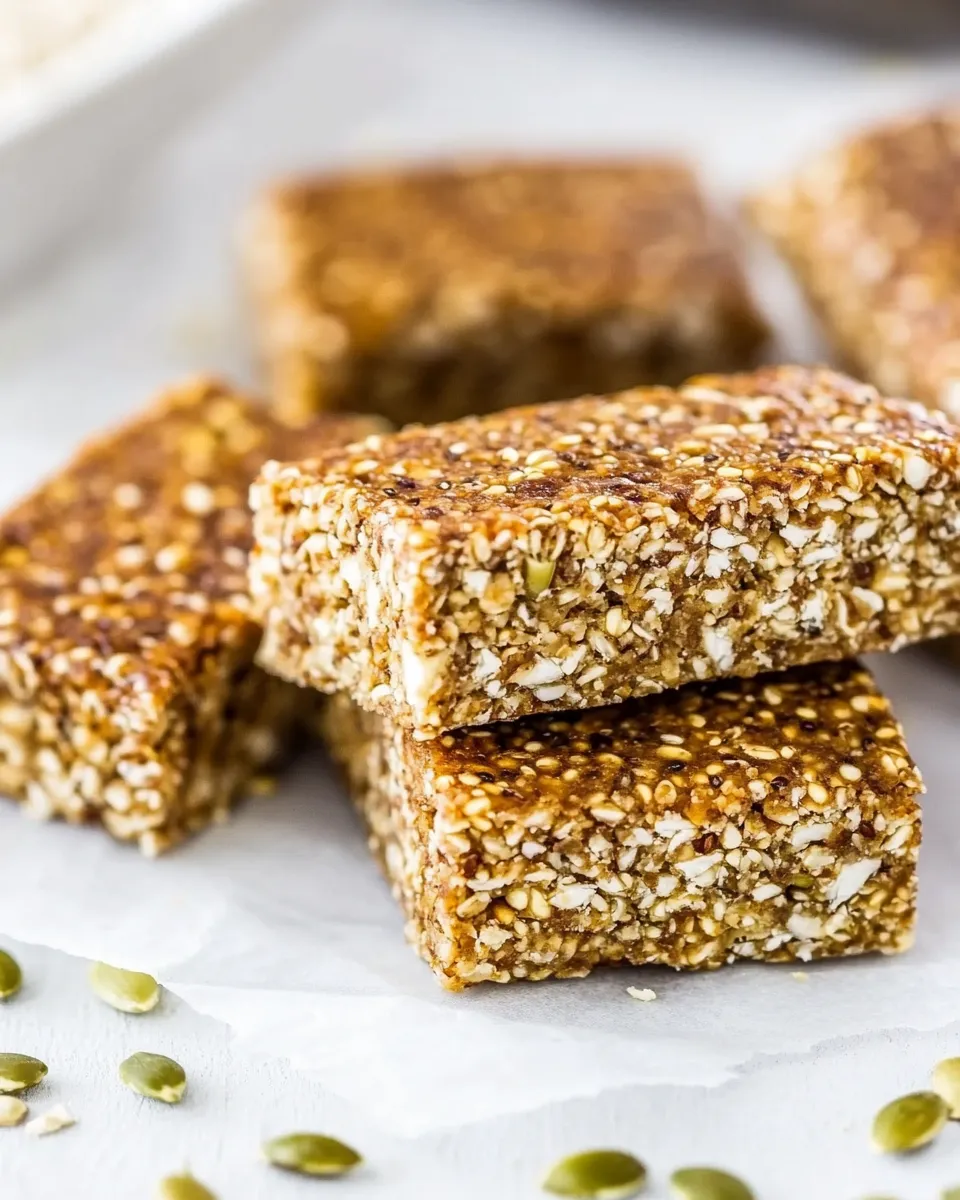
I test and tweak bars a lot. These quinoa protein bars came from a need: something portable, not too sweet, and with real texture. They use canned chickpeas as a binder, toasted quinoa for crunch, and a hint of lime to keep the flavor bright. White chocolate chips melt into pockets of sweetness without overpowering the bar.
They take a little technique, mostly around toasting and drying, but nothing fussy. If you follow the steps in order you’ll end up with firm bars that slice cleanly and travel well. I bake them twice—first to toast, then to set—so they keep their shape.
Below you’ll find the exact ingredient list and the step-by-step process I use. I also include troubleshooting notes, storage advice, and simple flex ideas so you can adapt the bars to what you have on hand.
Ingredient Checklist
Ingredients
- ¼ cup macadamia nuts, finely chopped — adds rich, buttery crunch when toasted.
- ¾ cup quinoa, uncooked — toasts into a light, crispy element that gives structure.
- ¼ cup unsweetened coconut flakes — for toasty coconut flavor and chew.
- ⅔ cup reduced-sodium chickpeas (128 grams), drained and rinsed — the main binder once skinned and mashed.
- ⅓ cup dried pineapple, finely chopped — concentrated fruity sweetness and chew.
- ¼ cup vanilla whey protein powder — boosts protein and contributes to the bar’s firmness.
- ¼ teaspoon salt — balances sweetness and enhances flavor.
- ¼ cup white chocolate chips — small pockets of creamy sweetness throughout the bars.
- Zest of 1 large lime — bright, aromatic lift to counter the richness.
- ⅓ cup honey — liquid sweetener and adhesive for the mixture.
- 1 tablespoon coconut oil — melts into the honey to help bind and add richness.
- 1 large egg white — adds structure and helps the bars set while baking.
Cooking (Quinoa Homemade Protein Bars With White Chocolate): The Process
- Preheat oven to 350°F. Line an 8 x 8-inch baking dish with parchment paper and lightly spray the parchment with nonstick cooking spray.
- Spread the finely chopped macadamia nuts and uncooked quinoa in a single layer on a baking sheet. Bake until the quinoa is light golden, about 9 minutes.
- Add the unsweetened coconut flakes to the same baking sheet and bake an additional 2–3 minutes, watching carefully so the coconut does not burn. Remove the baking sheet and let the toasted mixture cool slightly.
- Drain and rinse the ⅔ cup chickpeas (128 grams). Pat them dry with paper towels to remove excess moisture.
- Gently press each chickpea between your fingers to slip off and discard the skins, then place the skinned chickpeas into a large bowl.
- Using a fork, mash the chickpeas in the bowl until as smooth as you can get them.
- Add the toasted macadamia/quinoa/coconut mixture, the finely chopped dried pineapple, ¼ cup vanilla whey protein powder, ¼ teaspoon salt, ¼ cup white chocolate chips, and the zest of 1 large lime to the mashed chickpeas. Stir until evenly combined (using your hands to press and mix can help).
- In a medium microwave-safe bowl, combine ⅓ cup honey and 1 tablespoon coconut oil. Microwave until the oil and honey are melted and bubbly, about 1 minute, then stir to combine.
- Stir the warmed honey–coconut oil mixture and 1 large egg white into the chickpea–quinoa mixture until well combined.
- Transfer the mixture to the prepared 8 x 8-inch pan and press it firmly and evenly into the pan.
- Reduce the oven temperature to 300°F and bake the bars for 40–45 minutes, until the top is golden brown and feels firm to the touch.
- Let the bars cool completely in the pan on a wire rack before removing the parchment and slicing into bars.
Why This Recipe Works
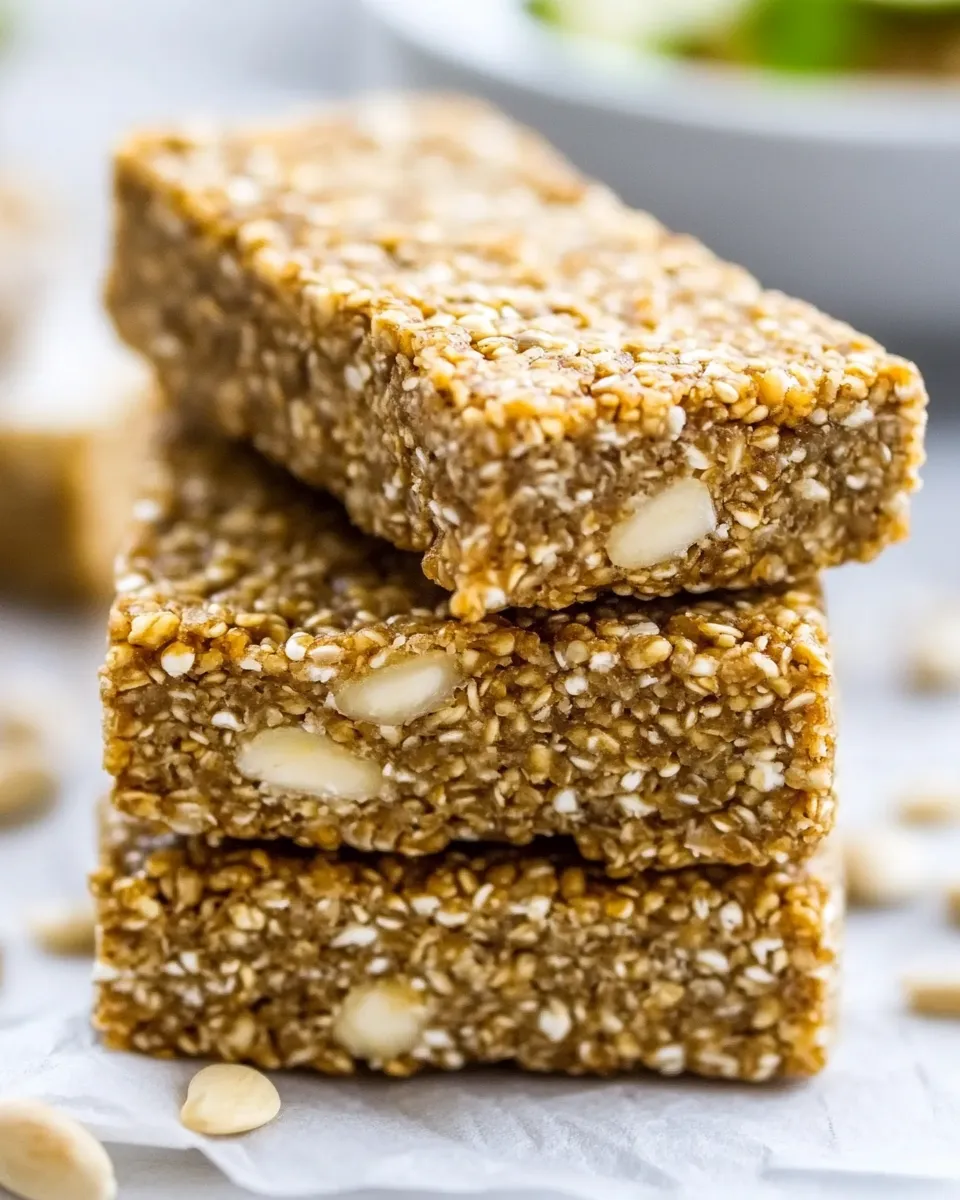
The recipe balances moisture, binder, and crisp elements so the bars hold their shape without being dry. Chickpeas, once skinned and mashed, act like a neutral-flavored paste that binds the dry ingredients while contributing protein. The egg white firms the mixture during baking, creating a sliceable texture.
Toasted quinoa and macadamia nuts provide contrast. Toasting removes raw flavors and adds crunch; quinoa becomes light and crispy, while macadamias bring a buttery note. Honey and coconut oil melt together and distribute evenly, helping the bars set as they bake. White chocolate chips add small, controlled bursts of sweetness so the bar never feels cloying.
Ingredient Flex Options
If you need to adjust based on what’s in your pantry, keep options simple and direct:
- Omit the white chocolate chips or reduce to 2 tablespoons if you prefer less sweetness.
- If you’d like a different texture, change the ratio of nuts to quinoa—more nuts equals more richness; more quinoa equals more crispness.
- Reduce honey slightly if you want a less sweet bar; remember the dried pineapple also contributes sweetness.
- Use a neutral or vanilla protein powder you already have; the recipe is forgiving about the exact flavor of the powder.
Tools & Equipment Needed
- 8 x 8-inch baking dish (lined with parchment)
- Baking sheet for toasting
- Wire rack for cooling
- Large mixing bowl
- Fork or potato masher for chickpeas
- Measuring cups and spoons
- Microwave-safe bowl (for melting honey and oil)
- Nonstick cooking spray and spatula or the palm of your hand for pressing the mixture
Errors to Dodge
There are a few easy missteps that change the outcome. Drying the chickpeas thoroughly is critical. Excess surface moisture will make the mixture too wet and extend baking time or prevent the bars from setting.
Don’t skip skimming the skins off the chickpeas. The texture improves dramatically when you remove the outer skins before mashing. It’s a little tedious, but it’s worth the extra minute per bean for a smoother binder.
Watch the coconut closely while toasting. Coconut burns faster than nuts or grains; remove the pan as soon as it turns golden. Also press the mixture into the pan firmly—air pockets lead to crumbling bars.
Seasonal Twists
Small seasonal swaps make these bars feel fresh without changing technique. In warm months, prioritize lighter toasted elements and reduce honey slightly to avoid overly sticky bars in hot climates. In cooler months, you can press the bars more firmly and allow a slightly longer cooling time for a firmer set.
Change the dried-fruit component according to availability—choose a dried fruit with similar moisture and chew as the dried pineapple called for. Zest choices can shift the profile too; lime is bright, but other citrus zests will also work if you prefer a different aromatic top note.
Insider Tips
- Toast the quinoa and nuts on a single layer so they brown evenly; crowding the pan causes steaming, not toasting.
- After microwaving the honey and coconut oil, stir well to ensure a uniform temperature. This helps the egg white incorporate with less chance of cooking.
- Use your hands to press the mixture into the pan if the mixture feels too stiff for a spatula—clean, slightly damp hands help compact the bars evenly.
- Let the bars cool fully in the pan. Warm bars are softer and more likely to fall apart when sliced.
- If slices crumble, refrigerate the whole slab for an hour before cutting; cold bars slice much cleaner.
Save It for Later
Store the bars in an airtight container at room temperature for up to 3 days. For longer storage, refrigerate for up to 10 days or freeze individual bars wrapped tightly in parchment and then in a zip-top bag for up to 3 months. Thaw at room temperature or briefly in the microwave.
If you plan to pack these in a lunchbox, place a small piece of parchment between bars to prevent sticking. If the bars are chilled, let them come to near room temperature before eating for the best texture and flavor.
Frequently Asked Questions
Can I use canned chickpeas? Yes. The recipe calls for chickpeas that are drained and rinsed; canned chickpeas are what you should use. Pat them as dry as possible and remove the skins before mashing.
Is the protein powder required? The powder contributes to structure and protein content. You can omit it, but the bars will be softer and less protein-forward.
Can I make these nut-free? If you need to avoid macadamia nuts, adjust with a higher quinoa-to-nut ratio and press the mixture very firmly. Keep in mind this may change final texture and flavor.
Why is the egg white necessary? The egg white helps the bars set and gives a firmer chew after baking. If you avoid eggs, expect a softer result and consider chilling the pan before slicing to firm them up.
Save & Share
If you make these bars, take a photo of the cross-section so the white chocolate pockets and the toasted quinoa show. Save the recipe to your favorites and share it with a friend who needs an easy, protein-rich snack. If you try any small tweaks, note what you changed and how it affected texture—those notes make future batches better.
These bars are a reliable bake when you follow the steps: toast, dry the chickpeas, press firmly, and bake low and slow the second time. They travel well and hold up to being eaten on the go. Happy baking—let me know how yours turn out.
Quinoa Homemade Protein Bars With White Chocolate
Equipment
- 8 x 8-inch baking dish
- Parchment Paper
- Nonstick cooking spray
- Baking Sheet
- Wire Rack
- Microwave-safe Bowl
- Large Bowl
- Fork
- Paper Towels
Ingredients
Ingredients
- 1/4 cupmacadamia nutsfinely chopped
- 3/4 cupquinoauncooked
- 1/4 cupunsweetened coconut flakes
- 2/3 cupreduced-sodium chickpeas128 grams drained and rinsed
- 1/3 cupdried pineapplefinely chopped
- 1/4 cupvanilla whey protein powder
- 1/4 teaspoonsalt
- 1/4 cupwhite chocolate chips
- Zest of 1 large lime
- 1/3 cuphoney
- 1 tablespooncoconut oil
- 1 large egg white
Instructions
Instructions
- Preheat oven to 350°F. Line an 8 x 8-inch baking dish with parchment paper and lightly spray the parchment with nonstick cooking spray.
- Spread the finely chopped macadamia nuts and uncooked quinoa in a single layer on a baking sheet. Bake until the quinoa is light golden, about 9 minutes.
- Add the unsweetened coconut flakes to the same baking sheet and bake an additional 2–3 minutes, watching carefully so the coconut does not burn. Remove the baking sheet and let the toasted mixture cool slightly.
- Drain and rinse the ⅔ cup chickpeas (128 grams). Pat them dry with paper towels to remove excess moisture.
- Gently press each chickpea between your fingers to slip off and discard the skins, then place the skinned chickpeas into a large bowl.
- Using a fork, mash the chickpeas in the bowl until as smooth as you can get them.
- Add the toasted macadamia/quinoa/coconut mixture, the finely chopped dried pineapple, ¼ cup vanilla whey protein powder, ¼ teaspoon salt, ¼ cup white chocolate chips, and the zest of 1 large lime to the mashed chickpeas. Stir until evenly combined (using your hands to press and mix can help).
- In a medium microwave-safe bowl, combine ⅓ cup honey and 1 tablespoon coconut oil. Microwave until the oil and honey are melted and bubbly, about 1 minute, then stir to combine.
- Stir the warmed honey–coconut oil mixture and 1 large egg white into the chickpea–quinoa mixture until well combined.
- Transfer the mixture to the prepared 8 x 8-inch pan and press it firmly and evenly into the pan.
- Reduce the oven temperature to 300°F and bake the bars for 40–45 minutes, until the top is golden brown and feels firm to the touch.
- Let the bars cool completely in the pan on a wire rack before removing the parchment and slicing into bars.