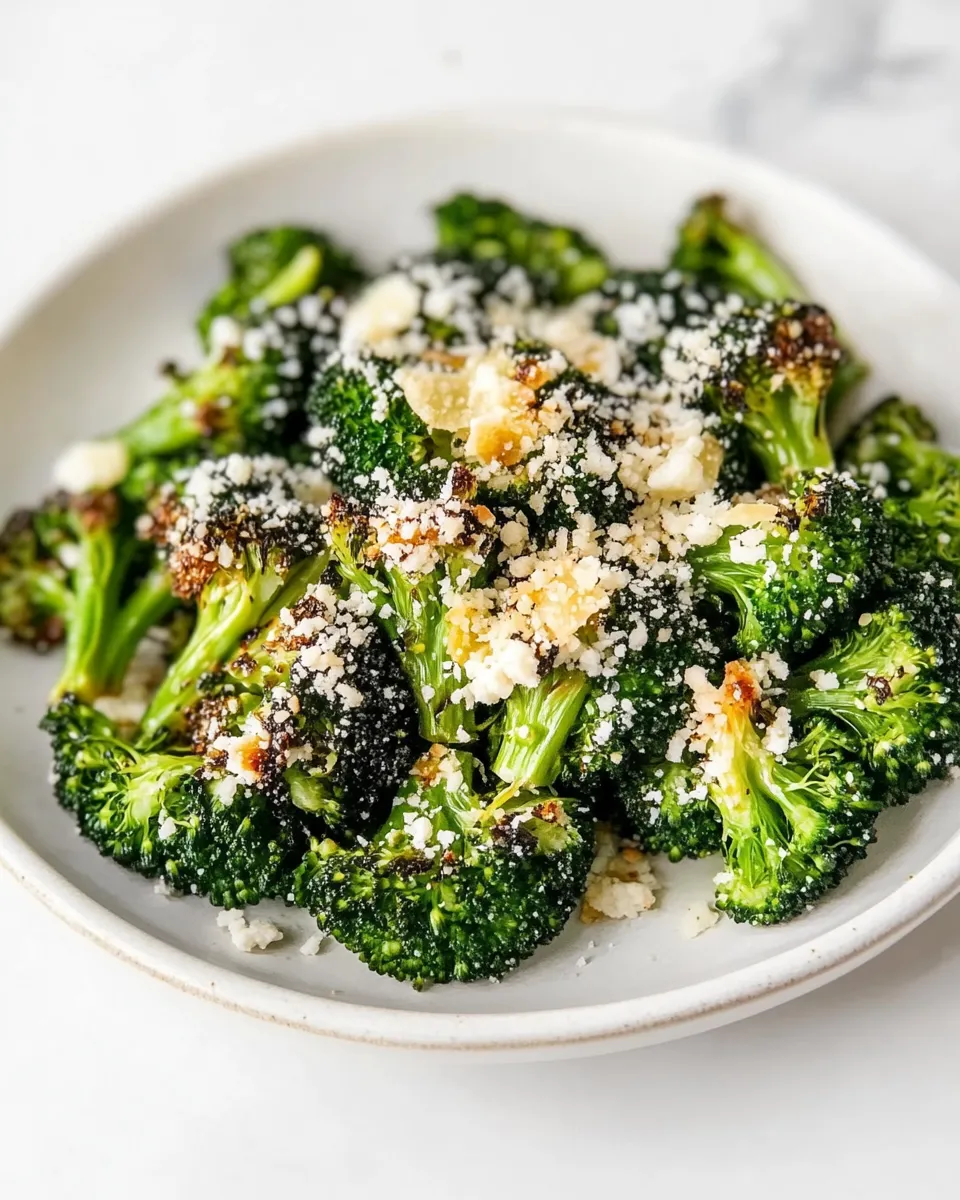
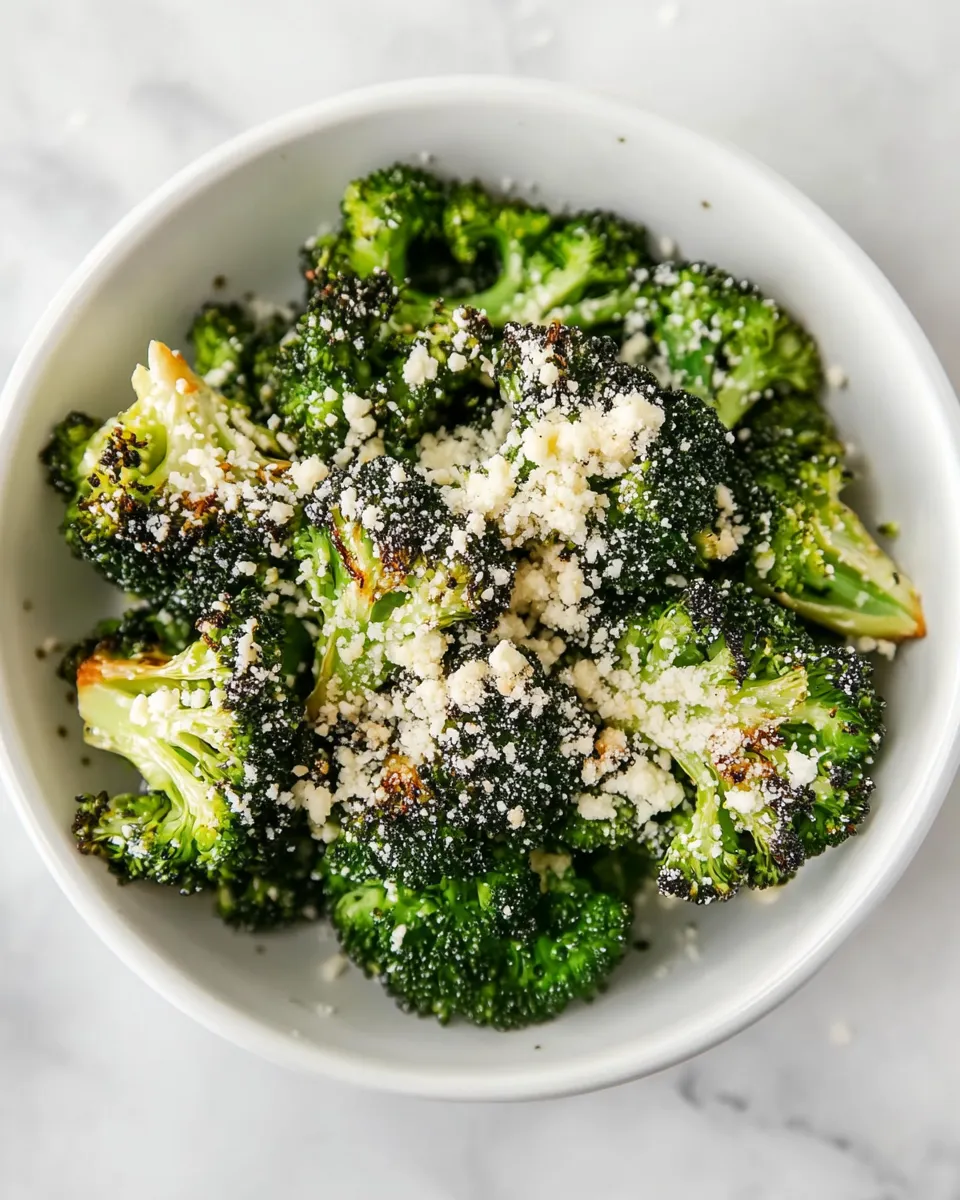
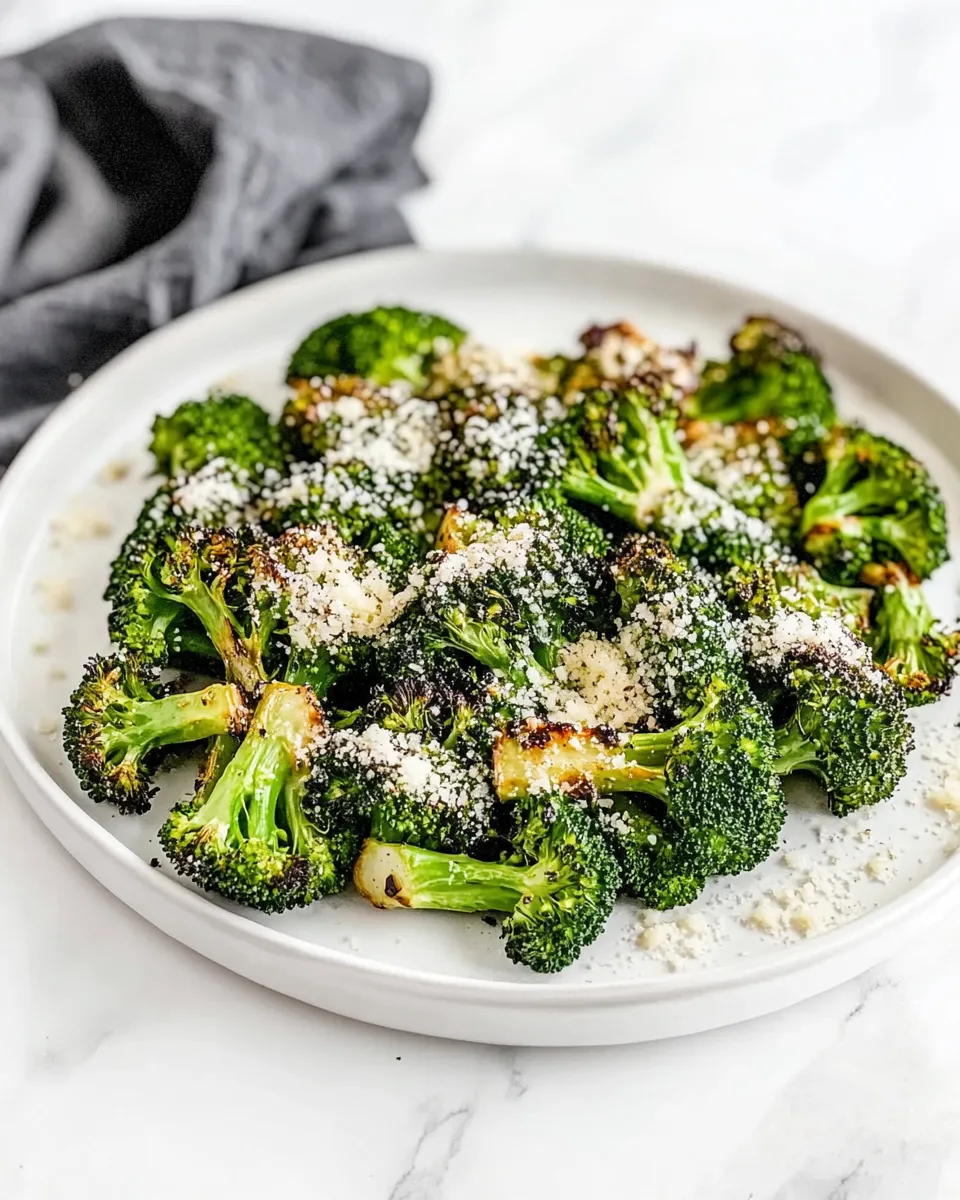
Roasted Broccoli with Asiago is a delightful side dish that transforms simple broccoli into a gourmet experience. With a crispy exterior and a rich, cheesy flavor, this dish is perfect for impressing guests or simply enjoying on a cozy weeknight. The combination of roasted broccoli and melted Asiago cheese creates a savory masterpiece that pairs well with a variety of main courses. Let’s dive into the details of how to make this delicious dish that will have everyone asking for seconds.
Why It Works Every Time
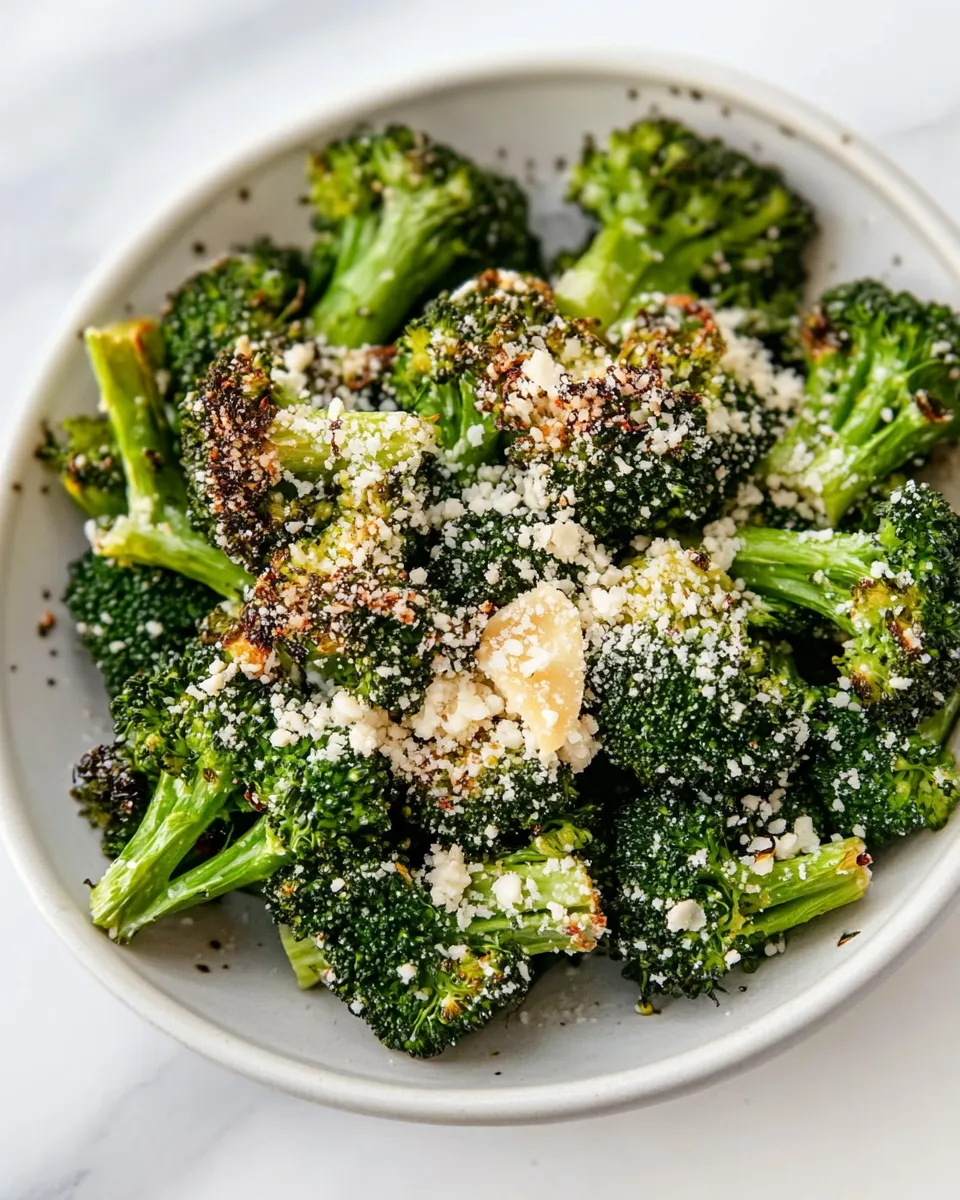
Roasting broccoli brings out its natural sweetness, while the high heat creates a satisfying crunch. The addition of Asiago cheese elevates the dish, adding a nutty and creamy flavor that complements the earthy notes of the broccoli beautifully. This dish is not only simple to prepare, but it also requires minimal ingredients, making it an approachable yet impressive option for any home cook. The easy preparation and the ability to customize it for various dietary preferences make Roasted Broccoli with Asiago a go-to recipe in any kitchen.
Ingredients at a Glance
- 1 pound broccoli, stalks trimmed
- 3 tablespoons olive oil
- 1 cup Asiago cheese, grated
Equipment at a Glance
- Baking Sheet: A large, rimmed baking sheet for roasting the broccoli.
- Mixing Bowl: For tossing the broccoli with olive oil and seasoning.
- Grater: To grate the Asiago cheese easily.
- Oven: Preheated to ensure even roasting.
Roasted Broccoli with Asiago Cooking Guide
Step 1: Preheat the Oven
Begin by preheating your oven to 425°F (220°C). A hot oven is key to achieving that perfect roasted texture and flavor.
Step 2: Prepare the Broccoli
Wash the broccoli thoroughly under cold water and trim the stalks to your desired length. Cut the broccoli into bite-sized florets to ensure even cooking.
Step 3: Toss with Olive Oil
In a mixing bowl, combine the trimmed broccoli with the olive oil. Toss well until the broccoli is evenly coated. This step is vital as it helps the broccoli roast beautifully, enhancing its flavor and texture.
Step 4: Spread on Baking Sheet
Spread the broccoli in a single layer on a baking sheet. Make sure there’s enough space between the florets to allow for proper roasting. Overcrowding the pan can lead to steaming rather than roasting.
Step 5: Roast the Broccoli
Place the baking sheet in the preheated oven and roast for about 20 minutes. Halfway through the cooking time, give the broccoli a good stir to ensure even browning.
Step 6: Add Asiago Cheese
After 20 minutes, remove the baking sheet from the oven. Sprinkle the grated Asiago cheese evenly over the broccoli. Return to the oven and roast for an additional 5-7 minutes, or until the cheese is melted and bubbly.
Step 7: Serve Warm
Once the cheese is perfectly melted and golden, remove the broccoli from the oven. Serve it warm as a delicious side dish to your favorite main course.
Dietary Customizations
- Vegan: Substitute the Asiago cheese with a vegan cheese alternative or nutritional yeast for a cheesy flavor without dairy.
- Gluten-Free: This recipe is naturally gluten-free, ensuring it fits into gluten-free dietary needs.
- Low-Carb: Perfect for a low-carb diet, this dish is packed with nutrients and flavor without the carbs.
- Spicy: For a kick, add crushed red pepper flakes or a drizzle of hot sauce before serving.
Steer Clear of These
When making Roasted Broccoli with Asiago, it’s best to avoid:
- Using frozen broccoli, as it may not roast well and could result in a mushy texture.
- Overcooking the broccoli, as it can become overly soft and lose its vibrant green color.
- Using low-quality olive oil, as it can affect the overall flavor of the dish.
Cooling, Storing & Rewarming
To ensure your Roasted Broccoli with Asiago stays fresh:
- Cooling: Allow the roasted broccoli to cool completely before storing.
- Storing: Place the cooled broccoli in an airtight container and store it in the refrigerator for up to 3 days.
- Rewarming: Reheat in the oven at 350°F (175°C) for about 10 minutes to regain its crispiness, or use a microwave for a quicker option, though it may not be as crispy.
Reader Questions
Can I use other cheeses instead of Asiago?
Absolutely! While Asiago adds a unique flavor, you can substitute it with Parmesan, Pecorino Romano, or even a blend of cheeses to suit your taste preferences.
How can I make this dish more filling?
If you want to turn Roasted Broccoli with Asiago into a main dish, consider adding roasted chickpeas or quinoa for added protein and texture.
Can I prepare this ahead of time?
Yes! You can prepare the broccoli and toss it with olive oil in advance. Store it in the refrigerator and roast it just before serving for the best results.
Is there a way to add more flavor?
Definitely! Consider adding minced garlic, lemon zest, or herbs like thyme or rosemary to the broccoli before roasting for an extra flavor boost.
Save & Share
If you enjoyed this Roasted Broccoli with Asiago recipe, be sure to save it to your favorite recipe board and share it with friends and family! This delicious dish is perfect for gatherings, casual dinners, or even meal prep for the week ahead. Happy cooking!
Roasted Broccoli with Asiago is more than just a side dish; it’s an experience that brings together flavors and textures in a delightful way. With its simplicity and versatility, this recipe is bound to become a staple in your kitchen. Whether you’re serving it alongside a hearty main course or enjoying it on its own as a healthy snack, this roasted broccoli is sure to impress. So gather your ingredients, fire up the oven, and let the aroma of roasted broccoli and melted cheese fill your home. Enjoy every bite!
Roasted Broccoli with Asiago
Equipment
- Baking Sheet
- Mixing Bowl
- Grater
- Oven
Ingredients
- 1 pound broccoli stalks trimmed
- 3 tablespoons olive oil
- 1 cup Asiago cheese grated
Instructions
- Begin by preheating your oven to 425°F (220°C). A hot oven is key to achieving that perfect roasted texture and flavor.
- Wash the broccoli thoroughly under cold water and trim the stalks to your desired length. Cut the broccoli into bite-sized florets to ensure even cooking.
- In a mixing bowl, combine the trimmed broccoli with the olive oil. Toss well until the broccoli is evenly coated. This step is vital as it helps the broccoli roast beautifully, enhancing its flavor and texture.
- Spread the broccoli in a single layer on a baking sheet. Make sure there’s enough space between the florets to allow for proper roasting. Overcrowding the pan can lead to steaming rather than roasting.
- Place the baking sheet in the preheated oven and roast for about 20 minutes. Halfway through the cooking time, give the broccoli a good stir to ensure even browning.
- After 20 minutes, remove the baking sheet from the oven. Sprinkle the grated Asiago cheese evenly over the broccoli. Return to the oven and roast for an additional 5-7 minutes, or until the cheese is melted and bubbly.
- Once the cheese is perfectly melted and golden, remove the broccoli from the oven. Serve it warm as a delicious side dish to your favorite main course.
Notes
- Use fresh broccoli instead of frozen for the best roasting results and texture.
- Store leftovers in an airtight container in the refrigerator for up to 3 days and reheat in the oven to maintain crispiness.
- Customize flavor by adding minced garlic, lemon zest, or herbs like thyme before roasting.