These Taco Biscuit Cups are the kind of recipe I turn to when I want something satisfying, fast, and crowd-pleasing. They take familiar taco flavors, tuck them into a buttery biscuit shell, and bake into neat handheld cups that are perfect for weeknight dinners, potlucks, or an easy game-night snack. They feel indulgent without being fussy, and they come together with pantry-friendly items.
I love how straightforward the technique is: brown the meat, thicken it with a little salsa and taco seasoning, stir in some cheese, and bake it all in biscuit cups. The results are crispy on the edges, tender inside, and ideal for customizing — swap add-ins or toppings, serve with sour cream or hot sauce, or make a double batch for a party.
Below you’ll find everything you need: clear ingredient notes, the exact step-by-step process, troubleshooting tips, equipment notes, and ways to adapt the recipe for different diets. Read through once, then roll up your sleeves and make a pan of these — they disappear fast.
The Essentials
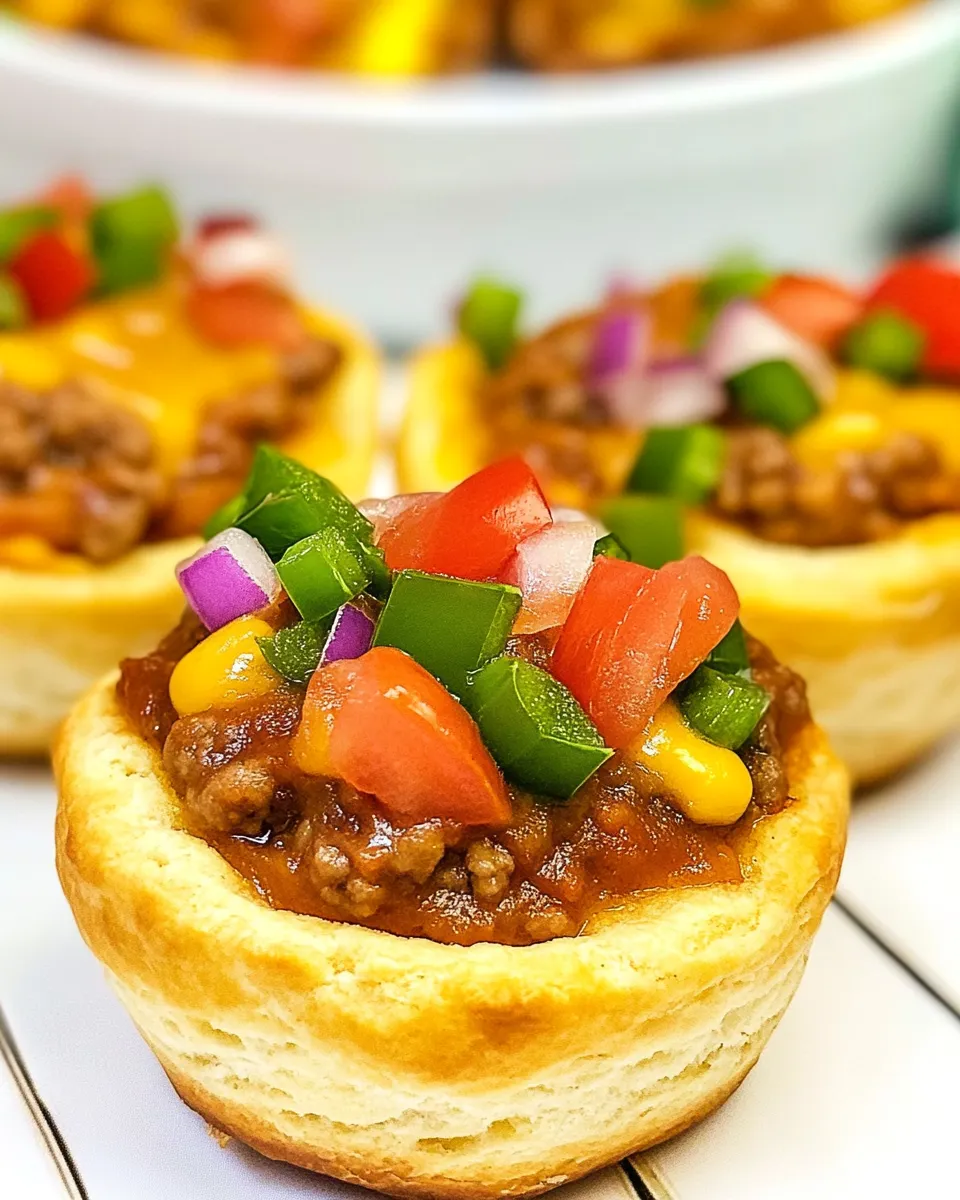
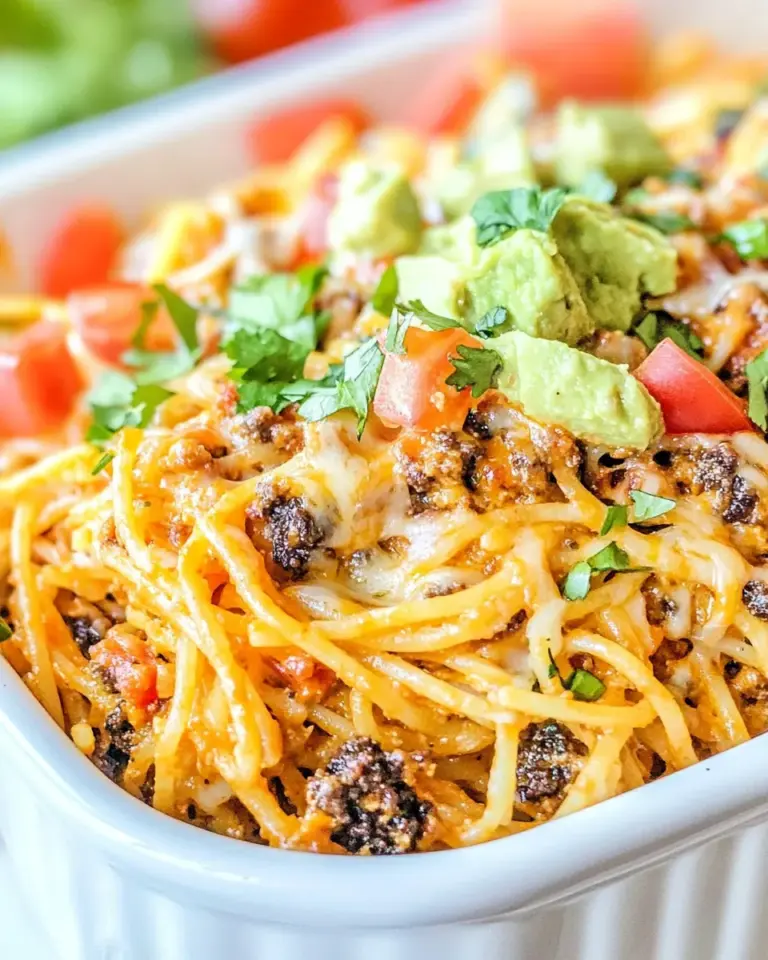
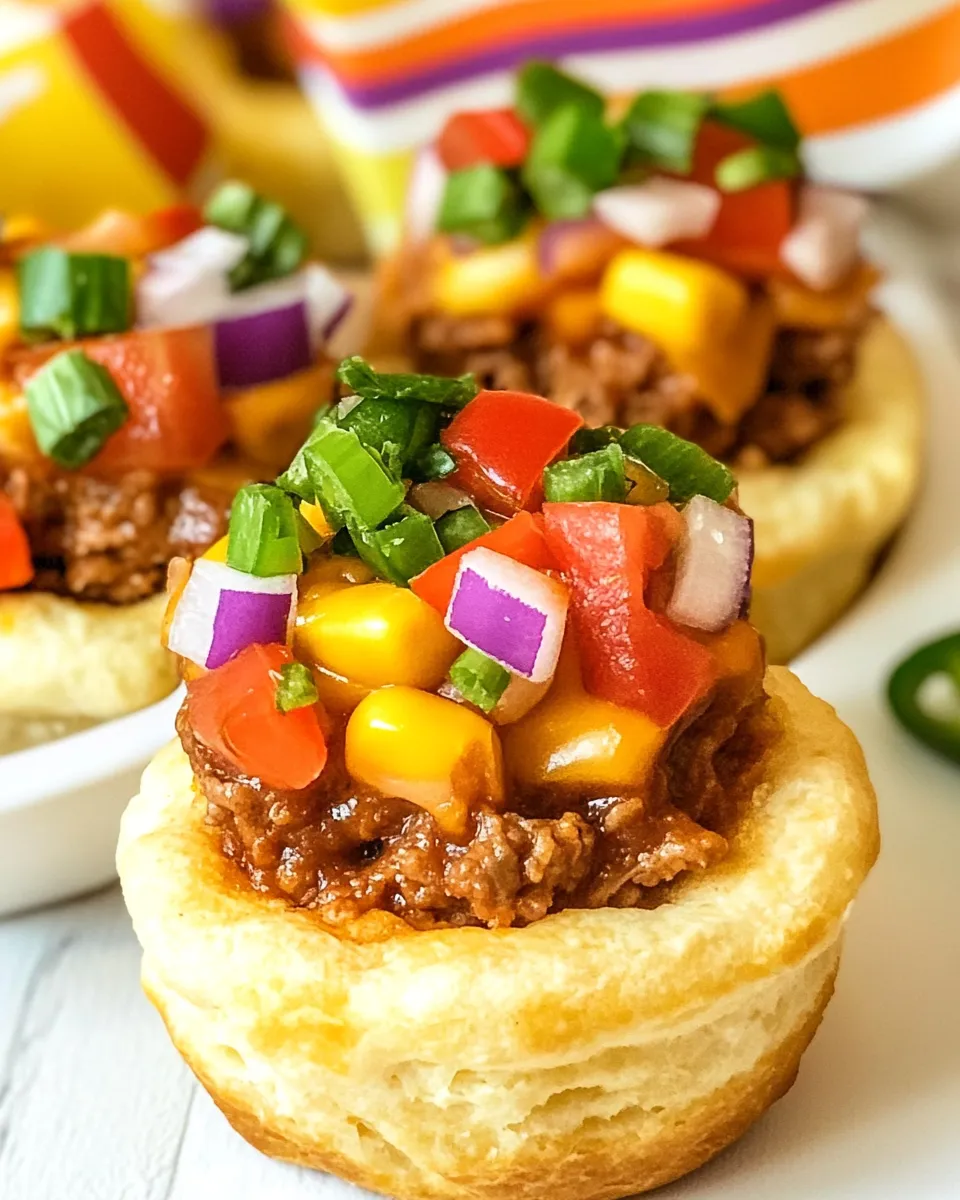
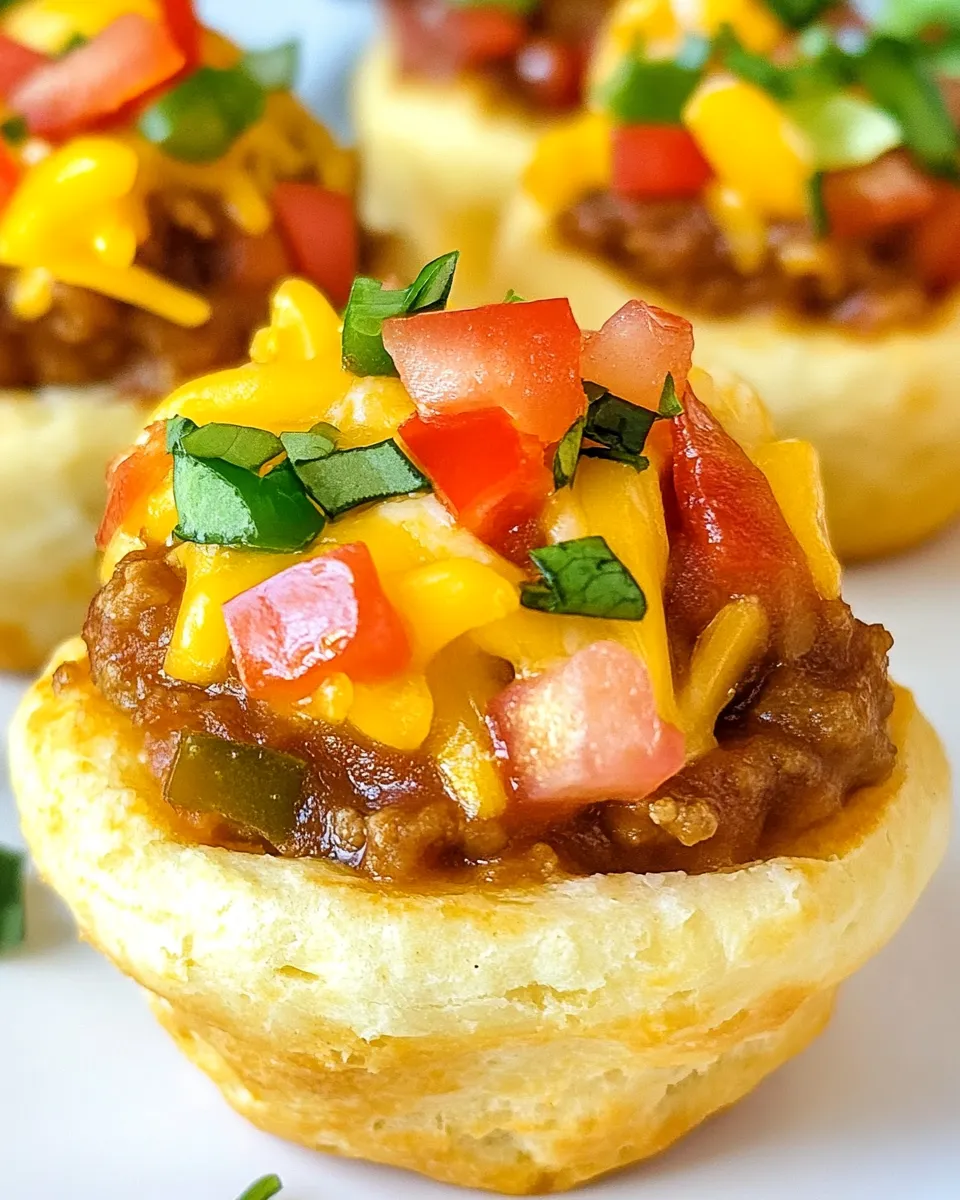
What they are: Individual biscuit cups filled with seasoned ground beef and melted cheddar. They come together quickly and bake into portable, golden pockets of taco flavor.
Yield and timing: This recipe makes 10 biscuit cups (the recipe uses 10 biscuits). Hands-on time is short — about 15 minutes to prep — with 17–20 minutes baking time. Total time depends on how quickly you brown the beef, but plan on roughly 35–45 minutes end to end.
Why you’ll love them: They’re efficient (one muffin tin, no plate juggling), flexible (toppings and fillings adapt easily), and great for feeding a small group or packing for leftovers. The biscuit cups give crisp edges and a soft base that holds the meat mixture without getting soggy if you drain the grease and simmer the filling properly.
Ingredients
- 1 lb lean ground beef — the base of the filling; lean helps reduce excess grease so the biscuit cups don’t get soggy.
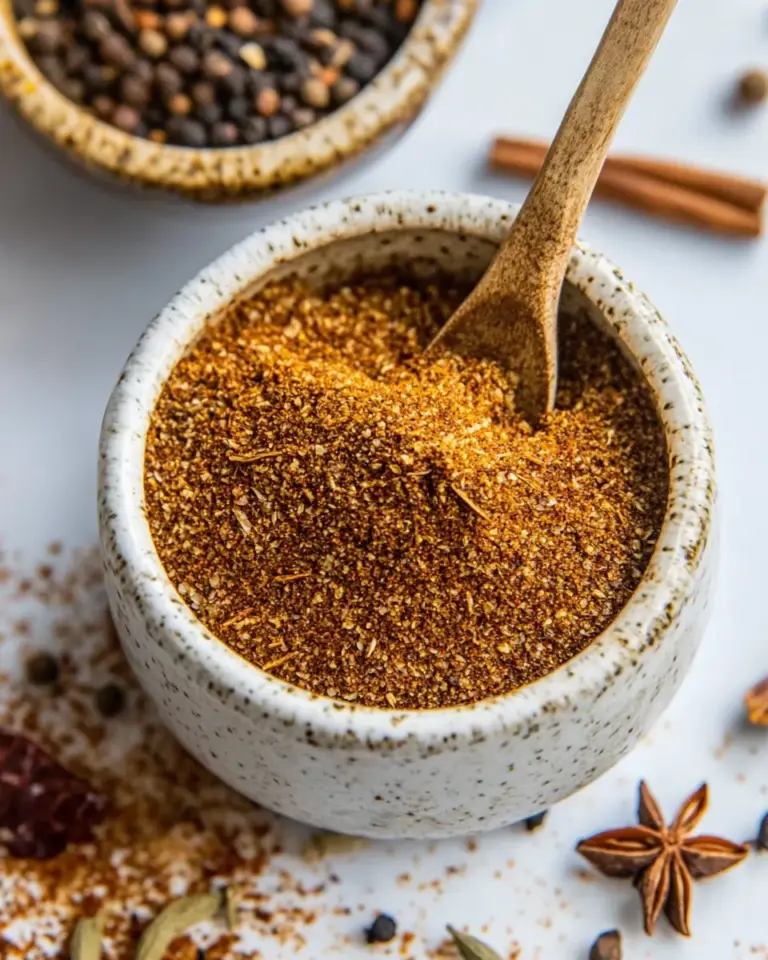
- 1 (1-oz) package taco seasoning — provides the classic taco spice blend; use a mild or hot packet depending on your family’s heat preference.
- ½ cup salsa — adds moisture and bright tomato flavor; it also helps create a saucy coating for the meat as it simmers.
- 3 Tbsp water — thins the seasoning and salsa so they combine evenly with the beef while simmering.
- 1 cup shredded cheddar cheese, divided — half the cheese gets stirred into the warm meat to bind and add creaminess; the other half melts on top for a golden finish.
- 2 (6-oz) cans refrigerated biscuits (10 biscuits total) — form the cups; use the refrigerated variety called for so they bake into soft, slightly flaky shells.
Cooking (Taco Biscuit Cups): The Process
- Preheat oven to 350°F. Spray a regular muffin pan with nonstick cooking spray.
- In a large skillet over medium-high heat, cook 1 lb lean ground beef, breaking it up, until no longer pink. Drain excess grease.
- Return the skillet to medium-low heat and add 1 (1-oz) package taco seasoning, 1/2 cup salsa, and 3 Tbsp water. Stir to combine.
- Simmer the mixture over low heat, stirring occasionally, about 10 minutes, until the sauce has thickened.
- Remove the skillet from the heat and stir in 1/2 cup shredded cheddar cheese (half of the 1 cup) until combined. Set the meat mixture aside.
- Open both cans of refrigerated biscuits and separate the dough into 10 biscuits. On a clean work surface or piece of parchment, use a rolling pin to roll each biscuit into a larger circle.
- Firmly press each rolled biscuit into the bottom and up the sides of 10 wells in the prepared muffin pan.
- Spoon the meat mixture evenly into each biscuit cup.
- Sprinkle the remaining 1/2 cup shredded cheddar cheese evenly over the filled cups.
- Bake in the preheated oven for 17 to 20 minutes, until the biscuits are golden brown.
- Allow the cups to cool in the pan for a few minutes, then remove and serve warm.
Why It Works Every Time
The method focuses on two simple principles: control excess moisture and build structure. Browning the beef and draining the grease removes fat that would otherwise make the biscuit cups soggy. Simmering the seasoned meat with salsa and a little water allows flavors to meld while reducing and thickening the sauce, so the filling is saucy but not runny.
The biscuit dough is rolled thin and pressed into the muffin wells, which creates crisp, sturdy edges while leaving the base soft. That contrast — crunchy ridge, tender bottom — makes each cup satisfying and prevents the filling from spilling out. Finally, stirring half the cheese into the meat gives the filling a creamier texture that stays together, and topping with the rest melts into a glossy, flavorful crust.
Quick Replacement Ideas
- Ground beef: Substitute ground turkey or lean ground chicken for a lighter flavor. Brown and drain them the same way.
- Taco seasoning: Use a homemade blend if you have one on hand, or reduce the packet to half for a milder flavor.
- Salsa: Swap for canned diced tomatoes with green chilies (drained) for a fresher acidity, or use a jarred salsa verde for a different flavor profile.
- Cheddar cheese: Try Monterey Jack or a Mexican-blend cheese for different melt and flavor characteristics.
- Biscuits: If you want a flakier edge, use a flaky canned biscuit variety; for a sturdier cup, roll the dough a little thinner before pressing into the tin.
Equipment Breakdown
- Large skillet — for browning the ground beef and simmering the filling. A wide skillet helps evaporate liquid faster.
- Muffin pan (regular size) — the shape creates the cup structure. Nonstick or well-sprayed pans work best for easy removal.
- Rolling pin — flattens the biscuits into circles that will line the wells evenly.
- Measuring spoons and cups — keep the seasoning-to-liquid ratio consistent so the filling isn’t too wet.
- Spoon or small scoop — to portion the meat mixture evenly into each cup.
- Oven — set to 350°F as specified for even baking and browning.
Mistakes That Ruin Taco Biscuit Cups
- Skipping grease drainage — not draining excess fat from the browned beef makes the biscuit bottoms soggy. Always drain and return to the pan before adding liquids.
- Not simmering long enough — if you don’t simmer the salsa, seasoning, and water until thickened, the filling will be too watery and the biscuits won’t crisp properly.
- Overfilling the cups — mounding too much meat into each biscuit can cause spillover and uneven baking. Spoon the filling evenly and leave a little room for the cheese on top.
- Not rolling the biscuits thinly — biscuits that are too thick won’t form tight cups and can bake unevenly. Roll to a larger circle so they press up the sides of the wells.
- Opening the oven early — poking or checking before 17 minutes can let heat escape and affect final texture. Wait until the lower end of the bake time before checking for doneness.
Dietary Customizations
Make these Taco Biscuit Cups work for different needs without changing the core technique.
- Vegetarian option: Replace the ground beef with cooked lentils or a mixture of black beans and corn. Sauté onions and bell peppers first for texture, then fold in the seasoned beans. If using beans, drain them well and simmer briefly so the filling isn’t too watery.
- Lower-carb approach: Use a low-carb biscuit or a biscuit alternative if you have one available, but keep in mind texture will change. You can also make the meat mixture and serve it piled into lettuce cups for a grain-free option.
- Dairy-free: Omit the cheddar or use a dairy-free shredded cheese. Stir a little mashed avocado into the cooked meat off heat for creaminess instead of cheese.
- Gluten-free: Swap for a gluten-free biscuit dough designed for baking. Press carefully; gluten-free doughs can be more fragile, so roll gently and handle minimally.
Behind the Recipe
I adapted this idea from whenever I want taco night with less fuss. Instead of tortillas and a dozen bowls of toppings, I started tucking the spiced meat into biscuit cups one evening to keep things simple for a hungry crew. It was a hit the first time: every single cup was gone in minutes. Since then, I’ve made small refinements — draining the meat, simmering a little longer, and stirring cheese into the hot filling — that make the cups hold together better.
There’s comfort here: easily available ingredients, assembly-line prep, and the ability to double up when guests stop by. It’s a recipe that rewards small attention (like rolling the biscuits evenly) but doesn’t demand perfection.
Prep Ahead & Store
Make-ahead tips
- Meat filling: You can cook the meat mixture fully through step 5, cool it, and refrigerate for up to 3 days. Reheat on the stovetop before filling the biscuit cups so the cheese melts smoothly and the filling warms through.
- Assembly: Roll the biscuits and press them into the muffin tin up to several hours before baking. Keep the pan loosely covered in the fridge and bring to room temperature for 10–15 minutes before baking if chilled.
Storage and reheating
- Refrigerate: Store baked Taco Biscuit Cups in an airtight container for up to 3 days. Reheat in a 350°F oven for 8–12 minutes to revive crisp edges, or microwave individual cups for 30–45 seconds for a quicker option (edges won’t be as crisp).
- Freeze: Freeze fully cooled cups on a baking sheet until solid, then transfer to a freezer bag for up to 2 months. Reheat from frozen in a 350°F oven for 20–25 minutes, or until heated through.
Reader Q&A
- Can I use store-bought rotisserie chicken instead of ground beef? Yes—shred the chicken, heat briefly with the taco seasoning, salsa, and water, then stir in cheese. Make sure any chicken you use is not too moist; drain or pat it dry if needed.
- What if my biscuit cans have a different number of biscuits? This recipe expects 10 biscuits total. If your cans contain more or fewer, adjust quantity or save extra dough to bake separately; overstuffing wells changes bake time and texture.
- Can I make these spicier? Absolutely. Use a hot taco seasoning, spicy salsa, or add a diced jalapeño to the cooked meat for extra heat. Taste and adjust carefully — a little goes a long way.
- How do I keep the bottoms from getting too soft? Drain the cooked beef well and simmer until the sauce reduces and thickens. Press biscuits firmly into the muffin wells to create a good crust and avoid underbaking.
Time to Try It
These Taco Biscuit Cups are simple to assemble, forgiving to customize, and crowd-pleasing in every setting. Follow the steps as written, pay attention to draining the beef and simmering the filling, and you’ll have a golden pan of cups ready in under an hour. Make a double batch for parties, or keep it small for an easy family dinner.
Ready to bake? Preheat that oven, brown the beef, and line your muffin tin — you’ll be pulling warm, cheesy cups from the oven before you know it. If you try them, leave a note about your favorite swap or topping — I love hearing how readers make a recipe their own.

Taco Biscuit Cups
Equipment
- 12-inch Non-Stick Skillet
- Rolling Pin
- Muffin pan
- Rotary Cheese Grater
Ingredients
Ingredients
- 1 lblean ground beef
- 1 1-ozpackage taco seasoning
- 1/2 cupsalsa
- 3 Tbspwater
- 1 cupshredded cheddar cheese divided
- 2 6-ozcans refrigerated biscuits, (10 biscuits total)
Instructions
Instructions
- Preheat oven to 350°F. Spray a regular muffin pan with nonstick cooking spray.
- In a large skillet over medium-high heat, cook 1 lb lean ground beef, breaking it up, until no longer pink. Drain excess grease.
- Return the skillet to medium-low heat and add 1 (1-oz) package taco seasoning, 1/2 cup salsa, and 3 Tbsp water. Stir to combine.
- Simmer the mixture over low heat, stirring occasionally, about 10 minutes, until the sauce has thickened.
- Remove the skillet from the heat and stir in 1/2 cup shredded cheddar cheese (half of the 1 cup) until combined. Set the meat mixture aside.
- Open both cans of refrigerated biscuits and separate the dough into 10 biscuits. On a clean work surface or piece of parchment, use a rolling pin to roll each biscuit into a larger circle.
- Firmly press each rolled biscuit into the bottom and up the sides of 10 wells in the prepared muffin pan.
- Spoon the meat mixture evenly into each biscuit cup.
- Sprinkle the remaining 1/2 cup shredded cheddar cheese evenly over the filled cups.
- Bake in the preheated oven for 17 to 20 minutes, until the biscuits are golden brown.
- Allow the cups to cool in the pan for a few minutes, then remove and serve warm.
Notes
Look for one 10-count (12-oz) can or two 5-count (6-oz) cans.
Look for one 10-count (12-oz) can or two 5-count (6-oz) cans.
Can use any variety: flaky biscuits or buttermilk biscuits work fine.
Can use any variety: flaky biscuits or buttermilk biscuits work fine.
Can substitute ground turkey for lower calories.
Here is our recipe for Homemade Taco Seasoning made with chili powder, garlic powder, onion powder, red pepper flakes, oregano, paprika, cumin, salt, and pepper:https://www.plainchicken.com/homemade-taco-seasoning/
Variations/Additions:onionsbell pepperblack oliveshot saucediced tomatoes
onions
bell pepper
black olives
hot sauce
diced tomatoes
Can Taco Biscuits be made in advance?Yes! You can assemble the biscuit cups ahead of time and refrigerate until you are ready to bake.
Can Taco be frozen?Yes! Bake the biscuits and cool completely. Transfer the biscuits to a freezer bag and store in the freezer for up to 3 months.
Storeleftoversin anairtight containerin the refrigerator.Reheat in the microwave.
Reheat in the microwave.