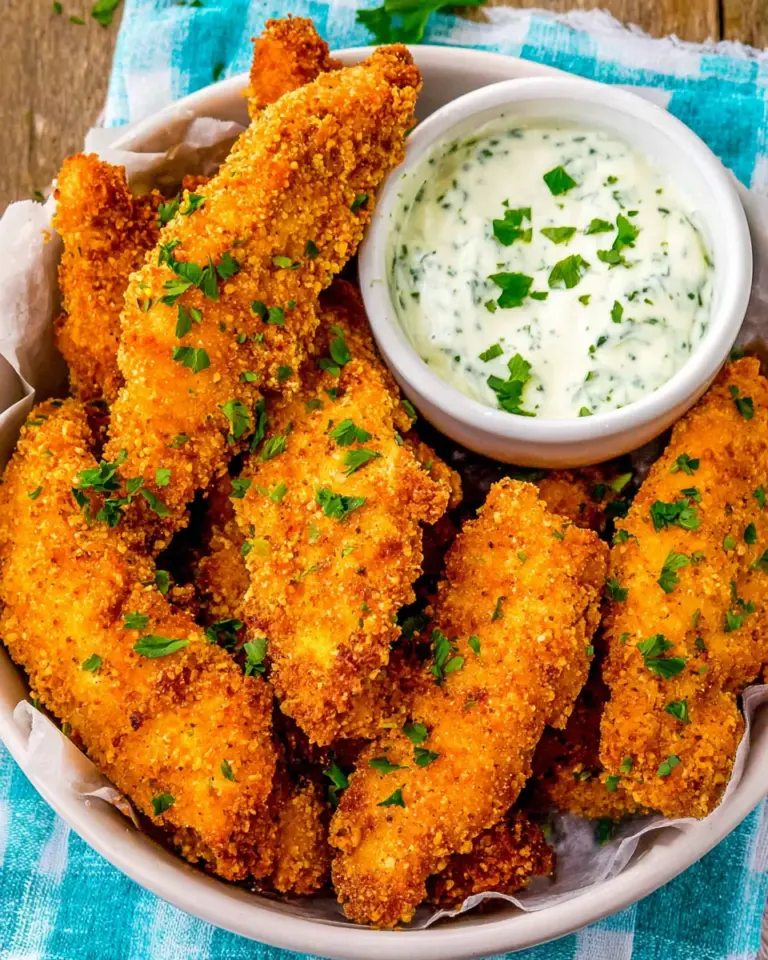
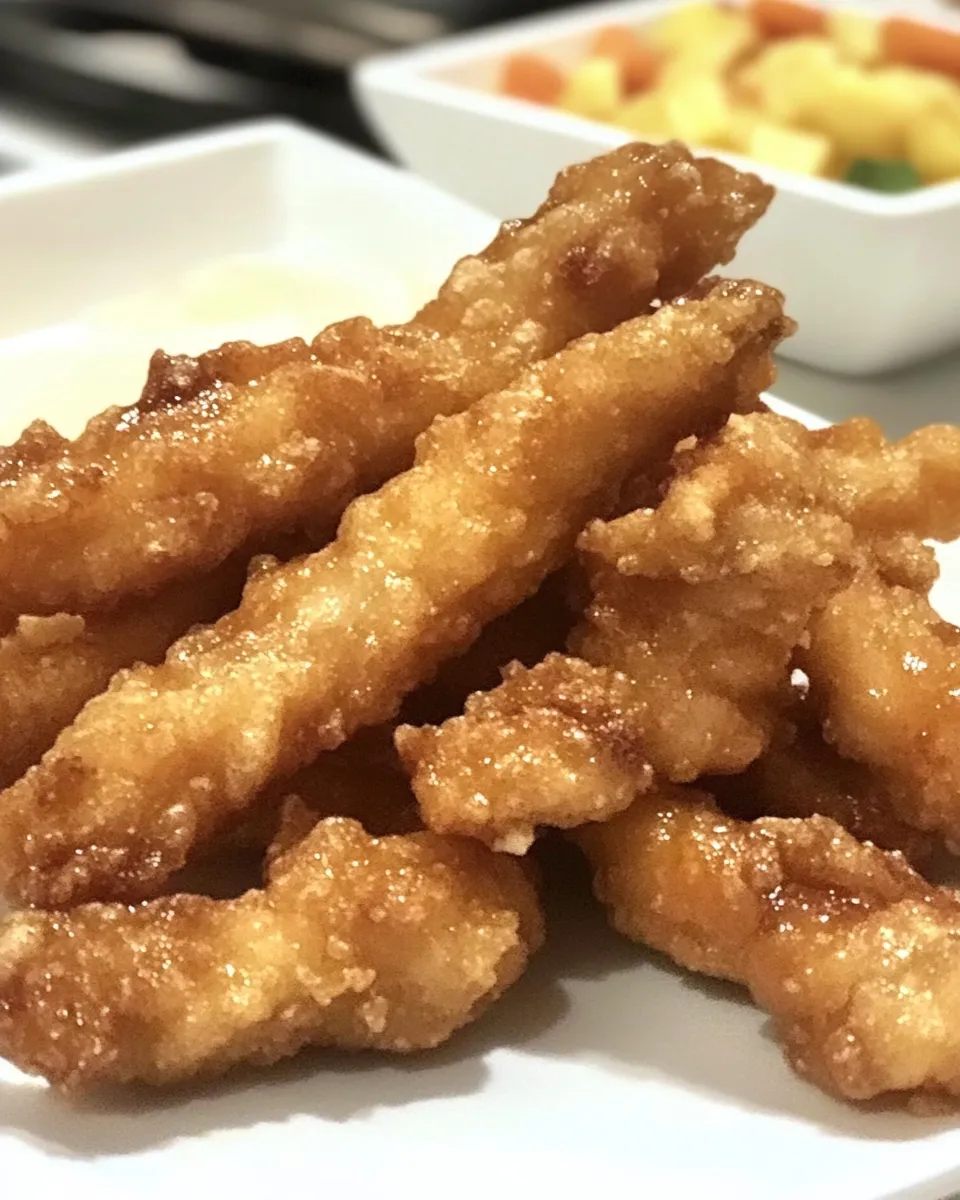
I make these tempura chicken fingers at least once a month. They’re shockingly simple but feel special every time — light, crisp batter hugging tender chicken. If you want something that passes for casual party fare yet still impresses, this is it.
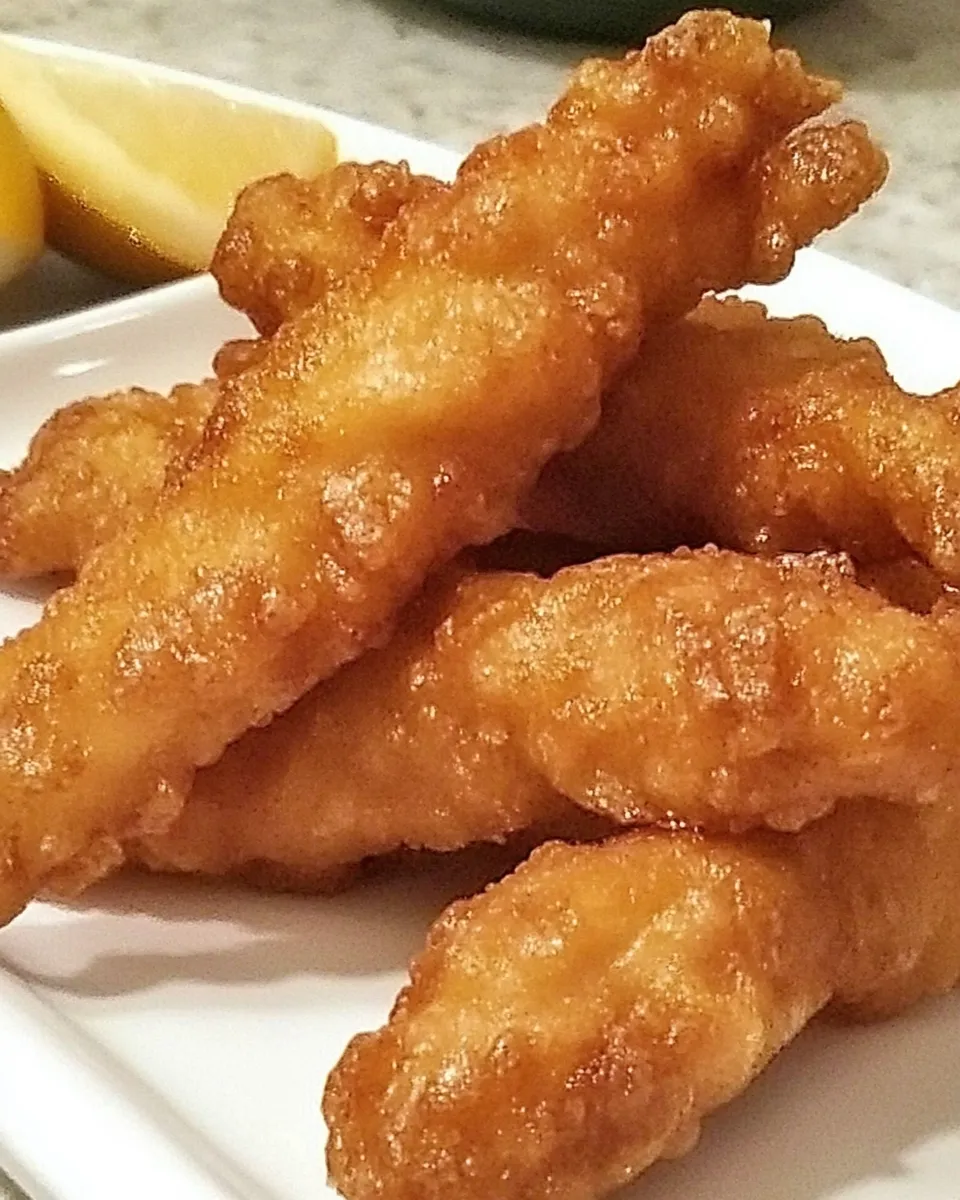
This recipe leans on the classic tempura idea: a thin, fizzing batter that fries up paper-thin and golden. No egg, no complicated battering technique, and the vinegar+baking soda combo gives instant lift. You’ll get a delicate crunch without a heavy coating.
Read on for the exact ingredient list, step-by-step fry method, sensible gear notes, common slip-ups and quick seasonal serving ideas. I keep the directions tight and practical so you can get frying with confidence.
Ingredient Checklist
Ingredients
- 2 cups all-purpose flour — the base for the batter; measure loosely for a lighter finish.
- 1½ tsp salt — seasons the batter so the chicken tastes balanced straight from the fryer.
- 2 cups water — cold water helps the batter stay light; don’t substitute warm water.
- 3 Tbsp Vinegar — reacts with baking soda to add lift and subtle tang to the batter.
- 1½ tsp baking soda — creates the foam that makes the batter airy; add it just before frying.
- 1 to 2 lb chicken tenders — use fresh tenders or trim strips from chicken breasts; size determines batch count.
Tempura Chicken Fingers in Steps
- Pat the chicken tenders dry with paper towels and set aside.
- In a large bowl, whisk together 2 cups all-purpose flour and 1½ teaspoons salt.
- In a separate bowl or large measuring cup, stir 2 cups water and 3 tablespoons vinegar until combined.
- Sprinkle 1½ teaspoons baking soda into the water–vinegar mixture (it will foam). Immediately pour the foaming mixture into the flour mixture.
- Gently stir the batter until just combined — small lumps are fine. The batter should be thin enough to coat the tenders; do not overmix.
- Pour oil to a depth of 2 inches into a large Dutch oven or deep skillet and heat to 350°F (use a thermometer).
- Working in small batches, dip each chicken tender into the batter, letting excess drip back into the bowl.
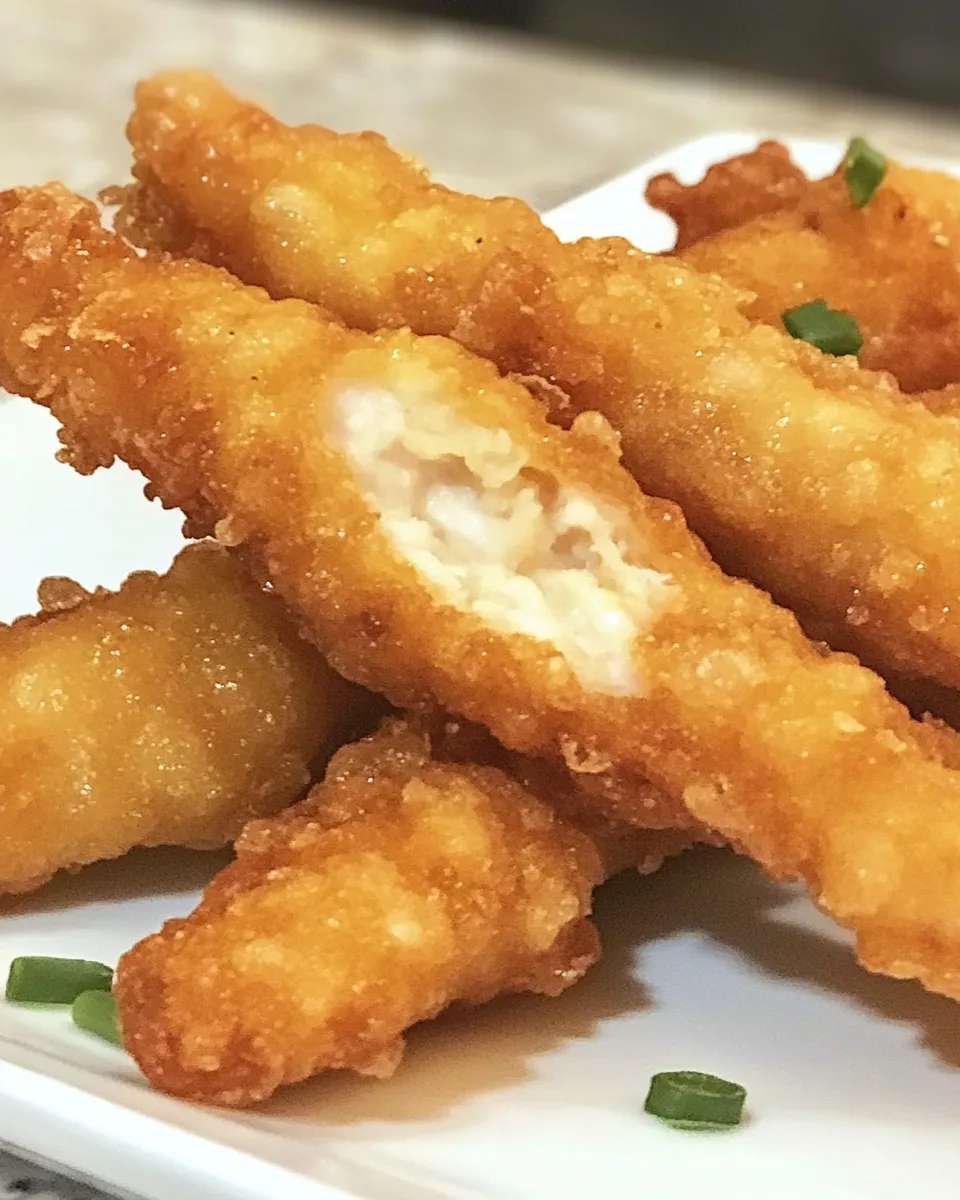
- Carefully add battered tenders to the hot oil without overcrowding. Fry each batch about 4–6 minutes (about 5 minutes) until golden and the chicken is cooked through.
- Transfer fried tenders to a paper towel–lined plate to drain and rest briefly.
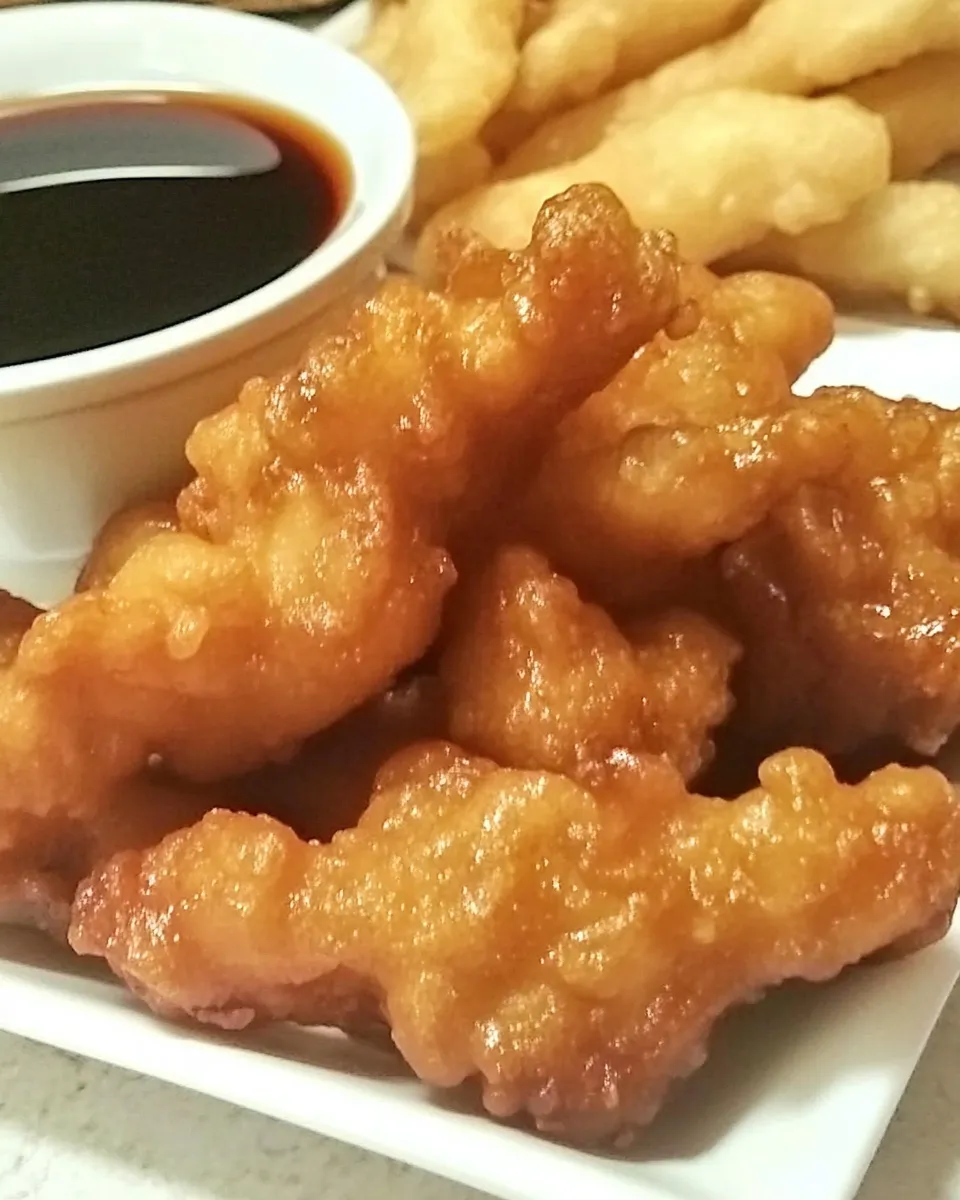
- Serve the tempura chicken fingers hot with your favorite dipping sauces.
Why It Deserves a Spot
These tempura chicken fingers win on texture and speed. The batter is featherweight, so you taste the chicken rather than a heavy crust. They crisp quickly — about five minutes per batch — so you don’t spend the evening over a pot of oil. For kids, date nights, or weekday dinners where you want special without fuss, this recipe reliably delivers.
They’re also remarkably forgiving. The batter mixes in seconds and tolerates slight temperature swings. The acid-plus-baking-soda trick gives a consistent lift, so you don’t need fancy flours or special equipment to get that signature lightness.
Budget & Availability Swaps
Chicken tenders can be pricier than trimmed breast pieces. If you’re stretching a budget, slice boneless, skinless chicken breasts into 1/2- to 3/4-inch strips and use the same method — the cook time may increase slightly for thicker pieces.
If you don’t have white vinegar on hand, most mild vinegars (like rice vinegar) will work; avoid highly flavored ones (e.g., apple cider with strong notes) to keep the batter neutral. All-purpose flour is fine here; you don’t need tempura flour. The key is the ratio and the fizz from the baking soda.
What You’ll Need (Gear)
- Large mixing bowls — one for dry, one for wet; you’ll combine them briefly and work quickly.
- Deep skillet or Dutch oven — choose something heavy-bottomed to hold temperature (2-inch oil depth required).
- Cooking thermometer — essential. Oil at 350°F is what keeps the batter crisp and prevents greasy chicken.
- Tongs or slotted spoon — for safely adding and removing tenders from hot oil.
- Paper towels and a tray — to rest and drain the fried tenders so they stay crisp.
Slip-Ups to Skip
Temperature mistakes
Too-cold oil soaks up batter and yields greasy tenders. Too-hot oil browns the outside before the chicken cooks through. Use a reliable thermometer and wait until the oil reads 350°F. Between batches the oil will drop slightly; allow it to return to temperature before adding more.
Overmixing the batter
Stir until just combined. Overmixing activates gluten and makes the coating heavy. Small lumps are fine — they help texture. The batter should be thin enough to drip but cling lightly.
Overcrowding the pan
Each tender needs space to float and fry. Crowding lowers oil temperature and causes uneven cooking. Fry in small batches and keep finished pieces on a paper towel-lined plate in a single layer.
Spring–Summer–Fall–Winter Ideas
Spring: Lightly dressed slaw. Use a quick lemon-mint slaw to cut through the fried richness — bright and herb-forward.
Summer: Serve with cold dipping sauces. Think cucumber-yogurt dip or a citrus-mayo for a picnic-friendly plate that stays cool.
Fall: Roast a root-vegetable hash on the side. The sweeter roasted vegetables pair nicely with the neutral, crisp coating.
Winter: Make a warming dipping sauce like honey-soy with a pinch of chili. Or serve over steamed rice with a drizzle of hot sesame oil for comforting simplicity.
Method to the Madness
Why does this batter stay light? The vinegar and baking soda react to produce bubbles the moment they meet. Pouring the foaming mix into the flour traps that gas inside the batter — similar in idea to carbonated batters or ice-cold beer batters used elsewhere. The result is lift without eggs or extra technique.
Work cold. Cold ingredients slow gluten development and keep batter tender. Measure flour but don’t pack it. When dipping, let excess drip; a thin, even layer fries into the signature delicate, crisp coat rather than a bulky crust.
Tips for extra-crisp finish
- Dry chicken thoroughly — moisture on the surface fights crisping. Pat well with paper towels.
- Maintain oil temperature — use a thermometer and give the oil time to recover between batches.
- Drain well — transfer to a single layer on paper towels for a minute, then enjoy. Don’t stack while still hot; steam softens the crust.
Refrigerate, Freeze, Reheat
Refrigerate: Cool fully and store in an airtight container lined with paper towels for up to 2 days. The batter loses crispness in the fridge, so plan to re-crisp before serving.
Freeze: Freeze on a tray in a single layer until solid, then transfer to a freezer bag for up to 1 month. For best texture, reheat straight from frozen to avoid sogginess.
Reheat: For reheating, use a 400°F oven or air fryer for best results: arrange on a wire rack set over a baking sheet and heat 8–12 minutes until hot and crisp. Avoid microwaving if you want crunch; it will make the batter soggy.
Reader Questions
Can I use egg in the batter?
Yes. Adding an egg will make the batter richer and slightly more substantial, but it changes the texture away from the classic featherlight tempura. This recipe is intentionally egg-free.
Is there a gluten-free option?
You can experiment with a 1:1 gluten-free flour blend, but results vary. The lightness here relies on quick chemical leavening and handling; some blends absorb more liquid and need adjustments.
How do I know the chicken is cooked through?
Fry time is about 4–6 minutes per batch for standard-size tenders. If you want absolute certainty, use an instant-read thermometer: the internal temperature should reach 165°F. Thicker strips will need the higher end of the time range.
The Takeaway
Tempura Chicken Fingers give you restaurant-feel crunch with home-kitchen ease. The batter is forgiving, quick to mix, and fries up light because of the vinegar+baking-soda reaction — no eggs required. Keep an eye on oil temperature, work in small batches, and drain well for the best texture.
Whether you’re feeding kids, hosting friends, or just want a satisfying weeknight meal, this recipe fits. Pair with a bright dipping sauce, a simple slaw, or steamed rice, and you’ve got a dinner that feels deliberate without taking over your evening.
Tempura Chicken Fingers
Equipment
- Dutch Oven
- deep-fry thermometer
Ingredients
Ingredients
- 2 cupsall-purpose flour
- 1 1/2 tspsalt
- 2 cupswater
- 3 TbspVinegar
- 1 1/2 tspbaking soda
- 1 to 2 lbchicken tenders
Instructions
Instructions
- Pat the chicken tenders dry with paper towels and set aside.
- In a large bowl, whisk together 2 cups all-purpose flour and 1½ teaspoons salt.
- In a separate bowl or large measuring cup, stir 2 cups water and 3 tablespoons vinegar until combined.
- Sprinkle 1½ teaspoons baking soda into the water–vinegar mixture (it will foam). Immediately pour the foaming mixture into the flour mixture.
- Gently stir the batter until just combined — small lumps are fine. The batter should be thin enough to coat the tenders; do not overmix.
- Pour oil to a depth of 2 inches into a large Dutch oven or deep skillet and heat to 350°F (use a thermometer).
- Working in small batches, dip each chicken tender into the batter, letting excess drip back into the bowl.
- Carefully add battered tenders to the hot oil without overcrowding. Fry each batch about 4–6 minutes (about 5 minutes) until golden and the chicken is cooked through.
- Transfer fried tenders to a paper towel–lined plate to drain and rest briefly.
- Serve the tempura chicken fingers hot with your favorite dipping sauces.