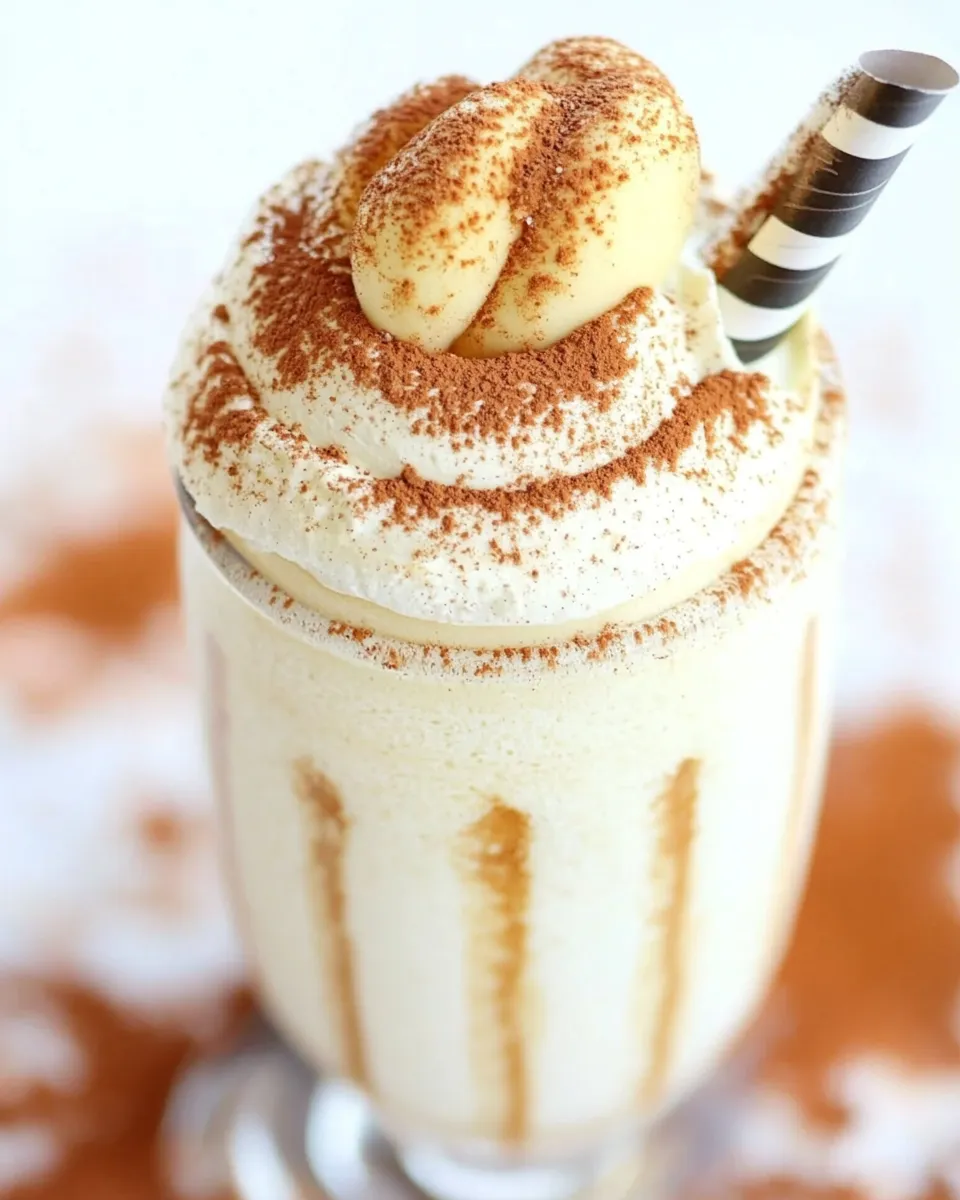
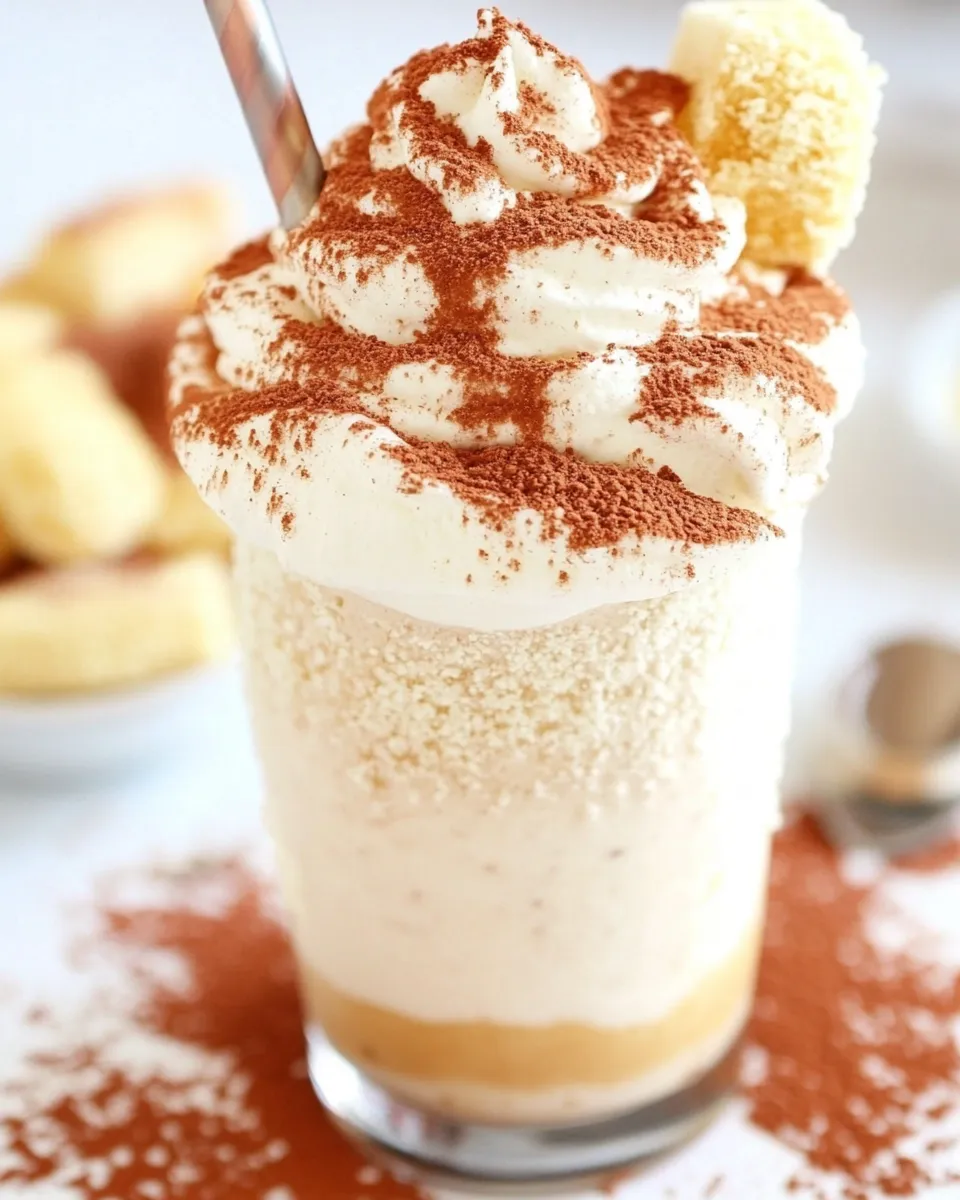
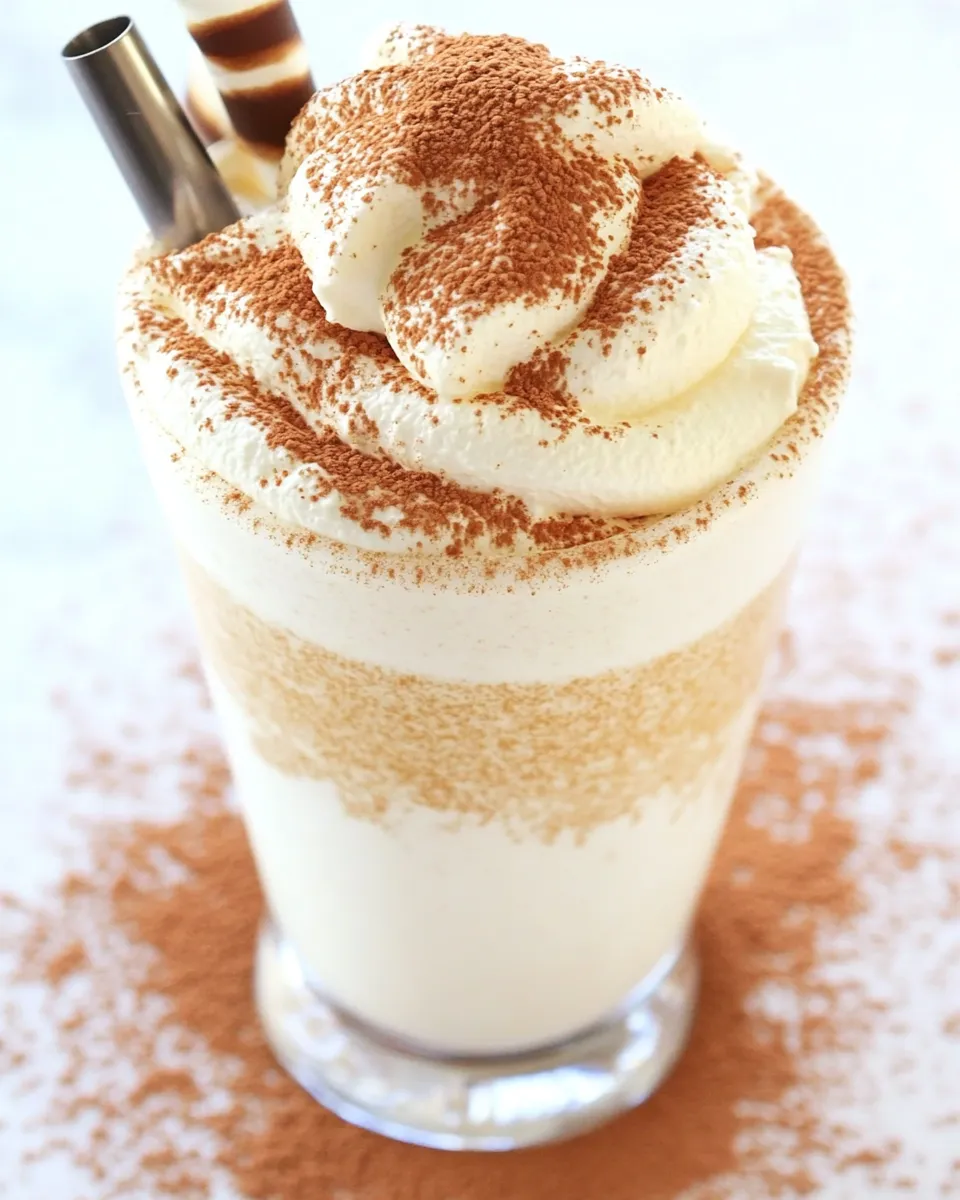
I love the idea of taking two desserts and making one spectacular, easily shareable treat. This Tiramisu Milkshake is exactly that: the coffee-and-cocoa notes of tiramisu, translated into a thick, creamy shake you can blend in minutes. It tastes like a small celebration in a glass, and the texture is utterly satisfying.
There’s no baking, no long soak times, and no complicated layering. You’ll rely on a few good ingredients and a blender. That makes it a great go-to for unexpected guests, a weekend treat, or when you want something indulgent without a lot of fuss.
Below I give the exact ingredient and method list I use every time — plus practical tips for speeding things up, storing leftovers, and small swaps if you want to lighten it. Follow the instructions precisely and you’ll get the same reliable result I do.
What Goes In

Ingredients
- 4 scoops Breyer’s Natural Vanilla Ice Cream — the creamy base; using Breyer’s gives a smooth, familiar vanilla backbone that blends well with coffee.
- 2 teaspoons decaf espresso powder — provides the espresso flavor without the caffeine bite; dissolve into milk when possible for even distribution.
- ½ cup milk — thins the shake to a drinkable consistency; adjust slightly for thicker or thinner texture.
- whipped cream — a light, fluffy topping that contrasts the thick shake and adds a dessert finish.
- cocoa powder — for dusting; adds cocoa bitterness that echoes classic tiramisu.
- 4 lady fingers — used as a garnish and a playful nod to tiramisu’s biscuit layer; they soften slightly when placed in the glass.
Tiramisu Milkshake — Do This Next
- Put 4 scoops Breyer’s Natural Vanilla Ice Cream, 2 teaspoons decaf espresso powder, and ½ cup milk into a blender.
- Blend on medium-high until smooth and no large ice cream pieces remain (about 20–30 seconds); stop and scrape down the sides if needed.
- Pour or divide the milkshake evenly into four serving glasses.
- Top each milkshake with whipped cream and dust with cocoa powder.
- Place one lady finger into each glass as a garnish, add a straw if desired, and serve immediately.
Why This Recipe Belongs in Your Rotation
Because it’s fast, low-effort, and reliably delicious. You get the essence of tiramisu — coffee, cream, and a dusting of cocoa — without the assembly and chilling time. It’s an excellent option when you want something dessert-like but don’t want to commit to a whole cake or layered dessert.
It also scales well. The recipe divides into four servings cleanly, which makes it handy for small gatherings. Finally, the components are pantry-friendly: a good vanilla ice cream, instant espresso, and basic toppings. No specialty equipment beyond a blender is required.
Healthier Substitutions
If you want to reduce calories or fat, there are a few simple swaps that keep the spirit of the drink while cutting back a bit.
- Lower-fat ice cream or frozen yogurt: Use a reduced-fat vanilla ice cream or a plain frozen yogurt. Texture will change — it can be looser — but flavor remains accessible.
- Milk alternative: Swap the ½ cup milk for unsweetened almond, oat, or skim milk. Almond milk thins quickly and keeps calories down; oat milk adds body if you lose richness.
- Whipped topping choice: Use a light whipped cream or a whipped coconut topping to reduce dairy fat.
Appliances & Accessories
One good appliance carries this recipe: your blender. Beyond that, a few small tools make the process cleaner and more presentable.
Must-have
- Sturdy blender — a medium-high setting gets the ice cream to a smooth consistency in under 30 seconds.
- Measuring spoons and a ½ cup measure — accurate amounts keep texture consistent.
Nice-to-have
- Dusting sifter for cocoa — gives an even, fine dusting over the whipped cream.
- Long-handled spoon or spatula — useful for scraping the blender sides clean between pulses without making a mess.
Mistakes Even Pros Make
Yes, even experienced cooks trip up here. The most common problems are texture-related and easily avoidable.
- Over-blending: Run the blender only until smooth. Over-working the mixture introduces air and can make the shake foamy rather than luxuriously thick.
- Too little milk: If you use far less than ½ cup without compensating, the shake may be too dense for easy sipping. If it’s too thick, add a tablespoon of milk at a time until you reach the texture you want.
- Uneven espresso distribution: If you dump espresso powder on top of the ice cream, you may end up with gritty pockets. Add it with the milk or dissolve in the milk first for an even flavor.
- Waiting to serve: This is best right away. Letting it sit makes it watery as the ice cream melts, and you lose the satisfaction of the creamy texture.
Nutrition-Minded Tweaks
You can keep this indulgent while making mindful adjustments for nutrition without losing the flavor profile.
- Reduce portion size: Serving in smaller glasses limits calories while maintaining the ritual of a decorated dessert.
- Use decaf or adjust espresso: The recipe calls for decaf espresso powder; if you want actual espresso flavor but reduced caffeine, stick to decaf or use half decaf and half regular.
- Smart toppings: Instead of thick layers of whipped cream, use a lighter dollop and add a dusting of cocoa for flavor without too many extra calories.
Cook’s Notes
Here are a few practical pointers I rely on every time I make this shake.
- Ice cream temperature: Slightly softened ice cream blends faster. Leave the scoops out for 3–5 minutes so they’re scoopable but not melted.
- Espresso powder: Use decaf as the recipe specifies for an evening treat that won’t affect sleep. If you only have instant coffee, the flavor will be different — espresso powder is more concentrated and gives a sharper coffee note.
- Serving glasses: Chill glasses in the freezer for 10 minutes before pouring to keep the shake cold longer.
- Lady finger placement: Insert the lady finger after topping with whipped cream so it stands upright and looks intentional, not like an afterthought.
Cooling, Storing & Rewarming
This is meant to be served immediately. Once blended, the shake begins to melt and separate. That said, here are options if you need to prepare components ahead or manage leftovers.
- Make ahead: You can measure the espresso powder into the milk in a small jar and store it covered in the fridge for a day. Scoop ice cream into an airtight container and keep frozen until ready to blend.
- Storing leftovers: If you have a partially finished glass, cover it tightly and place in the freezer. It will firm up; thaw slightly before re-blending. Note: texture will change and it won’t be identical to freshly made.
- Rewarming: Not applicable in the traditional sense. If you freeze leftover milkshake into a semi-frozen slab, allow it to sit for a few minutes at room temperature and stir or pulse in a blender to restore drinkable consistency.
Your Questions, Answered
I get the same handful of questions about this recipe over and over. Here are short, direct answers so you don’t have to guess.
- Can I use strong brewed espresso instead of espresso powder? You can, but adjust the milk amount to compensate for the extra liquid. Start with 1–2 tablespoons of brewed espresso mixed into the ½ cup milk and proceed.
- How thick should the shake be? Smooth and thick enough to sip through a straw but not like soft-serve. About 20–30 seconds on medium-high typically hits that texture.
- Can I make it vegan? Substitute vegan vanilla ice cream and a non-dairy milk. Use a dairy-free whipped topping and choose vegan lady fingers if you can find them.
- Why Breyer’s? The recipe lists Breyer’s Natural Vanilla Ice Cream because its balance of cream and vanilla blends well with espresso flavor. You can use another high-quality vanilla ice cream, but expect subtle differences.
Ready to Cook?
Collect your 4 scoops of Breyer’s Natural Vanilla Ice Cream, measure 2 teaspoons of decaf espresso powder, and grab ½ cup milk. That’s all you need to get started. The method is intentionally short: combine, blend, pour, garnish, and serve. It takes about five minutes from start to finish.
Make it tonight. Serve it immediately to enjoy the contrast between the cold, creamy shake and the bitter-sweet cocoa dusting. Little details — chilling the glasses, dissolving the espresso in the milk, adding the lady finger at the end — make it look restaurant-worthy without extra work. Cheers to quick, delicious desserts that taste like more effort than they take.
Tiramisu Milkshake Recipe
Equipment
- Blender
- Serving glasses
Ingredients
Ingredients
- 4 scoops Breyer's Natural Vanilla Ice Cream
- 2 teaspoonsdecaf espresso powder
- 1/2 cupmilk
- whipped cream
- cocoa powder
- 4 lady fingers
Instructions
Instructions
- Put 4 scoops Breyer's Natural Vanilla Ice Cream, 2 teaspoons decaf espresso powder, and ½ cup milk into a blender.
- Blend on medium-high until smooth and no large ice cream pieces remain (about 20–30 seconds); stop and scrape down the sides if needed.
- Pour or divide the milkshake evenly into four serving glasses.
- Top each milkshake with whipped cream and dust with cocoa powder.
- Place one lady finger into each glass as a garnish, add a straw if desired, and serve immediately.