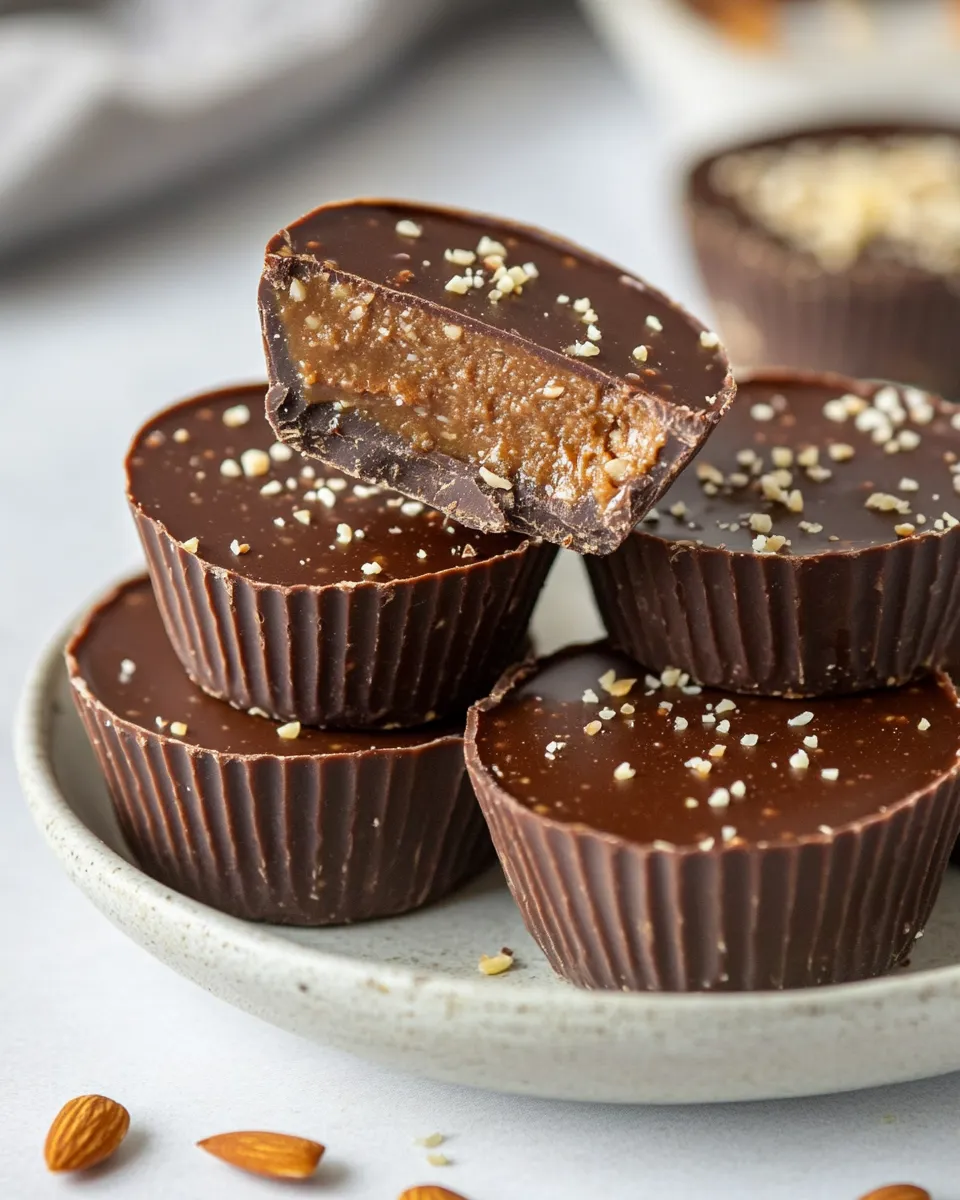
These Chocolate Almond Butter Protein Cups are a controlled-taste, grab-and-go snack that I reach for every week. They hit the sweet spot between a treat and a sensible post-workout bite: nut butter for creaminess, oats and protein powder for substance, seeds for crunch, and a thin dark chocolate cap for satisfaction. They’re straightforward to make and store well, which keeps my kitchen calm and my snack drawer useful.
I make a batch on Sunday evening and portion them out for the week. They freeze beautifully, so there’s no pressure to eat them all in three days. The recipe is forgiving on texture and substitutions, and I’ll point out the swap options where they matter. Follow the steps in order and you’ll end up with consistent, firm cups every time.
No elaborate equipment or tempering required. If you have a food processor, a muffin tray, and a microwave-safe bowl, you’re set. Read every section once before starting—you’ll save hands-on time and avoid unnecessary tweaks.
What to Buy
Shop for these items in the grocery aisle and the bulk section. Get a creamy unsweetened almond butter if you want a neutral base; otherwise, smooth peanut butter works fine. Pick quick or rolled oats—either grinds down in the processor quickly. Choose a protein powder with a flavor you enjoy since it affects the final taste: vanilla or chocolate are both common choices.
Buy Medjool dates if you prefer natural sweetness — they blend into a sticky, binding paste. If you want a simpler, maple-sweetened route, buy real pure maple syrup. Get chocolate chips labeled for baking and a small jar of coconut oil so the chocolate sets with a glossy sheen. Flaky sea salt is optional but every so often it makes each bite more balanced.
Ingredients
- 1 cup unsweetened almond butter or peanut butter* — the creamy fat base; use unsweetened to control sweetness.
- ⅔ cup quick oats or rolled oats — structure and chew; quick oats blend faster but rolled oats are fine.
- ½ cup protein powder or more oats — adds protein and firmness; if you skip it, increase oats to match texture.
- 3 Tbsp hemp seeds or ground flax seed — extra protein, omega fats, and a slightly nutty texture.
- 4 Tbsp pumpkin seeds or sunflower seeds — crunch and bite; swap as needed for allergy considerations.
- 6 to 8 pitted Medjool dates or 3 to 5 Tbsp pure maple syrup to taste — binder and sweetness; dates also add chew.
- 1 tsp pure vanilla extract optional — flavor lift; optional but I often add it.
- ½ tsp sea salt — balances sweetness and heightens flavor.
- 2-6 Tbsp water** — used sparingly to reach the right dough-like consistency.
- ⅔ cup chocolate chips — for the chocolate cap.
- 2 Tbsp coconut oil — thins the chocolate for easy spreading and a shiny finish.
- Flaky sea salt optional — finish; a tiny pinch on each cup transforms the flavor.
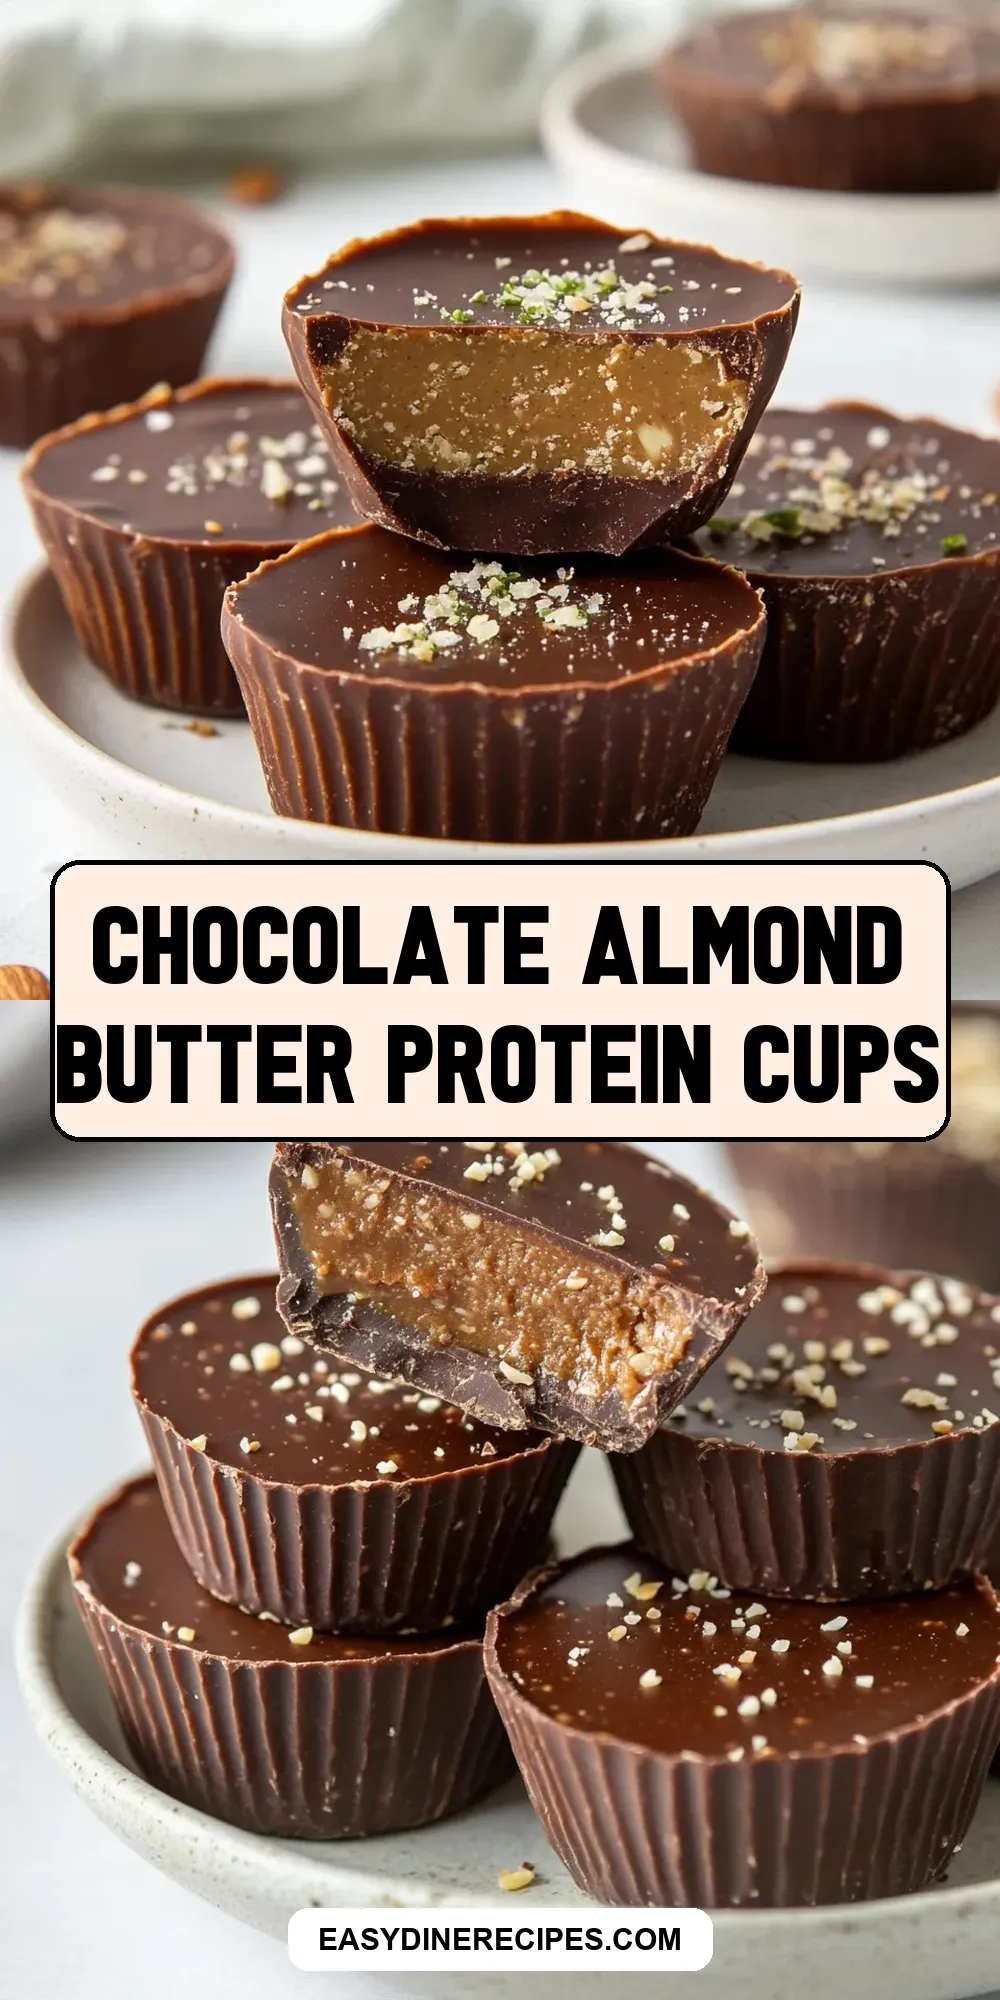
Make Chocolate Almond Butter Protein Cups: A Simple Method
- Place the following into a food processor: 1 cup unsweetened almond butter (or peanut butter), 2/3 cup quick or rolled oats, 1/2 cup protein powder (or more oats), 3 Tbsp hemp seeds (or ground flax seed), 4 Tbsp pumpkin seeds (or sunflower seeds), 6 to 8 pitted Medjool dates (or 3 to 5 Tbsp pure maple syrup), 1 tsp pure vanilla extract (optional), and 1/2 tsp sea salt. Do not add the chocolate chips or the coconut oil yet.
- Process until the ingredients are combined and the mixture is thick and fairly crumbly.
- With the processor running (or stopping to add and then processing), add 2 Tbsp water and blend until incorporated. If the mixture is still too dry to hold together, add more water 1 Tbsp at a time, blending after each addition, up to a total of 6 Tbsp water. The correct consistency is a stiff, slightly thicker-than-cookie-dough texture that holds its shape when pressed.
- Use a spoon or cookie scoop to divide the mixture evenly among a 12-hole muffin tray. Press the mixture firmly into each cup to form an even layer (covering the bottom and slightly up the sides if you prefer).
- Put 2/3 cup chocolate chips and 2 Tbsp coconut oil in a microwave-safe bowl. Microwave in 20-second intervals, stirring well between intervals, until the chocolate and oil are fully melted and smooth (about 60 seconds total).
- Spoon or drizzle the melted chocolate over the packed mixture in each muffin cup, spreading to cover the tops. Sprinkle flaky sea salt on top if desired.
- Freeze the tray for at least 1 hour, or until the chocolate is hard and the cups are firm.
- Run a paring knife or butter knife around the edge of each cup to loosen, then remove the protein cups from the muffin tray.
- Store the protein cups in an airtight container or zip-top bag in the refrigerator for up to 1 week, or freeze for up to 3 months.
Why It’s My Go-To
This recipe fits so many needs: a satiating snack after a run, a portion-controlled treat, or a travel-friendly pick-me-up. The texture is balanced—the almond butter and oats make the center sturdy, while the seeds add a pleasant crunch. The quick set-up means I can assemble a batch in about 20 minutes, then walk away while the freezer does the rest.
I love how customizable it is without being fussy. You can tweak the sweetener, swap seeds, or adjust the chocolate layer to fit your goals. And because they store well, I get consistent snacks that support my day, not sugar highs or complicated prep.
Quick Replacement Ideas

If you need to swap ingredients quickly, here are the easiest, recipe-approved options that won’t throw off texture:
- Almond butter ↔ Peanut butter — measured one-to-one; peanut adds a more pronounced flavor.
- Quick oats ↔ Rolled oats — use the same volume; quick oats will blend faster for a smoother crumb.
- Protein powder ↔ More oats — if you don’t have protein powder, add oats to reach similar bulk and texture.
- Hemp seeds ↔ Ground flax seed — both bind and add nutrition; flax is a little denser.
- Pumpkin seeds ↔ Sunflower seeds — equal swap, same crunch level.
- Medjool dates ↔ Pure maple syrup — dates provide chew and body; maple syrup adds liquid sweetness and is easier to measure.
Before You Start: Equipment
Gather these tools before you begin to keep assembly smooth:
- Food processor — required for combining the base into a cohesive mixture.
- 12-hole muffin tray — forms uniform cups; silicone trays make removal easier.
- Microwave-safe bowl — to melt chocolate and coconut oil.
- Spoon or cookie scoop — to portion mixture evenly.
- Small spatula or back of a spoon — to press and spread the chocolate layer.
- Paring or butter knife — to loosen the cups from the tray after freezing.
Troubleshooting Tips
If the mixture is too dry and crumbles when you press it:
Add water 1 Tbsp at a time, processing after each addition, until it binds. You should aim for a stiff, slightly thicker-than-cookie-dough consistency. Too much water will make the base soft and unstable; stop when the mixture holds its shape when pressed.
If the mixture is too wet and sticky:
Add a small spoonful of oats or a tablespoon of protein powder and pulse to incorporate until it firms up. Chill the mixture for 10–15 minutes—cold dough is easier to pack into cups.
If the chocolate layer doesn’t set:
Make sure you used coconut oil with the chocolate; the two combine to firm up nicely in the freezer. Also confirm the tray was in the freezer long enough—an hour is usually sufficient, but thicker chocolate layers take longer. If you used a very large amount of coconut oil, the chocolate may take longer to firm; chill longer or reduce oil next time.
Health-Conscious Tweaks
Want to trim sugar or boost protein? Try these adjustments while keeping the recipe’s balance intact:
- Reduce chocolate chips slightly and spread a thinner layer to cut added sugars while maintaining the chocolate experience.
- Choose an unsweetened or low-sugar protein powder to lower overall sugar; compensate by using a bit more dates if you prefer sweetness.
- Swap hemp seeds for ground flax to increase fiber and omega-3s.
- Use peanut butter if you want a slightly higher protein and more affordable nut butter option.
Chef’s Rationale
I designed this combination to hit three goals: texture, flavor balance, and simplicity. Almond butter provides a smooth fat backbone that keeps the centers creamy. Oats and protein powder give body and chew, preventing the cups from being overly fatty. Seeds introduce bite and nutrients without overpowering the almond flavor. Dates or maple syrup act as natural binders so you don’t need separate syrups or added sugars. Coconut oil thins the chocolate enough to spread in a thin, crisp layer that firms in the freezer.
Every element serves a purpose. Skip or replace one and you alter mouthfeel and shelf life. If you follow the steps and respect the ratios, you’ll get the intended result—portable, firm cups with a satisfying chocolate finish.
Storage Pro Tips
After removing the cups from the tray, layer them between sheets of parchment in an airtight container or zip-top bag. Store in the refrigerator for up to 1 week—this keeps the centers slightly firmer and ready to eat. For longer storage, freeze them flat in a single layer and transfer to a sealed bag; they’ll keep well for up to 3 months.
To serve from frozen, pull a few out 5–10 minutes before eating; they soften quickly at room temperature. From the fridge, they are ready to go immediately and make a great pre-workout snack.
Frequently Asked Questions
Can I use peanut butter instead of almond butter? Yes. The recipe explicitly allows peanut butter as a direct swap.
What protein powder should I use? Any flavor you like will work, but note that vanilla or chocolate will influence the final taste. If you want no flavor change, use an unflavored powder and taste as you go.
Do I have to microwave the chocolate? No—melting on the stovetop over a gentle double boiler works fine. The microwave is simply faster and cleaner for this small batch.
Will these cups melt at room temperature? The chocolate will soften at warm room temperatures. Keep them refrigerated or frozen for best texture, especially in warm weather.
Ready to Cook?
Everything you need is here: a clear ingredient list, precise steps, and troubleshooting notes. Assemble your food processor, line up the ingredients, and follow the method. Press the mixture into your muffin tray, melt the chocolate with the coconut oil, and let the freezer do the finishing work. In about an hour you’ll have a dozen firm, portable Chocolate Almond Butter Protein Cups ready to fuel your day.
Make a batch this weekend and you’ll see why these are my pantry staple. Happy baking—and enjoy the crunch.

Chocolate Almond Butter Protein Cups
Equipment
- Food Processor
Ingredients
Ingredients
- 1 cupunsweetened almond butteror peanut butter*
- 2/3 cupquick oats or rolled oats
- 1/2 cupprotein powderor more oats
- 3 Tbsphemp seedsor ground flax seed
- 4 Tbsppumpkin seedsor sunflower seeds
- 6 to 8 pitted medjool datesor 3 to 5 Tbsp pure maple syrup to taste
- 1 tsppure vanilla extractoptional
- 1/2 tspsea salt
- 2-6 Tbspwater**
- 2/3 cupchocolate chips
- 2 Tbspcoconut oil
- Flaky sea saltoptional
Instructions
Instructions
- Place the following into a food processor: 1 cup unsweetened almond butter (or peanut butter), 2/3 cup quick or rolled oats, 1/2 cup protein powder (or more oats), 3 Tbsp hemp seeds (or ground flax seed), 4 Tbsp pumpkin seeds (or sunflower seeds), 6 to 8 pitted Medjool dates (or 3 to 5 Tbsp pure maple syrup), 1 tsp pure vanilla extract (optional), and 1/2 tsp sea salt. Do not add the chocolate chips or the coconut oil yet.
- Process until the ingredients are combined and the mixture is thick and fairly crumbly.
- With the processor running (or stopping to add and then processing), add 2 Tbsp water and blend until incorporated. If the mixture is still too dry to hold together, add more water 1 Tbsp at a time, blending after each addition, up to a total of 6 Tbsp water. The correct consistency is a stiff, slightly thicker-than-cookie-dough texture that holds its shape when pressed.
- Use a spoon or cookie scoop to divide the mixture evenly among a 12-hole muffin tray. Press the mixture firmly into each cup to form an even layer (covering the bottom and slightly up the sides if you prefer).
- Put 2/3 cup chocolate chips and 2 Tbsp coconut oil in a microwave-safe bowl. Microwave in 20-second intervals, stirring well between intervals, until the chocolate and oil are fully melted and smooth (about 60 seconds total).
- Spoon or drizzle the melted chocolate over the packed mixture in each muffin cup, spreading to cover the tops. Sprinkle flaky sea salt on top if desired.
- Freeze the tray for at least 1 hour, or until the chocolate is hard and the cups are firm.
- Run a paring knife or butter knife around the edge of each cup to loosen, then remove the protein cups from the muffin tray.
- Store the protein cups in an airtight container or zip-top bag in the refrigerator for up to 1 week, or freeze for up to 3 months.
Notes
*Use any nut or seed butter you love!
**Start with 2 tablespoons of water and blend well in between any additions. I use 4 tablespoons.