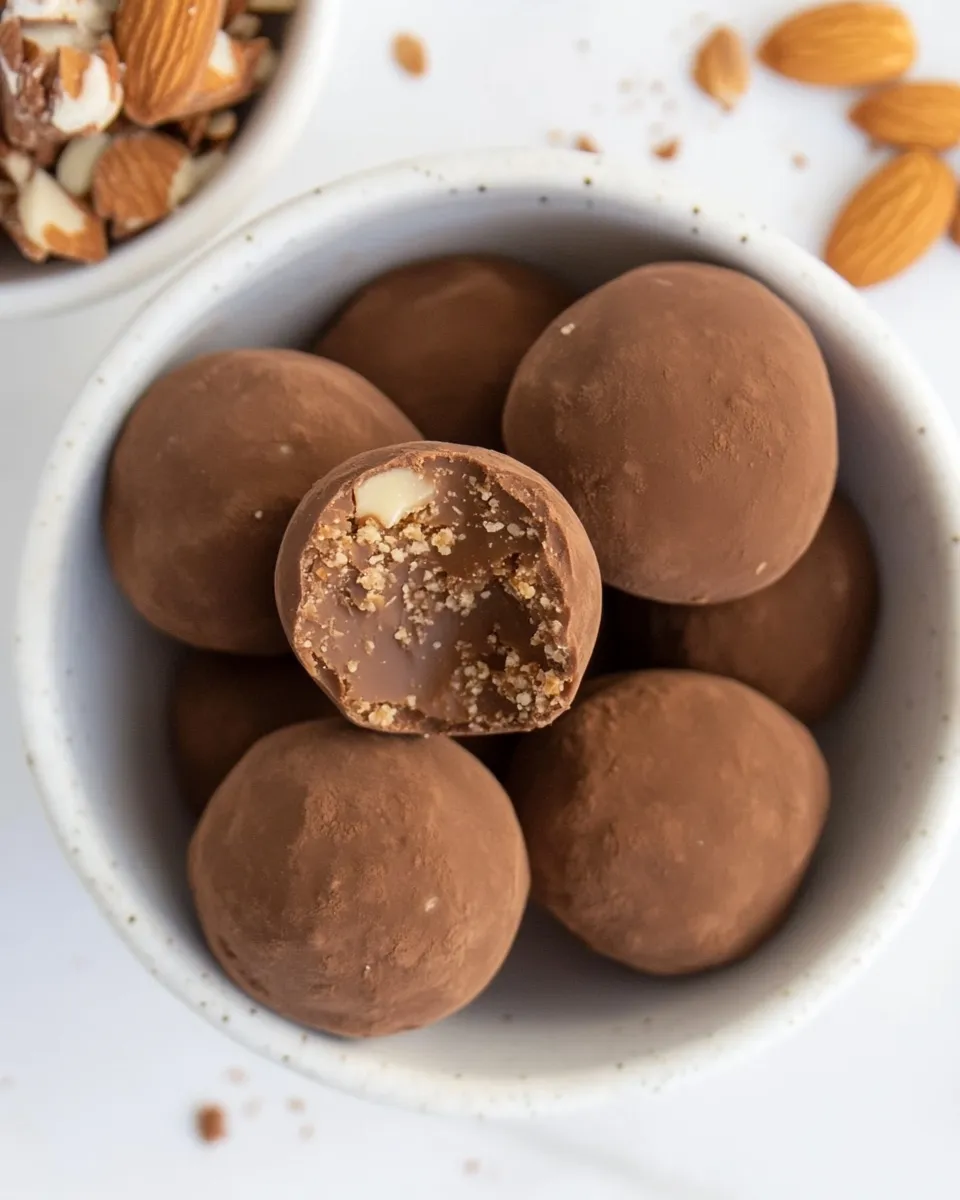
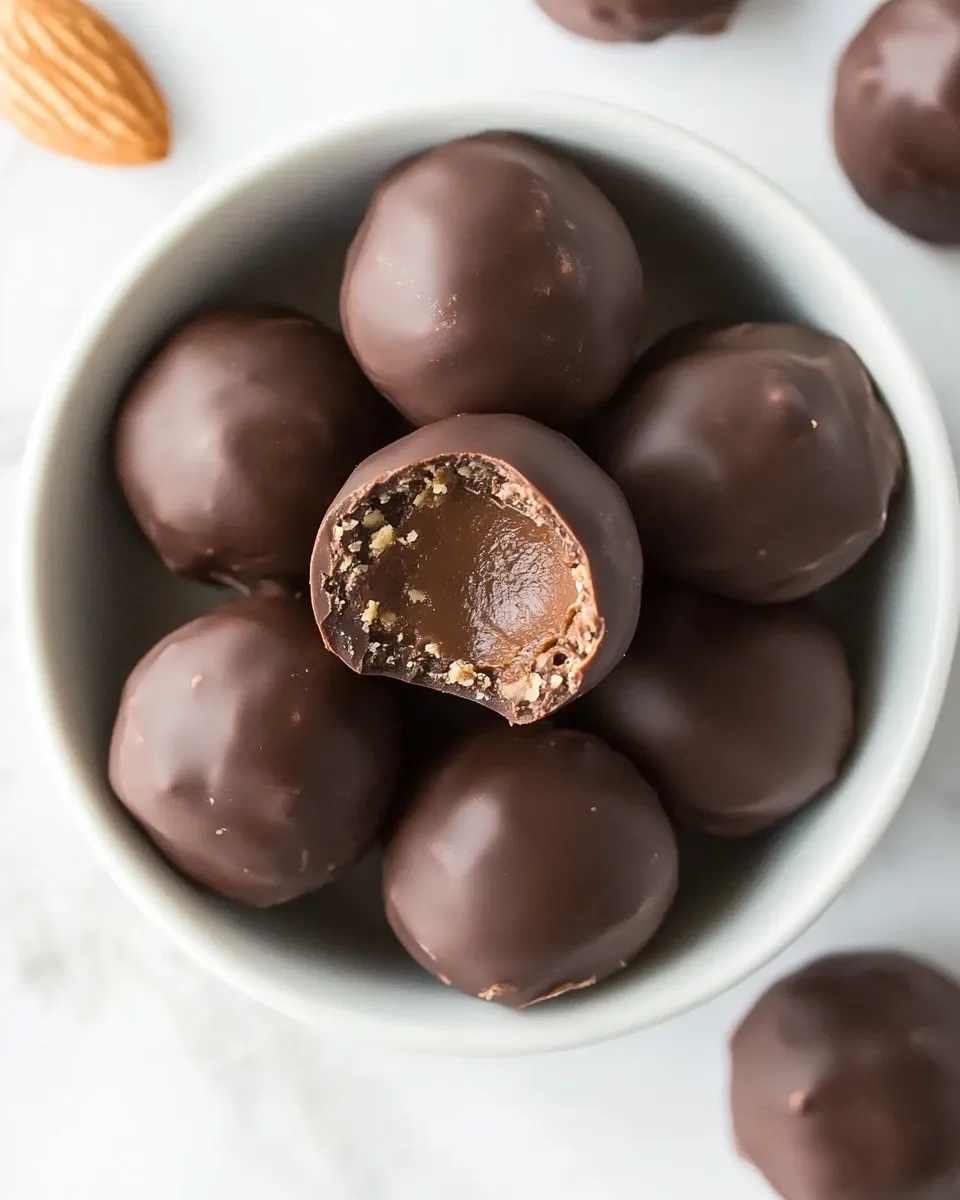
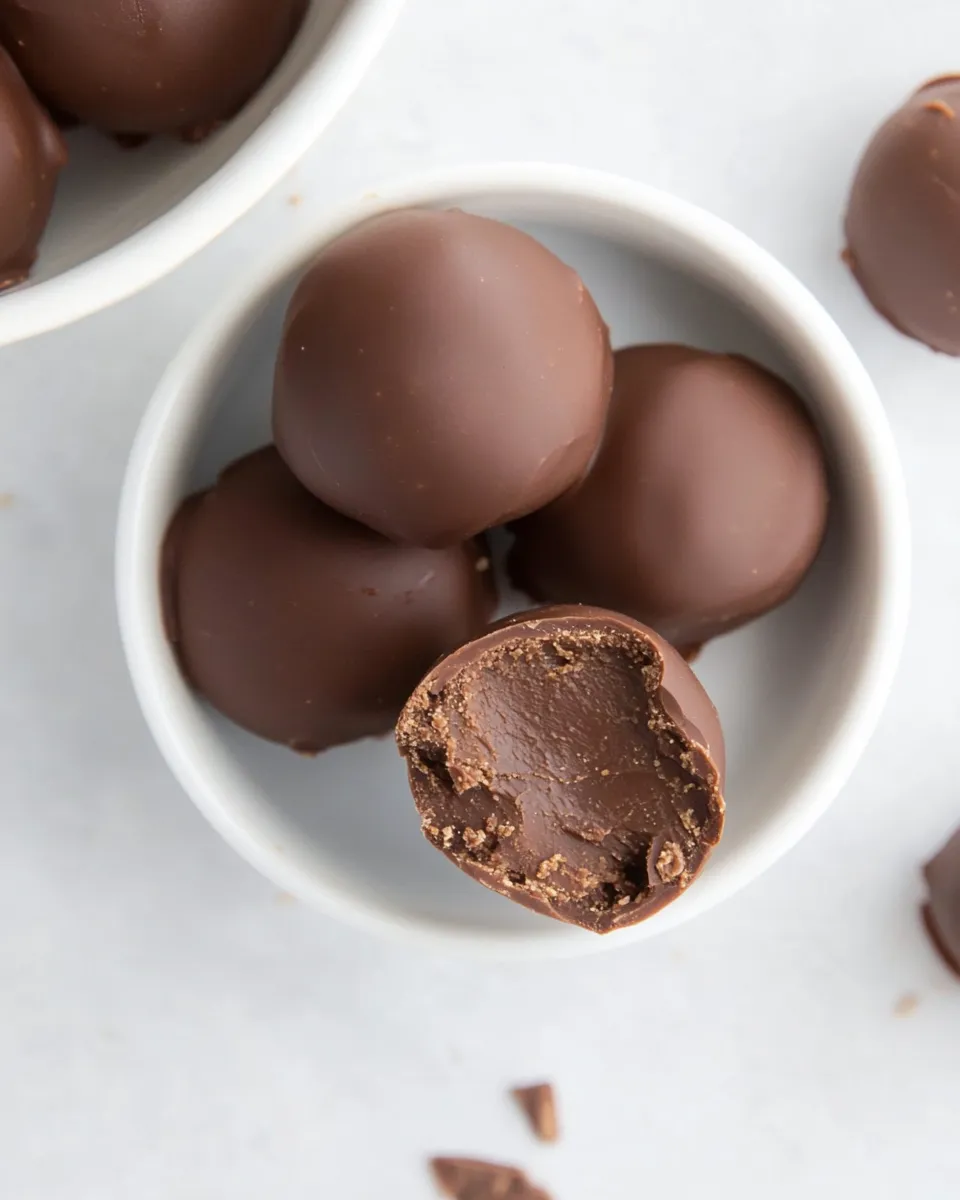
I make these almond butter truffles on slow Sunday afternoons and also on rushed weeknights when I need a small, reliable treat. They’re simple, require no baking, and come together with pantry basics. The texture is rich and a little dense, the kind you want from a good truffle — and the coating gives a clean, chocolate snap.
This recipe is for people who like things practical. You’ll measure, mix, chill, coat, and eat. No complicated tempering, no long ingredient lists, and no mystery steps. It’s straightforward and forgiving; small adjustments in flour or chilling time are part of the process.
Below you’ll find the exact ingredients and the exact step-by-step directions to make these truffles. I also include the small troubleshooting tips I use when testing in my kitchen so you can skip the guesswork and get the texture and finish right the first time.
What Goes In
- 1 cup almond butter (200 g) — the base and main binder; pick a texture you like (creamy or slightly thick), but note thicker almond butter may need a touch more almond flour.
- ½ cup almond flour (50-75 g or more, depending on the thickness of your almond butter) — provides structure and a tender crumb; start with 50 g and add up to 75 g if needed to get the right texture.
- 8 drops stevia (equivalent to 2 teaspoon sugar) — sweetener; gives sweetness without sugar. Taste and adjust in future batches if your stevia brand differs.
- 2 tablespoons sugar free syrup — adds moisture and helps the mixture bind while contributing sweetness.
- optional: 1 teaspoon cinnamon — warms the flavor; leave it out if you prefer a pure almond-chocolate profile.
- 2.3 oz sugar free chocolate (70 g) — for coating. You can use sugar-free chocolate or a very dark chocolate (90% cocoa) or unsweetened chocolate; see notes below on texture and bitterness.
Cook Almond Butter Truffles Like This
- Line a baking sheet with parchment paper and set aside.
- In a medium mixing bowl combine 1 cup (200 g) almond butter, 8 drops stevia (equivalent to 2 tsp sugar), 2 tablespoons sugar-free syrup, and the optional 1 teaspoon cinnamon (if using).
- Add 50 g (½ cup) almond flour to the bowl and stir or mix until combined.
- Check the texture. You want a dough-like mixture that can be rolled into balls without being squishy or falling apart. If it is too runny, add up to an additional 25 g (¼ cup) almond flour (for a total of 75 g). If needed, add a little more almond flour, a small amount at a time, until the mixture holds together.
- Portion the mixture and roll into small balls weighing about 10–12 g each. (With these quantities you should get roughly 25 truffles.) Place the rolled balls on the prepared parchment-lined sheet.
- Chill the uncoated balls in the refrigerator for 10–15 minutes to firm slightly (this makes coating easier).
- Melt 70 g (2.3 oz) sugar-free chocolate in the microwave in 30-second bursts, stirring between bursts, until smooth; or melt it using a double boiler.
- Using a spoon or fork, dip or coat each chilled ball in the melted chocolate, letting excess chocolate drip back into the bowl. Return the coated truffles to the parchment-lined sheet.
- Refrigerate the chocolate-covered truffles for about 20 minutes, or until the chocolate has set. Store the truffles in the refrigerator.
What Makes This Recipe Special
This recipe leans minimal and honest. The almond butter does the heavy lifting: it’s both the main flavor and the binder. That single-ingredient spotlight gives these truffles a clean, nut-forward profile that doesn’t need much else. The sugar-free chocolate keeps the sugar low, which is helpful if you’re watching added sugars or prefer a less-sweet finish.
Another strength is texture control. The almond flour is the variable you use to dial firmness. Adding it in measured increments lets you make everything from slightly tender truffles to firmer, more candy-like bites. That adjustability makes the recipe versatile for different almond butter consistencies and personal texture preferences.
Ingredient Flex Options

Stick to the listed ingredients if you want the exact outcome described. That said, the recipe tolerates a few simple swaps without breaking the method:
– Almond butter: don’t replace with peanut butter or seed butter without expecting textural changes; those will alter flavor and absorption. If you do swap, be prepared to adjust almond flour slightly.
– Sweeteners: the recipe uses stevia and sugar-free syrup. If you prefer sugar, you can swap the stevia + syrup for an equivalent sweetness using sugar or honey, but you will change texture and moisture. Start small and taste as you go.
– Chocolate: the recipe offers sugar-free chocolate, 90% cocoa chocolate, or unsweetened chocolate as options. Strong, bitter chocolate will make for a sophisticated but less sweet truffle; milder chocolate will be sweeter and rounder.
Kitchen Gear Checklist
Minimal gear is needed. Here’s what I use every time:
- Mixing bowl — medium size to combine the almond butter and other ingredients comfortably.
- Spoon or spatula — to mix and scrape the bowl clean.
- Kitchen scale — optional but helpful for portioning 10–12 g truffles and measuring almond flour precisely.
- Baking sheet and parchment paper — for rolling and setting the truffles without sticking.
- Microwave-safe bowl or double boiler — for melting chocolate gently.
- Spoon or fork — for dipping the truffles into melted chocolate.
- Refrigerator — for chilling both the uncoated and coated truffles.
Troubles You Can Avoid
Too runny or too dry
If the mixture is runny and won’t roll: add almond flour in small increments up to the recommended 75 g total. If it’s too dry and crumbly: add a tiny dash of sugar-free syrup or a small extra drop of almond butter to bring it together. Work slowly. Add a little at a time; you can always add more but you can’t take it away.
Coating problems
Chocolate that’s too thick will clump; too warm and it won’t set properly. Melt in short bursts if using the microwave, stirring between bursts. If using a double boiler, keep the water at a gentle simmer, not a boil. Chill the balls for the full 10–15 minutes so the chocolate sets cleanly on contact and drips off more easily.
Surface blemishes
Excess chocolate pooling on the bottom happens if the parchment isn’t raised or if you don’t let excess drip. Use a fork to lift the truffles and tap gently to remove drips before returning them to the sheet.
Customize for Your Needs
Want to make these for different dietary needs or flavor profiles? Here are simple adjustments that keep the method intact:
– To make them less sweet: reduce the stevia slightly or use a darker chocolate for coating.
– To boost fiber and texture: roll the finished truffles in finely chopped toasted almonds, unsweetened shredded coconut, or cocoa powder (note: these are toppings, not ingredient swaps).
– For bite-size variations: weigh balls slightly smaller (8–9 g) or larger (15 g) depending on how indulgent you want them to be; adjust chilling time if larger.
Little Things that Matter
Small details make a noticeable difference. Use room-temperature almond butter for easier mixing. If your almond butter separates (oil on top), stir it thoroughly so the texture is uniform before measuring. When rolling, slightly moisten hands if the mixture sticks; it helps form smooth balls without adding ingredients.
When melting chocolate, always stir until glossy. Any unmelted specks will create uneven coating and visual streaks. If you like a shiny finish, refrigerate only until set, then brief rest at cool room temperature before serving; full long refrigeration dulls chocolate gloss but tightens the texture.
Storage & Reheat Guide
Store these truffles in an airtight container in the refrigerator. They keep well for up to two weeks. If you want longer storage, freeze them on a tray until firm, then transfer to a freezer-safe container for up to three months. Thaw in the refrigerator for an hour or at room temperature for 15–20 minutes before serving.
There’s no reheating required. If the chocolate softens slightly at room temperature, briefly chill so the coating regains a snap. Avoid microwaving a covered truffle to warm it; it will melt the chocolate and soften the center too much.
Common Questions
Q: How many truffles will this make?
A: Portioning at about 10–12 g each yields roughly 25 truffles.
Q: Can I use crunchy almond butter?
A: Yes, but expect a slightly more textured interior. If the butter has large pieces, they can interfere with rolling; consider stirring or pulsing to slightly reduce chunk size if needed.
Q: What if my almond flour is coarse?
A: Coarser almond flour gives a grainier texture. Finely milled almond flour integrates more smoothly. You can pulse coarse flour in a food processor a few times to refine it, but don’t over-process into a paste.
Q: Is there a nut-free version?
A: This recipe is almond-based and relies on almond butter and almond flour. Converting to seed butters and seed flours will change absorption and texture; start conservatively and expect to adjust the almond-flour measurement if you experiment.
Bring It to the Table
Serve these truffles straight from the refrigerator for a firm center and crisp chocolate shell. For a slightly softer hit, let them sit at room temperature for 10–15 minutes before plating. They make an elegant, low-maintenance dessert for a small gathering and a reliable grab-and-go treat for lunches or coffee breaks.
If you’re gifting them, place the truffles in a tight-fitting box lined with parchment and keep them refrigerated until delivery. Add a small note about refrigeration to ensure the recipient stores them correctly. They travel well in a cooler or insulated bag for short periods.
Make a batch, taste one, and write down the small tweak you’d make next time — a dash more cinnamon, a fraction more almond flour, or a darker chocolate. This recipe is simple on purpose; those small personalizations are where it becomes yours.
Almond Butter Truffles
Equipment
- Baking Sheet
- Parchment Paper
- Mixing Bowl
- Microwave
- Double boiler
- spoon or fork
Ingredients
Ingredients
- 1 cupalmond butter200 g
- 1/2 cupalmond flour50-75 gor more depending on the thickness of your almond butter
- 8 dropssteviaequivalent to2 teaspoon sugar
- 2 tablespoonsugar free syrup
- optional: 1 teaspoon cinnamon
- 2.3 ozsugar free chocolate70 g alternatively chocolate with 90% cocoa solids or unsweetened chocolate, see notes
Instructions
Instructions
- Line a baking sheet with parchment paper and set aside.
- In a medium mixing bowl combine 1 cup (200 g) almond butter, 8 drops stevia (equivalent to 2 tsp sugar), 2 tablespoons sugar-free syrup, and the optional 1 teaspoon cinnamon (if using).
- Add 50 g (½ cup) almond flour to the bowl and stir or mix until combined.
- Check the texture. You want a dough-like mixture that can be rolled into balls without being squishy or falling apart. If it is too runny, add up to an additional 25 g (¼ cup) almond flour (for a total of 75 g). If needed, add a little more almond flour, a small amount at a time, until the mixture holds together.
- Portion the mixture and roll into small balls weighing about 10–12 g each. (With these quantities you should get roughly 25 truffles.) Place the rolled balls on the prepared parchment-lined sheet.
- Chill the uncoated balls in the refrigerator for 10–15 minutes to firm slightly (this makes coating easier).
- Melt 70 g (2.3 oz) sugar-free chocolate in the microwave in 30-second bursts, stirring between bursts, until smooth; or melt it using a double boiler.
- Using a spoon or fork, dip or coat each chilled ball in the melted chocolate, letting excess chocolate drip back into the bowl. Return the coated truffles to the parchment-lined sheet.
- Refrigerate the chocolate-covered truffles for about 20 minutes, or until the chocolate has set. Store the truffles in the refrigerator.
Notes
You can use any sweetener you like in this recipe. Personally, I find that by mixing sweeteners you don't get that one overpowering taste which makes sugar free sweets taste like "diet food".
If you aren't a fan of
stevia
drops or you don't have a
sugar free syrup
in the house, simply sweeten your sugar free truffles with
erythritol.
Use 3-4 tbsp, depending on your sweet tooth.
You can use
sugar free chocolate, 90% chocolate
(stir in 1 teaspoon of powdered erythritol if you wish) or
unsweetened chocolate
(stir in 1-2 tablespoon of powdered sweetener) to coat.
I calculated the nutritional facts on the basis that a sugar free chocolate is used. If you use a dark chocolate with 90% cocoa solids, the 50 g you will use will contain ca 5 grams of sugar. Divided between your 25 pralines, the amount of sugar per praline will only go up by
0.2 grams.