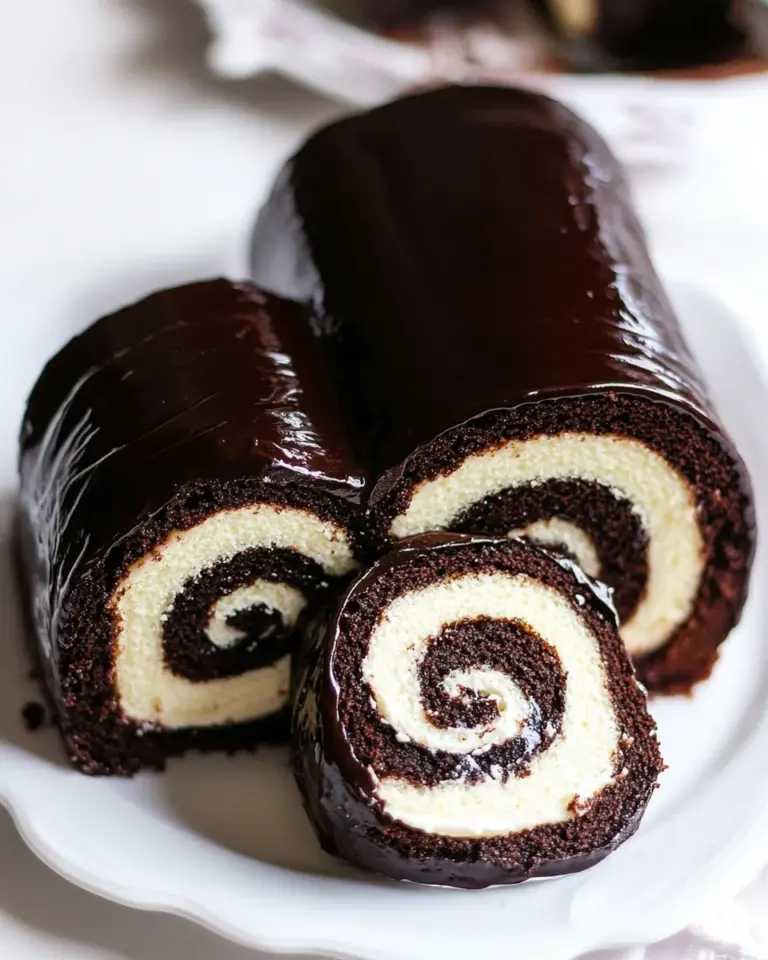
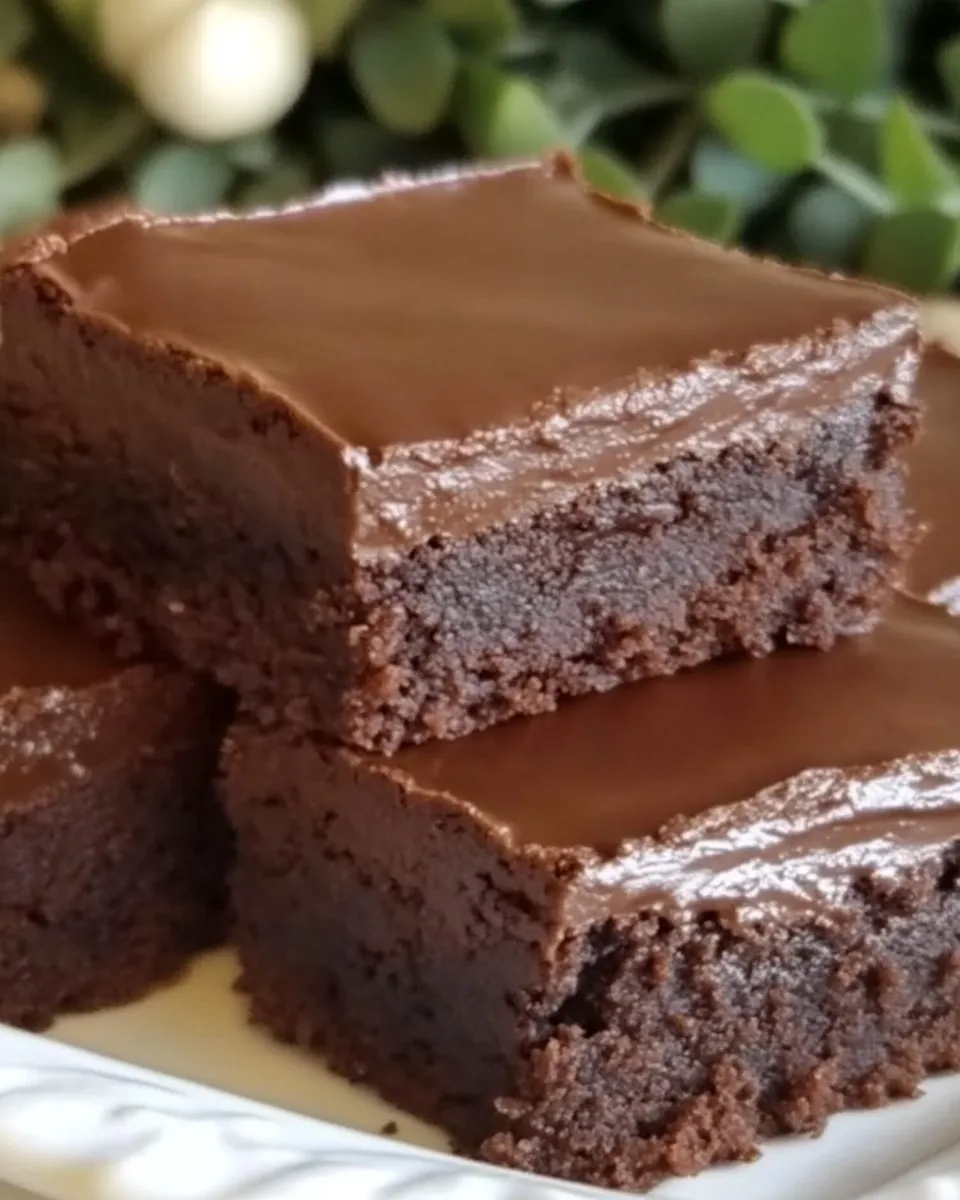
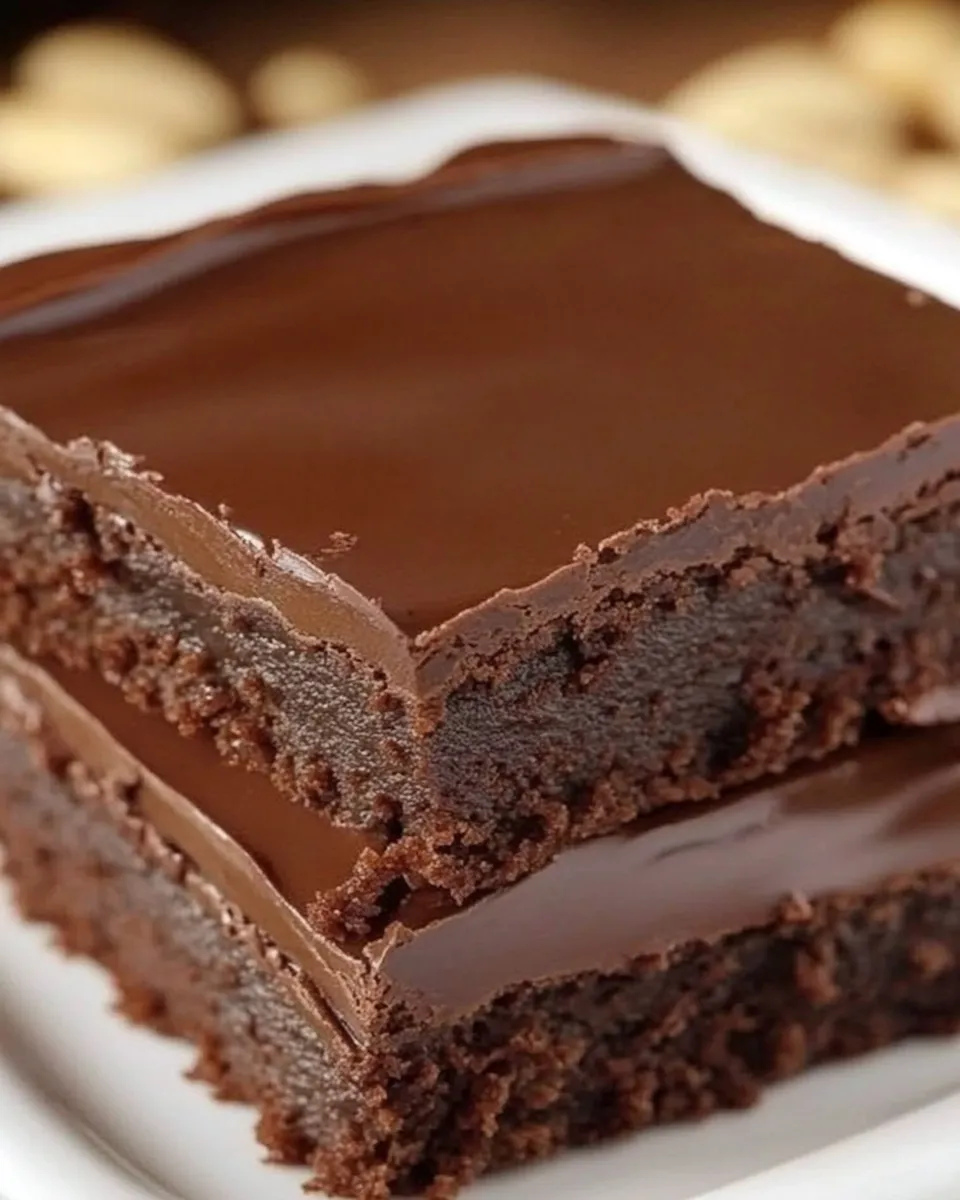
These no bake brownies are a tiny miracle for anyone who wants dense, chocolatey squares without turning on the oven. They come together in one bowl, chill in the fridge, and slice like a dream. I make them when I want something fudgy and fast — perfect for busy afternoons, last-minute guests, or a simple treat after dinner.
The recipe relies on just a few pantry staples and a jar of chocolate frosting for a glossy top. No baking, no melting chocolate over a double boiler, and no long ingredient list. The texture is chewy and rich; the flavor is straightforward dark cocoa cut by the almond butter’s nuttiness and balanced sweetness from maple syrup.
Below you’ll find a precise ingredient breakdown, step-by-step instructions that follow the tested method, and practical notes on swaps, storage, and common problems. Read through the tips before you start — they’ll save time and keep the brownies consistent every time.
The Ingredient Lineup

- 1 cup almond butter — provides the fat, structure, and nutty backbone; use a smooth almond butter for easiest mixing and best texture.
- 1/2 cup maple syrup — sweetener and binder; adds moisture and a clean sweetness that doesn’t overpower the cocoa.
- 2/3 cup cocoa powder — the chocolate flavor; unsweetened Dutch or natural cocoa both work, but expect slight flavor differences.
- 1 cup chocolate frosting — creates a glossy, familiar “brownie top” and adds extra chocolate richness; if it’s stiff, it will need softening before spreading.
Stepwise Method: (No Bake Brownies)
- Line a square pan with parchment paper, leaving an overhang to lift the brownies out later; set the pan aside.
- In a large mixing bowl add 1 cup almond butter, 1/2 cup maple syrup, and 2/3 cup cocoa powder. Stir until fully combined and smooth, scraping the sides of the bowl as needed.
- Transfer the mixture into the lined pan and press firmly and evenly into an even layer with a spatula or the back of a spoon.
- Spread 1 cup chocolate frosting evenly over the pressed brownie layer. If the frosting is very stiff, stir it until spreadable or briefly soften it just enough to spread.
- Refrigerate the pan for at least 30 minutes, until the brownie layer is firm.
- Lift the set brownies from the pan using the parchment overhang, place on a cutting board, slice into squares, and serve.
Why It’s My Go-To
This recipe is reliable under real-life conditions: kids at the table, limited time, or an overcrowded oven. It’s forgiving — the almond butter and maple syrup bind well and cocoa gives instant chocolate depth. No tempering, no melting, no fuss.
I also love that the finished squares have a consistent, sliceable texture. They’re portable, hold up in lunch boxes, and stay pleasantly chewy from refrigeration. For casual entertaining, they look finished with minimal effort thanks to the frosting layer.
Smart Substitutions

- Almond butter — swap for smooth peanut butter or sunflower seed butter if you need a nut-free option. Texture and flavor will change, but the binding function remains.
- Maple syrup — honey or agave syrup can replace it 1:1. Honey gives a different floral note and slightly more stickiness.
- Cocoa powder — Dutch-processed cocoa can be used if you prefer a milder, rounder chocolate; increase to 3/4 cup only if you want a firmer, drier crumb.
- Chocolate frosting — you can use a chocolate ganache (cooled but pourable) for a less sweet, more intense top, or a store-bought frosting for convenience.
What You’ll Need (Gear)
- Square baking pan (8×8″ or similar) — lines and thickness will affect slice size and chill time.
- Parchment paper — for easy lift-out and clean edges.
- Large mixing bowl and spatula — to combine and spread the batter evenly.
- Spoon or the back of a measuring cup — for pressing the mixture into the pan firmly and evenly.
- Refrigerator space — at least 30 minutes chill time required; a flat shelf is best to keep the layer level.
Pitfalls & How to Prevent Them
Too soft or crumbly brownies
If the base is too loose or crumbles when you slice, it likely needs more chilling time or wasn’t pressed firmly enough into the pan. Press the mixture firmly and evenly before topping; use a flat-bottomed measuring cup to compact it. Chill longer than 30 minutes if your fridge is crowded or warm.
Difficulty spreading the frosting
If the frosting is rock hard, it will tear the surface when you try to spread it. Stir the frosting until it loosens, or microwave it in a microwave-safe bowl for 5–10 second bursts, stirring between bursts until spreadable. Don’t overheat — you want spreadability, not a runny topping.
Overly sweet result
The chocolate frosting adds sugar on top of the maple syrup. If you prefer less sweetness, choose a less sweet frosting (some dark chocolate frostings or a lightly sweet ganache) or reduce the amount of frosting used slightly.
Better-for-You Options
If you want a lighter version, focus on the frosting and the type of nut butter. Using a lower-sugar chocolate spread or a dark chocolate ganache with less confectioners’ sugar will cut the overall sugar. Swapping almond butter for a natural nut butter without added oils or sugars lowers additives. Maple syrup is a natural sweetener; you can decrease it a touch (by a tablespoon or two) to reduce total sugars, but expect a firmer, less cohesive base.
For added nutrition, you can fold in a small amount (1–2 tablespoons) of chia seeds or finely ground flaxseed into the almond butter mixture before pressing. That will slightly change texture but increases fiber and omega-3s.
Notes on Ingredients
Almond butter: Choose a smooth, stirred almond butter for the best spread and mouthfeel. Natural almond butter that separates is okay as long as you stir it back to combine; chunky varieties will alter the final texture.
Maple syrup: Pure maple syrup adds flavor notes beyond sweetness. If you use pancake syrup or flavored syrups, the final taste will be different. Measure carefully — the syrup is the primary liquid binder here.
Cocoa powder: Unsweetened cocoa provides direct chocolate intensity. If you prefer milk-chocolaty notes, you could mix in a small amount of powdered milk, but that is an ingredient change. Using high-quality cocoa powder makes a noticeable difference.
Chocolate frosting: Store-bought frostings are convenient and consistent. If making your own, aim for a spreadable consistency that will firm slightly when chilled. If it’s too soft, chilling can firm it up before slicing.
Storage & Reheat Guide
Store the brownies in an airtight container in the refrigerator for up to 7 days. The frosting helps seal in moisture so the texture stays fudgy. If you prefer room temperature, allow a chilled square to sit at room temperature for 10–15 minutes before serving — this softens the base and brings flavors forward.
For longer storage, wrap individual squares in plastic wrap and freeze in a resealable freezer bag for up to 3 months. Thaw overnight in the refrigerator, then bring to room temperature before serving. Do not microwave directly from frozen; this can make the frosting grainy.
Troubleshooting Q&A
Q: My mixture was very sticky and impossible to press. What went wrong?
A: Sticky is normal because of the maple syrup and almond butter. Use a dampened spatula or the back of a measuring cup to press firmly. Chilling briefly (10 minutes) before final pressing can help firm the mixture if it’s too loose to handle.
Q: The frosting cracks when I cut the brownies. Any fixes?
A: Cold frosting tends to crack. Let the assembled pan sit at room temperature for 5–10 minutes before slicing to slightly soften the top. Use a sharp knife, wipe it clean between cuts, and press down in a single smooth motion for cleaner edges.
Q: I want a firmer bite. How can I adjust?
A: A slightly drier base can be achieved by adding a tablespoon more cocoa (up to 3/4 cup total) or chilling the pan longer. Both will firm the texture without changing the steps.
That’s a Wrap
No bake brownies are one of those recipes that feel like a cheat in the best possible way: minimal effort, fast assembly, and reliably delicious results. Keep the ingredients simple and measure carefully, press firmly, and respect the chill time. You’ll have dense, fudgy squares that travel well, please a crowd, and rescue any moment when you want chocolate without fuss.
Tip before you go: make a double batch when you have the chance. They keep beautifully, and a second pan in the freezer will save you on future cravings. Happy no-bake baking — or rather, happy no-bake assembling!
No Bake Brownies
Equipment
- square pan
- Parchment Paper
- Mixing Bowl
- Spatula
- Spoon
- Cutting Board
Ingredients
Ingredients
- 1 cupalmond butter
- 1/2 cupmaple syrup
- 2/3 cupcocoa powder
- 1 cupchocolate frosting
Instructions
Instructions
- Line a square pan with parchment paper, leaving an overhang to lift the brownies out later; set the pan aside.
- In a large mixing bowl add 1 cup almond butter, 1/2 cup maple syrup, and 2/3 cup cocoa powder. Stir until fully combined and smooth, scraping the sides of the bowl as needed.
- Transfer the mixture into the lined pan and press firmly and evenly into an even layer with a spatula or the back of a spoon.
- Spread 1 cup chocolate frosting evenly over the pressed brownie layer. If the frosting is very stiff, stir it until spreadable or briefly soften it just enough to spread.
- Refrigerate the pan for at least 30 minutes, until the brownie layer is firm.
- Lift the set brownies from the pan using the parchment overhang, place on a cutting board, slice into squares, and serve.
Notes
TO STORE
: Leftovers can be stored in the refrigerator, covered, for up to two weeks.
TO FREEZE
: Place the brownies in an airtight container and store it in the freezer for up to six months.