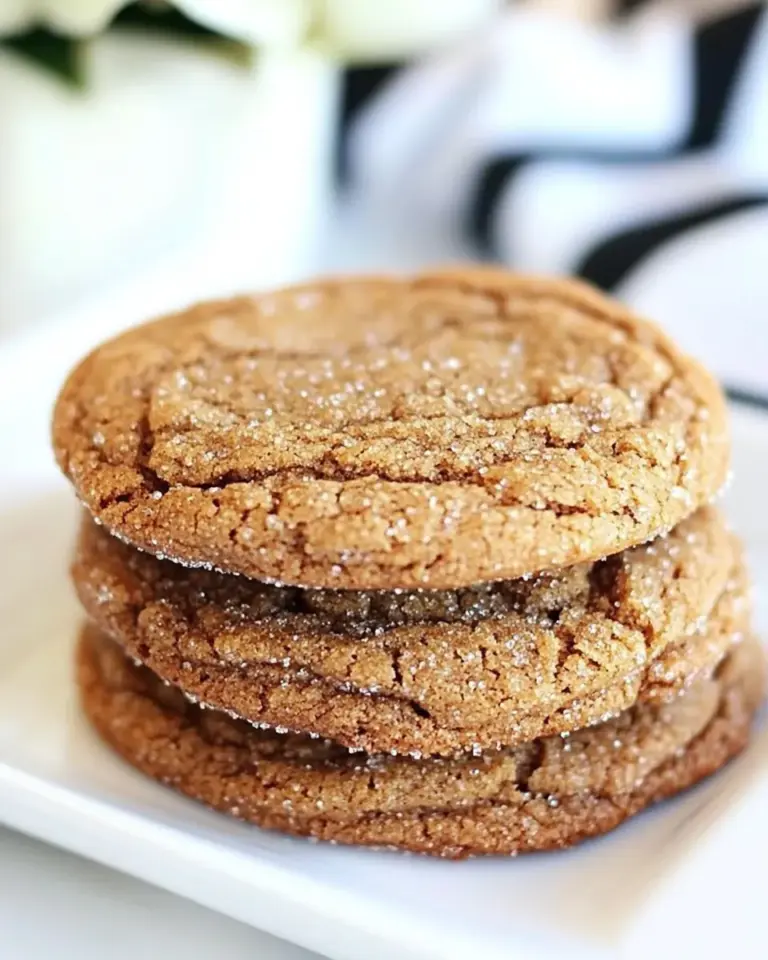
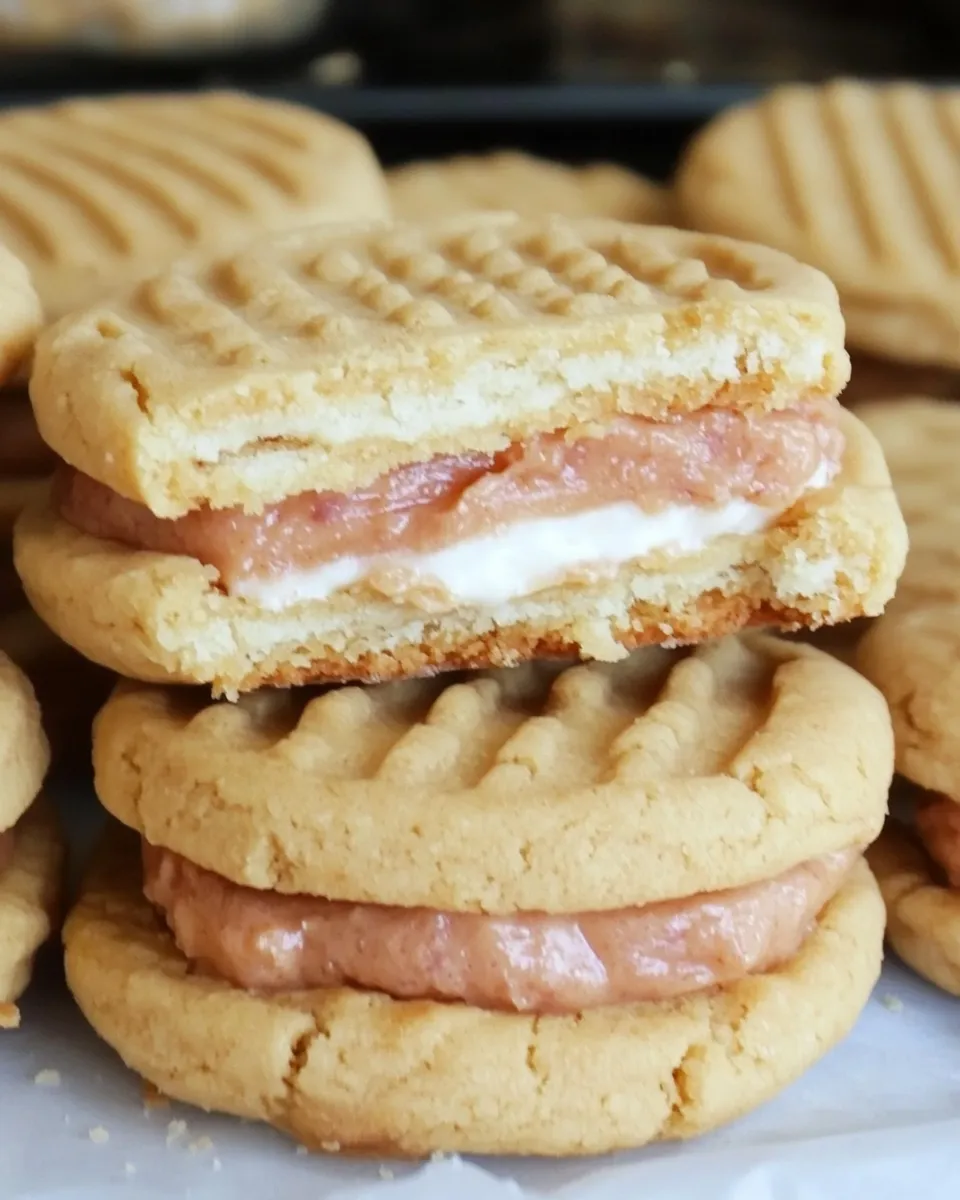
These sandwich cookies are exactly what they sound like: a tender peanut butter cookie baked until just set, sandwiched with a marshmallowy cream-cheese filling spiked with jam. They feel nostalgic — the PB&J idea reimagined for a cookie tin instead of a lunchbox — but with adult structure and reliable technique. They’re the kind of bake that travels well and doesn’t need fuss to look thoughtful.
I test this recipe on weekends and in the kitchen at odd hours because it delivers every single time. The dough is straightforward, the cookies bake quickly, and the filling comes together in minutes. Even if you’re not a regular baker, you’ll find the process forgiving: creaming, folding, a little fork-pressing, and a short bake.
Below you’ll find clear ingredient notes, the step-by-step method straight from my test kitchen notes, troubleshooting pointers, smart swaps, and storage tips so your sandwiches stay soft but not soggy. Read through once, line up your bowls, and you’ll have a tray of cookie sandwiches before you know it.
Ingredient Notes
These ingredients are chosen for balance: butter and sugars for structure and chew, peanut butter for flavor and fat, eggs for lift, and a small amount of chemical leavener so the cookies spread predictably. The filling pairs tang (cream cheese) with sweetness (marshmallow cream and jam) to echo the classic combo without being one-dimensional.
Ingredients
- 1cupunsalted butter, room temperature — Provides richness and structure; soften to room temperature so it creams smoothly with the sugars.
- 1cupbrown sugar — Adds moisture and chew thanks to its molasses content; packs lightly when measuring.
- 1cupwhite granulated sugar — Balances sweetness and helps the cookies spread properly when creamed with butter.
- 1cupcreamy peanut butter — Backbone of the flavor; creamy gives a uniform texture in the dough.
- 2large eggs — Bind and add lift; use large eggs at room temperature for even incorporation.
- 1teaspoonvanilla extract — Rounds and lifts the peanut butter flavor; pure vanilla if you have it.
- 2 1/2cupsall-purpose flour — The structure; spoon and level or sift for accurate measurement.
- 1 1/2teaspoonsbaking soda — Reacts with the acid in brown sugar and cream cheese in the filling for lightness.
- 1teaspoonbaking powder — Adds a little extra lift and steadiness to the cookie crumb.
- 1/2teaspoonsalt — Essential for flavor balance with the peanut butter and sugars.
- 1/2cupcream cheese — Softened — gives the filling tang and a smooth mouthfeel. Full-fat works best for texture.
- 1/2cupmarshmallow cream — Adds sweetness and a light, fluffy texture to the filling; also helps the filling hold shape.
- 2-3tablespoonsstrawberry jam, or whichever flavor you prefer — Use 2 tablespoons for subtler fruit notes, 3 for more pronounced jam flavor.
- powdered sugar, if needed — Optional to thicken the filling if the jam or cream makes it too loose to spread.
Cook Peanut Butter and Jelly Sandwich Cookies Like This
- Preheat the oven to 350°F (175°C). Line a baking sheet with parchment paper or a silicone baking mat, or lightly grease a non-stick cookie sheet.
- In a large bowl, place 1cupunsalted butter, room temperature, 1cupbrown sugar, and 1cupwhite granulated sugar. Beat with an electric mixer on medium speed for 3–5 minutes, until the mixture is pale and fluffy.
- Add 1cupcreamy peanut butter to the butter-sugar mixture and beat on medium speed for 30–60 seconds, until fully combined.
- Add 2large eggs and 1teaspoonvanilla extract. Beat on low-to-medium speed just until the eggs and vanilla are incorporated and the batter is uniform (about 20–30 seconds). Do not overmix.
- In a separate bowl, whisk together 2 1/2cupsall-purpose flour, 1 1/2teaspoonsbaking soda, 1teaspoonbaking powder, and 1/2teaspoonsalt.
- Add the dry ingredients to the wet ingredients in two additions. Use a rubber spatula to gently fold after each addition until no streaks of flour remain. Mix only until combined; do not overwork the dough.
- Scoop or roll the dough into 1-inch balls and place them on the prepared baking sheet about 2 inches apart. Using the tines of a fork, press each ball with the fork to create a crisscross grid pattern and slightly flatten the cookies.
- Bake the cookies in the preheated oven for 8–9 minutes, until the edges are set and the cookies are slightly golden. Centers may look slightly soft.
- Remove the cookies from the oven and let them cool on the baking sheet for 3 minutes. After 3 minutes, transfer the cookies to a wire rack to cool completely.
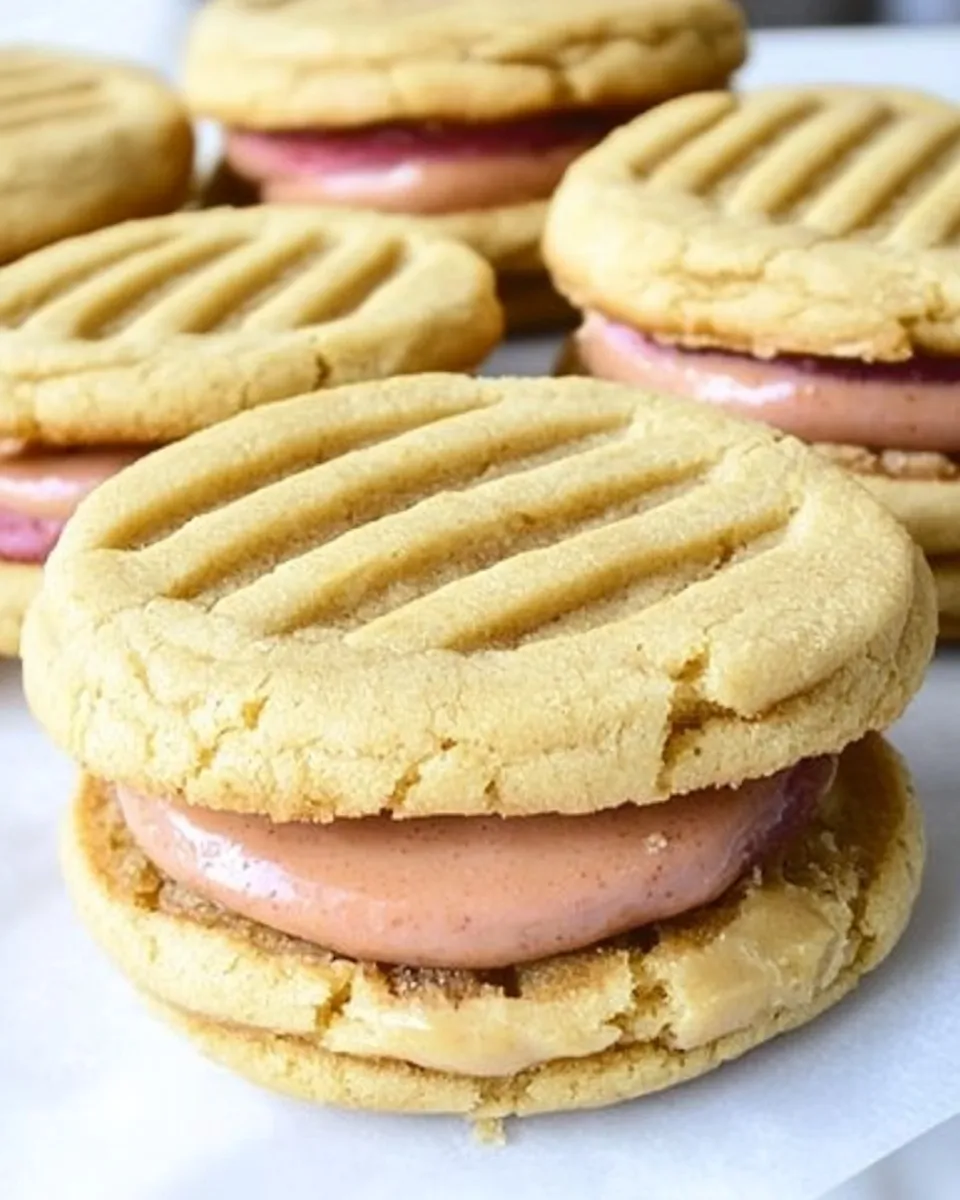
- While the cookies cool, make the filling: place 1/2cupcream cheese (softened), 1/2cupmarshmallow cream, and 2–3tablespoonsstrawberry jam in a bowl. Beat until smooth and evenly combined. If the filling is too runny to spread, beat in powdered sugar, a tablespoon at a time, until it reaches a spreadable consistency.
- To assemble sandwiches, use a butter knife or small spatula to spread a layer of filling on the bottom (flat) side of one cooled cookie, then top with another cookie to form a sandwich. Repeat with remaining cookies and filling.
- Store assembled sandwich cookies in an airtight container in the refrigerator for up to 3–4 days. If chilled, let sit a few minutes at room temperature before serving for easier eating.
Why This Recipe Belongs in Your Rotation
It’s fast and forgiving. The dough is straightforward: cream, add peanut butter, eggs, then fold in the dry ingredients. No chilling required and the bake time is short. That makes it a go-to when you want fresh-baked cookies without a full afternoon commitment.
The sandwich format lifts these above everyday drop cookies. They travel well, look nicer for a potluck, and the filling lets you play with jam flavors. The filling is intentionally stable thanks to the cream cheese and marshmallow cream, so you don’t end up with runny sandwiches within an hour of assembly.
No-Store Runs Needed

If you already keep pantry staples like flour, sugar, peanut butter, and butter on hand, odds are you can make a batch with minimal shopping. The only perishable items are eggs and cream cheese. Jam and marshmallow cream are shelf-stable or typically already in the pantry.
Checklist for a minimal shopping trip: eggs, cream cheese, and jam. Everything else is usually on hand in a well-stocked kitchen.
Cook’s Kit
- Electric mixer (hand or stand) — speeds up creaming and gives a consistent texture.
- Mixing bowls — at least two: one for wet, one for dry.
- Rubber spatula — for gentle folding so you don’t overwork the dough.
- Scoop or scale — for uniform cookies, a 1-tablespoon or 1-inch scoop keeps sizes consistent.
- Baking sheet and parchment or silicone mat — prevents sticking and promotes even browning.
- Wire rack — cools cookies so the filling doesn’t melt when assembled.
Steer Clear of These
- Overmixing the dough — that develops gluten and yields dense, tough cookies. Fold only until combined.
- Overbaking — remove at 8–9 minutes; the centers will look soft but will set as they cool.
- Assembling warm cookies — the filling will melt and make a mess. Cool completely before sandwiching.
- Using rock-hard butter — it won’t cream properly. Aim for room temperature so it yields under a firm touch.
Smart Substitutions
- Peanut butter — swapping for almond or sunflower seed butter works if you need a peanut-free option. Texture may be slightly different; creamy is preferable.
- Brown sugar — use all white granulated sugar if that’s what you have, but expect a slightly less chewy result.
- Jam — any flavor works: raspberry, grape, apricot. Choose a thicker jam for easier spreading.
- Cream cheese — full-fat gives the best texture. Neufchâtel can be used to cut fat, but add powdered sugar carefully if the filling is loose.
- Marshmallow cream — if unavailable, a thicker whipped frosting can replace it; reduce powdered sugar elsewhere to taste.
Testing Timeline
During recipe testing, I watched three variables: spread, chew, and filling stability. The 1-inch dough balls and fork press create even thickness so cookies bake in the short 8–9 minute window without over-browning.
If your cookies spread too much, check your butter temperature (too soft) or the accuracy of your flour measurement (too little flour causes extra spread). If they’re dry, reduce baking time by 30–60 seconds next round or check oven calibration.
Meal Prep & Storage Notes
Make-ahead: you can bake the cookies and store them unfilled in an airtight container at room temperature for up to 2 days. Assemble the day you plan to serve for the best texture.
Refrigeration: store assembled sandwiches in the refrigerator in an airtight container for up to 3–4 days. They soften in the fridge and are easiest to bite after sitting at room temperature for 5–10 minutes.
Freezing: freeze baked, fully cooled cookies in a single layer on a tray until solid, then transfer to an airtight bag for up to 2 months. Thaw completely, then assemble. Avoid freezing assembled sandwiches — the filling can get icy and the jam may weep on thawing.
Top Questions & Answers
- Can I use chunky peanut butter? Yes, but chunky will give a different texture and may cause slightly more spread. Smooth is recommended for consistent structure.
- Why do some cookies stay soft in the center? That’s normal here; the recipe calls for an 8–9 minute bake so centers remain slightly tender for chew. They firm as they cool.
- My filling is too runny — what next? Beat in powdered sugar, a tablespoon at a time, until it reaches a spreadable consistency. Chill briefly if needed.
- Can I make smaller or larger cookies? Yes. Adjust the bake time: smaller cookies need less time (6–7 minutes), larger ones more (10–12). Keep an eye on edge color.
- Is there a way to prevent the jam from making cookies soggy? Use a thicker jam and spread a thin layer. Assembling closer to serving time helps. Refrigerating slows moisture migration but do allow a short rest at room temperature before eating.
Next Steps
Gather your ingredients and set the oven to preheat. Follow the steps above in order: cream, fold, scoop, press, and bake. Make the filling while the cookies cool and assemble when everything is at the right temperature. If you like switching things up, try a different jam flavor for the filling next time — raspberry is my personal favorite.
When you’ve tried the recipe, note any small adjustments you made (oven quirks, flour pack density, or preferred jam quantity) and save them with the recipe so every batch gets you closer to perfect.

Peanut Butter and Jelly Sandwich Cookies
Equipment
- Mixing Bowl
- Electric Mixer
- Rubber spatula
- Baking Sheet
- Parchment paper or silicone baking mat
- Fork
- Wire Rack
- butter knife or small spatula
Ingredients
Ingredients
- 1 cupunsalted butter room temperature
- 1 cupbrown sugar
- 1 cupwhite granulated sugar
- 1 cupcreamy peanut butter
- 2 large eggs
- 1 teaspoonvanilla extract
- 2 1/2 cupsall-purpose flour
- 1 1/2 teaspoonsbaking soda
- 1 teaspoonbaking powder
- 1/2 teaspoonsalt
For the filling
- 1/2 cupcream cheese
- 1/2 cupmarshmallow cream
- 2-3 tablespoonsstrawberry jam or whichever flavor you prefer
- powdered sugar if needed
Instructions
Instructions
- Preheat the oven to 350°F (175°C). Line a baking sheet with parchment paper or a silicone baking mat, or lightly grease a non-stick cookie sheet.
- In a large bowl, place 1cupunsalted butter, room temperature, 1cupbrown sugar, and 1cupwhite granulated sugar. Beat with an electric mixer on medium speed for 3–5 minutes, until the mixture is pale and fluffy.
- Add 1cupcreamy peanut butter to the butter-sugar mixture and beat on medium speed for 30–60 seconds, until fully combined.
- Add 2large eggs and 1teaspoonvanilla extract. Beat on low-to-medium speed just until the eggs and vanilla are incorporated and the batter is uniform (about 20–30 seconds). Do not overmix.
- In a separate bowl, whisk together 2 1/2cupsall-purpose flour, 1 1/2teaspoonsbaking soda, 1teaspoonbaking powder, and 1/2teaspoonsalt.
- Add the dry ingredients to the wet ingredients in two additions. Use a rubber spatula to gently fold after each addition until no streaks of flour remain. Mix only until combined; do not overwork the dough.
- Scoop or roll the dough into 1-inch balls and place them on the prepared baking sheet about 2 inches apart. Using the tines of a fork, press each ball with the fork to create a crisscross grid pattern and slightly flatten the cookies.
- Bake the cookies in the preheated oven for 8–9 minutes, until the edges are set and the cookies are slightly golden. Centers may look slightly soft.
- Remove the cookies from the oven and let them cool on the baking sheet for 3 minutes. After 3 minutes, transfer the cookies to a wire rack to cool completely.
- While the cookies cool, make the filling: place 1/2cupcream cheese (softened), 1/2cupmarshmallow cream, and 2–3tablespoonsstrawberry jam in a bowl. Beat until smooth and evenly combined. If the filling is too runny to spread, beat in powdered sugar, a tablespoon at a time, until it reaches a spreadable consistency.
- To assemble sandwiches, use a butter knife or small spatula to spread a layer of filling on the bottom (flat) side of one cooled cookie, then top with another cookie to form a sandwich. Repeat with remaining cookies and filling.
- Store assembled sandwich cookies in an airtight container in the refrigerator for up to 3–4 days. If chilled, let sit a few minutes at room temperature before serving for easier eating.
Notes
Store assembled sandwich cookies in an airtight container in the refrigerator for up to 3–4 days.