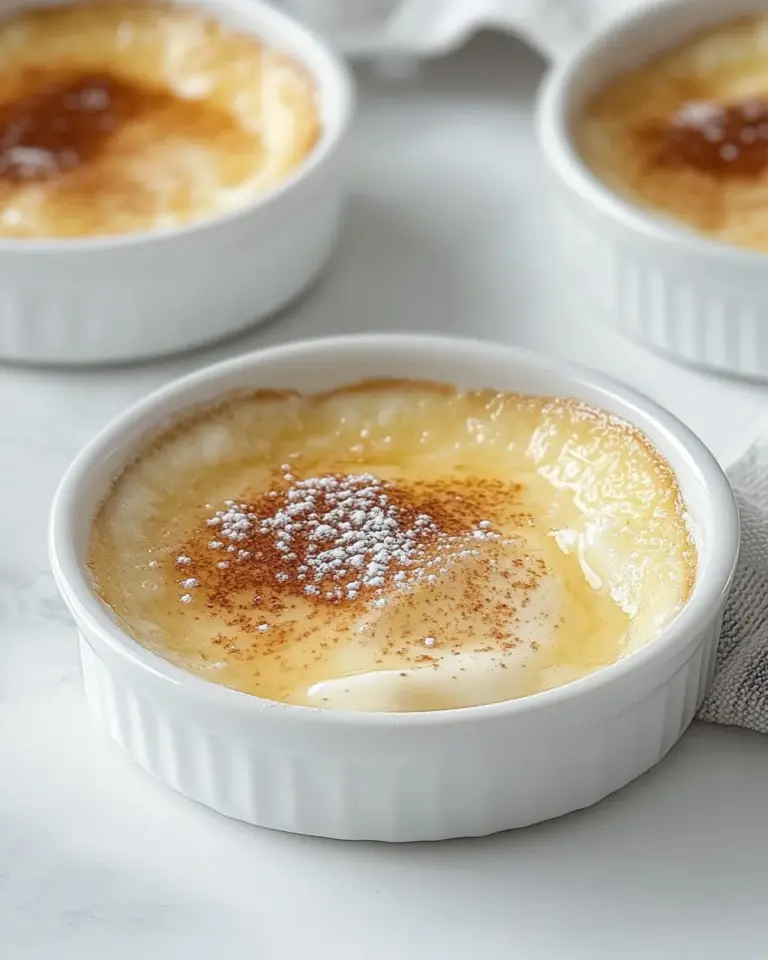
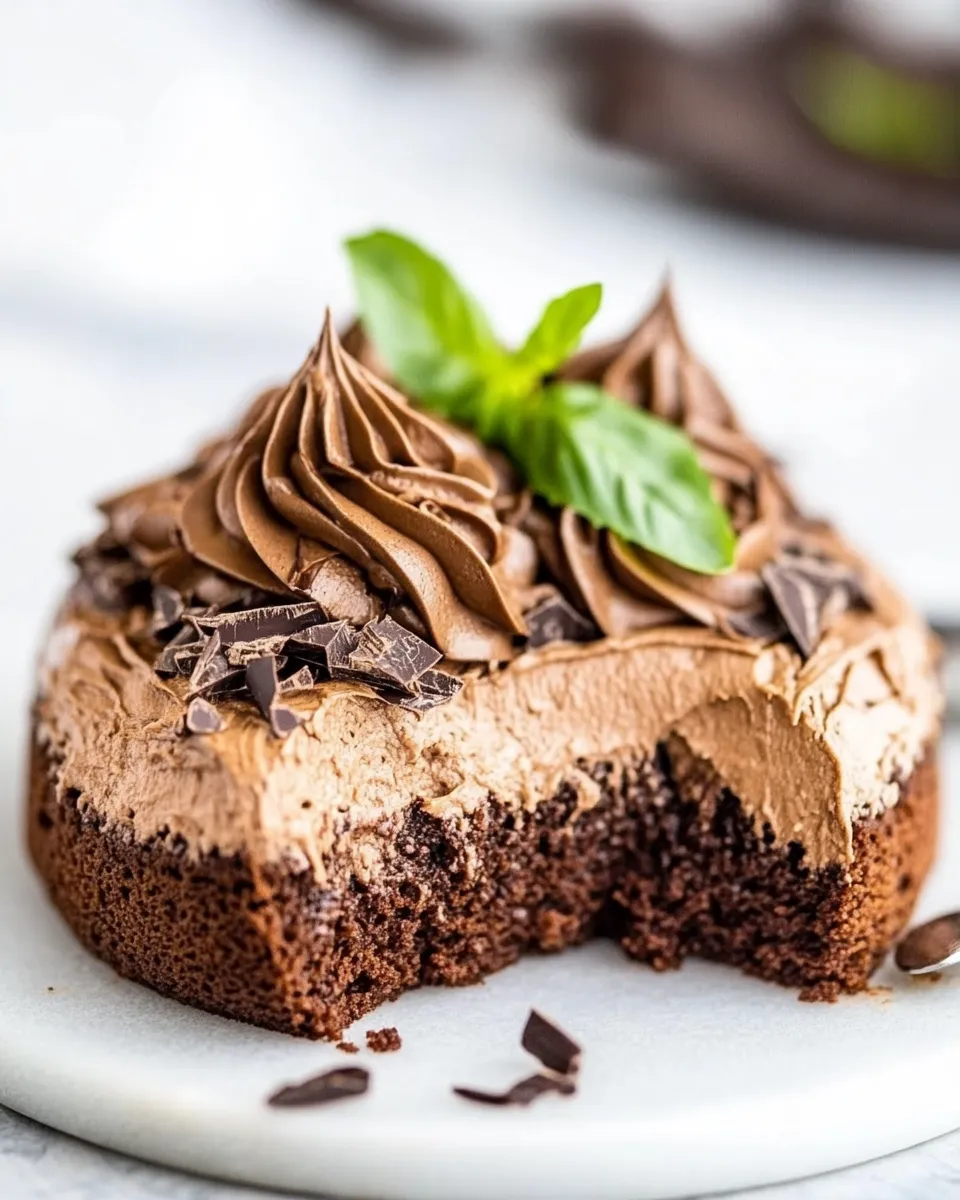
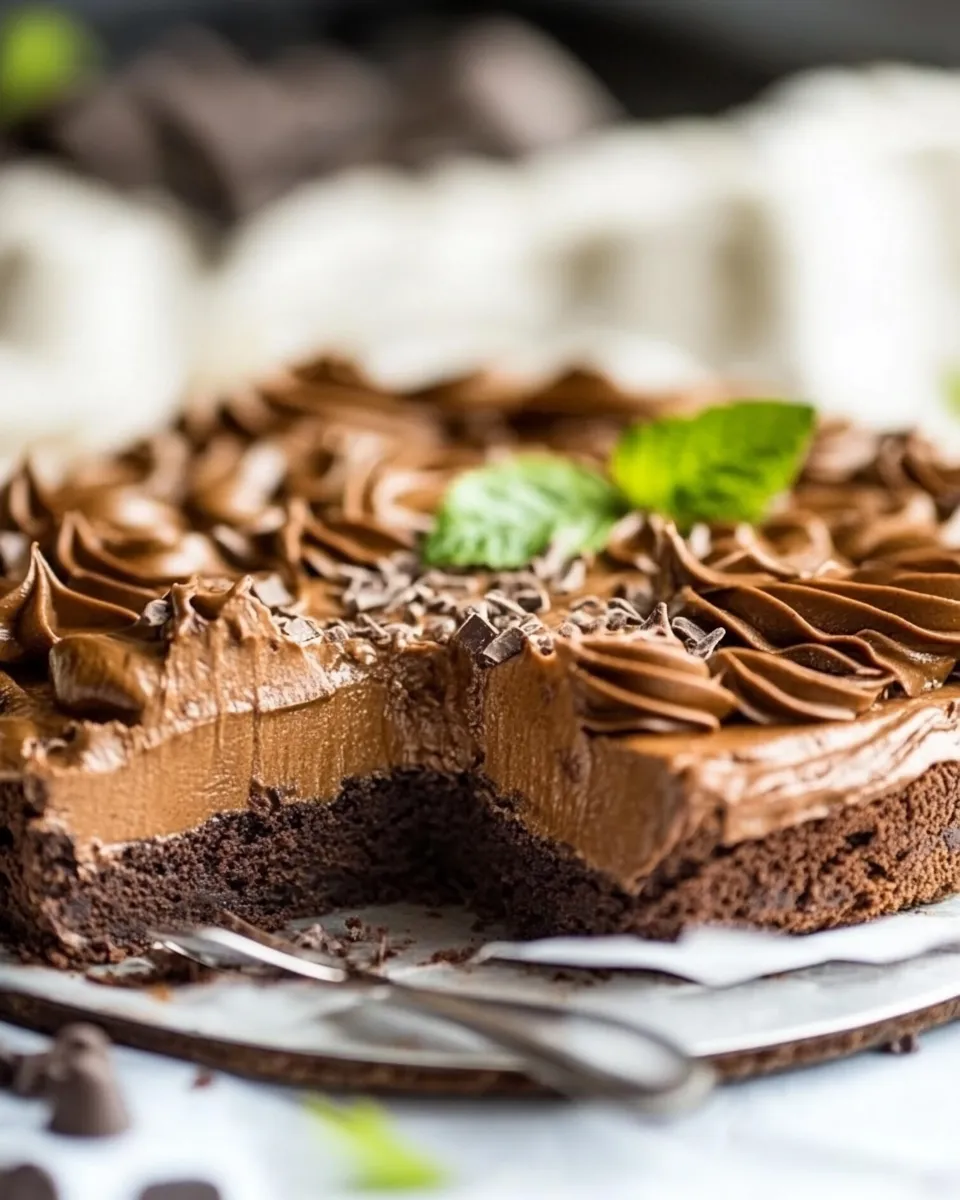
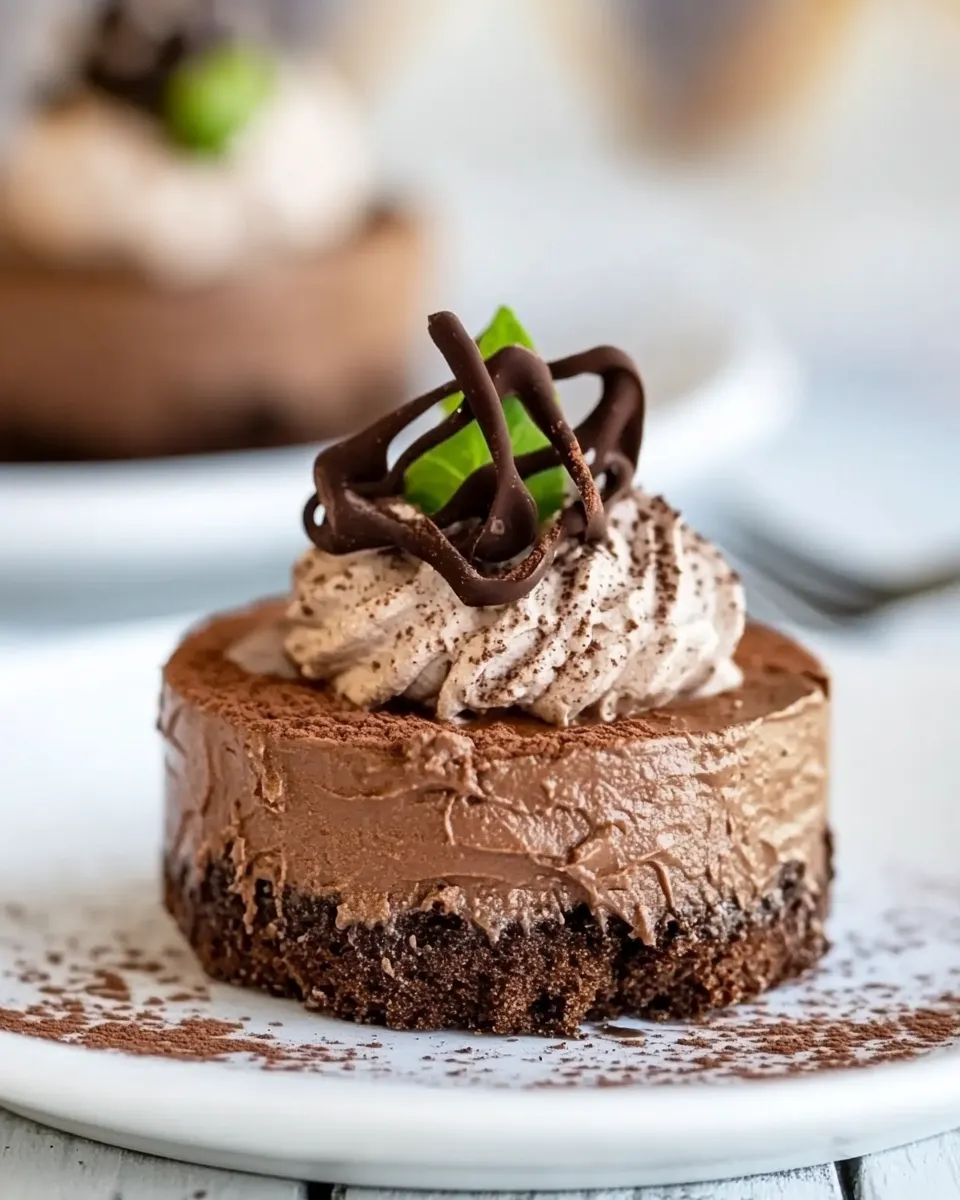
This is the kind of dessert I make when I want something that reads elegant but behaves like a reliable friend. Chocolate Velvet Dessert is rich, chocolate-forward, and surprisingly straightforward: a chocolate wafer crust, a silky chocolate custard, and a soft buttercream finish. It feels special without being fussy, and I reach for it when guests are coming or when I want a small, impressive centerpiece for a weekend dessert.
You’ll find clear steps below, with exact amounts and an ordered flow that keeps the bake simple and predictable. I test it until the texture is consistent: the custard should have a slight jiggle when it comes out of the oven and then set fully in the refrigerator overnight. The decoration is optional, but a few piped buttercream stars transform it from “home-baked” to “treat-yourself” in minutes.
Read the ingredients and the method once through before you start. The steps are forgiving if you follow the order, and a couple of practical tips I add will save you time and prevent common mistakes. Let’s get to it.
Ingredient Breakdown
- 2 cups chocolate wafer crumbs — forms the base and sides; finely crushed ensures an even, compact crust.
- 2 1/2 tablespoons sugar — adds a touch of sweetness to the crust and helps bind the crumbs.
- 1/3 cup butter, melted — binds the crumbs; warm, fully melted butter makes the crust hold its shape when pressed into the pan.
- 2 cups semisweet chocolate chips (12 ounces) — the primary chocolate flavor for the custard; use good-quality chips for best texture and taste.
- 6 egg yolks — provide richness and structure to the custard; separate and use only yolks for a smooth, dense texture.
- 1-3/4 cups heavy whipping cream — creates the custard base; the fat gives the dessert its velvety mouthfeel.
- 1 teaspoon vanilla extract — rounds and brightens the chocolate without overwhelming it.
- 1/2 cup butter, softened — for the buttercream; room temperature ensures it creams smoothly with the sugar.
- 3 cups confectioners’ sugar — sweetens and structures the buttercream; sift if lumpy.
- 3 tablespoons unsweetened cocoa powder — deepens the frosting’s chocolate flavor; use Dutch-process if you prefer a darker profile.
- 3-4 tablespoons milk — loosens the buttercream to a pipeable consistency; add gradually and stop when the frosting holds shape but is squeezable.
How to Prepare (Chocolate Velvet Dessert)
- Preheat oven to 350°F. Line a baking sheet for the springform pan to sit on (optional for easier handling).
- In a medium bowl, stir together 2 cups chocolate wafer crumbs and 2 1/2 tablespoons sugar. Stir in 1/3 cup melted butter until evenly moistened.
- Transfer the crumb mixture to a 9-inch springform pan. Press the crumbs firmly and evenly onto the bottom and up the sides about 1 1/2 inches.
- Place the springform pan on the prepared baking sheet and bake the crust at 350°F for 10 minutes. Remove from the oven and let the crust cool while you prepare the filling.
- Put 2 cups (12 ounces) semisweet chocolate chips in a microwave-safe bowl. Heat in 20-second intervals, stirring after each interval, until the chocolate is completely smooth. Let the melted chocolate cool for a few minutes.
- In a medium bowl, whisk together 6 egg yolks, 1 3/4 cups heavy whipping cream, and 1 teaspoon vanilla extract until combined.
- With the egg mixture in a steady whisking motion, gradually pour the slightly cooled melted chocolate into the egg mixture to combine (this tempers the eggs). Whisk until the mixture is smooth and uniform.
- Pour the chocolate custard into the prepared crust. Bake at 350°F for 45 to 50 minutes, or until the center is almost set (it may still have a slight jiggle).
- Remove the pan from the oven and let the dessert cool on a wire rack for 10 minutes. Run a knife around the inside edge of the springform pan to loosen the dessert.
- Let the dessert cool to room temperature, then cover and refrigerate overnight.
- To make the buttercream, beat 1/2 cup softened butter in a bowl with an electric mixer until smooth.
- With the mixer on low, gradually add 3 cups confectioners’ sugar and 3 tablespoons unsweetened cocoa powder until mostly incorporated.
- Add 3 tablespoons milk and beat until smooth. If the frosting is too thick to pipe easily, add up to 1 additional tablespoon milk (up to 4 tablespoons total) until you reach a piping consistency that holds its shape but can be squeezed from a piping bag.
- If desired, release the springform pan sides and transfer the chilled dessert to a serving plate. Fit a pastry bag with a large star tip, fill with the buttercream, and pipe stars all over the top of the chilled dessert.
Why It Works Every Time
The structure here is simple and reliable: a pressed crumb crust for texture, a chocolate custard that sets gently, and a flexible buttercream that hides small imperfections. The crust uses melted butter to bind the crumbs; pressing it into the pan and a short blind bake gives it rigidity so the custard doesn’t seep into it. Tempering the eggs with slightly cooled melted chocolate prevents scrambling and keeps the custard silky.
Baking at 350°F for the specified time lets the custard cook thoroughly without overcooking the edges. The “center almost set” cue is deliberate — carryover heat and refrigeration finish the job, producing a smooth but sliceable interior. The buttercream balances richness and structure: confectioners’ sugar makes it stable enough for piping while a small amount of milk ensures it isn’t stiff.
If You’re Out Of…
If you don’t have an exact ingredient on hand, here are safe substitutions and what changes to expect:
- Chocolate wafer crumbs — you can use crushed chocolate cookies or Oreos (filling removed) for a similar effect; flavor will be slightly sweeter if fillings remain.
- Semisweet chocolate chips — a mix of bittersweet and milk chocolate works if you want a darker or milder finish; retain the same weight (12 ounces).
- Heavy whipping cream — do not replace with milk; the custard needs the fat. If absolutely necessary, use half-and-half, but expect a slightly looser texture.
- Confectioners’ sugar — powdered sugar is required for a smooth buttercream; granulated sugar will be gritty and won’t dissolve.
- Butter for buttercream — use European-style butter for a richer taste; keep the amount the same.
Prep & Cook Tools

Minimal, but precise, tools make this recipe easier:
- 9-inch springform pan — essential for easy removal of the dessert.
- Mixing bowls — a medium bowl for crust, another for custard, and one for buttercream.
- Electric mixer — for smooth, lump-free buttercream and to cream the butter.
- Microwave-safe bowl or double boiler — to melt chocolate evenly.
- Whisk and spatula — for combining and folding; a steady whisk motion is mentioned in the method for tempering.
- Wire rack and baking sheet — the rack for cooling, the sheet under the springform for safer handling.
- Pastry bag and large star tip — optional for piping the buttercream stars.
Frequent Missteps to Avoid
There are a few predictable places you can trip up. First, don’t pour very hot chocolate directly into the eggs — always let it cool a few minutes and add it slowly while whisking to temper the yolks. Second, overbaking the custard will dry it out; aim for a slight jiggle at the center when you take it out. Third, if your buttercream is too warm, it won’t pipe cleanly — chill it briefly, then whip again to the right consistency. Lastly, don’t skip the overnight chill: it dramatically improves slicing and texture.
Fit It to Your Goals
Serve scales and ideas:
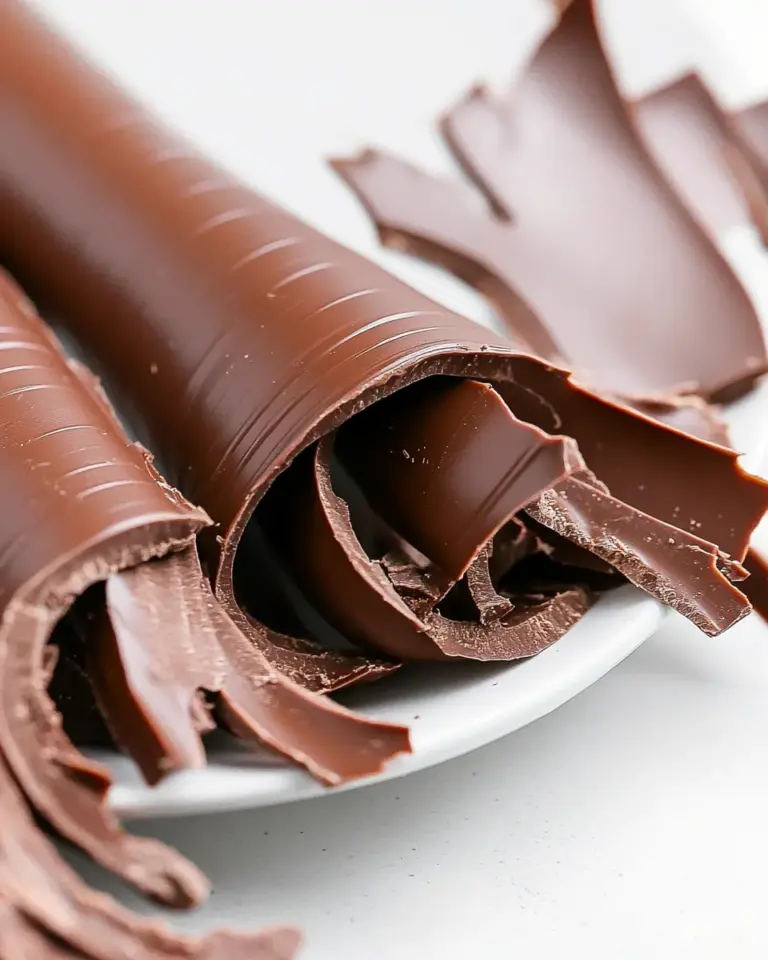
- For a dinner party: pipe the buttercream decoratively and add a few chocolate shavings or cocoa-dusted raspberries for contrast.
- For a low-effort finish: skip piping and dust the top with a thin layer of cocoa powder or powdered sugar.
- To make it richer: use a higher percentage chocolate for the custard or fold a spoonful of crème fraîche into the whipped cream before adding to the custard (note: altering the cream ratio changes texture slightly).
- For smaller servings: the recipe fits one 9-inch pan. If you need to halve it, precise measurements and a smaller round pan (6–7 inch) will help, but chilling time may change.
Recipe Notes & Chef’s Commentary
I test desserts like this to find the sweet spot between indulgence and reliability. The overnight chill is non-negotiable in my book — it finishes the custard and makes clean slices possible. When melting chocolate, stirring frequently after short bursts of heat is faster and safer than long exposure. You’ll also find that pressing the crust up the sides gives a nicer profile and holds the custard in place.
When piping, a large star tip creates a classic look quickly. If the buttercream seems a touch grainy after adding the powdered sugar, beat it a little longer — confectioners’ sugar usually dissolves with extra mixing. If bubbles form after piping, a quick spatula smoothing or a light torch pass (careful) can finish the top smoothly.
Keep-It-Fresh Plan
Storage and handling to keep the dessert at its best:
- Refrigerate: keep covered in the refrigerator for up to 4 days. The custard and buttercream both hold well chilled.
- Freeze: you can freeze slices wrapped tightly in plastic wrap and foil for up to 1 month. Thaw overnight in the refrigerator before serving; textures will soften slightly.
- Transport: if you need to move the dessert, release the springform sides and transfer the chilled cake to a sturdy plate before travel. Keep it level and cool during transit to avoid slippage.
Frequently Asked Questions
Can I make this without a springform pan?
A springform pan is recommended for easy removal. If you don’t have one, line a regular cake pan with parchment and leave some overhang to lift the finished dessert out, or bake in a tart pan with a removable bottom.
Why only egg yolks?
Egg yolks add richness and create a dense, silky custard. Whites would change the texture, making it lighter and more fragile.
Can I use store-bought frosting?
Yes, in a pinch. Homemade buttercream is richer and pipes better, but a quality store-bought frosting can save time—just be aware of sweetness levels.
My custard cracked—what happened?
Cracking usually comes from overbaking. Aim for the center to still have a slight jiggle when you pull it out; it will finish setting in the fridge.
Let’s Eat
Slice straight from the fridge and serve with a small spoon of whipped cream or a handful of fresh berries to cut through the richness. Each bite should feel plush and chocolate-forward, with a satisfying contrast from the crumb crust. Keep it simple and let the chocolate speak for itself — this dessert is designed to be both showy and forgiving.
Make it a night—invite people who appreciate chocolate. Or keep it all to yourself and savor one tidy piece each evening. Either way, it’s a dependable dessert that rewards attention to the few key details above. Enjoy.
Chocolate Velvet Dessert
Equipment
- 9-inch Springform Pan
- Baking Sheet
- Medium Bowl
- Whisk
- Microwave-safe Bowl
- Electric Mixer
- Wire Rack
- Knife
- Pastry bag
- large star tip
- Oven
Ingredients
Ingredients
- 2 cupschocolate wafer crumbs
- 2 1/2 tablespoonssugar
- 1/3 cupbutter ,melted
- 2 cupssemisweet chocolate chips (12 ounces)
- 6 egg yolks
- 1-3/4 cupsheavy whipping cream
- 1 teaspoonvanilla extract
- 1/2 cupbutter ,softened
- 3 cupsconfectioners’ sugar
- 3 tablespoonsunsweetened cocoa powder
- 3-4 tablespoonsmilk
Instructions
Instructions
- Preheat oven to 350°F. Line a baking sheet for the springform pan to sit on (optional for easier handling).
- In a medium bowl, stir together 2 cups chocolate wafer crumbs and 2 1/2 tablespoons sugar. Stir in 1/3 cup melted butter until evenly moistened.
- Transfer the crumb mixture to a 9-inch springform pan. Press the crumbs firmly and evenly onto the bottom and up the sides about 1 1/2 inches.
- Place the springform pan on the prepared baking sheet and bake the crust at 350°F for 10 minutes. Remove from the oven and let the crust cool while you prepare the filling.
- Put 2 cups (12 ounces) semisweet chocolate chips in a microwave-safe bowl. Heat in 20-second intervals, stirring after each interval, until the chocolate is completely smooth. Let the melted chocolate cool for a few minutes.
- In a medium bowl, whisk together 6 egg yolks, 1 3/4 cups heavy whipping cream, and 1 teaspoon vanilla extract until combined.
- With the egg mixture in a steady whisking motion, gradually pour the slightly cooled melted chocolate into the egg mixture to combine (this tempers the eggs). Whisk until the mixture is smooth and uniform.
- Pour the chocolate custard into the prepared crust. Bake at 350°F for 45 to 50 minutes, or until the center is almost set (it may still have a slight jiggle).
- Remove the pan from the oven and let the dessert cool on a wire rack for 10 minutes. Run a knife around the inside edge of the springform pan to loosen the dessert.
- Let the dessert cool to room temperature, then cover and refrigerate overnight.
- To make the buttercream, beat 1/2 cup softened butter in a bowl with an electric mixer until smooth.
- With the mixer on low, gradually add 3 cups confectioners’ sugar and 3 tablespoons unsweetened cocoa powder until mostly incorporated.
- Add 3 tablespoons milk and beat until smooth. If the frosting is too thick to pipe easily, add up to 1 additional tablespoon milk (up to 4 tablespoons total) until you reach a piping consistency that holds its shape but can be squeezed from a piping bag.
- If desired, release the springform pan sides and transfer the chilled dessert to a serving plate. Fit a pastry bag with a large star tip, fill with the buttercream, and pipe stars all over the top of the chilled dessert.