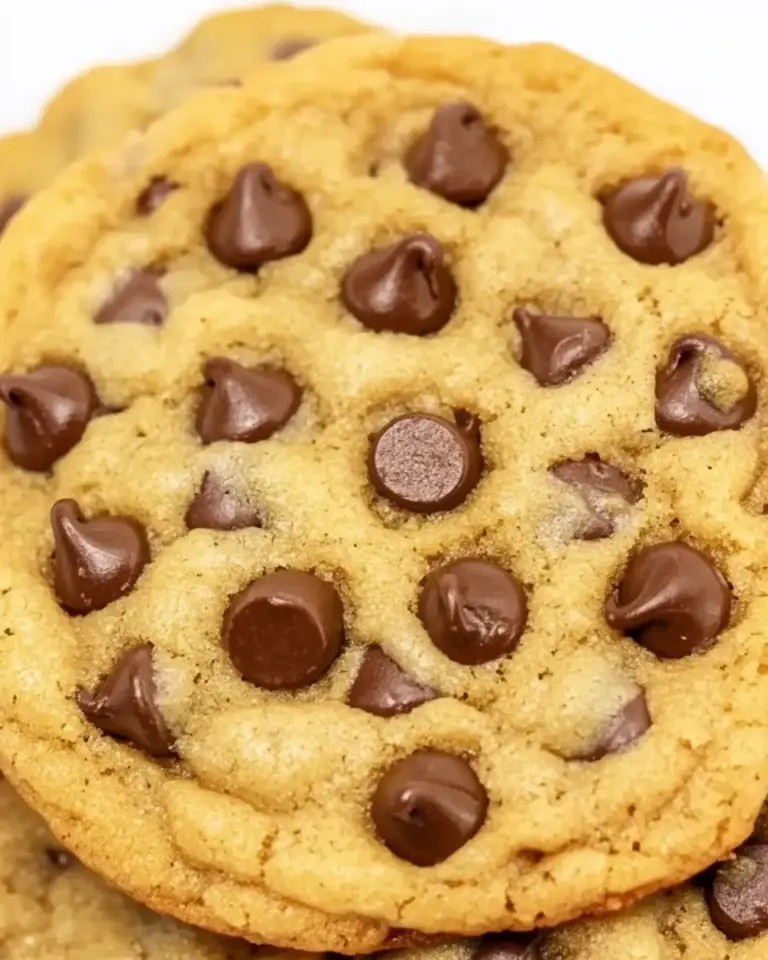
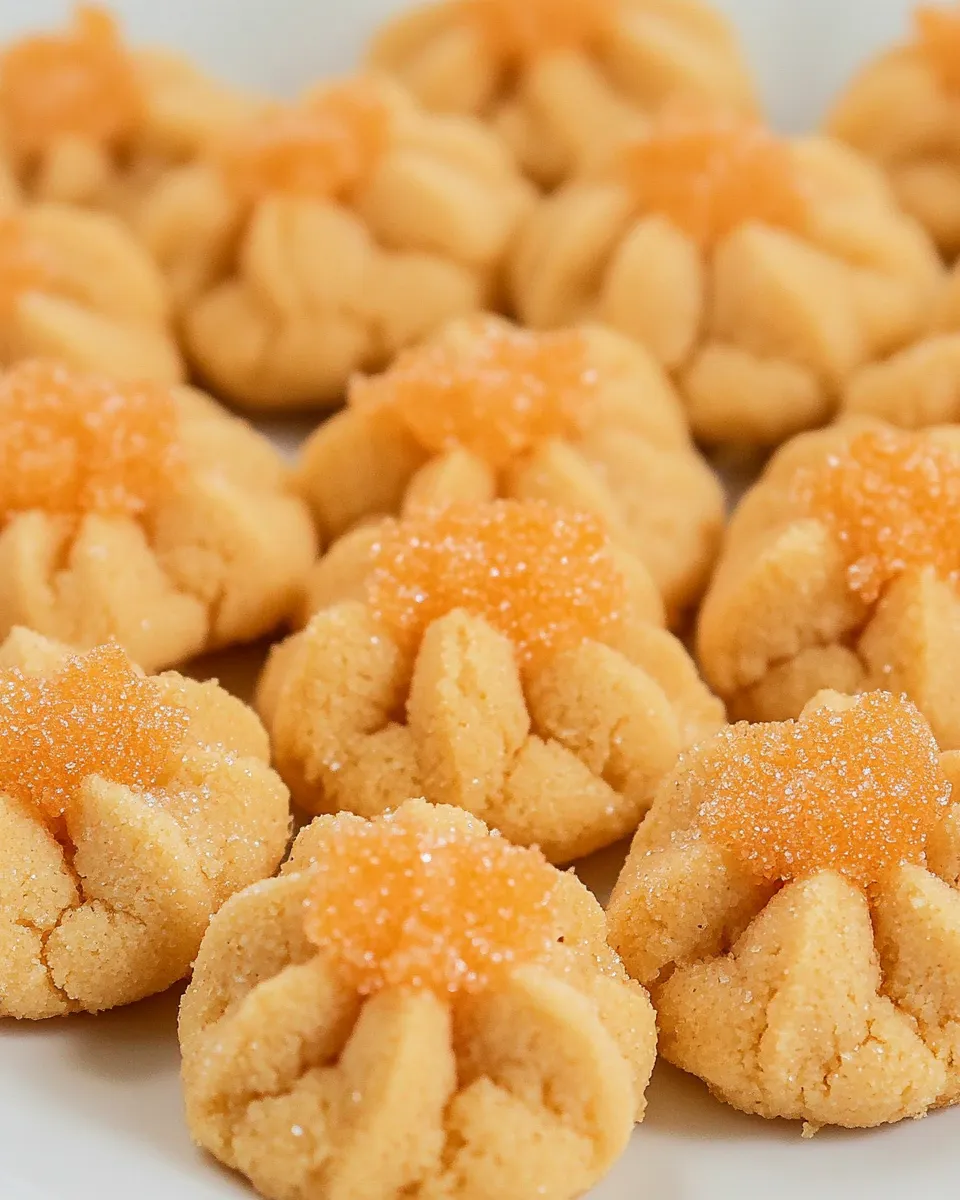
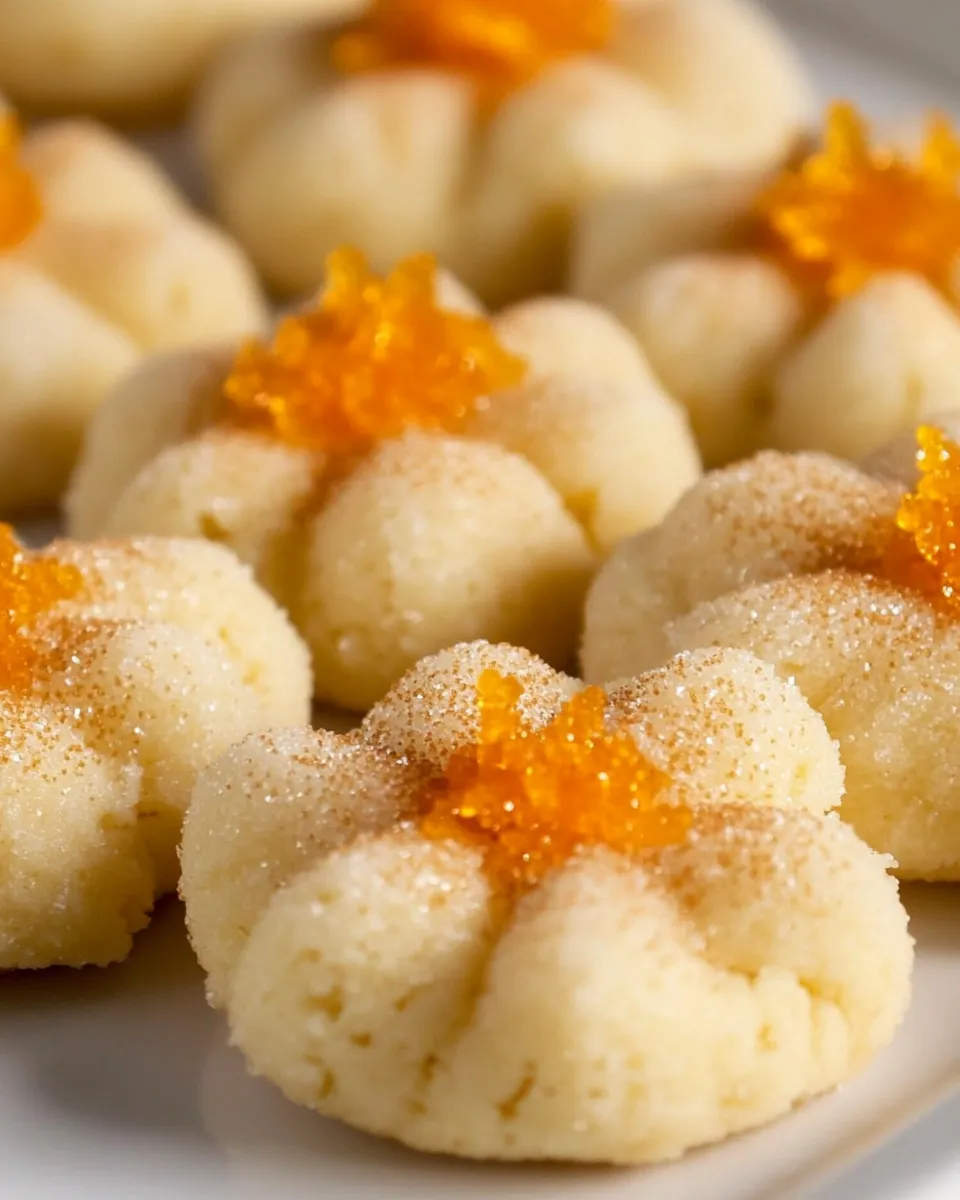
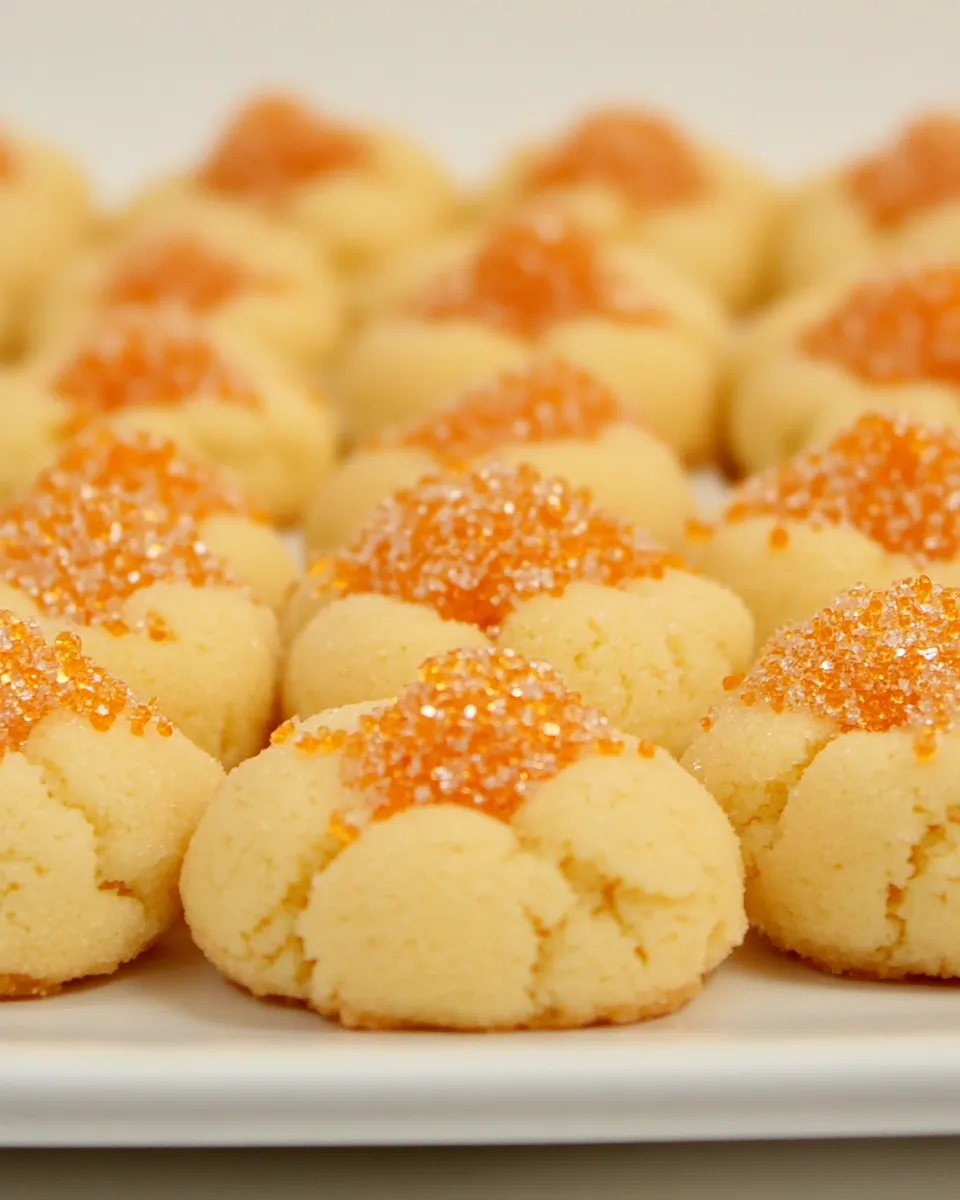
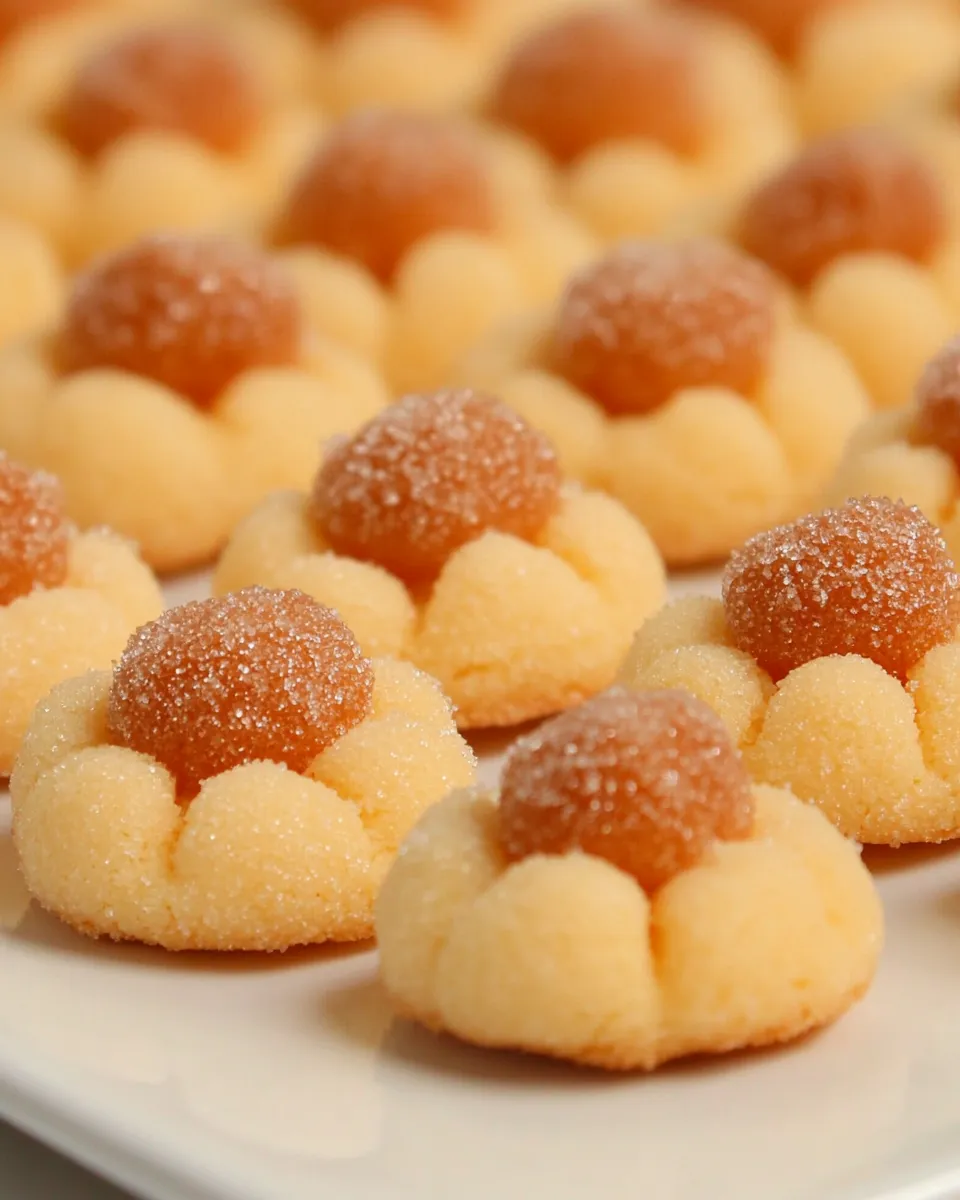
These Sugar Cookie Blossoms are the kind of cookie you can make on a weekday afternoon and still show up at a party with something that looks and tastes like you spent the whole day baking. Crisp, tender, with a bright smear of orange-scented sugar on the outside and a chocolate kiss tucked into the middle — they come together quickly and deliver on classic comfort.
No complicated dough chilling, no complex shaping. The dough is straightforward, you roll it in a fragrant orange-sugar, bake until the edges just set, and press a Hershey’s Kiss into the warm center. They finish cooling on a rack, and you have 24 small, charming cookies in under an hour.
I like these because they are honest cookies: few ingredients, simple technique, satisfying result. They’re perfect for bake sales, holiday trays, or a last-minute dessert to bring when you need something pretty and reliable.
Ingredient Notes
Below I list each ingredient from the recipe and a short note on what it contributes or a simple tip. Read these before you start so nothing surprises you during assembly.
Ingredients
- 1/4 cup butter, softened — provides richness, tenderness, and structure; softened butter creams smoothly with sugar.
- 3/4 cup granulated sugar — sweetens and helps create a slight crisp edge; the creamed sugar also traps air for lift.
- 1 egg — binds the dough and gives moisture and a bit of chew.
- 1 teaspoon vanilla extract — rounds the flavor and balances the orange zest.
- 1 1/4 cups all purpose unbleached flour — the base of the dough; unbleached is a reliable choice for texture.
- 1/4 teaspoon cream of tartar — adds a mild tang and helps keep the cookies tender and slightly chewy.
- 1/4 teaspoon baking soda — provides a little lift and lightness to the crumb.
- 1/4 teaspoon salt — enhances flavor and balances the sweetness.
- 24 Hershey’s Kisses, any flavor — the signature center; milk chocolate is classic, but other flavors work if you prefer.
- 1/4 cup granulated sugar — separate portion for rolling; here it gets flavored with zest for a bright outer snap.
- 2 teaspoons orange zest — rubbed into the rolling sugar for a fresh citrus note that cuts the sweetness.
How to Prepare (Sugar Cookie Blossoms)
- Preheat oven to 400°F and place a rack in the center of the oven.
- In a large bowl, use an electric hand mixer to cream 1/4 cup softened butter and 3/4 cup granulated sugar together until smooth.
- Add 1 egg and 1 teaspoon vanilla extract to the butter mixture and beat about 2 minutes, until light and fluffy.
- In a separate bowl, whisk together 1 1/4 cups all-purpose unbleached flour, 1/4 teaspoon cream of tartar, 1/4 teaspoon baking soda, and 1/4 teaspoon salt.
- Gradually add the dry ingredients to the wet mixture and stir until just combined; avoid overmixing.
- On a small plate, combine 1/4 cup granulated sugar and 2 teaspoons orange zest, rubbing the zest into the sugar with your fingers so it is evenly distributed.
- Using a cookie scoop, portion the dough, then roll each scoop in the orange-sugar to lightly coat. Place the coated dough balls on an un-greased cookie sheet about 2 inches apart.
- Bake the cookies 8–10 minutes, or until the bottoms are just barely starting to brown and the edges are set.
- While the cookies are baking, unwrap the 24 Hershey’s Kisses.
- Remove the baking sheet from the oven and immediately, while the cookies are still warm, carefully press one Hershey’s Kiss into the center of each cookie.
- Let the cookies cool on the hot baking sheet for 5 minutes, then transfer them to cooling racks to cool completely.
Why You’ll Keep Making It
These cookies are uncomplicated and deliver consistent results. That matters. A recipe that works on the first try becomes a go-to. The orange-sugar coating gives a small, unexpected lift to the flavor profile — it keeps the cookies from tasting flat or overly sweet.
The Hershey’s Kiss pressed into the center is both nostalgic and efficient: no frosting, no piping, just a neat chocolate pocket. They look special with almost no effort, and that makes them useful for last-minute plans.
They scale well and travel easily. Make a double batch for a party and you’ll still be assembling faster than you think. If you like small cookies that offer a little snap, a tender middle, and a contrasting chocolate center, this is the recipe you’ll reach for again.
Substitutions by Category
- Butter — If you need to swap, use an equal amount of unsalted margarine for a dairy-free-ish option, but expect a slight texture change. Butter is preferred for flavor.
- Sugar — White granulated sugar gives the right snap and structure. Substituting part of it with a light brown sugar will add chew and a hint of molasses; reduce nothing, but expect a softer edge.
- Egg — For an egg-free version, try an appropriate commercial egg replacer or 3 tablespoons of applesauce (texture will be softer). This will alter the crumb.
- Flour — Stick with all-purpose unbleached to match texture. If you must use a gluten-free blend, use a 1:1 cup-for-cup blend labeled for baking; results can vary, so test one batch first.
- Hershey’s Kisses — Any small chocolate candy of similar size works as a center; if you swap to a larger or smaller chocolate, adjust placement so the cookie still supports it.
- Orange zest — Lemon or lime zest can replace orange if you want a brighter or tarter note. Dried citrus zest is less vibrant; fresh zest is best.
- Leavening — The recipe uses cream of tartar and baking soda for a classic sugar-cookie bite. Don’t skip or drastically change these without testing, as texture depends on them.
Essential Tools for Success
- Electric hand mixer — Creames the butter and sugar quickly and evenly; a stand mixer works just as well.
- Cookie scoop — Ensures uniform cookies so they bake in the same time and look consistent.
- Microplane or fine grater — For zesting citrus; a fresh zest disperses flavor into the rolling sugar.
- Small plate — Where you rub the orange zest into the sugar for easy coating.
- Baking sheets — Use light-colored pans for even browning; no need to grease the sheets for this recipe.
- Cooling rack — Essential for stopping carryover baking once the cookies are removed from the sheet.
Learn from These Mistakes
Common issues are easy to fix if you know what to look for.
- Cookies spread too thin — That usually happens if the butter was too soft or melted. Chill the scooped dough briefly (10–15 minutes) before rolling if your kitchen is warm.
- Centers crack or sink when placing chocolate — If you press the Kiss in too deep, the cookie can collapse. Press gently and only after the cookie leaves the oven so the structure is set but still warm.
- Edge over-browning — Ovens vary. Start checking at 8 minutes and look for set edges and lightly colored bottoms. If the bottoms brown quickly, use a higher rack or lower the oven 25°F next time.
- Orange sugar not fragrant — Be sure to rub the zest into the sugar with your fingers; that releases essential oils and perfumes the sugar. If you pre-zest too far ahead, store the zest lightly wrapped in the fridge to preserve brightness.
Make It Fit Your Plan
Need to scale, prep ahead, or adjust for a crowd? This recipe is forgiving.
- To double — Double each ingredient, scoop to uniform size, and bake in batches. Don’t overcrowd sheets.
- To prepare ahead — Make the dough, portion with the scoop, roll in the orange-sugar, then freeze the dough balls on a tray. Transfer to a bag and bake from frozen; add a minute or two to the bake time.
- Health-minded tweaks — Reducing sugar will change texture and browning. For a lighter option, reduce the sugar by small increments and test. Keep expectations modest: sugar affects structure.
- For a themed batch — Swap Kiss flavors for seasonal colors (peppermint for winter, caramel for autumn) to match an occasion.
Pro Perspective
As a baker, I focus on three things: consistent sizing, oven control, and timing. Use a scoop — identical dough balls are the secret to even baking. Know your oven; if it runs hot, lower the temp by 15–25°F. Finally, timing is not about hitting an exact minute but watching cues: set edges and barely-colored bottoms.
Press the chocolate into the warm cookie, not piping-hot and not cold. Warm is the sweet spot: the dough will cradle the chocolate without letting it sink. Let the cookies rest five minutes on the hot sheet to firm up, then transfer to racks.
Store, Freeze & Reheat
- Room temperature — Store cooled cookies in an airtight container at room temperature for up to 3 days. Separate layers with parchment if stacking.
- Refrigeration — Not necessary; refrigeration can dry them out. Only refrigerate if your kitchen is very warm and you need to protect chocolate centers for a short time.
- Freezing — Freeze baked, cooled cookies in a single layer on a tray, then transfer to a freezer bag for up to 2 months. Thaw at room temperature before serving.
- Baking from frozen dough — If you freeze scooped dough balls, bake from frozen and add 1–2 minutes to time; press on the Kiss as soon as they come out of the oven.
- Reheating — A 10–15 second zap in the microwave softens the chocolate but can over-soften the cookie. A 2–3 minute warm-up in a 300°F oven refreshes texture without melting the Kiss too much.
Ask the Chef
- Q: Can I use less sugar? A: You can reduce sugar slightly, but it will affect spread and texture. Cut no more than 10–15% on a first test.
- Q: Can I omit the orange zest? A: Yes, but the outer sugar will lose its bright note. Consider substituting vanilla bean or a pinch of cinnamon for a different character.
- Q: What if my dough is sticky? A: Chill briefly to firm it up for scooping. If it’s still sticky, dust your hands with a little flour while handling.
- Q: Can I use larger chocolate pieces? A: Yes, but larger pieces may cause the cookie to collapse if pressed too deeply. Place gently and press only to level.
- Q: Do I need to grease the baking sheet? A: No. These cookies bake fine on un-greased sheets; greasing can make bottoms brown faster.
Ready to Cook?
Set your oven to 400°F, gather the ingredients, and pre-measure the orange-sugar so assembly moves quickly. Use a cookie scoop for uniform portions and an electric hand mixer for a light, well-creamed base. Follow the recipe steps, watch for the edges to set, and press a Hershey’s Kiss while the cookies are warm. That’s it — simple, dependable, and delightful.
Make a batch, let them cool on a rack, and enjoy the small satisfaction of a perfect little blossom of cookie and chocolate.
Sugar Cookie Blossoms
Equipment
- Oven
- electric hand mixer
- Large Bowl
- separate bowl
- small plate
- Cookie Scoop
- Baking Sheet
- Cooling rack
- Whisk
Ingredients
Ingredients
- 1/4 cupbuttersoftened
- 3/4 cupgranulated sugar
- 1 egg
- 1 teaspoonvanilla extract
- 1 1/4 cupsall purpose unbleached flour
- 1/4 teaspooncream of tartar
- 1/4 teaspoonbaking soda
- 1/4 teaspoonsalt
- 24 Hershey's Kissesany flavor
- 1/4 cupgranulated sugar
- 2 teaspoonsorange zest
Instructions
Instructions
- Preheat oven to 400°F and place a rack in the center of the oven.
- In a large bowl, use an electric hand mixer to cream 1/4 cup softened butter and 3/4 cup granulated sugar together until smooth.
- Add 1 egg and 1 teaspoon vanilla extract to the butter mixture and beat about 2 minutes, until light and fluffy.
- In a separate bowl, whisk together 1 1/4 cups all-purpose unbleached flour, 1/4 teaspoon cream of tartar, 1/4 teaspoon baking soda, and 1/4 teaspoon salt.
- Gradually add the dry ingredients to the wet mixture and stir until just combined; avoid overmixing.
- On a small plate, combine 1/4 cup granulated sugar and 2 teaspoons orange zest, rubbing the zest into the sugar with your fingers so it is evenly distributed.
- Using a cookie scoop, portion the dough, then roll each scoop in the orange-sugar to lightly coat. Place the coated dough balls on an un-greased cookie sheet about 2 inches apart.
- Bake the cookies 8–10 minutes, or until the bottoms are just barely starting to brown and the edges are set.
- While the cookies are baking, unwrap the 24 Hershey's Kisses.
- Remove the baking sheet from the oven and immediately, while the cookies are still warm, carefully press one Hershey's Kiss into the center of each cookie.
- Let the cookies cool on the hot baking sheet for 5 minutes, then transfer them to cooling racks to cool completely.
Notes
*You could also add in some pumpkin pie spice too! Yum! I didn’t, but feel free to switch it up! I don’t know if this will make the sugar look less orange and more brown or vice versa. Experiment and let me know 🙂