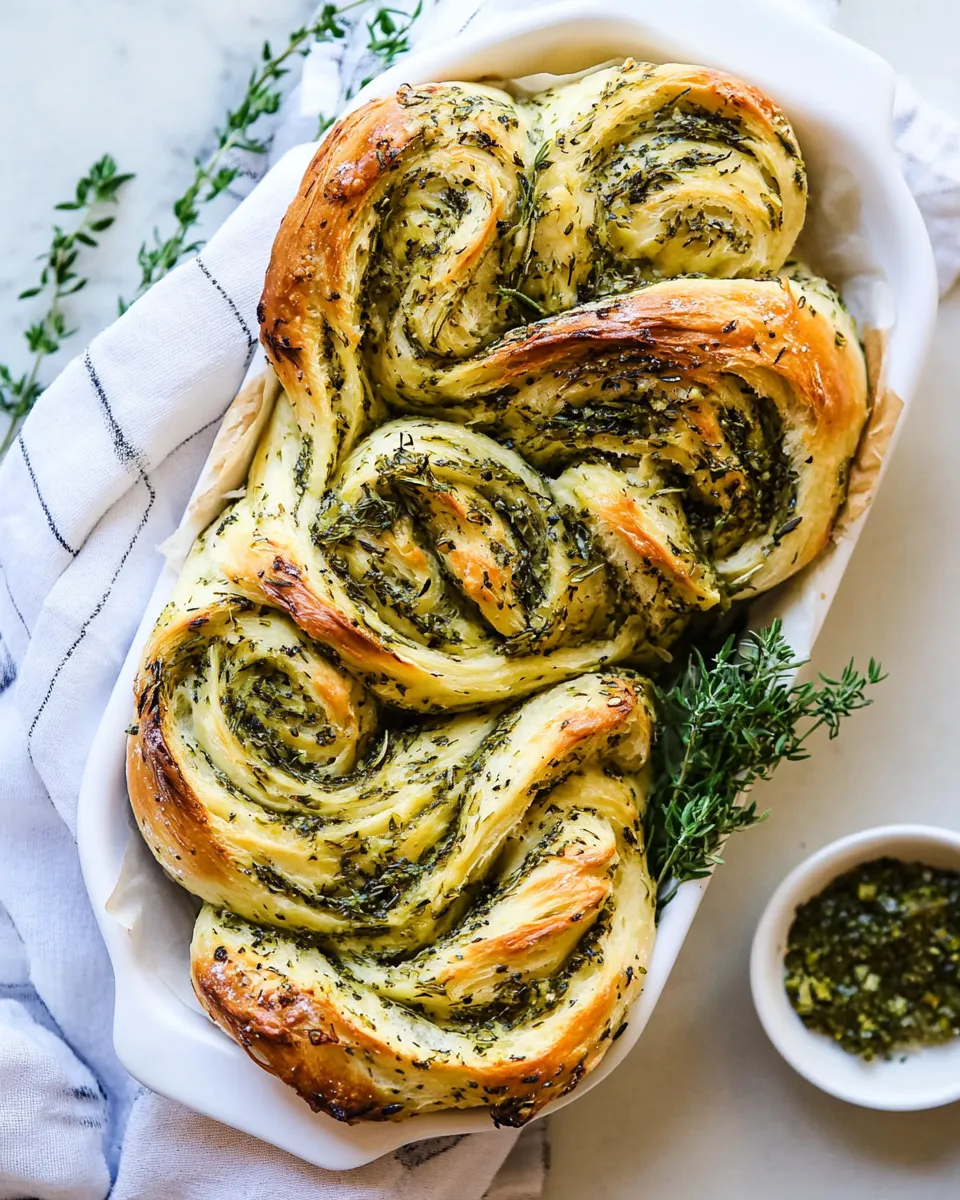
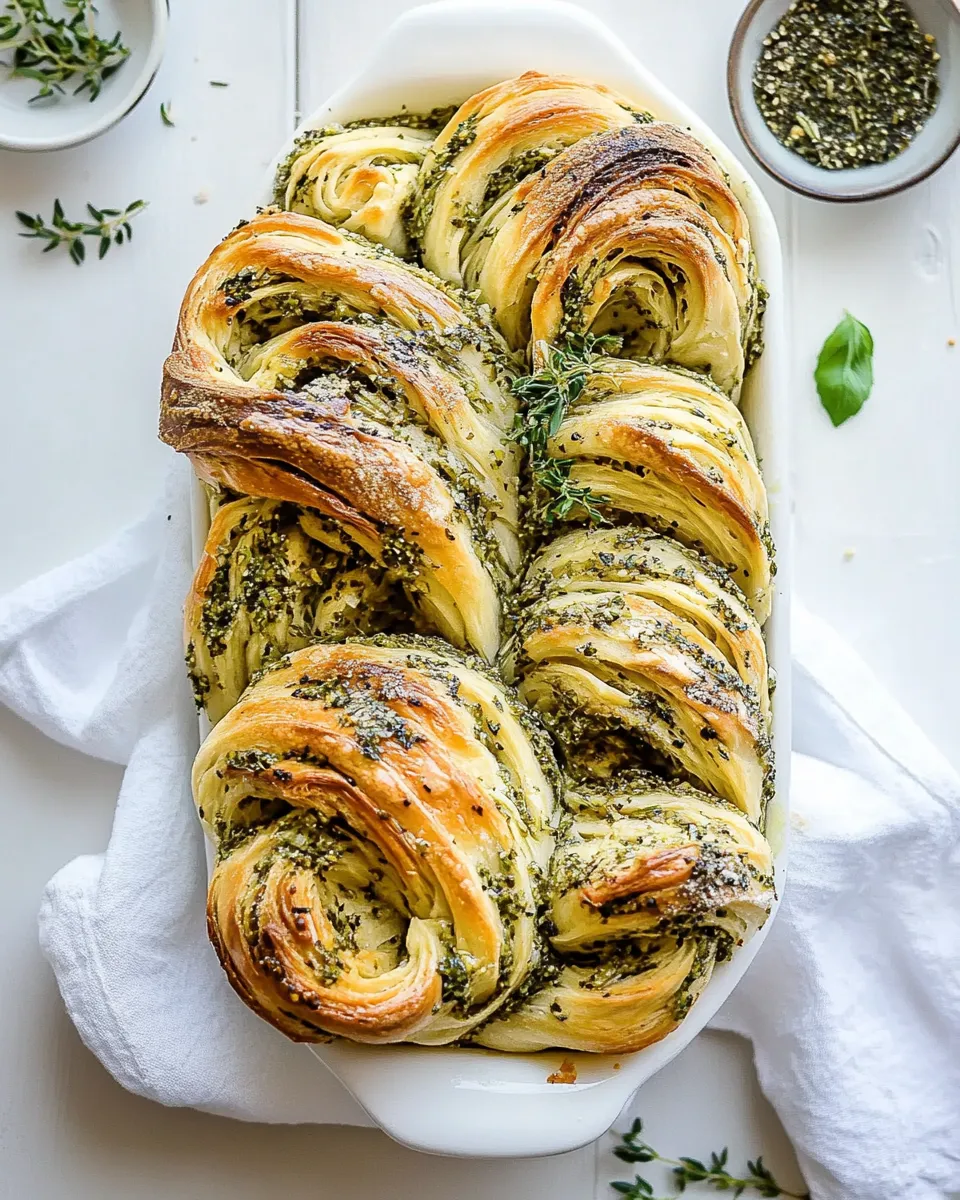
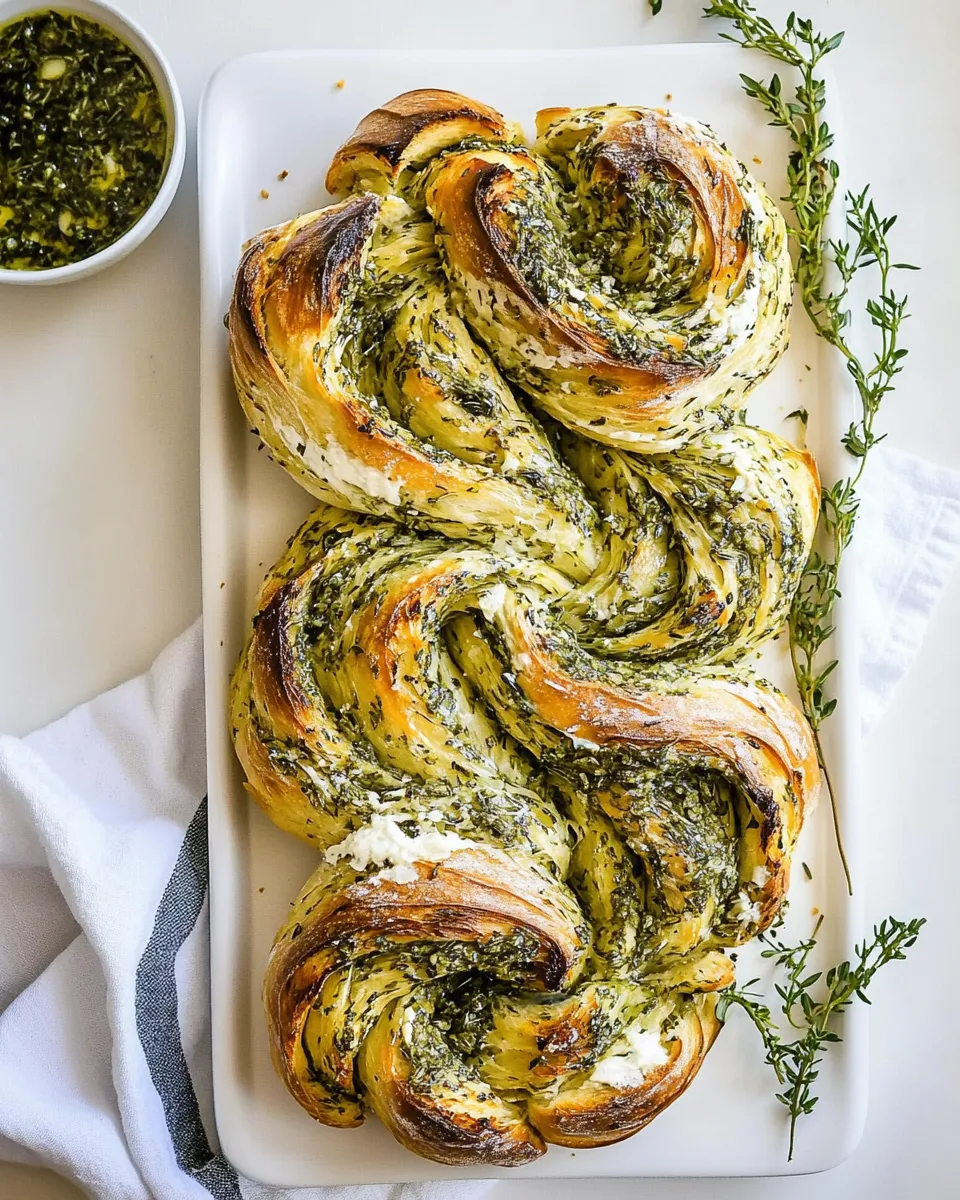
This Swirled Garlic Herb Bread is the kind of loaf you bake when you want a centerpiece that tastes like a warm hug. It has a soft, enriched crumb, layers of garlic-herb butter, and a twisted, coiled shape that pulls apart in wide, buttery ribbons. It’s sturdy enough to stand on the table and soft enough to disappear slice by slice.
I test techniques so you don’t have to guess. The dough is forgiving and the assembly is straightforward once you get the rolling and twisting pattern down. Whether you’re serving it with a bowl of soup, alongside a roasted chicken, or at a weekend brunch, it rewards the time you invest with big flavor and beautiful presentation.
Below you’ll find the ingredient list exactly as used, the step-by-step method, and practical tips for swaps, gear, storage, and troubleshooting. Read the ingredients and directions once before you start and you’ll move through this recipe confidently.
Ingredient Checklist
Start by gathering these items. I list the ingredients exactly as provided so you can measure and prep without surprises. The notes beneath each line are practical reminders—why the ingredient matters or how to handle it.
Ingredients
- 3/4 cup warm whole milk — provides moisture and activates the yeast; aim for warm (not hot) to the touch.
- 2 1/4 teaspoons instant yeast — the rising agent; instant yeast can be mixed right into the dough.
- 2 tablespoons honey — feeds the yeast and adds a touch of sweetness to the crumb.
- 3 large eggs — enrich the dough, add structure and color.
- 3 1/2 – 4 cups all-purpose flour, plus more for rolling — start with 3 1/2 cups and add up to 1/2 cup more if needed for a slightly tacky dough.
- 1 teaspoon kosher salt — balances sweetness and strengthens gluten.
- 6 tablespoons salted butter, at room temperature, plus more for serving — divided for mixing into the dough and finishing the loaf.
- 1-2 cloves garlic, grated or finely chopped — fragrant and sharp; use the amount you prefer.
- 1/4 cup freshly grated Parmesan cheese — adds umami and helps the filling bind.
- 1/2 cup fresh basil, finely chopped — bright, fresh flavor; chop finely so it spreads easily.
- 2 tablespoons chopped fresh thyme — aromatic and earthy; fresh is best here.
- 1 tablespoon chopped fresh sage — adds a savory depth; chop very fine to avoid tough bites.
Cook Swirled Garlic Herb Bread Like This
Make the dough
- In the bowl of a stand mixer fitted with the dough hook, combine 3/4 cup warm whole milk, 2 1/4 teaspoons instant yeast, 2 tablespoons honey, 3 large eggs, 3 1/2 cups all-purpose flour, and 1 teaspoon kosher salt. Mix on low/medium speed until the flour is completely incorporated, about 4–5 minutes.
Incorporate the butter
- Add 2 tablespoons of the room-temperature salted butter and mix on low/medium speed until the butter is incorporated and the dough becomes smoother, about 2–3 minutes. If the dough is still sticky, add up to the additional 1/2 cup flour (a little at a time) until the dough is soft, smooth, and only slightly tacky to the touch.
- Form the dough into a ball, cover the bowl with plastic wrap (or a clean kitchen towel), and let the dough rise in a warm, draft-free place until doubled in size, about 1 hour.
Prepare the garlic-herb filling while it rises
- While the dough is rising, make the garlic-herb butter: in a small bowl combine the remaining 4 tablespoons room-temperature salted butter, 1–2 cloves garlic (grated or finely chopped, use your preferred amount), 1/4 cup freshly grated Parmesan cheese, 1/2 cup finely chopped fresh basil, 2 tablespoons chopped fresh thyme, and 1 tablespoon chopped fresh sage. Stir until evenly mixed and set aside.
Roll, fill, and shape
- After the dough has doubled, punch it down to release the gas. Turn it out onto a lightly floured surface and roll it into a rectangle about 12 x 18 inches, using additional flour as needed to prevent sticking.
- Spread the garlic-herb butter evenly over the entire surface of the rolled dough, leaving a small margin (about 1/4 inch) along one long edge.
- Starting with the long edge closest to you, tightly roll the dough into a log lengthwise. Pinch the seam and the ends to seal.
- Place the log seam-side up on the work surface. Using a sharp knife, cut the log lengthwise down the middle to create two long ropes, leaving about 1 inch uncut at one short end so the two ropes remain attached there.
- Turn each rope so the cut/filling sides face up. Cross the two ropes over each other and twist them together along the length, keeping the cut sides exposed as you braid/twist until you have one long twisted rope.
- Coil the twisted rope into a round loaf by coiling one half of the rope into a spiral in one direction and coiling the other half into a spiral in the opposite direction so the two spirals meet in the center. Tuck or pinch the ends under to help the loaf hold its shape.
Final rise and bake
- Transfer the coiled loaf to a parchment-lined baking sheet. Cover loosely with plastic wrap or a clean towel and let rise in a warm place for about 45 minutes, until puffy.
- While the loaf is finishing its final rise, preheat the oven to 350°F (175°C).
- Bake the bread in the preheated oven for 30–35 minutes, until the top is golden brown and the loaf sounds hollow when tapped or is cooked through.
- Remove the bread from the oven and immediately brush the top with additional butter (use the “plus more for serving” butter listed in the ingredients). Let the loaf rest a few minutes, then slice and serve warm.
Why I Love This Recipe
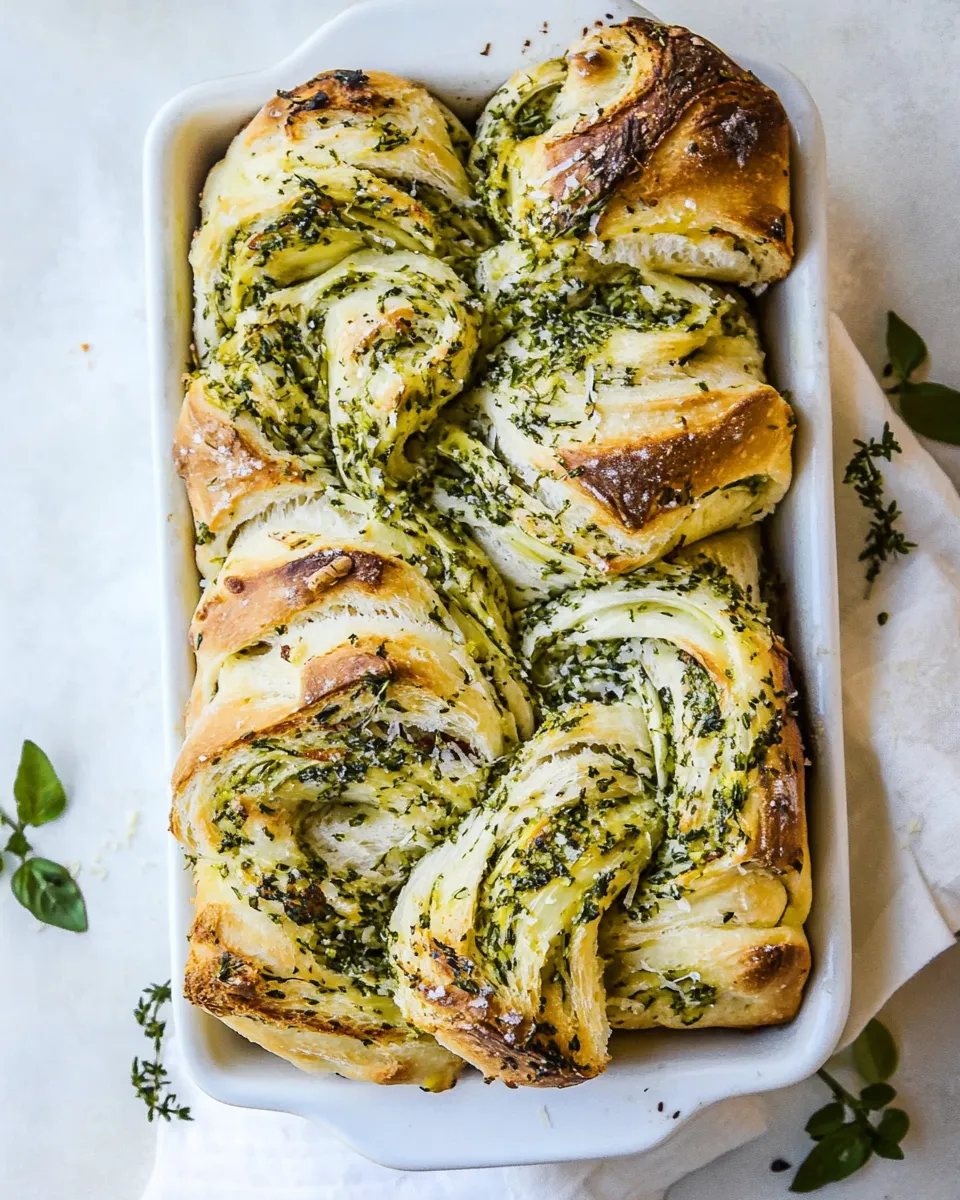
This loaf brings three things I look for: great texture, bold flavor, and easy showmanship. The enriched dough produces a tender crumb that stands up to the butter-rich filling without collapsing. The herb mixture — basil, thyme, sage, Parmesan, and garlic — creates a complex, savory profile that’s never flat. And the swirl-and-coil finish gives you a loaf that looks like you spent all morning on it; in truth, most of the work is simple shaping and waiting for the dough to rise.
It’s versatile. Slice it thin for sandwiches, rip it apart to mop up sauces, or serve thick at breakfast with eggs and jam. It’s impressive enough for guests but forgiving enough to fit into a busy weekend bake schedule.
Swap Guide
- Dairy: If you prefer unsalted butter, use it and add a pinch more kosher salt to the dough or the finishing butter to balance flavor.
- Herbs: Dried herbs can be used in a pinch—reduce the total amount by about one-third because dried are more concentrated. Fresh parsley or oregano will work if you don’t have basil or sage.
- Cheese: Pecorino Romano can replace Parmesan for a sharper edge; reduce slightly if it’s particularly salty.
- Sweetener: Maple syrup can stand in for honey at a 1:1 ratio for a different note in the dough.
- Yeast: The recipe uses instant yeast. If you use active dry yeast, proof it in the warm milk with the honey first (about 5–10 minutes) before adding to the flour.
What You’ll Need (Gear)
- Stand mixer with dough hook — speeds up kneading and gives consistent results; you can knead by hand if needed.
- Rolling pin — for rolling the dough to the 12 x 18 inch rectangle.
- Sharp knife or bench scraper — to cut the log lengthwise cleanly.
- Parchment-lined baking sheet — prevents sticking and makes transfer easy.
- Plastic wrap or clean kitchen towel — for covering rises to keep a consistent temperature.
- Pastry brush — to brush melted butter over the finished loaf.
Troubles You Can Avoid
Classic mistakes and simple fixes
- Dough too sticky: Add flour a tablespoon at a time—up to the extra 1/2 cup—until slightly tacky but manageable.
- Overheating the milk: If the milk is too hot it will kill the yeast. Aim for warm, not hot; test it on the inside of your wrist.
- Butter that won’t spread: Room-temperature butter should be soft enough to spread. If it’s cold, the filling will be lumpy; if it’s melted, it’ll soak into the dough—keep it soft but still spreadable.
- Uneven roll: Roll from the center outward and rotate the dough occasionally to keep the rectangle even.
Seasonal Flavor Boosts
- Spring: Add young spinach and lemon zest to the filling for brightness (squeeze excess moisture from the spinach first).
- Summer: Use extra fresh basil and a few sun-dried tomato pieces for a Mediterranean twist.
- Fall: Replace some basil with chopped rosemary and swap sage for marjoram for a deeper, woodsy note.
- Winter: Fold in a small handful of finely chopped roasted garlic for a mellow, caramelized garlic flavor.
What Could Go Wrong
Here are the problems I see most often and how to fix them quickly.
- Dense loaf: Usually caused by under-proofing or too little kneading. Make sure the dough doubles in size and that it’s smooth and elastic before the first rise.
- Filling leaks during baking: This comes from an over-wet filling or insufficient sealing of the log. Keep the filling on the thicker side and pinch seams and ends tightly.
- Top browns too fast: Tent the loaf loosely with foil halfway through baking to prevent over-browning while the center finishes cooking.
- Loaf collapses: High oven temperature and underbaked interior can cause collapse. Check for hollow sound when tapped and give it the full bake time when needed.
Save for Later: Storage Tips
- Room temperature: Wrap the cooled loaf tightly in plastic wrap or store in an airtight container for up to 2 days. Reheat slices in a low oven (300°F / 150°C) for 8–10 minutes to revive softness.
- Freezing: Freeze whole or sliced. Wrap well in plastic and then in foil or a freezer bag. Freeze up to 3 months. Thaw overnight in the fridge or at room temperature; reheat briefly before serving.
- Reheating: For best texture, warm slices in a toaster oven or regular oven rather than a microwave to avoid sogginess. A quick brush of butter before reheating restores that glossy finish.
Reader Q&A
Q: Can I make this dough the night before?
A: Yes. After step 2, place the dough in the fridge for a slow overnight rise. Let it sit at room temperature for 30–60 minutes before shaping to take the chill off, then continue with rolling and shaping.
Q: I don’t have a stand mixer—can I do this by hand?
A: Absolutely. Knead by hand for 8–10 minutes until the dough is smooth and slightly tacky. The timing will vary, but the texture is the key signal.
Q: How do I know if my loaf is done?
A: The top should be golden brown, and the loaf should sound hollow when tapped on the bottom. If you have an instant-read thermometer, the internal temperature should be around 190–200°F (88–93°C) for enriched bread.
Before You Go
This Swirled Garlic Herb Bread is one of my reliable favorites—beautiful enough for the table, forgiving enough for busy hands. Read the ingredients and directions once through, measure everything, and prep the garlic-herb butter while the dough rises. If you follow the method, you’ll get a bread with an airy crumb and layers of savory butter that everyone will fight over.
If you try it, take a photo and note any small changes you made—those become your personal version next time. Happy baking.
Swirled Garlic Herb Bread.
Equipment
- Stand mixer with dough hook
- Small Bowl
- parchment-lined baking sheet
- Sharp Knife
- plastic wrap or clean kitchen towel
- Oven
Ingredients
Ingredients
- 3/4 cupwarm whole milk
- 2 1/4 teaspoonsinstant yeast
- 2 tablespoonshoney
- 3 large eggs
- 3 1/2 – 4 cupsall-purpose flour plus more for rolling
- 1 teaspoonkosher salt
- 6 tablespoonssalted butter at room temperature, plus more for serving
- 1-2 clovesgarlic grated or finely chopped
- 1/4 cupfreshly grated parmesan cheese
- 1/2 cupfresh basil finely chopped
- 2 tablespoonschopped fresh thyme
- 1 tablespoonchopped fresh sage
Instructions
Instructions
- In the bowl of a stand mixer fitted with the dough hook, combine 3/4 cup warm whole milk, 2 1/4 teaspoons instant yeast, 2 tablespoons honey, 3 large eggs, 3 1/2 cups all-purpose flour, and 1 teaspoon kosher salt. Mix on low/medium speed until the flour is completely incorporated, about 4–5 minutes.
- Add 2 tablespoons of the room-temperature salted butter and mix on low/medium speed until the butter is incorporated and the dough becomes smoother, about 2–3 minutes. If the dough is still sticky, add up to the additional 1/2 cup flour (a little at a time) until the dough is soft, smooth, and only slightly tacky to the touch.
- Form the dough into a ball, cover the bowl with plastic wrap (or a clean kitchen towel), and let the dough rise in a warm, draft-free place until doubled in size, about 1 hour.
- While the dough is rising, make the garlic-herb butter: in a small bowl combine the remaining 4 tablespoons room-temperature salted butter, 1–2 cloves garlic (grated or finely chopped, use your preferred amount), 1/4 cup freshly grated Parmesan cheese, 1/2 cup finely chopped fresh basil, 2 tablespoons chopped fresh thyme, and 1 tablespoon chopped fresh sage. Stir until evenly mixed and set aside.
- After the dough has doubled, punch it down to release the gas. Turn it out onto a lightly floured surface and roll it into a rectangle about 12 x 18 inches, using additional flour as needed to prevent sticking.
- Spread the garlic-herb butter evenly over the entire surface of the rolled dough, leaving a small margin (about 1/4 inch) along one long edge.
- Starting with the long edge closest to you, tightly roll the dough into a log lengthwise. Pinch the seam and the ends to seal.
- Place the log seam-side up on the work surface. Using a sharp knife, cut the log lengthwise down the middle to create two long ropes, leaving about 1 inch uncut at one short end so the two ropes remain attached there.
- Turn each rope so the cut/filling sides face up. Cross the two ropes over each other and twist them together along the length, keeping the cut sides exposed as you braid/twist until you have one long twisted rope.
- Coil the twisted rope into a round loaf by coiling one half of the rope into a spiral in one direction and coiling the other half into a spiral in the opposite direction so the two spirals meet in the center. Tuck or pinch the ends under to help the loaf hold its shape.
- Transfer the coiled loaf to a parchment-lined baking sheet. Cover loosely with plastic wrap or a clean towel and let rise in a warm place for about 45 minutes, until puffy.
- While the loaf is finishing its final rise, preheat the oven to 350°F (175°C).
- Bake the bread in the preheated oven for 30–35 minutes, until the top is golden brown and the loaf sounds hollow when tapped or is cooked through.
- Remove the bread from the oven and immediately brush the top with additional butter (use the "plus more for serving" butter listed in the ingredients). Let the loaf rest a few minutes, then slice and serve warm.
Notes
To Make Ahead:
prepare the bread through step 6. Once the bread is shaped, place it on a parchment lined baking sheet, cover, and place in the fridge for up to 2 days. When ready to bake, remove the bread from the fridge 1 hour prior to baking, then bake as directed.
To Freeze:
bake the bread as directed and allow to cool completely. Once cool, wrap the bread tightly with plastic wrap, then transfer to a freezer safe container. Freeze for up to 3 months. Thaw on the counter and warm or toast before serving.
Leftovers:
the bread is best served warm after baking, but the leftover bread is delicious when lightly toasted or served at room temperature.