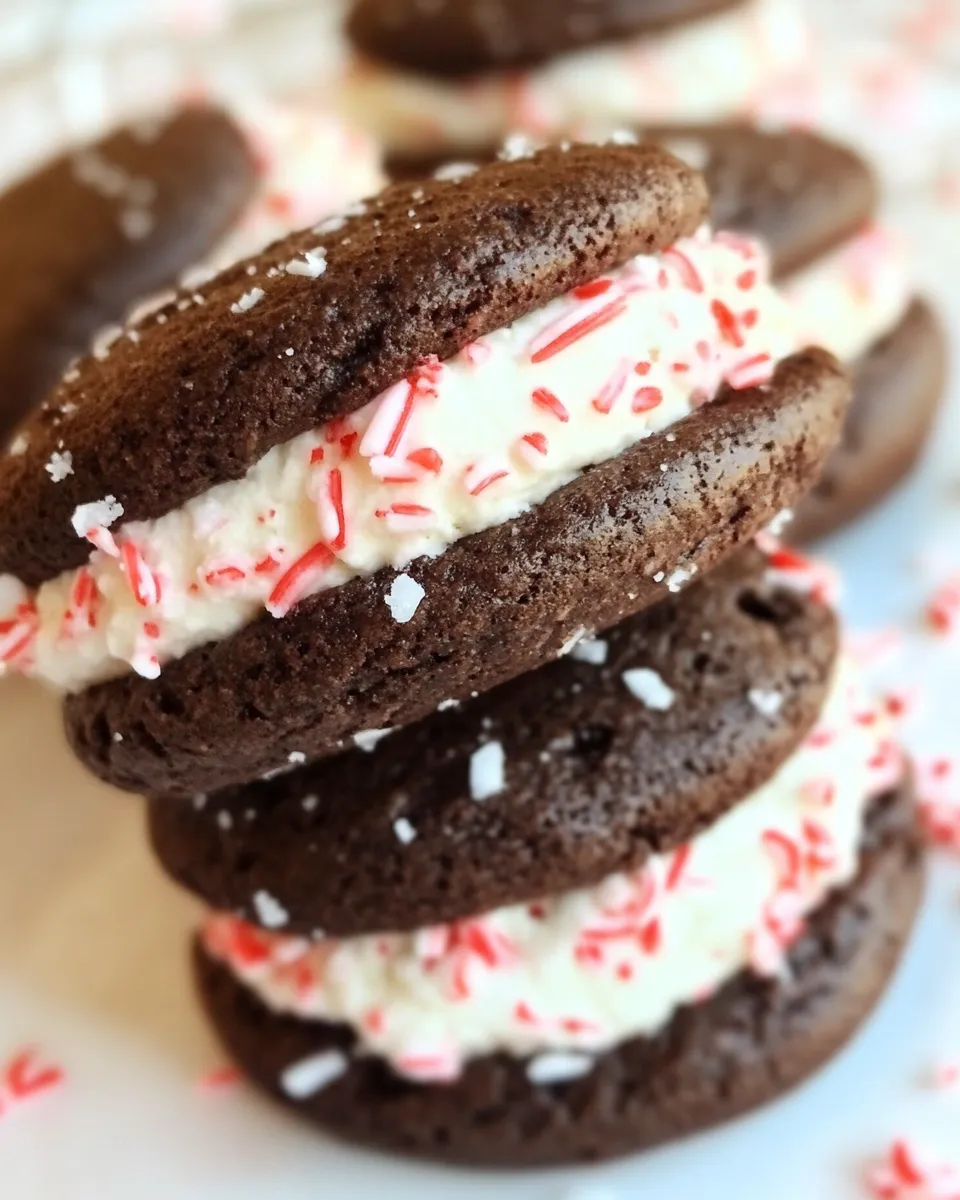
Are you ready to take your holiday baking to the next level? These Peppermint Whoopie Pies are a delightful twist on the classic treat, combining soft and chewy chocolate cookies with a creamy peppermint filling. Perfect for gifting or enjoying with a cup of hot cocoa, these whoopie pies are sure to become a favorite in your holiday baking repertoire. Let’s dive into this festive recipe that’s bursting with flavor and holiday cheer!
What Makes This Recipe Special

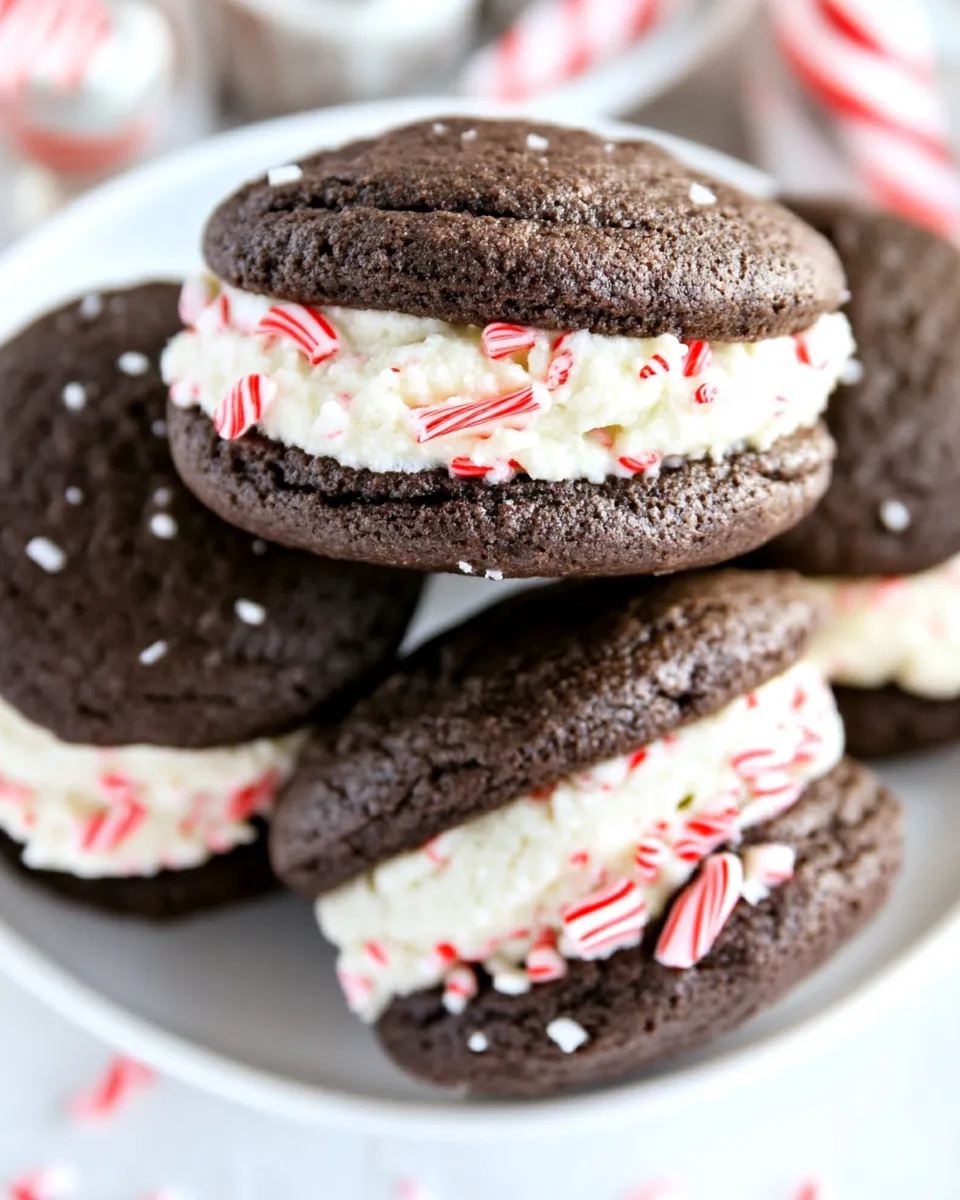
What truly sets these Peppermint Whoopie Pies apart is their rich chocolate flavor paired with the refreshing coolness of peppermint. The combination creates a delightful contrast that will awaken your taste buds. The creamy filling, infused with peppermint extract and topped with crushed candy canes, adds a crunchy texture that elevates each bite. This recipe is not only easy to follow but also perfect for sharing at holiday parties or cozy gatherings.
Ingredient Breakdown
To make these delicious Peppermint Whoopie Pies, you’ll need the following ingredients:
- 1-2/3 cups all-purpose flour (41.67g) – The base for our cookies.
- __ cup unsweetened cocoa powder (57.33g) – Adds rich chocolate flavor.
- 1 teaspoon baking soda (1.5 teaspoons) – Helps the cookies rise.
- __ teaspoon salt (0.5 teaspoons) – Enhances all the flavors.
- 4 tablespoons unsalted butter, at room temperature – For a rich flavor and tender texture.
- 4 tablespoons vegetable shortening – Keeps the cookies moist.
- 1 cup dark brown sugar (220g) – Adds sweetness and a hint of molasses.
- 1 egg – Binds the ingredients together.
- 1 teaspoon vanilla extract – For a warm, sweet note.
- 1 cup milk (244ml) – Adds moisture to the batter.
- 2 cups powdered sugar (240g) – For the sweet filling.
- 4 tablespoons unsalted butter, at room temperature – Gives the filling a creamy texture.
- 3 tablespoons heavy cream – Enhances the creaminess of the filling.
- 2 teaspoons vanilla extract – Adds depth to the filling.
- __ teaspoon peppermint extract (0.5 teaspoons) – Gives that signature minty flavor.
- __ teaspoon salt (0.5 teaspoons) – Balances the sweetness of the filling.
- Crushed candy canes – For garnish and festive crunch.
Tools & Equipment Needed
Before you start baking, gather the following tools:
- Mixing bowls – For combining ingredients.
- Electric mixer – Makes creaming butter and sugar easy.
- Spatula – For scraping down the sides of the bowl.
- Baking sheets – To bake the cookies on.
- Parchment paper – To line the baking sheets for easy cleanup.
- Cookie scoop – For evenly sized whoopie pie halves.
- Cooling rack – To cool the cookies completely.
Step-by-Step: Peppermint Whoopie Pies
Step 1: Preheat the Oven
Preheat your oven to 350°F (175°C). Line your baking sheets with parchment paper to prevent sticking.
Step 2: Combine Dry Ingredients
In a medium bowl, whisk together the all-purpose flour, cocoa powder, baking soda, and salt. Set aside.
Step 3: Cream the Butter and Sugar
In a large mixing bowl, beat together the unsalted butter and vegetable shortening until creamy. Gradually add the dark brown sugar, mixing until well combined and fluffy.
Step 4: Add Egg and Vanilla
Add the egg and vanilla extract to the butter mixture, beating until fully incorporated.
Step 5: Alternate Adding Dry Ingredients and Milk
Gradually add the dry ingredients to the wet mixture, alternating with the milk. Start and end with the dry ingredients, mixing until just combined.
Step 6: Scoop the Batter
Using a cookie scoop, drop rounded tablespoons of batter onto the prepared baking sheets, leaving enough space between each for spreading.
Step 7: Bake the Cookies
Bake in the preheated oven for 10-12 minutes, or until the edges are set. The cookies should look slightly underbaked in the center. Remove from the oven and let them cool on the baking sheets for a few minutes before transferring them to a cooling rack.
Step 8: Prepare the Filling
While the cookies cool, prepare the peppermint filling. In a mixing bowl, beat together the powdered sugar, unsalted butter, heavy cream, vanilla extract, peppermint extract, and salt until smooth and fluffy.
Step 9: Assemble the Whoopie Pies
Once the cookies are completely cooled, spread a generous amount of the peppermint filling on the flat side of one cookie, then sandwich it with another cookie, flat side down. Repeat with the remaining cookies.
Step 10: Garnish
Sprinkle crushed candy canes on top of the filling for a festive touch and additional crunch.
Seasonal Serving Ideas

These Peppermint Whoopie Pies are perfect for various occasions and can be served in numerous ways:
- As a festive dessert for holiday parties.
- Packed in gift boxes for friends and family.
- As a sweet treat for cookie exchanges.
- Served with hot cocoa or peppermint tea for a cozy afternoon snack.
What Not to Do
To ensure your Peppermint Whoopie Pies turn out perfectly, avoid these common pitfalls:
- Don’t overmix the batter; it can make the cookies tough.
- Be careful not to overbake the cookies; they should be soft and chewy.
- Don’t skip the cooling step; warm cookies can melt the filling.
- Use a cookie scoop for uniform sizes to ensure even baking.
Best Ways to Store
For optimal freshness and flavor, follow these storage tips:
- Store assembled whoopie pies in an airtight container at room temperature for up to 3 days.
- Refrigerate them for longer storage, up to 1 week, but bring them to room temperature before serving.
- For longer-term storage, freeze the unfilled cookies in a single layer, then wrap them tightly and store in the freezer for up to 3 months. Fill them when ready to serve.
Peppermint Whoopie Pies FAQs
Can I make these whoopie pies ahead of time?
Absolutely! You can bake the cookies in advance and store them in an airtight container. Assemble them with the filling just before serving for the best texture.
What can I substitute for vegetable shortening?
If you prefer, you can use an equal amount of unsalted butter instead of vegetable shortening. This will give the cookies a richer flavor.
Can I use white chocolate instead of peppermint filling?
Yes! You can create a delicious white chocolate filling and omit the peppermint extract if you’d like a different flavor profile.
How do I prevent the filling from being too runny?
If your filling is too runny, add more powdered sugar until you reach your desired consistency. The filling should be thick enough to hold its shape.
If you love these Peppermint Whoopie Pies, check out these other festive recipes:
Final Bite
Peppermint Whoopie Pies are not just a treat; they are an experience filled with joy and nostalgia. The combination of chocolate cookies and creamy peppermint filling creates a delightful dessert that brings smiles to all who taste it. With their festive appearance and delicious flavor, these whoopie pies are sure to become a cherished part of your holiday traditions. So, roll up your sleeves, gather your loved ones, and bake a batch of these delightful peppermint-infused treats that will warm your heart and satisfy your sweet tooth. Enjoy every bite!
Peppermint Whoopie Pies
Equipment
- Mixing Bowls
- Electric Mixer
- Spatula
- Baking Sheets
- Parchment Paper
- Cookie Scoop
- Cooling rack
Ingredients
For the Cookies:
- 1-2/3 cups all-purpose flour
- 1/2 cup unsweetened cocoa powder
- 1 teaspoon baking soda
- 1/2 teaspoon salt
- 4 tablespoons unsalted butter at room temperature
- 4 tablespoons vegetable shortening
- 1 cup dark brown sugar
- 1 egg
- 1 teaspoon vanilla extract
- 1 cup milk
For the Filling:
- 2 cups powdered sugar
- 4 tablespoons unsalted butter at room temperature
- 3 tablespoons heavy cream
- 2 teaspoons vanilla extract
- 1/2 teaspoon peppermint extract
- 1/2 teaspoon salt
- Crushed candy canes for garnish
Instructions
Preparation
- Preheat your oven to 350°F (175°C). Line your baking sheets with parchment paper to prevent sticking.
- In a medium bowl, whisk together the all-purpose flour, cocoa powder, baking soda, and salt. Set aside.
- In a large mixing bowl, beat together the unsalted butter and vegetable shortening until creamy. Gradually add the dark brown sugar, mixing until well combined and fluffy.
- Add the egg and vanilla extract to the butter mixture, beating until fully incorporated.
- Gradually add the dry ingredients to the wet mixture, alternating with the milk. Start and end with the dry ingredients, mixing until just combined.
- Using a cookie scoop, drop rounded tablespoons of batter onto the prepared baking sheets, leaving enough space between each for spreading.
- Bake in the preheated oven for 10-12 minutes, or until the edges are set. The cookies should look slightly underbaked in the center. Remove from the oven and let them cool on the baking sheets for a few minutes before transferring them to a cooling rack.
Filling and Assembly
- While the cookies cool, prepare the peppermint filling. In a mixing bowl, beat together the powdered sugar, unsalted butter, heavy cream, vanilla extract, peppermint extract, and salt until smooth and fluffy.
- Once the cookies are completely cooled, spread a generous amount of the peppermint filling on the flat side of one cookie, then sandwich it with another cookie, flat side down. Repeat with the remaining cookies.
- Sprinkle crushed candy canes on top of the filling for a festive touch and additional crunch.
Notes
- Don’t overmix the batter to keep cookies soft and chewy.
- Use a cookie scoop for uniform cookie sizes and even baking.
- Store whoopie pies in an airtight container at room temperature up to 3 days or refrigerate up to 1 week.